Making Headway

IMG-2914

Here’s the back of Malachai’s head with Lost Chronicles’ logo loud and proud. Isn’t it a lovely design? The edges are rough cause it’s popped fresh out of the mould with no sanding just yet. That comes later. Busy busy busy!

IMG-2917

They’re multiplying … o_o Taking over the workshop! Somebody help before they —

Hehe just kidding. They’ve been mostly well behaved. Mostly. I’ve had some odd bubble issues to the degree that I actually had to alter the mould and give more room for the gas to escape from the resin. All of the bubbles occurred right at the top of the mould so at least fixing them should be reasonably easy. Well … as easy as manually filling the tiny voids with tiny amounts of mixed resin and then sanding it back down flat so no imperfections remain.

In fact, I was just about to start that process when …

IMG-2924

What the heck is this?! This is the Part B jug of my white resin. It has chunks in it like orange juice pulp! How? Why? Dammit I can’t use this! I will have to contact the seller and figure out what’s going on. Ugh!

In the meantime, I will be exploring other options. This resin sets in only two minutes. That’s clearly not enough time for all the air to get out despite the mould being very well vented. I’m looking at the very real possibility of having to use a different resin that sets more slowly … which probably means casting all those heads over again. -_- But if that’s what I have to do, I will do so at my own expense, as per usual. I have a policy of not making customers pay for my mistakes.

Now, despite my adventures in Doll Land, yes I do still make swords everybody, don’t panic. In fact, I have two lovely Clariel swords waiting to be purchased on my Etsy shop.

IMG_2788

Now I’ve got to poke my resin seller to see what’s wrong with the stuff they sold me and get to the workshop to do some more experimentation. Wish me luck!

Let there be light!

Last week I finished up the electrics in the Clariel I’m working on. Yay! My customers have given me really valuable feedback and yes I absolutely have been listening. (Thank you! <3)

People are keen to have their Seraph Blades’ light stay on without holding onto the handle so they can take pictures of it. (Previously, I just wrapped a band around the light mechanism to take photos.) Since I was unable to find a pre-made light and switch combo that was low-profile enough to fit in the sword handle, I had to design and make the electronics myself. I’m happy to say that it worked beautifully.

What’s next for this lovely blade? I’d just like to place a small, light insert into the slot with the electronics to make sure the mechanism sits snug and secure in there and doesn’t rattle around. (That kind of ruins the magic.) And I also want to make a small adjustment to the way the flap closes on the handle so no extra light peeks out of any gaps between the leather and the blade.

I’ve plopped a sneak preview of the sword lit up sitting on my office chair. Sorry it’s not a gorgeous and well-composed shot. I intended to take some more shots on Friday but there was some sort of accident in one of the washrooms involving a couple of the toilets backing up and exploding and … stuff going everywhere. (You don’t wanna know.) It was all cleaned up by the time I got to work on Friday so thankfully I didn’t have to actually see what happened but the smell was so horrific I had to leave a couple hours early.

But don’t worry! If they haven’t managed to de-stink the place over the Easter long weekend, I’ll just bring the sword home with me and do the final photo shoot here. Just like in the old days!

That’s all from me for now. Have an awesome day everyone!

First Resin-Cast Clariel!

I waited until today to show you guys this because I wanted to have a full set of photos from start to finish. It was a tough wait! This is so unbelievably exciting for me! A lot of you know how very frustrated I was with this project because there was just so very much to learn.

The fact is: you can read tutorials and articles and watch all the videos you like, but when it comes right down to it, practice is the most essential part of learning any skill. How firm or squishy will the silicone be when it’s fully cured? How warm does the container of mixed resin feel when it’s beginning to catalyse? How fast will it cure with the temperature and humidity of the room I’m working with? How does a vacuum pump sound when it’s running well versus running poorly? All these questions can only be answered by getting your hands on the materials and working with them.

Every mistake is a learning experience, but when your materials are this expensive, every mistake is costly. I’ve ‘wasted’ about 80-100 Euros worth of silicone to get where I am now and I have a lot more learning to do.

So you can imagine, after weeks and months of materials not arriving on time, machines not working, chemicals doing weird unexplained things, how overjoyed I was to open up the mould and see …

IMG_2308

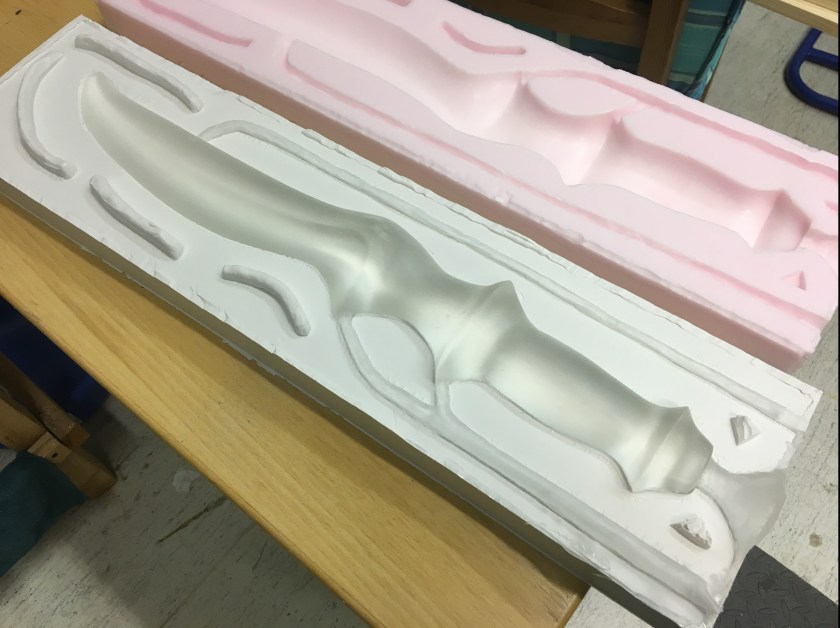
Perfect. It looked perfect. I couldn’t believe it. I had expected to fail, yet again, as I had failed so many times before. Expected it with such certainty that I could not accept that it had actually worked. I had convinced myself, with every heartbreaking flop that I was too stupid to get it right.

I poked the little side tubes where the air vents are because I was so afraid of messing up the sword after all this struggle. It was solid. No stickiness. No softness.

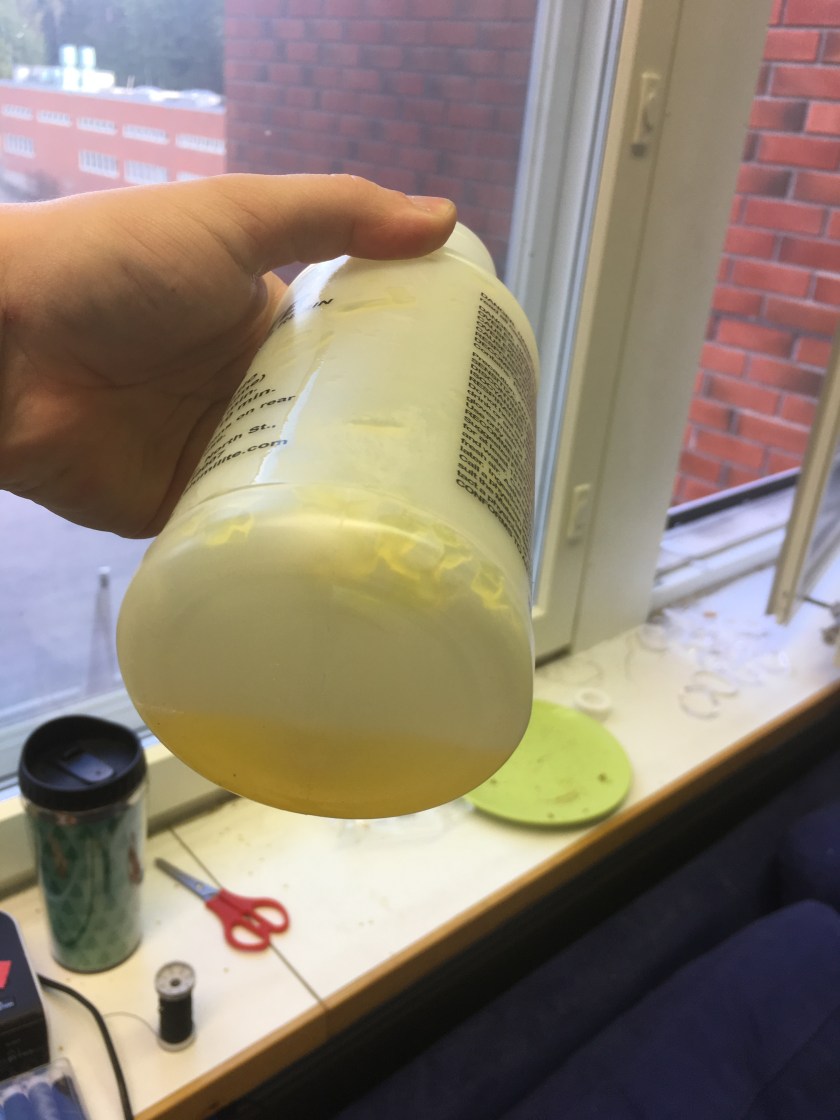
I put my fingertips on the blade of the sword, expecting to encounter a gummy, gluey surface. It was completely smooth. It was still warm from the exothermic catalysing process and it felt like a living creature.

IMG_2310

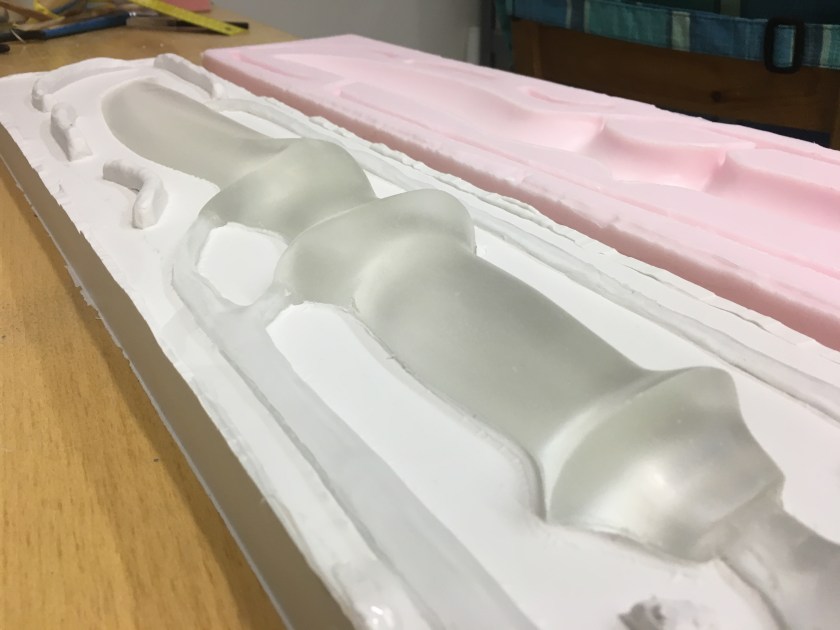
Honestly, I teared up. I was so exhausted from fighting with this project and now it was finally here. All I could do for several minutes was just run my hands over it and marvel at how a bucket of thickish goo could become something like this.

IMG_2314

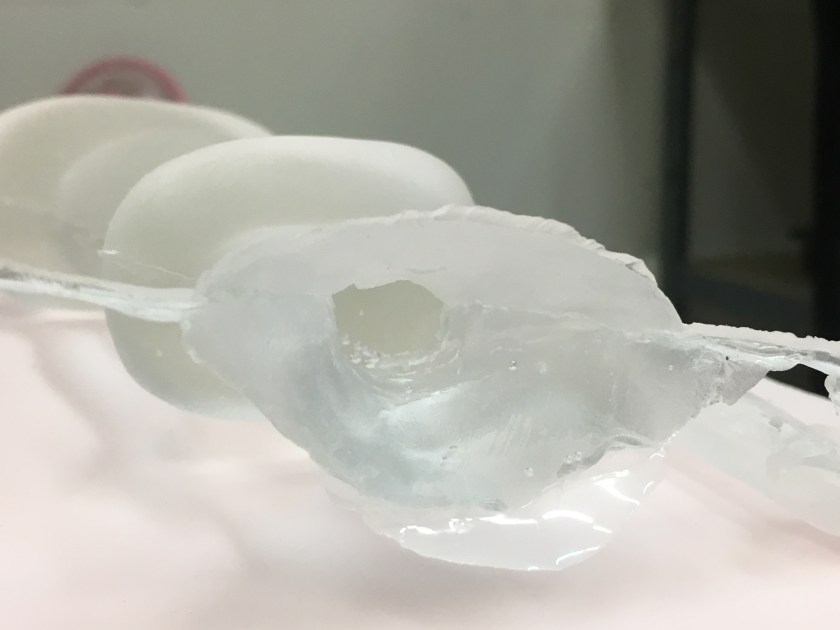
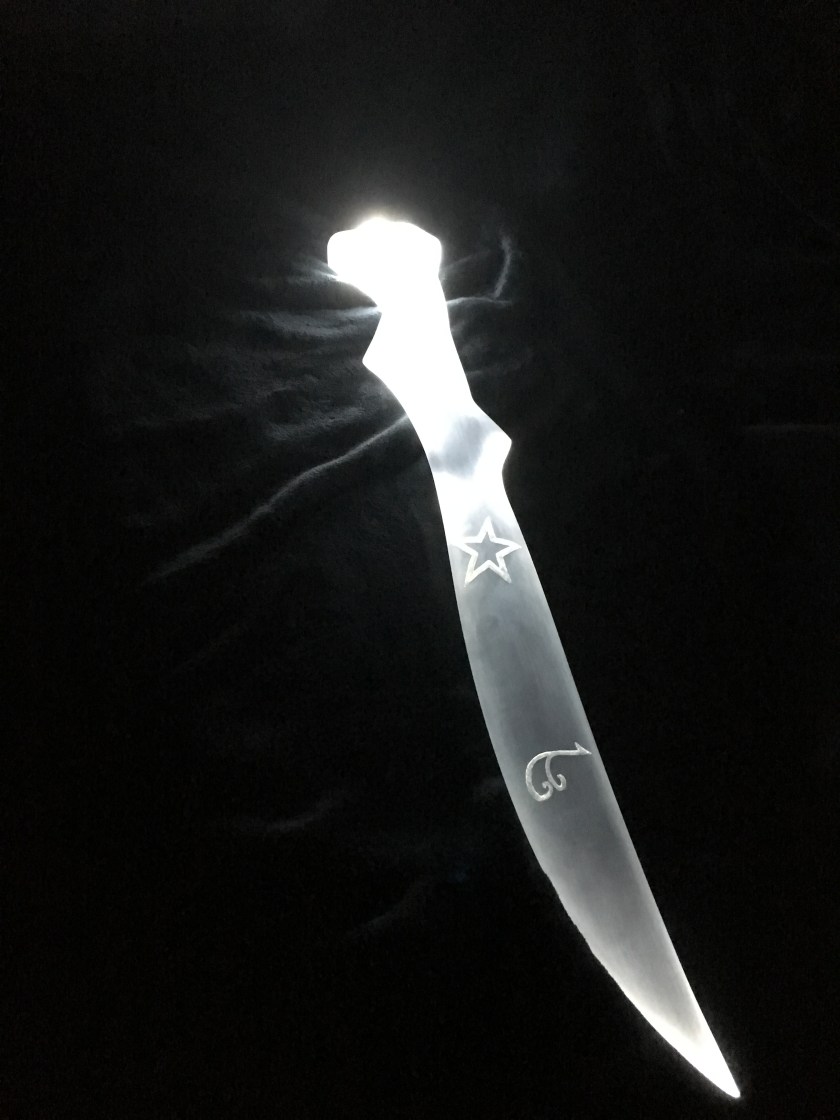
I had been worried about clarity, unsure if this resin would be as beautifully transparent as the PMMA resin I’d been carving. Well, I snapped a photo straight down the pour-spout. I think I have nothing to be worried about. It’s so clear it looks hollow.

IMG_2316

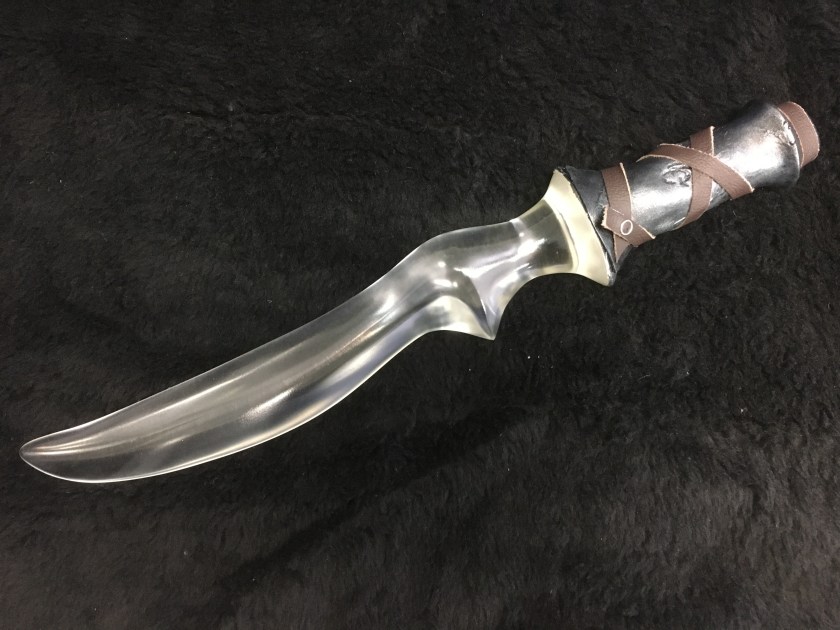
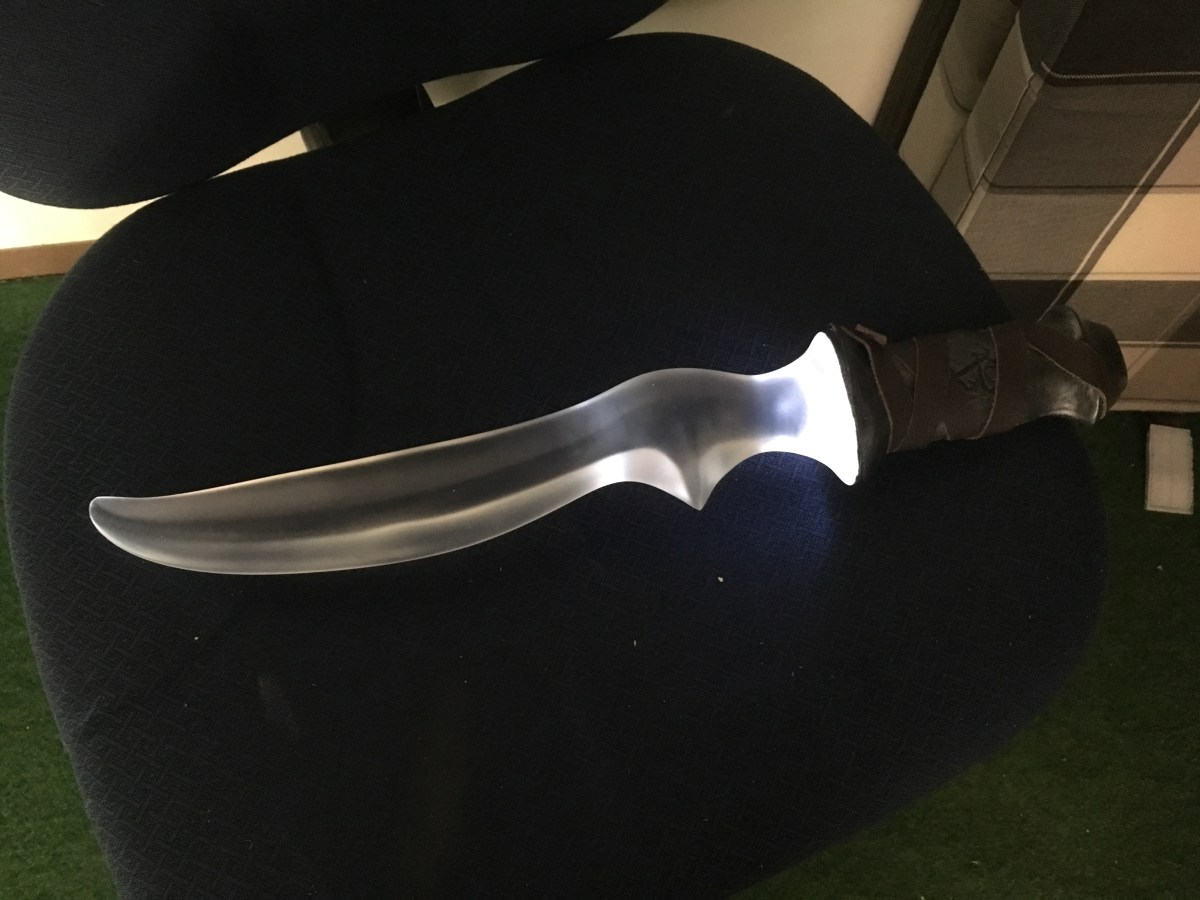
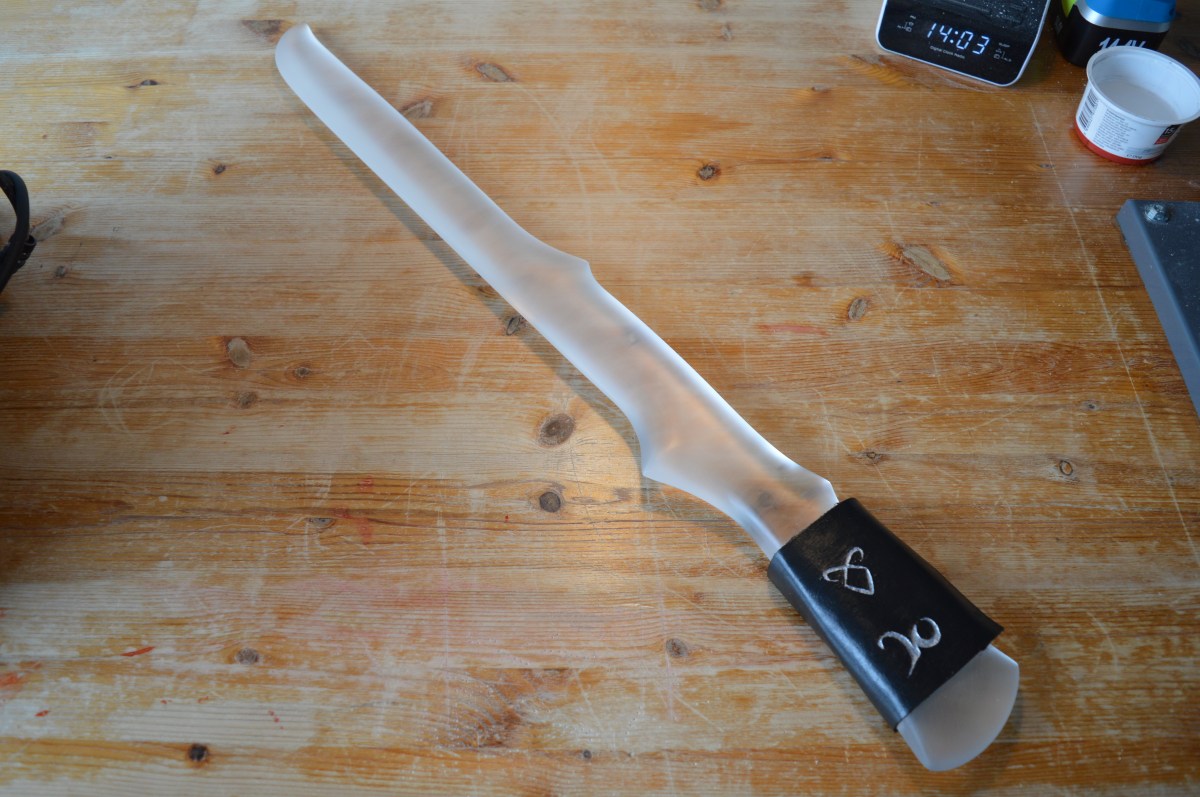
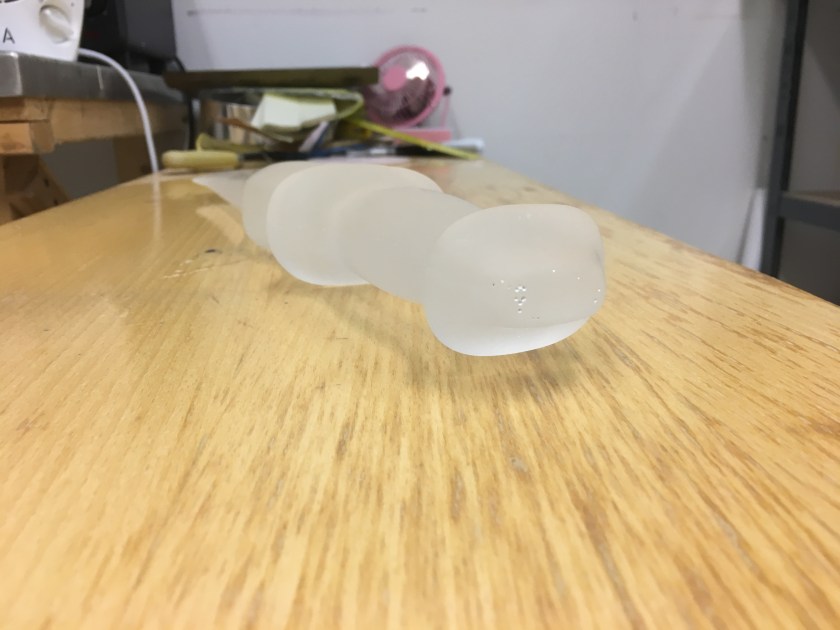
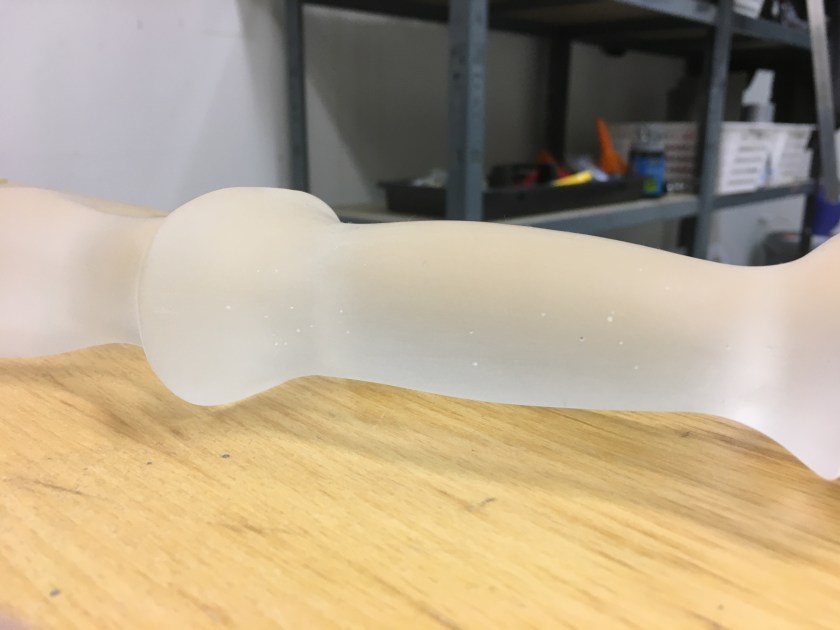
After nipping off the extra resin from the air vents and the spout (I affectionately call them ‘umbilical cords’ since that’s really what they looked like!) I buzzed off the seams around the edges with the Dremel tool. In this shot, I haven’t even started polishing it yet.

IMG_2318

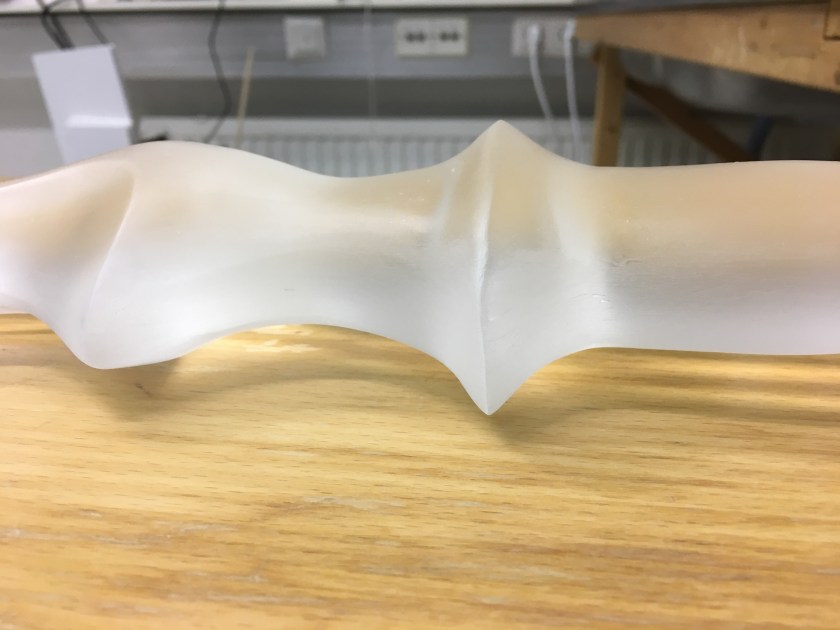
The edges are still scratchy from the Dremel. Can’t have that! The finish must be even!

IMG_2336

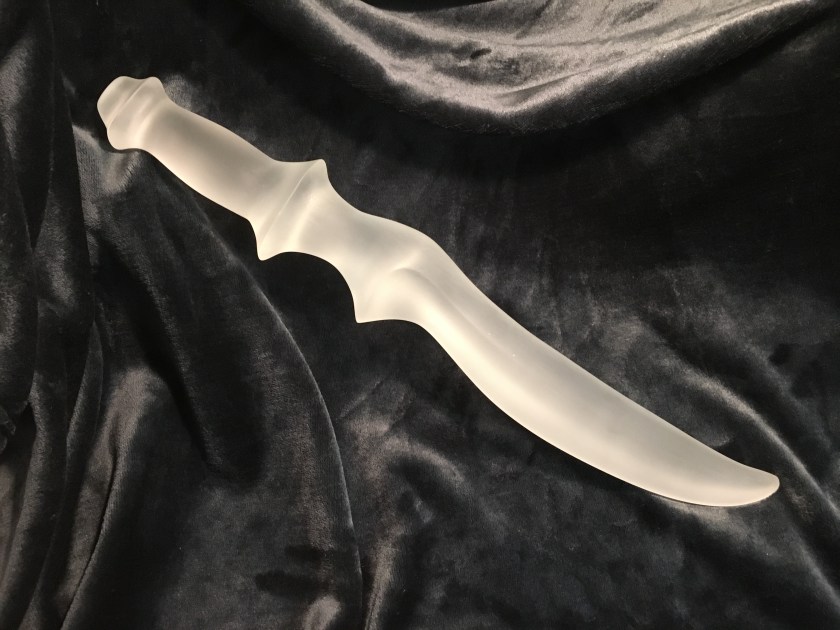
This is polished. I gave it my favourite frosted finish (800 grit polish).

This sword is one I’m going to keep for myself and not just because it’s the first and very special because of that. There are some tiny air bubbles in it. I think it’s from when the mould started leaking because it wasn’t clamped tightly enough during the pour. The bubbles are only in the handle, mostly in the pommel which is exactly the point during the pouring that the resin started seeping out at the seams.

IMG_2330

IMG_2332

You can tell that these little imperfections are barely the size of a needle-point but you know what a stickler for perfection I am! I will be experimenting on this sword to see if I can get the bubbles filled with epoxy or other type of liquid resin and get the surface totally flawless. The bubbles that are encased in the resin I can’t do anything about, but that’s okay. I’m pretty sure no one but me can see them.

I want to make an even better quality mould with this sword since it’s smoother than the plaster prototype and I would have even less work to do with the polishing. That means better quality swords straight out of the mould, and less time taken with buffing so they can be in your hands sooner. Yay!

So what’s next for Clariel and when will I have swords available to sell? Well, technically, I could start putting out unlit blades right now, but for everybody wanting their swords with LEDs equipped, I’ve got to cast another sword, decide on the light mechanism I want to implant, mill out a slot for the light to go in, check and make sure the electronics work the way I want them to, make a mould for all the swords that will have lights in them.

Easy … peasy? Man I hope so after all this but I fully expect a “Mistakes with Metal” photo series to be coming up. Haha! Wish me luck okay?

Before I scamper off to the workshop, I want to thank you all from the bottom of my heart for being so supportive through all my frustrated yowling. Those of you who have commented on my page, in person, here on my website, the hugs, the suggestions, the shares, the likes, the kitten pictures, the coffee … it all helped so very much to keep me somewhat sane … okay functional while throwing myself at this project. The demon Depression is the scariest of all; it steals your will to fight, to even try. It needs a full team to defeat and it’s great to know you’re all part of my posse.

Stay awesome everybody. I’m off to make cool stuff.

Introducing Heosphoros!

Hm, does that shape look familiar? I sure hope so!

IMG_1678

This blade is a re-imagining of what the Morgenstern short sword might look like if it had been crafted from adamas. The Shadowhunter who ordered it specified which runes she liked and we put our own spin on the piece. I think it came out rather well.

IMG_1715

So exactly how hard is it to engrave on a curved piece of acrylic with no router or CNC milling machine? Well, on a scale of 1-10 it’s somewhere between 12 and crying in the fetal position. See, the lovely thing about automatic machines is that they are very stable and they don’t get tired. Hand-engraving with the Dremel tool requires the craftsman to hold his body and arms perfectly rigid and force the tool to stay in one place when all it really wants to do is skitter off into Narnia.

The other challenge was cutting 90-degree angles and sharp corners. I have a Dremel tool, a Bosch multi-tool, and Chewie my faithful belt sander. So how do we get these kind of angles?

IMG_1704

30% creativity, 70% tenacity, and 112% profanity.

Needless to say, Heosphoros challenged me and pushed me to my limits.

IMG_1743

I think it came out pretty nice though. 😉

The pommel is actually made of pine but thanks to the wonders of paint and a really nice high-gloss sealer it not only looks like metal but also feels like it too. It’s pretty fun to watch people run their fingers over it and then, perplexed, ask “what’s it made out of?” I figure that if you can’t really tell even after touching it, I’m doing a decent job.

IMG_1739

The runes themselves are inlaid with liquid acrylic (yes the stuff that smells like Satan’s personal urinal when it’s curing) and then inlaid again with a semi-transparent lacquer. I had to do this for two reasons: #1 It’s impossible to smooth out the tool marks from the engraving without using the acrylic because I don’t have a CNC milling machine or laser cutter, and #2 the acrylic is so clear that they were too hard to see without adding some opacity.

IMG_1718
Without the inlay.
IMG_1745
With the inlay.

Hopefully you’ve enjoyed this post. Sorry it’s been a long while between updates. I’ve been pretty busy and now you can see what I was working on!

IMG_1751

Haha take that demons!

Hopefully, it won’t be so long between posts next time. I’d like to give you a wee presentation on some product testing I’ve been doing and some neat ideas I have for future creations.

That’s all from me for now. I’ve got to dash off to the workshop and get started on the next sword. Until next time, stay safe out there Shadowhunters.


A Brand New Start – Workshop Pics

Today, I signed the lease and put the security deposit on my new workshop. I collected the last bit of paperwork I needed and submitted my application for the government Start-Up Grant. This is a proud day for me and it marks the end to months of stress and frustration.

You’ve all shown me the kindness and patience that the Shadowhunter fandom is known for and I can’t tell you how much I appreciate that.

I’d like to share with you the first pictures of my new workshop. It needs some cleaning and some care, but I can’t wait until then to show you! Besides, you see all my other works-in-progress so why not my work space too?

This slideshow requires JavaScript.

On my floor, there is also a break room with a microwave, fridge, and a couple of coffee makers. Maybe I’ll see some of the other artists? Who knows! The building manager said he’s never seen anyone use it. I’ll be cooking myself lunch in there though so maybe it will encourage others to come and be social. 🙂

This slideshow requires JavaScript.

Finally, after so much tearing my hair out and worrying myself silly, I can relax and enjoy my holiday. I still have to deal with tax registration and insurance and all that crud but for now, I’m just going celebrate my victory with my favourite beer.

img_1418

Whatever winter holiday you’re celebrating, I hope you have a good one! Me, I’m gonna eat a lot of food and be lazy. Probably visit with a bunch of friends while we all have a little time off.

I’ve got permission from the building manager to paint my workspace, by the way. Any suggestions about what COLOUR it should be? Feel free to comment! I’d love to hear what you think. 🙂

That’s all from me for now. Stay safe out there Shadowhunters.

Exciting News!

After a long and difficult search, I have finally found a suitable workshop! It is 32 meters squared, has an industrial sink for wet-sanding, its own climate control, a wall of storage racks, a workbench and chair, and excellent air filtration. It has a freight elevator and hand-trucks I can use to haul in my big plastic slabs, and also a kitchen to cook and store my food in. Best of all, I can be as noisy as I like! I’ll be surrounded by mostly storage rooms, another sculptor, and a hockey-mask painter with a lovely, loud air compressor.

The only downside is that it’s in Herttoniemi which is about 45-50 minutes away from where I live. Not a terrible commute as it’s mostly on the metro line, and frankly many people have a longer trip than that so I won’t complain. Much. Hehehe.

Herttoniemi has a lot of industry in it, especially automotive shops. There are several huge hardware stores within easy walking distance of my workshop. That means re-supplying tools and machine parts will be easier than ever!

I’m really looking forward to working near other people, to be honest. Having a workshop in my home was pretty convenient but also usually lonely. I could go an entire day without going outside or talking to someone other than my wife when she comes home from work. While I’m pretty introverted, I do need people-time now and then or I get sad.

So, Monday is going to be a very busy day for me. In the morning, I will go to register my business. That means I get my registration number and notify the tax man of my company’s existence. Then, in the afternoon, I go to sign the lease for the new workshop. Yaaaay!

After that, I’ll need to poke the Startup Grant people in hopes of getting some financial assistance with my newborn company. Wish me luck! I’ll put up some photos of the new space as soon as I’m able.

Engraving in Leather

I’ve had some questions about engraving runes into the grip of the sword. The most frequently asked one is: what does it look like?

Here’s my most recent Azrael style sword with runes for your viewing pleasure.

DSC_0758

DSC_0764

Anyone want to guess which runes those are? C’mon, put on a Fearless rune and shout ’em out!

%d bloggers like this: