Back from Holiday

Wait, didn’t you just have a holiday Ethan? I did, a bit earlier in the summer, yes, but I had to chop my holiday time in half and take it in two parts because of my wife’s work. So I finally got to have the other half of my vacation.

What’s been going on at the workshop?

clariel

I’ve been putting the finishing touches on a couple brand new Clariels!

IMG_2788

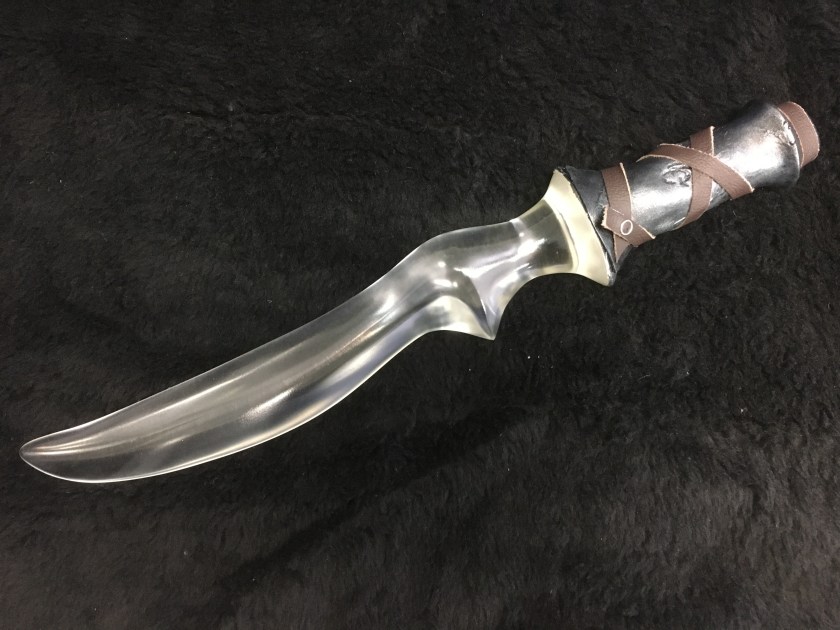
Want to grab one? My Etsy shop is right here. 🙂

I’ve actually managed to significantly lower my shipping costs by switching to a different carrier. For example, if you live in Australia, you can now pay about 40 euros for shipping instead of a whopping 103 that FedEx was charging me. Whew! I told you guys I’m always working hard to make these things more affordable. It’s tough when you’re talking about hand-made commission artwork but I try my best to find some more wiggle room and put things in reach for more people. I understand tight budgets, believe me.

What else am I working on? Witchlights! I’m trying to put the photo here but my phone is being weird. Darn it. I’ll have to do it later. Anyhow, it doesn’t look very exciting at the moment since I’m just working on the mould and figuring out the circuits. Expect pretty things later!

One more exciting announcement before I head off to work. I’m starting on a new project that has nothing to do with Shadowhunters! I know, I know. Bizarre right? But yes I do do other things! One of my interests is ball-jointed dolls. For those of you who don’t know what that is: they are pose-able art dolls.

Inkblade Studios will be partnering up with Lost Chronicles BJD to cast dolls in resin. Our first project will be a small run of head parts for the nice folks who pre-ordered and made this project possible. Here’s a sneak peak at the 3D printed head I’ll be making a mould of later this week.

Malechai

I’m pretty excited to be working on this fella! It will be a relief to get to deal with a small amount of resin for once instead of something the size of my arm haha! Wish me luck everybody!

Trying New Things

Hi guys! In spite of the heat, I’m still trying to get stuff done. I managed to get most of the way finished one of the Clariel swords on my table. It just needs its protective glossy sealant and the strap around the handle.

IMG_2784[1]


That’s a handle made of Milliput. Milliput is a two-part epoxy paste. You smoosh it together, knead it thoroughly, and do whatever it is you want to do with it. It’s a lot like modelling clay in consistency. After 3-4 hours it sets hard as a rock. Much more solid and robust than the polymer air-dry clay I’ve been using before.

The downside to Milliput is that because it’s so much harder, it takes longer to shape, sand and polish. The paste is stiffer and harder to mould than softer clays so I have to do some shaping with the Dremel tool after it’s set and then sand those tool marks away before I can begin polishing. It’s also harder to engrave. It’s also a bit more expensive than the air-dry polymer clay.

In addition, any patching of gaps or fine details that I want to do with the Polymer clay (which is softer and easier to accomplish these things with) has to be done after polishing the Milliput. Milliput is hard enough that I have to wet-sand it to smooth and polish it if I want to work with any kind of speed. But the air-dry polymer clay softens with water and can become crumbly before its had its protective coats of paint and sealer put on it.

So the procedure has to go like: Mould handle with Milliput. Wait 4 hours. Shape with Dremel. Wet-sanding. Install leather flap for the light cavity. Smooth over any seam-lines with polymer clay. Dry-sanding. Install magnet closures. Engrave. Paint. Paint. Paint. Seal.

Do I like this procedure? Uhh … I’m still working on tinkering with it. But I do like the structural hardness of the Milliput and will definitely be keeping it on hand for anything that needs reinforcement. I totally recommend getting some to play with. It’s fun!

IMG_2781[1]


Here’s a different style of Milliput handle I also tried out. I wanted it to be all one piece so I could slide it on and off the sword to change the light battery when needed. Buuuut Milliput bonds with resin. On the one hand: that’s great! I can put stuff on my swords and be 100% sure it’s not going to come off. On the other hand: I wanted it to come off.

I even put a layer of liquid latex all over the handle before I started moulding the Milliput on. But Milliput forms itself absolutely perfectly to the object you’re sticking it on, so it formed an air-tight suction seal that I couldn’t pull free. I had to cut out a section of the front to do a conventional leather-flap for the light cavity.

IMG_2780[1]

Of course that broke the suction seal. And it came off just like I originally wanted to but far too late. I had already altered the design by slicing a section out of the front. GAH! That was a frustrating day guys!

But now it’s all epoxied into place and smoothed and patched. Ready to have its flap adhered in place

Will I be at the workshop today? I don’t know! I was supposed to have an air conditioner delivered to my apartment last week and they didn’t come. 😦 So I have to figure out if they’re coming today or not and if they are, I have to stick around and wait. But I won’t be doing nothing. I received my electrical components for the witchlights last week so I can begin tinkering with that until my AC arrives. (Hopefully.)

Wish me luck guys!

%d bloggers like this: