Give My Creations Life!

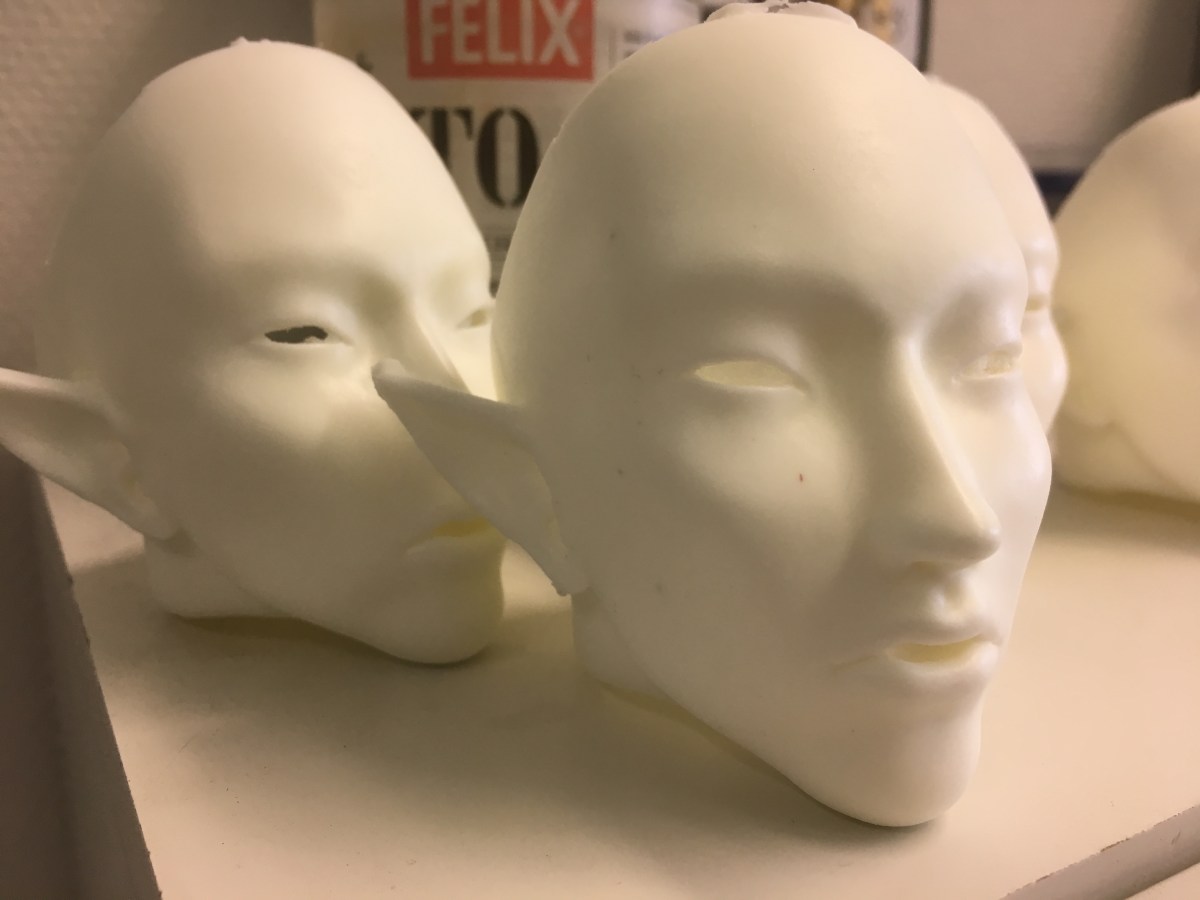
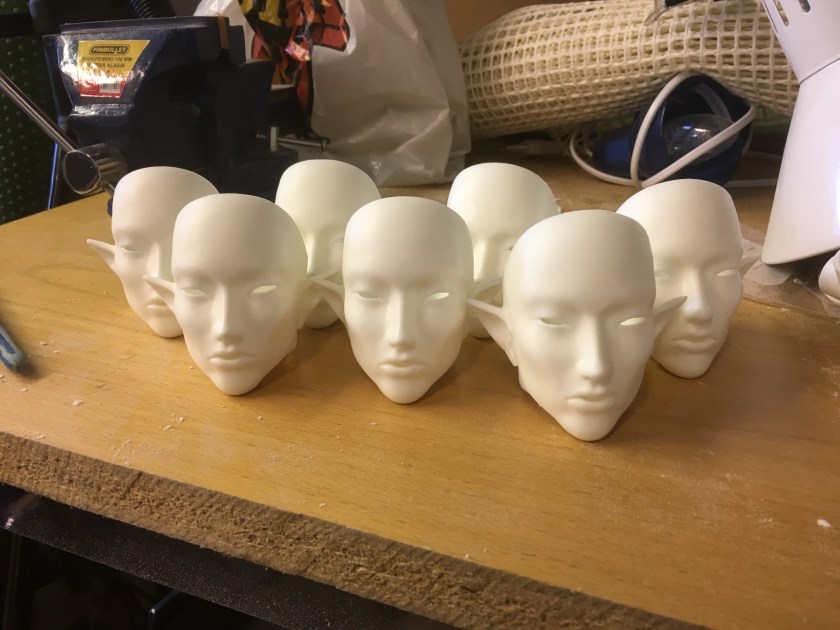
What a crazy week. I spent the whole of it waiting for a resin shipment to arrive so I could finish these doll heads. Due to a mix-up with the ordering (PayPal apparently farted or something) it will arrive this week instead.

But I didn’t spend all that time doing nothing!

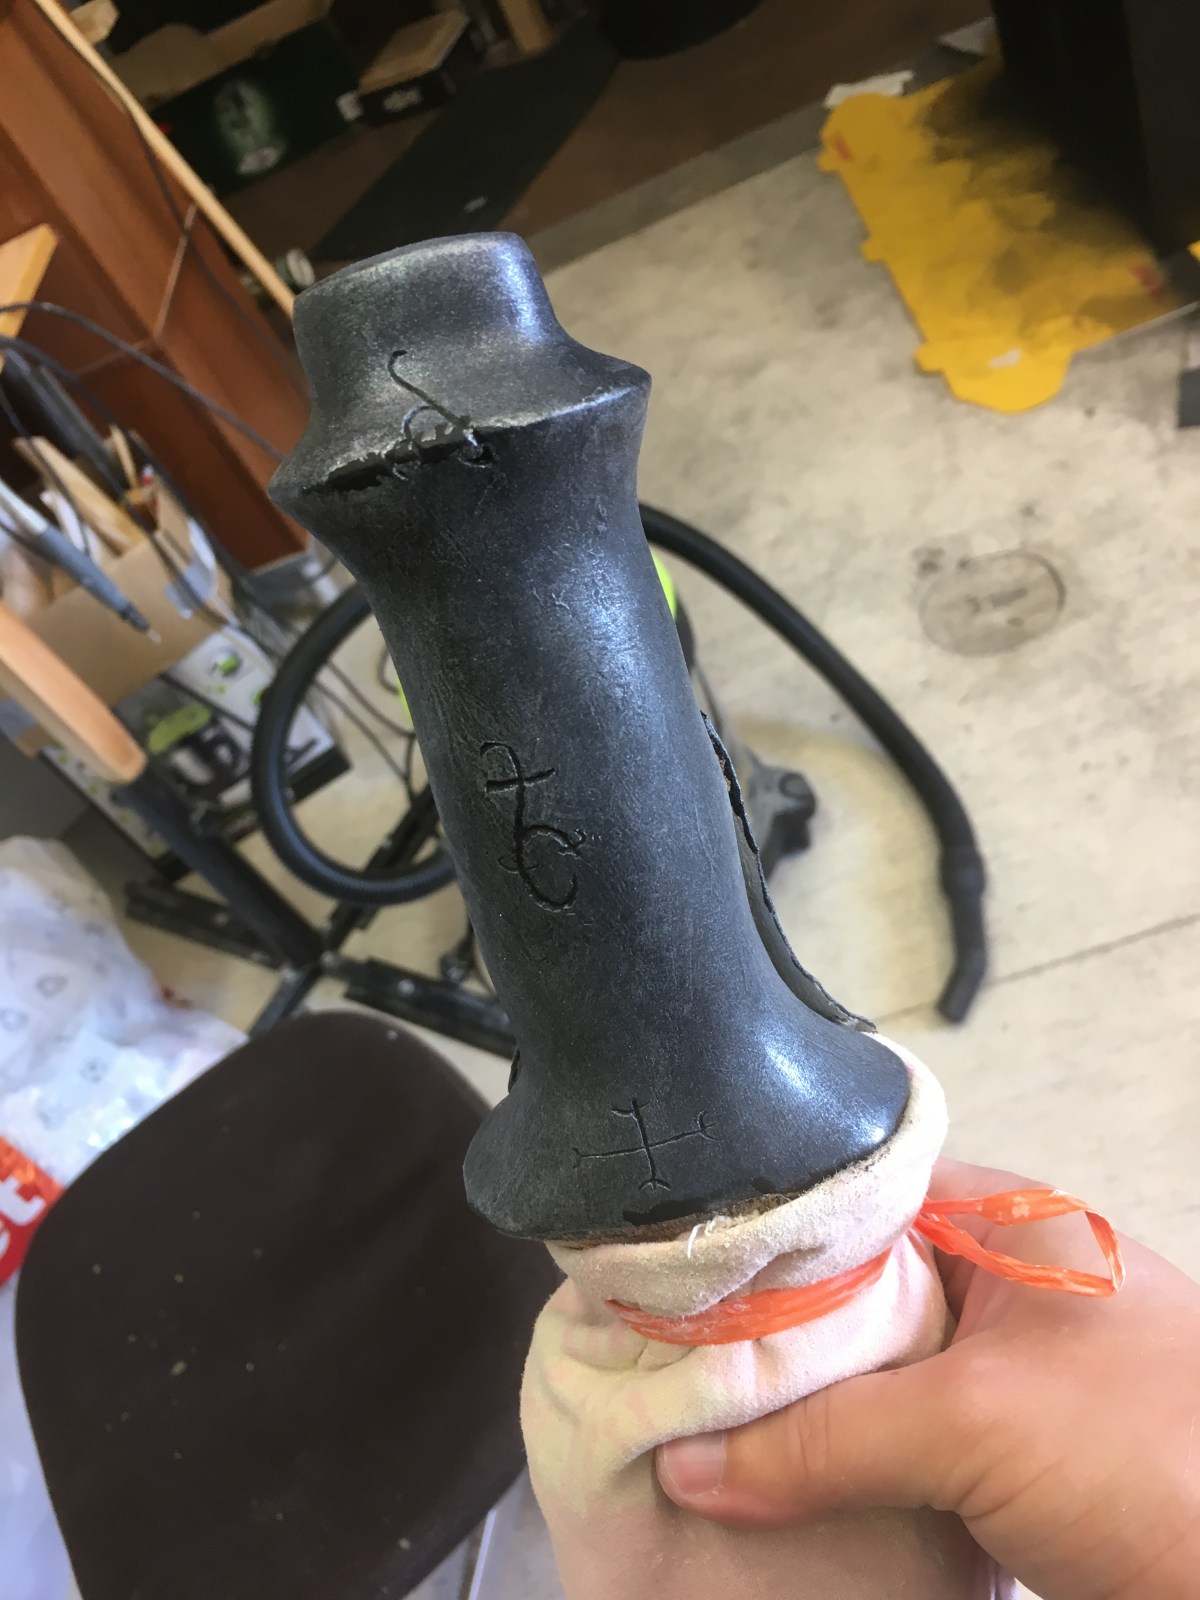
I’ve got not one, but two new swords in the works.

Everybody remember the cool ring-sword Zaapiel that I made for a wedding?

DSC_0824

It’s making a comeback for a very special project!

IMG-3020

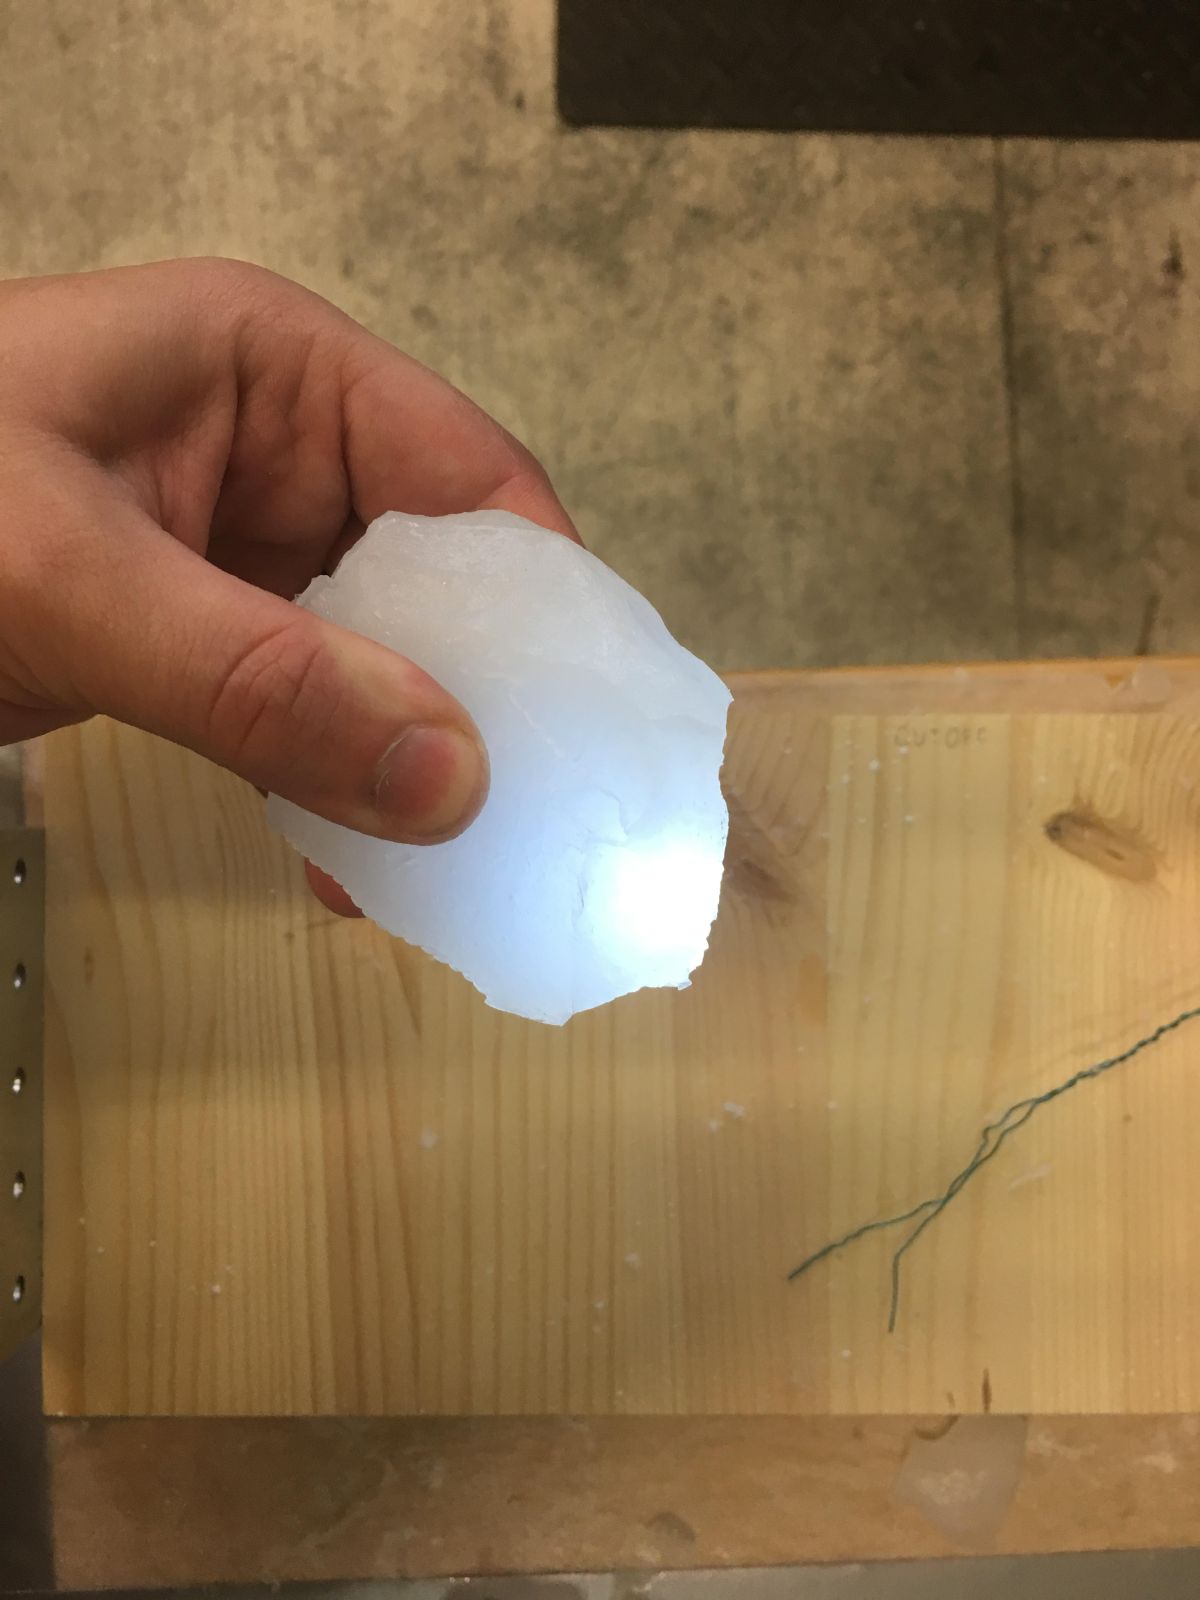
From humble beginnings traced onto a piece of foam insulation …

IMG-3031

To a cut and and honed profile …

IMG-3036

To a sleek shape ready for patching, sealing, and finally, its first moulding. But it will have to wait until my table is clear.

IMG-3021

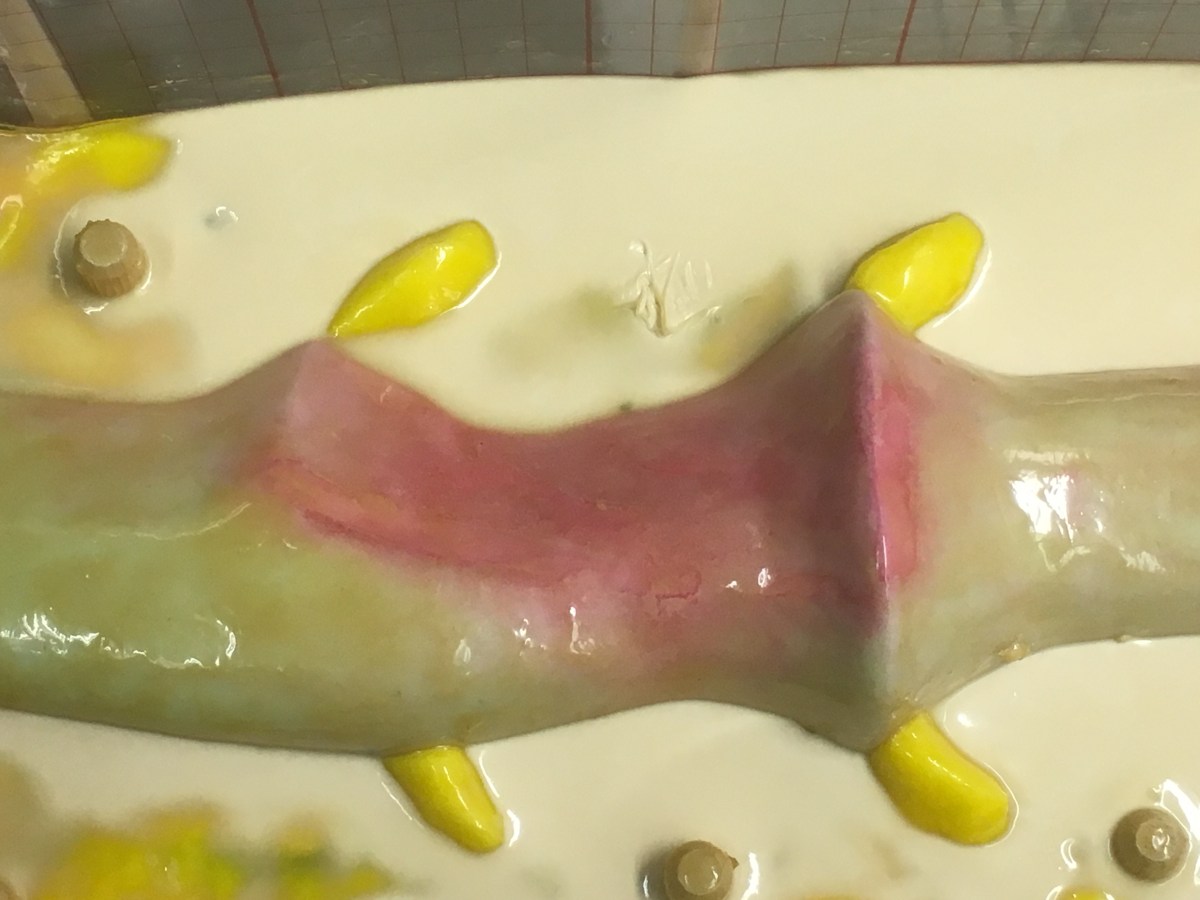
THIS bad boy is currently taking up all the space! What’s all the pink stuff? That is light, air-dry clay that I use to fill voids in the insulation that I carve the first prototypes from. There’s always some air bubbles and cavities in foam insulation and this makes holes in the swords that I really don’t want. So I fill them before I seal them to ensure a nice even shape.

IMG-3035

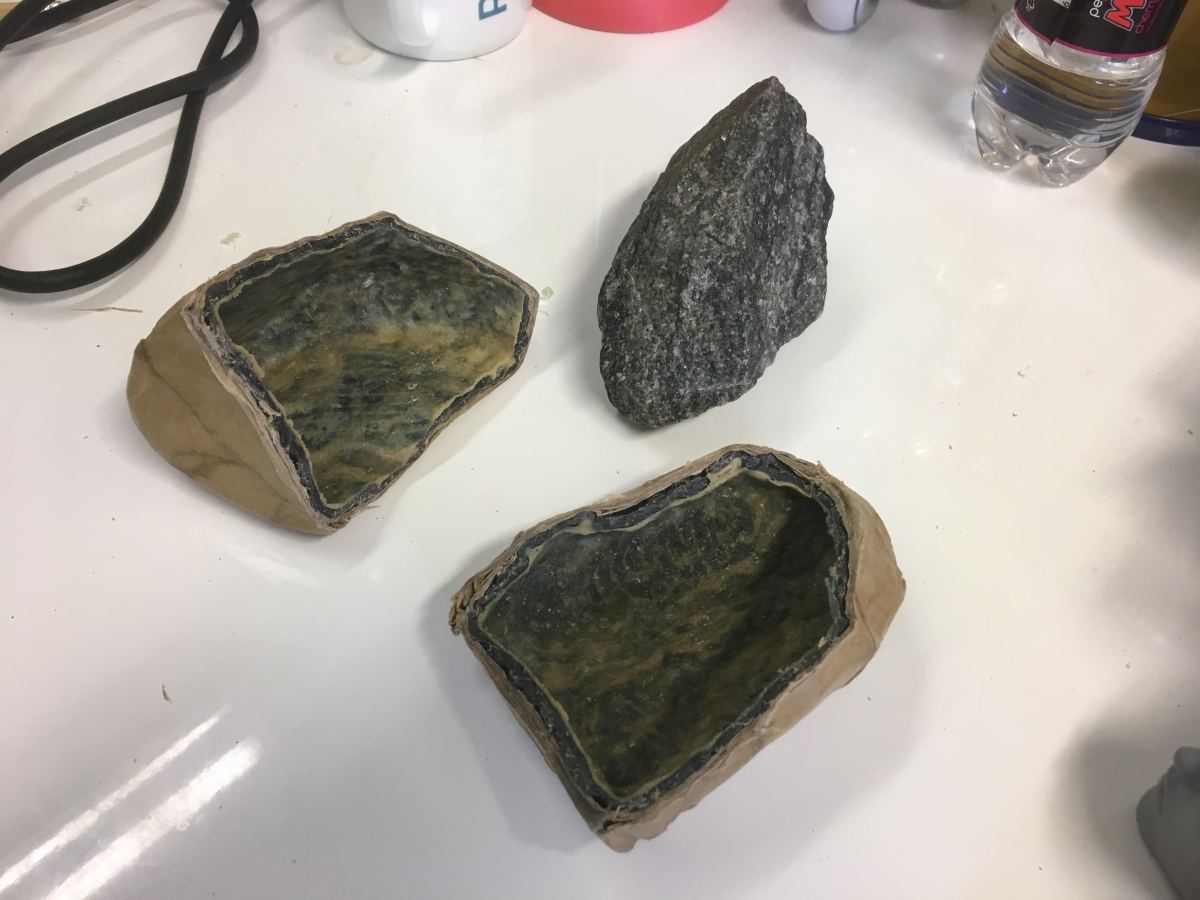
Here’s Sariel chilling out in its moulding “box”. I’ve been experimenting with more flexible walls for the moulding boxes so that I don’t have to use as much silicone or other moulding compound. Most swords aren’t just big rectangles, so filling that extra space in the corners of the box is a lot of wasted material! I’m doing my best to reduce costs for crafting my pieces so that more people can afford them. This … isn’t easy. I have to spend a lot of time problem solving and trying out different things before I find something that actually works well.

IMG-3042

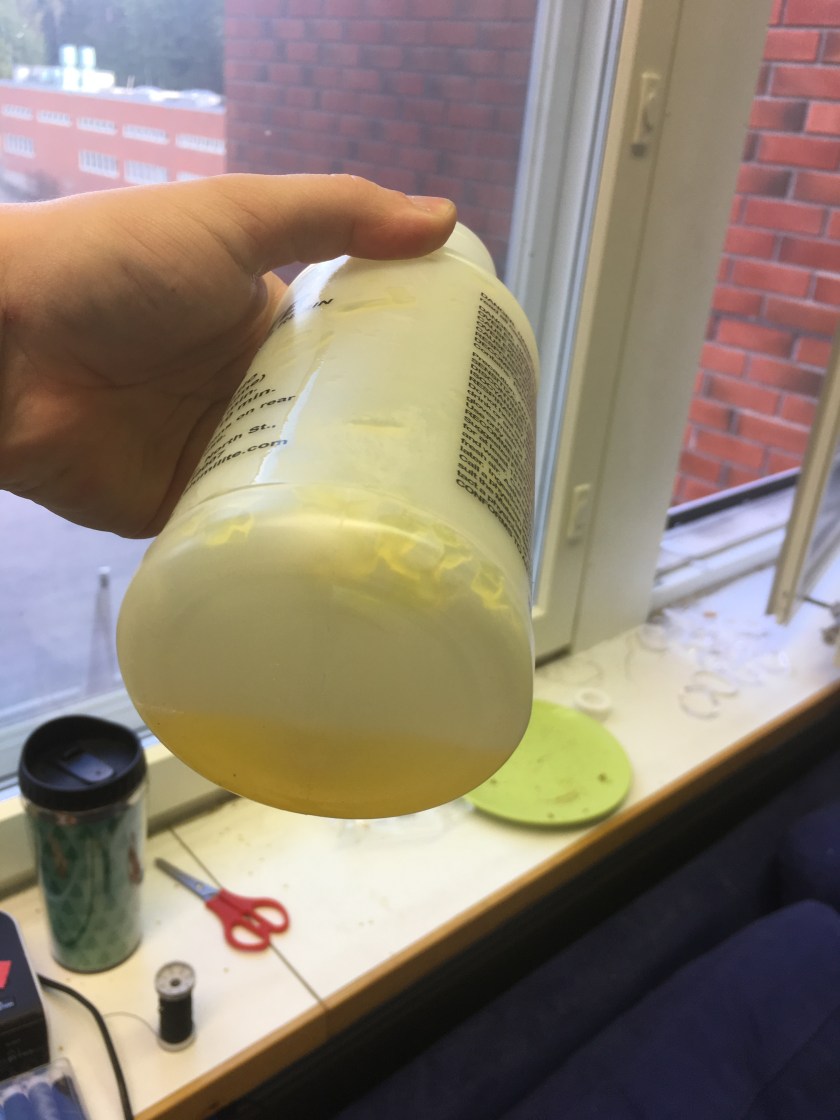
Part of that cost-cutting effort is right here in this “box”. I’m using liquid latex as a moulding compound. On the upside: liquid latex is cheap and also bio-degradable over time. On the downside: it takes many coats and takes a long time to dry between coats so what it saves me in cash, it costs me in hours. I’m currently trying to work out if it’s going to be worth it to do latex layers, or if I’m going to have to buy a ton of alginate and try to do it that way.

I haaaaate using non-bio-degradable materials for prototypes. It’s so bad for the environment to make something that’s going to last forever and then only use it once. The foam I’m using for my first prototypes isn’t bio-degradable (I think) but I have a huge slab of it so I have to use it up.  I’m still working out what I’m going to use instead after the foam is all gone.

Wish me luck everyone!

Longswords Anyone?

Just a wee update this morning to show you what I’m working on this week.

IMG-2986

It’s Sariel! Inspired by Isabelle’s glorious two-handed sword from the Mortal Instruments movie. 🙂 I’ve got all the initial carving done and the holes all patched up. (This insulation seems to have a lot of voids in it for some reason.) Now I just need to sand it and apply several layers of sealing on it before I can do the first moulding.

I’m hoping to have these available in time for Christmas. Wish me luck!

Wild Week

Yes I’m updating today instead of Monday. It’s been crazy.

My water jug decided to leak onto the table all weekend. Apparently the table was mostly made of cardboard and the entire end of it was ruined.

damaged table

So I had to take an entire day to chop the end off my work-table and reattach the legs. The seatings for the bolts were apparently laminated into a block, inserted into the table, and then laminated over so it was impossible to just move them and re-bolt. I had to use wood screws, which ended up being too long and pierced the top of the table, and a couple of G-clamps which are now a permanent fixture helping to hold the stupid legs on. Yay.

So. much. swearing.

IMG-2955

I did some experimenting with a product called ComposiMold. It is a re-meltable, re-usable moulding compound. Poor Malechai looks a bit like Han Solo frozen in carbonite here. LOL

IMG-2957

I also discovered that I can close the eye and neck holes with draft-stop tape. I’ll remember this trick for the future!

bubbles

Now, what I learned from this experience is that ComposiMold tends to retain some bubbles. Currently not sure if I can actually get them OUT before the moulding compound hardens. But, since it’s a reusable substance, and the bubbles are quite small, I can use it to create prototypes of the items I make without having to buy more moulding products each time AND without creating more environmental waste to make a mould that will only be used once.

Nice!

geode2

Now what have we got going on with this crazy little geode thing here? This is a prototype mould I made with a new technique I’ve been trying out. I’m constantly working on making things more cheaply so that I can lower my prices and make my stuff more accessible.

This is a moulding of a rock I’ll be using for the shape of my new witchlights. I’m still unsure of the size. It might be a little big, but we’ll have to see.

Now, here’s the really exciting part:

This is a touch-activated circuit that I have been working on. The final model of witchlight that I will be selling will light up when placed in the palm of your hand. No buttons, no slide switches. Magic. My aim, as always, is to make the prop look like it is activated by the power of the person holding it. I strive to hide the electronics and mechanics to the point where nobody but you can find the button. It’s a secret trick that you get to reveal (or not!) at your own discretion.

I want to take a moment to again thank the people who have been ever so patient while I tinker with these projects to get them working just right. It means a lot to me to bring something to you that I can be truly proud of, not just something that’s “meh good enough”.

That’s all for me for today. I’ve got to get back to makin’ magic! Have a great weekend guys. ❤

Making Headway

IMG-2914

Here’s the back of Malachai’s head with Lost Chronicles’ logo loud and proud. Isn’t it a lovely design? The edges are rough cause it’s popped fresh out of the mould with no sanding just yet. That comes later. Busy busy busy!

IMG-2917

They’re multiplying … o_o Taking over the workshop! Somebody help before they —

Hehe just kidding. They’ve been mostly well behaved. Mostly. I’ve had some odd bubble issues to the degree that I actually had to alter the mould and give more room for the gas to escape from the resin. All of the bubbles occurred right at the top of the mould so at least fixing them should be reasonably easy. Well … as easy as manually filling the tiny voids with tiny amounts of mixed resin and then sanding it back down flat so no imperfections remain.

In fact, I was just about to start that process when …

IMG-2924

What the heck is this?! This is the Part B jug of my white resin. It has chunks in it like orange juice pulp! How? Why? Dammit I can’t use this! I will have to contact the seller and figure out what’s going on. Ugh!

In the meantime, I will be exploring other options. This resin sets in only two minutes. That’s clearly not enough time for all the air to get out despite the mould being very well vented. I’m looking at the very real possibility of having to use a different resin that sets more slowly … which probably means casting all those heads over again. -_- But if that’s what I have to do, I will do so at my own expense, as per usual. I have a policy of not making customers pay for my mistakes.

Now, despite my adventures in Doll Land, yes I do still make swords everybody, don’t panic. In fact, I have two lovely Clariel swords waiting to be purchased on my Etsy shop.

IMG_2788

Now I’ve got to poke my resin seller to see what’s wrong with the stuff they sold me and get to the workshop to do some more experimentation. Wish me luck!

Big Changes Ahead

Hi guys! I have to try to show and tell you lots of stuff while being really quick cause I have to go move my workshop. YES! I am moving. From the 3rd floor to the 4th floor. LOL

Why?

My previous space was too expensive for me. Almost 600 euros a month. That, coupled with the cost of materials to make my shinies (silicone is ridiculously expensive, I’m not even kidding), and my vacuum pump dying and needing replacement (I’m degassing things in a couple stages as it limps along with its last gasps of life) I could not afford to stay there.

So: we’re going from 37 square meters down to 15 square meters. This is okay because I had way too much space to begin with. But … the new room also doesn’t have access to water. So I have to schlep a water reservoir from the bathroom to my workroom when I run out. Booo. Well, I guess I’m about to become very strong? Yay.

My wife helped me move all the things that needed two people to move yesterday (Sunday). Bless her heart for sacrificing a day off lifting and lugging with me.

Now, on to the stuff I’ve been working on! Quick quick GO!

I made a witchlight! Yay!

unnamed

It didn’t work! Boo.

I shaved it down.

unnamed (1)

It … kinda works! Yay? Not good enough. I’ll keep trying!

Next thing GO!

Doll head made by Lost Chronicles prepped for moulding!

unnamed (2)

Covered in blue goo!

unnamed
Mmmphhhrrmmph!

How did the moulding go? Don’t know! Not finished yet. Not touching it until it’s safely settled in the new workshop!

Next thing GO!

More carving done on Sariel!

unnamed (1)

Yes! In about a month you will be able to get your hands on a glorious longsword like the one that Isabelle Lightwood wielded in The Mortal Instruments movie! Woo! Send thoughts n’ prayers that everything goes smoothly.

Okaygottarun wishmeluck! Aaaaaah bye!

Wait! I forgot.

Don’t forget I have a Clariel for sale on my Etsy! It could be yours! Grab it!

Okay now bye for real gotta move stuff!

Back from Holiday

Wait, didn’t you just have a holiday Ethan? I did, a bit earlier in the summer, yes, but I had to chop my holiday time in half and take it in two parts because of my wife’s work. So I finally got to have the other half of my vacation.

What’s been going on at the workshop?

clariel

I’ve been putting the finishing touches on a couple brand new Clariels!

IMG_2788

Want to grab one? My Etsy shop is right here. 🙂

I’ve actually managed to significantly lower my shipping costs by switching to a different carrier. For example, if you live in Australia, you can now pay about 40 euros for shipping instead of a whopping 103 that FedEx was charging me. Whew! I told you guys I’m always working hard to make these things more affordable. It’s tough when you’re talking about hand-made commission artwork but I try my best to find some more wiggle room and put things in reach for more people. I understand tight budgets, believe me.

What else am I working on? Witchlights! I’m trying to put the photo here but my phone is being weird. Darn it. I’ll have to do it later. Anyhow, it doesn’t look very exciting at the moment since I’m just working on the mould and figuring out the circuits. Expect pretty things later!

One more exciting announcement before I head off to work. I’m starting on a new project that has nothing to do with Shadowhunters! I know, I know. Bizarre right? But yes I do do other things! One of my interests is ball-jointed dolls. For those of you who don’t know what that is: they are pose-able art dolls.

Inkblade Studios will be partnering up with Lost Chronicles BJD to cast dolls in resin. Our first project will be a small run of head parts for the nice folks who pre-ordered and made this project possible. Here’s a sneak peak at the 3D printed head I’ll be making a mould of later this week.

Malechai

I’m pretty excited to be working on this fella! It will be a relief to get to deal with a small amount of resin for once instead of something the size of my arm haha! Wish me luck everybody!

Trying New Things

Hi guys! In spite of the heat, I’m still trying to get stuff done. I managed to get most of the way finished one of the Clariel swords on my table. It just needs its protective glossy sealant and the strap around the handle.

IMG_2784[1]


That’s a handle made of Milliput. Milliput is a two-part epoxy paste. You smoosh it together, knead it thoroughly, and do whatever it is you want to do with it. It’s a lot like modelling clay in consistency. After 3-4 hours it sets hard as a rock. Much more solid and robust than the polymer air-dry clay I’ve been using before.

The downside to Milliput is that because it’s so much harder, it takes longer to shape, sand and polish. The paste is stiffer and harder to mould than softer clays so I have to do some shaping with the Dremel tool after it’s set and then sand those tool marks away before I can begin polishing. It’s also harder to engrave. It’s also a bit more expensive than the air-dry polymer clay.

In addition, any patching of gaps or fine details that I want to do with the Polymer clay (which is softer and easier to accomplish these things with) has to be done after polishing the Milliput. Milliput is hard enough that I have to wet-sand it to smooth and polish it if I want to work with any kind of speed. But the air-dry polymer clay softens with water and can become crumbly before its had its protective coats of paint and sealer put on it.

So the procedure has to go like: Mould handle with Milliput. Wait 4 hours. Shape with Dremel. Wet-sanding. Install leather flap for the light cavity. Smooth over any seam-lines with polymer clay. Dry-sanding. Install magnet closures. Engrave. Paint. Paint. Paint. Seal.

Do I like this procedure? Uhh … I’m still working on tinkering with it. But I do like the structural hardness of the Milliput and will definitely be keeping it on hand for anything that needs reinforcement. I totally recommend getting some to play with. It’s fun!

IMG_2781[1]


Here’s a different style of Milliput handle I also tried out. I wanted it to be all one piece so I could slide it on and off the sword to change the light battery when needed. Buuuut Milliput bonds with resin. On the one hand: that’s great! I can put stuff on my swords and be 100% sure it’s not going to come off. On the other hand: I wanted it to come off.

I even put a layer of liquid latex all over the handle before I started moulding the Milliput on. But Milliput forms itself absolutely perfectly to the object you’re sticking it on, so it formed an air-tight suction seal that I couldn’t pull free. I had to cut out a section of the front to do a conventional leather-flap for the light cavity.

IMG_2780[1]

Of course that broke the suction seal. And it came off just like I originally wanted to but far too late. I had already altered the design by slicing a section out of the front. GAH! That was a frustrating day guys!

But now it’s all epoxied into place and smoothed and patched. Ready to have its flap adhered in place

Will I be at the workshop today? I don’t know! I was supposed to have an air conditioner delivered to my apartment last week and they didn’t come. 😦 So I have to figure out if they’re coming today or not and if they are, I have to stick around and wait. But I won’t be doing nothing. I received my electrical components for the witchlights last week so I can begin tinkering with that until my AC arrives. (Hopefully.)

Wish me luck guys!

I’m Melting!

Okay, so, it’s really freaking hot in my workshop. Still. It’s been a couple weeks or so of 30C, in Finland. What the crap?! I didn’t move within spitting distance of the Arctic Circle for this garbage! Rawr!

IMG_2765[1]
Pls send ice cream.
I’m going slightly bonkers. Still trying to get work done. Somehow. I stand directly in front of the fan and wear a cooling vest so I don’t lose quite as much water via sweat but it’s a daily struggle. Just trying to keep my head clear enough to work without messing things up. Gah!

But the good news is I am well on my way to completing my latest couple of swords (the ones I saved and made gorgeous with the crazy resin glaze experiment). I’m also trying a new product (new to me anyway) called Milliput for the handles. It is a two part epoxy paste that hardens into a very strong plastic in about 4 hours. I absolutely love it so far! Today I’m going to be sanding off all the lumps and bumps and smoothing it into the shape we all know and love. 🙂

More exiting news! I have just ordered the electronic components for the new witchlight design I’m working on! I have many hurdles to overcome with this project which is why it has taken so long. Several of you have requested witchlights and I have not forgotten you! Let me just run over the problems I’m trying to solve:

  • How to hide the electronics inside a transparent substance?
  • How to make the electronics as small as possible?
  • How to conceal the on-off switch?
  • How to conceal the opening? (You’re going to have to change the battery sometime…)
  • How will it open and close?
  • How will the on-off switch work? (Touch? Click? Slider?)
  • How can I keep costs as low as possible so people can afford them while still managing to pay rent on my workshop?
  • How do the Iron Sisters work in a freaking volcano when I can’t even concentrate at 30C?

All this and more on the next episode of What the Crap am I Doing?! Stay tuned.

A New Look!

Whoa! Dude! What happened to the site? Don’t panic guys; I changed my logo. Everything’s still here.

I took a recommendation from a friend to check out Turbo Gold Media  to get my very own logo designed for me. I liked the work they did on her logo so much that I decided to give it a whirl. I was immensely pleased with their services and I found their prices to be quite reasonable for the quality I got. They’re very quick and responsive and took my feedback seriously.

InkbladeStudC12a-A04bT01a-Z

I felt the need to change my logo because the old one didn’t really fit the direction my company was going. Originally, it was my plan to make a career of both writing novels and making cool costume props. Well, it turns out that making costume props is a heck of a lot more work than I thought and takes almost all the energy and time I have and I still don’t get everything done that I need to. On top of that … well … books just don’t sell. I don’t really care about worldly riches but I do need to eat and pay rent.

So, yes I still write, but it’s a hobby now. It was a brutally difficult decision to make but I had to be real with myself and admit that it was time to adjust my priorities. Maybe once I can afford to hire an employee or two to help me out and I don’t have to do everything myself, writing will be able to take a bigger role in my life. Until then, I need to focus on improving my prop-making business and get a stable income so things aren’t so financially tight for me.

Running a company is hard guys! O_o

Enough yammering about my new pretty picture! What’s up in the workshop? Well! I had a crazy failure in casting a couple of swords. I think the resin got contaminated or is a little too old or quite possibly the heat/humidity is too high in my workshop right now. It’s 30 degrees Celsius and because there is no air conditioning, I have no way to bring the temperature down.

Either way, I had this bizarre snowflake-pattern delamination on two swords.

IMG_2743[1]

Now, that would be rather cool if it was what I was going for, but since I wanted crystal clear and perfectly smooth … nope. Bad news for me. 😦 As you can see (maybe) there’s a bajillion little bubbles there and each one has flaky resin coming up around it in a flower/snowflake pattern. Boo!

What to do? I didn’t want to waste all that resin. So I sanded the swords as best I could manage to get alllll those little air bubbles and flakes off the surface. I got it as smooth as I could and then tried something weird: I mixed some glazing resin (the stuff you normally use to seal a painting or piece of wooden furniture) and carefully dribbled it down the sides of one of the swords until it was completely coated and left it hanging to dry.

It was an unconventional solution to be sure, but desperate times call for desperate measures. Either it would work and the sword would be saved, or I would have to admit defeat and throw it away. And you know how crazy I get over wasted plastics!

IMG_2751[1]

Whoa. Just whoa.

Why did I never think to do this before!? That is the clearest, smoothest, most pristine finish I have ever been able to get on a sword EVER. I cannot wait to get back to the workshop today to handle it and inspect it now that it’s all cured.

What do you guys think of it? I mean … this is more than crystal clear. It looks like a liquid that just decided to hold the shape of a sword! Should I offer this option as a possible finish you could choose for your blade? What should I call it? Ahhhh I’m so excited! I gotta go to the workshop now and give this beauty a handle!

Back from Vacation

So I’m back from Estonia! I don’t think I mentioned I was going on vacation. Sorry. I was so excited to visit Tallinn for the first time that I just kind of ran out the door.

I finished off another lovely Clariel sword. It arrived in Germany safe and sound and now has a loving home.

IMG_2725[1]

I’d like to take a brief moment to talk about my packaging methods just in case anyone is curious. My blades are always packaged in materials that are bio-degradable, recyclable, or re-usable because I am committed to making my company as eco-friendly as possible.

IMG_2727[1]

When you open your package, you will find unbleached brown paper used for filling voids in the box (so the contents don’t rattle around inside). The sword is wrapped snugly in a fleece baby blanket, all tied securely with a ribbon. The colours of the blanket and ribbon may vary but my wrapping method is always the same.

Even though I work with plastics and craft things with plastics, I don’t want any plastic waste products. The way I see it: you’ll want to keep the sword forever, but not the packaging. So why should the packaging last forever? It shouldn’t! It should go back into the earth and continue the natural cycle of the environment.

Okay, enough jabber about tree-hugging stuff LOL! What’s up for this week? Well, I made a new mould jacket for my Clariel mould annnd … it doesn’t quite fit snugly enough so I have to trim it down a bit. I have to go find out how badly it leaked. Not looking forward to it. Yuck. But at least I had it wrapped up in plastic just in case it failed so it didn’t go all over the floor. It shouldn’t take too long to fix. Hopefully. Wish me luck!