

Sorry I’ve been quiet. I was ill for awhile. But I’m back now with a brand new Clariel to offer!
Tag: Shadowhunter Sword


Two Steps Forward One Step Back
So I have a photo shoot coming up with a photographer who just moved into my building this week. Cool! This will give me high quality photos of my stuff that I can use on my website. It’ll also give him more stuff for his portfolio and it will give the model stuff for her portfolio as well. All-around win right?

So the sealant that I put on the sword ate the beautiful solvent paint I had on the handle. The solvent paint that takes 3 days to harden fully. Yeah. That solvent paint. Photo shoot is on this upcoming Sunday. I still have to do the light fixture in the pommel and the seaweed wrap for the handle.
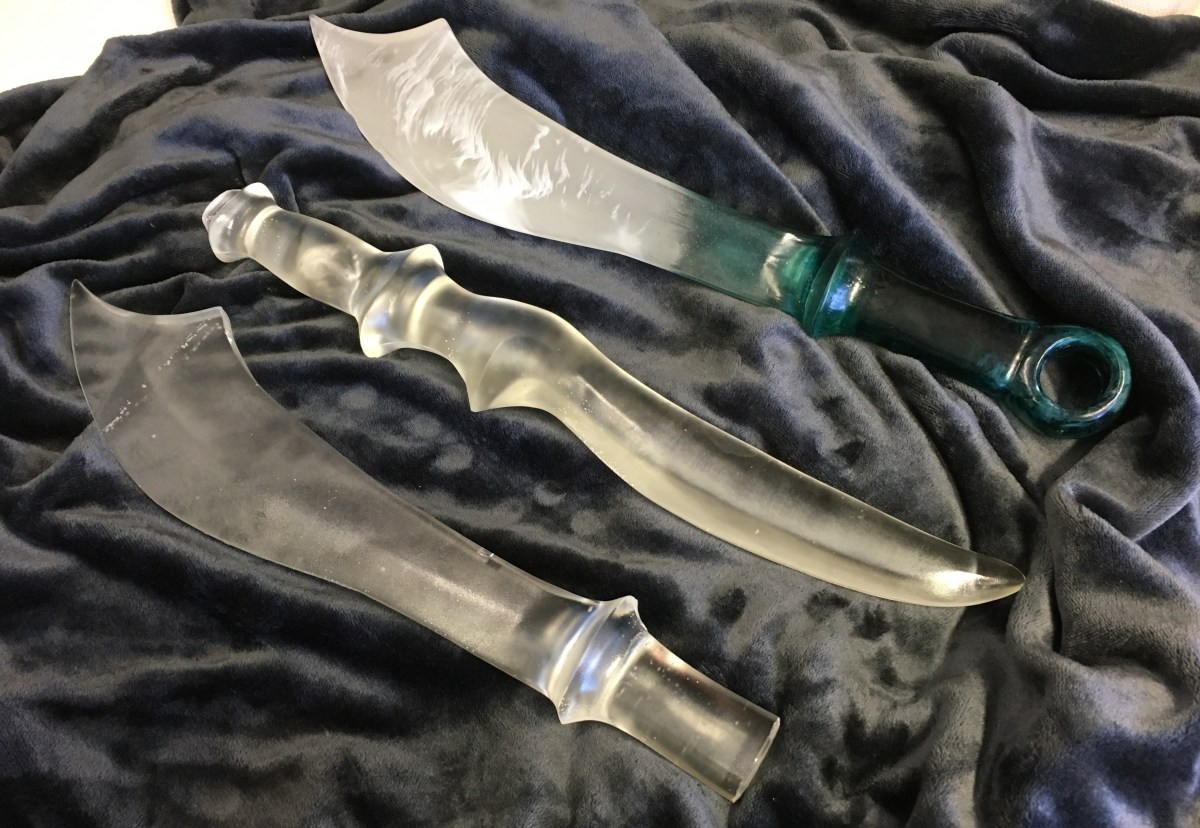
Did I mention I’m also working on these? Yeah. The Clariel there needs to be polished and have its handle sculpted, painted, light fixture in place and magnet closure installed.
Did I also mention the new witchlight mould I’m testing? Yeah. So this is gonna be a short update. I have to run this entire week or this all is not going to get done.
First stop: Hobby Point to get a sealant that won’t eat the solvent paint. Plus some casting resin if they have any on hand. Probably only the stinky crap but I’ll have my respirator on all day from the solvent paint anyway so I might as well. Then try to finish the light fixture while the paint is drying. When I come home, I get to look forward to wet-sanding the Clariel blade cause my apartment has running water and my workshop does not. Obvious choice there.
Tomorrow, will be sculpting the handle for Clariel. Hopefully I can get it done early in the morning so I can get it sanded in the same day. Then it’s on to carving the runes, painting, installing the light … you get the idea. It’s gonna be bonkers.
Wish me luck. Send coffee. Halp. @_@
Share this:

New Sword Model!
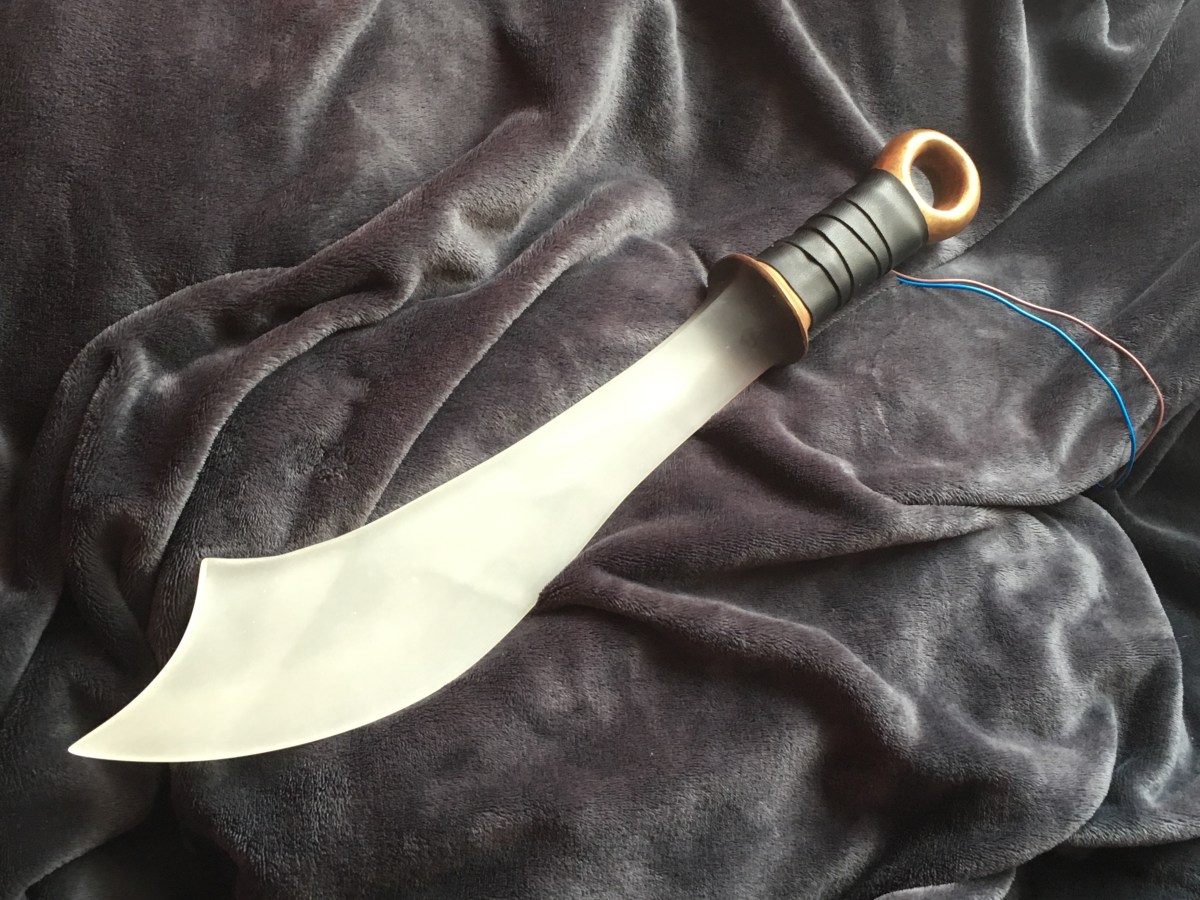
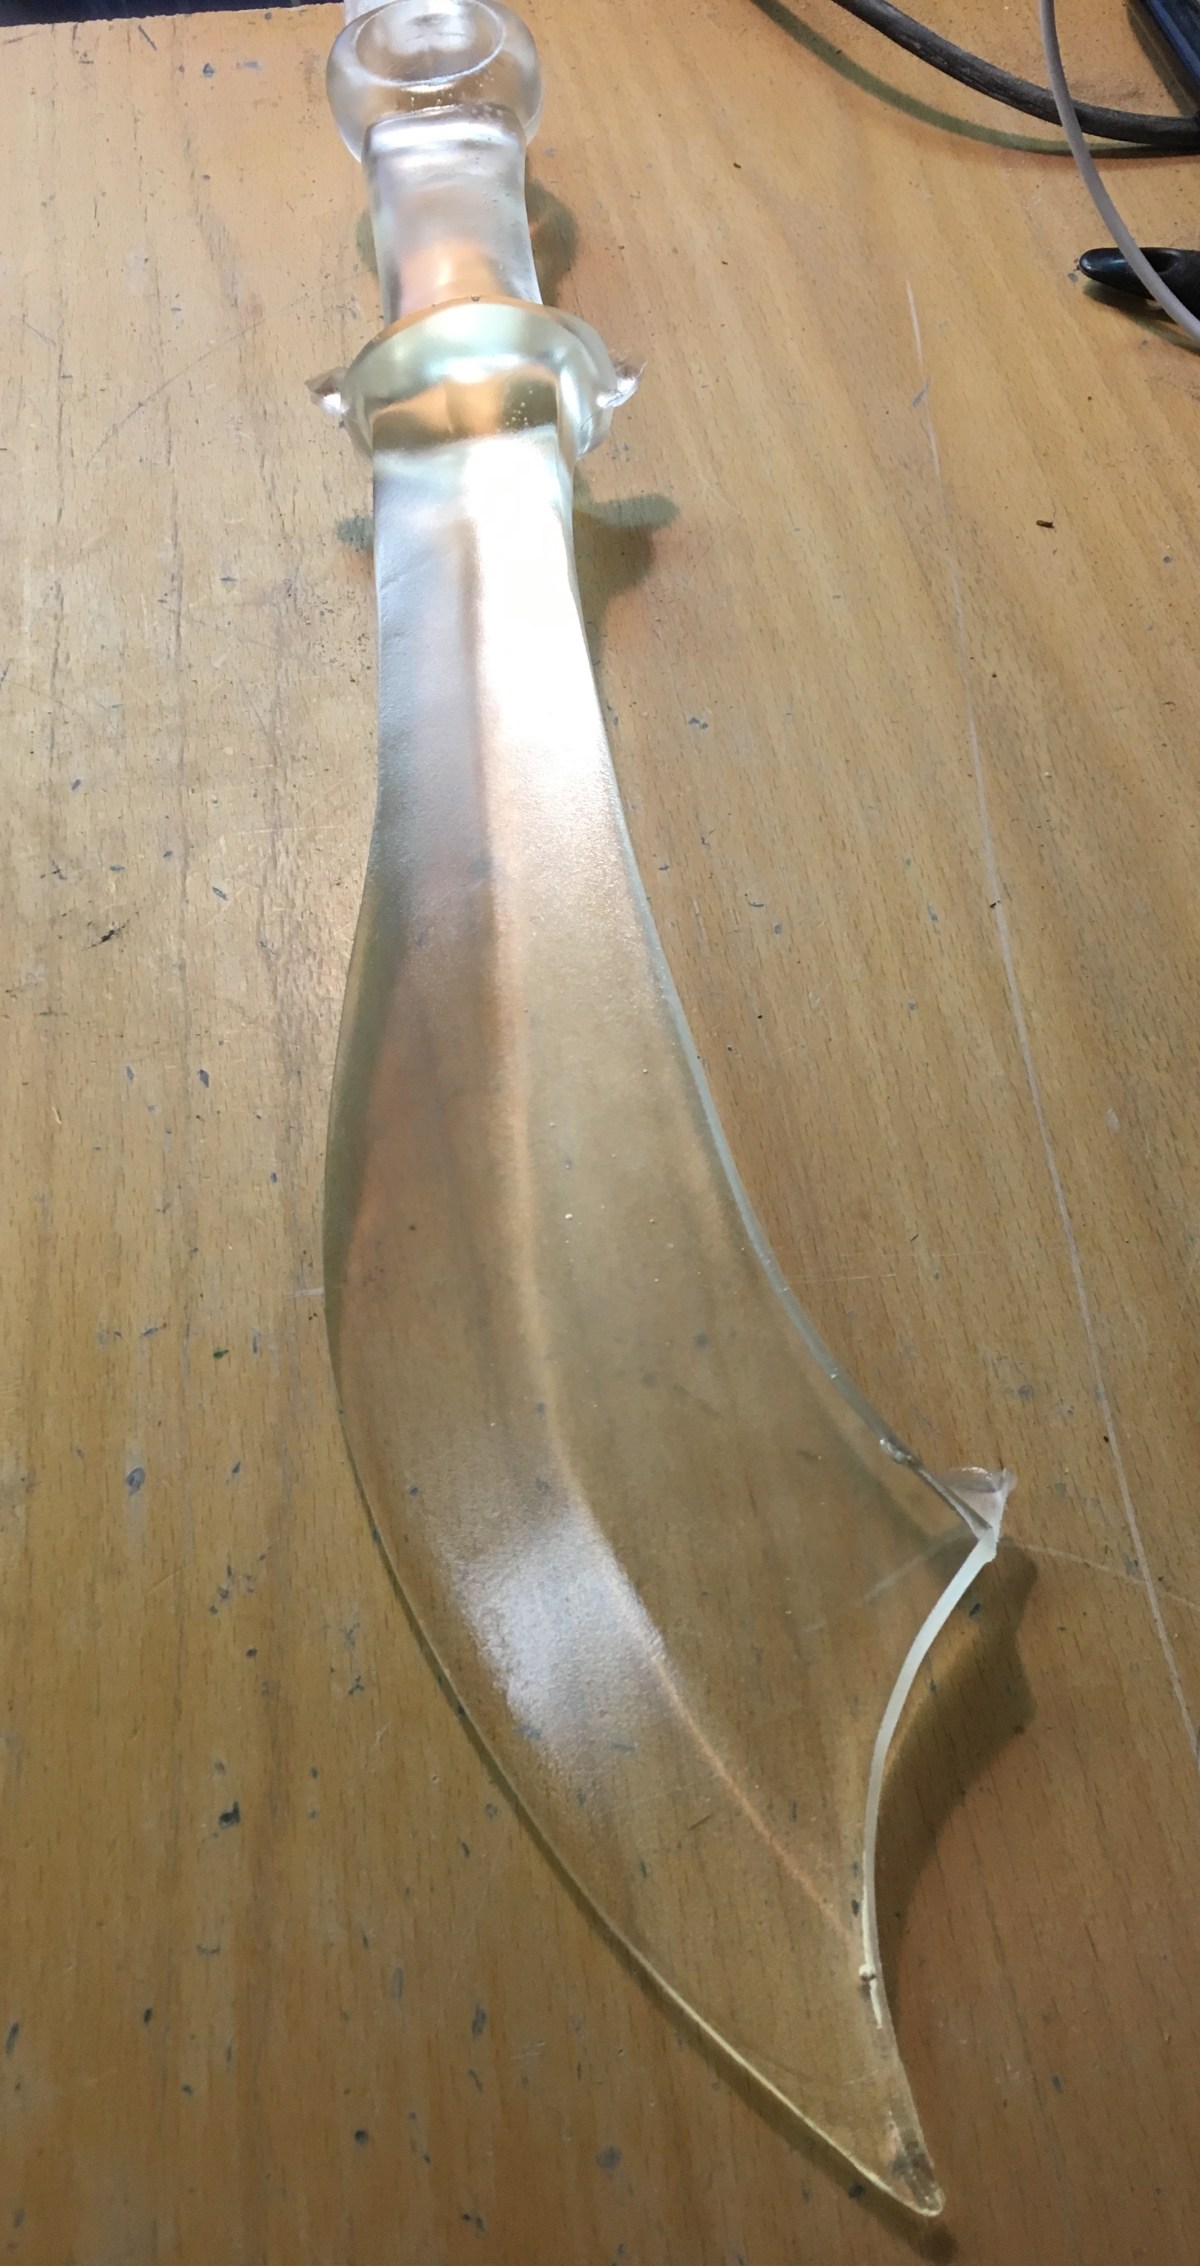
Yep, you read that right. The beautiful, exotic Zaapiel is coming to my Etsy shop. Possibly as early as this week!

Does it light up? Pffft, guys. You’re at Inklbade Studios. Of course it lights up!


Why does the sword have a couple wires sticking out of it? This beauty is a custom job, designed to be decorate a pinball machine, so it needed to be modified to hook up directly to the machine. If you need any kind of custom modifications for power sources, you need only ask. I’m quite flexible.
Now everybody likes to see the insanity of my crafting process so let’s have some pics!


Yeah! Never had a doubt. 🙂 … Not for a second. Nope.
So I’ve got one of these Zaapiels in the mould at work. I just have to go get it out and start sanding. The next question is: who would like a lovely glowing scimitar?
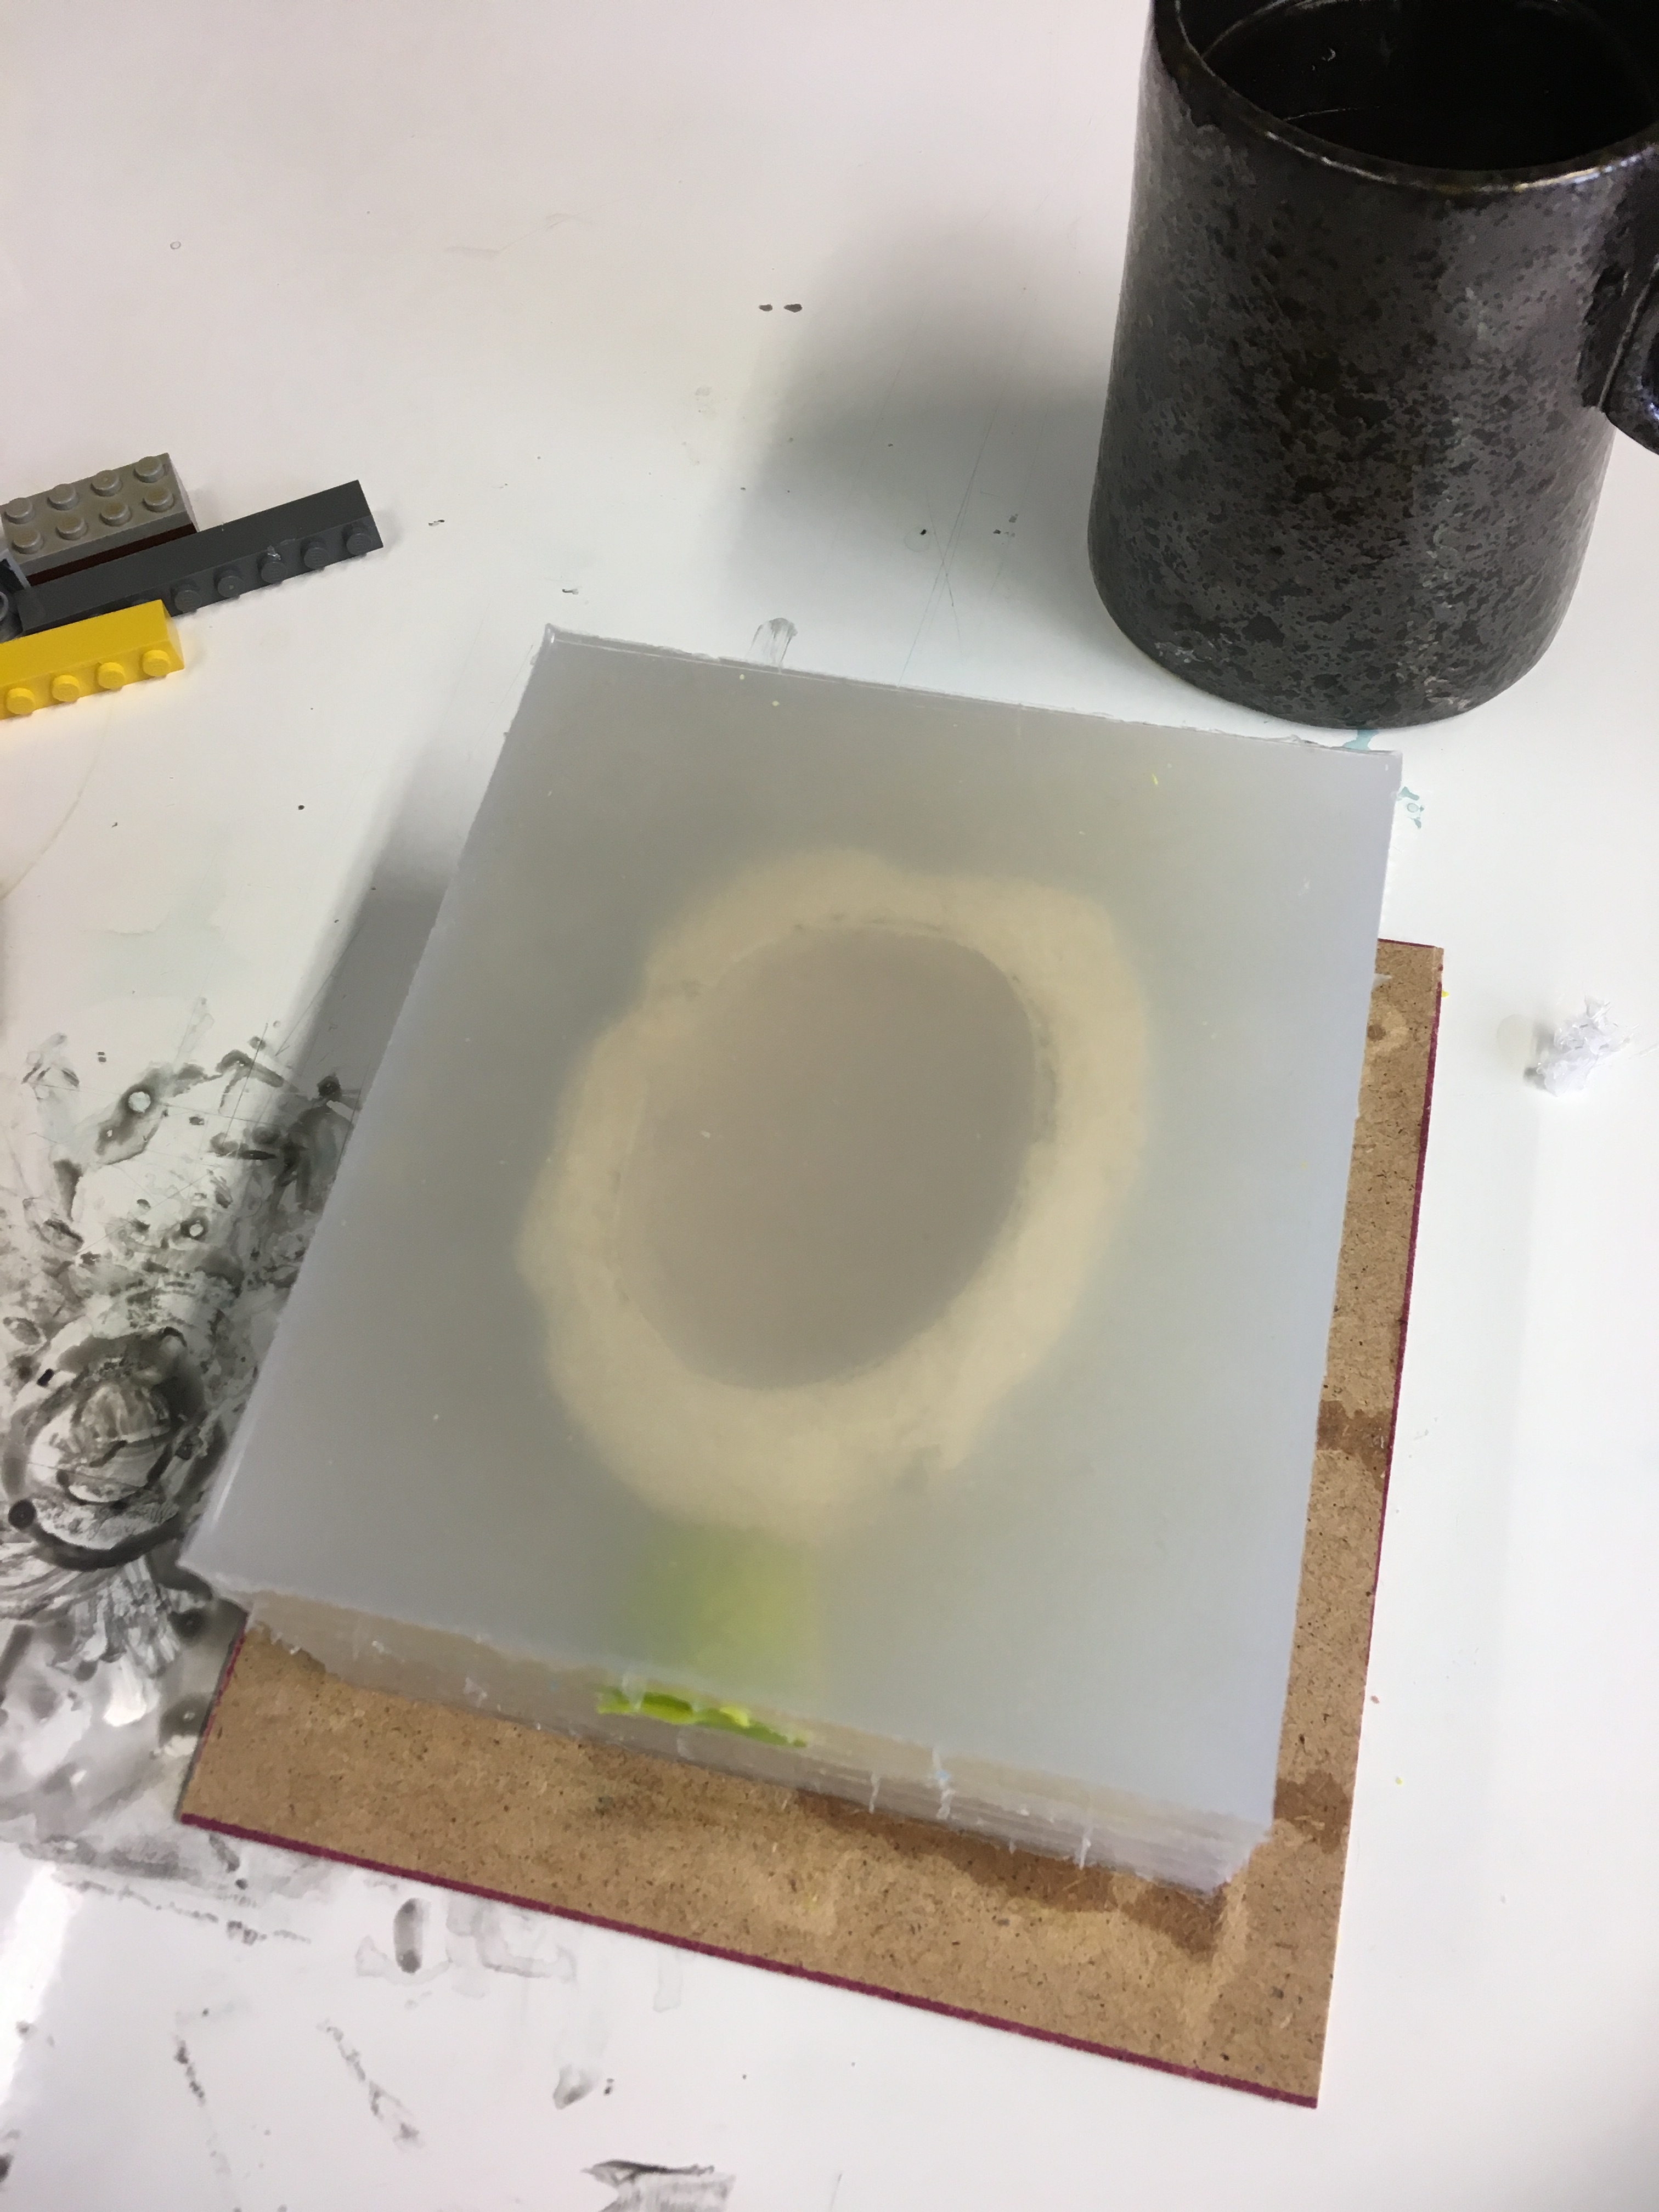
In other news, I am still working on the witchlights. The thing that I’m having problems with is getting the lid to line up properly and look like it’s part of the whole rock. I know how I want it to work but how to get it to that point is a real brain-twister.

Here’s what the underside of the witchlight looks like right now on my prototype. The lid at least sits flush on the opening and extends a few millimetres into the body of the rock so it doesn’t rattle around. But how to get it to look like there isn’t a seam? Hmm … still working on it. Thanks to everybody who’s been patient so far! I’m close to the solution.
Share this:

Polishing Day
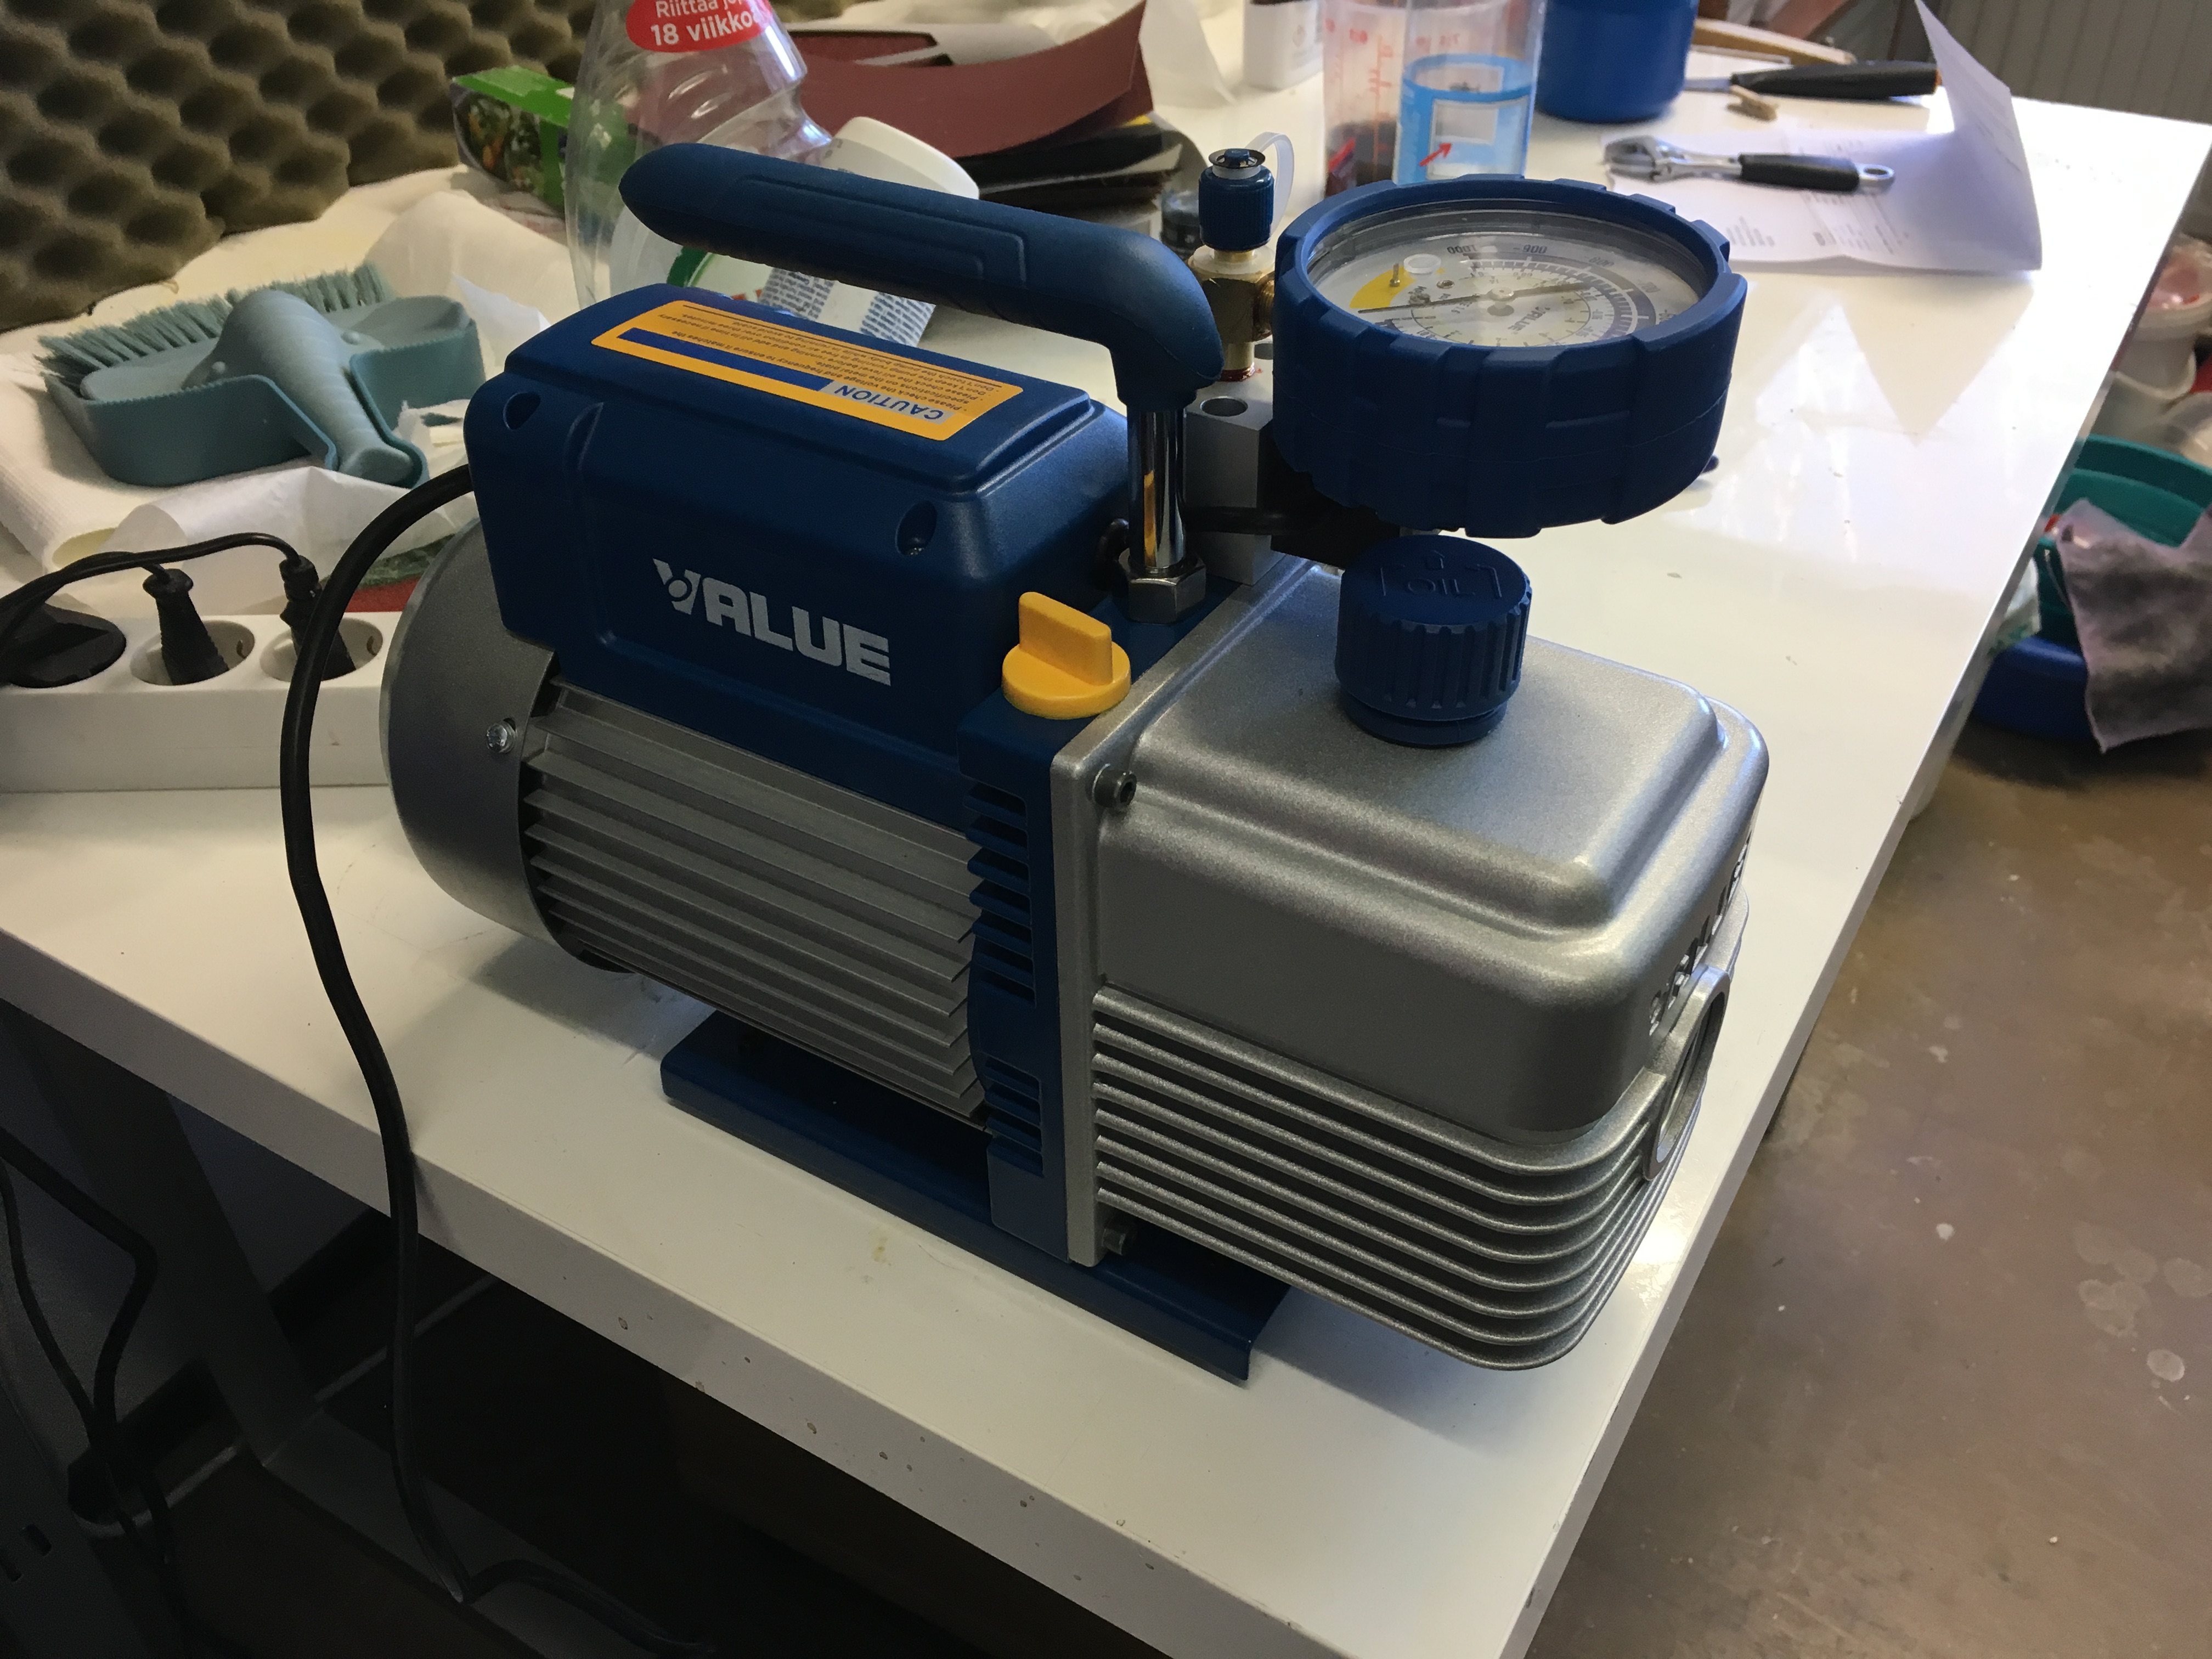
I have got some great news for you all. Check out my new baby!
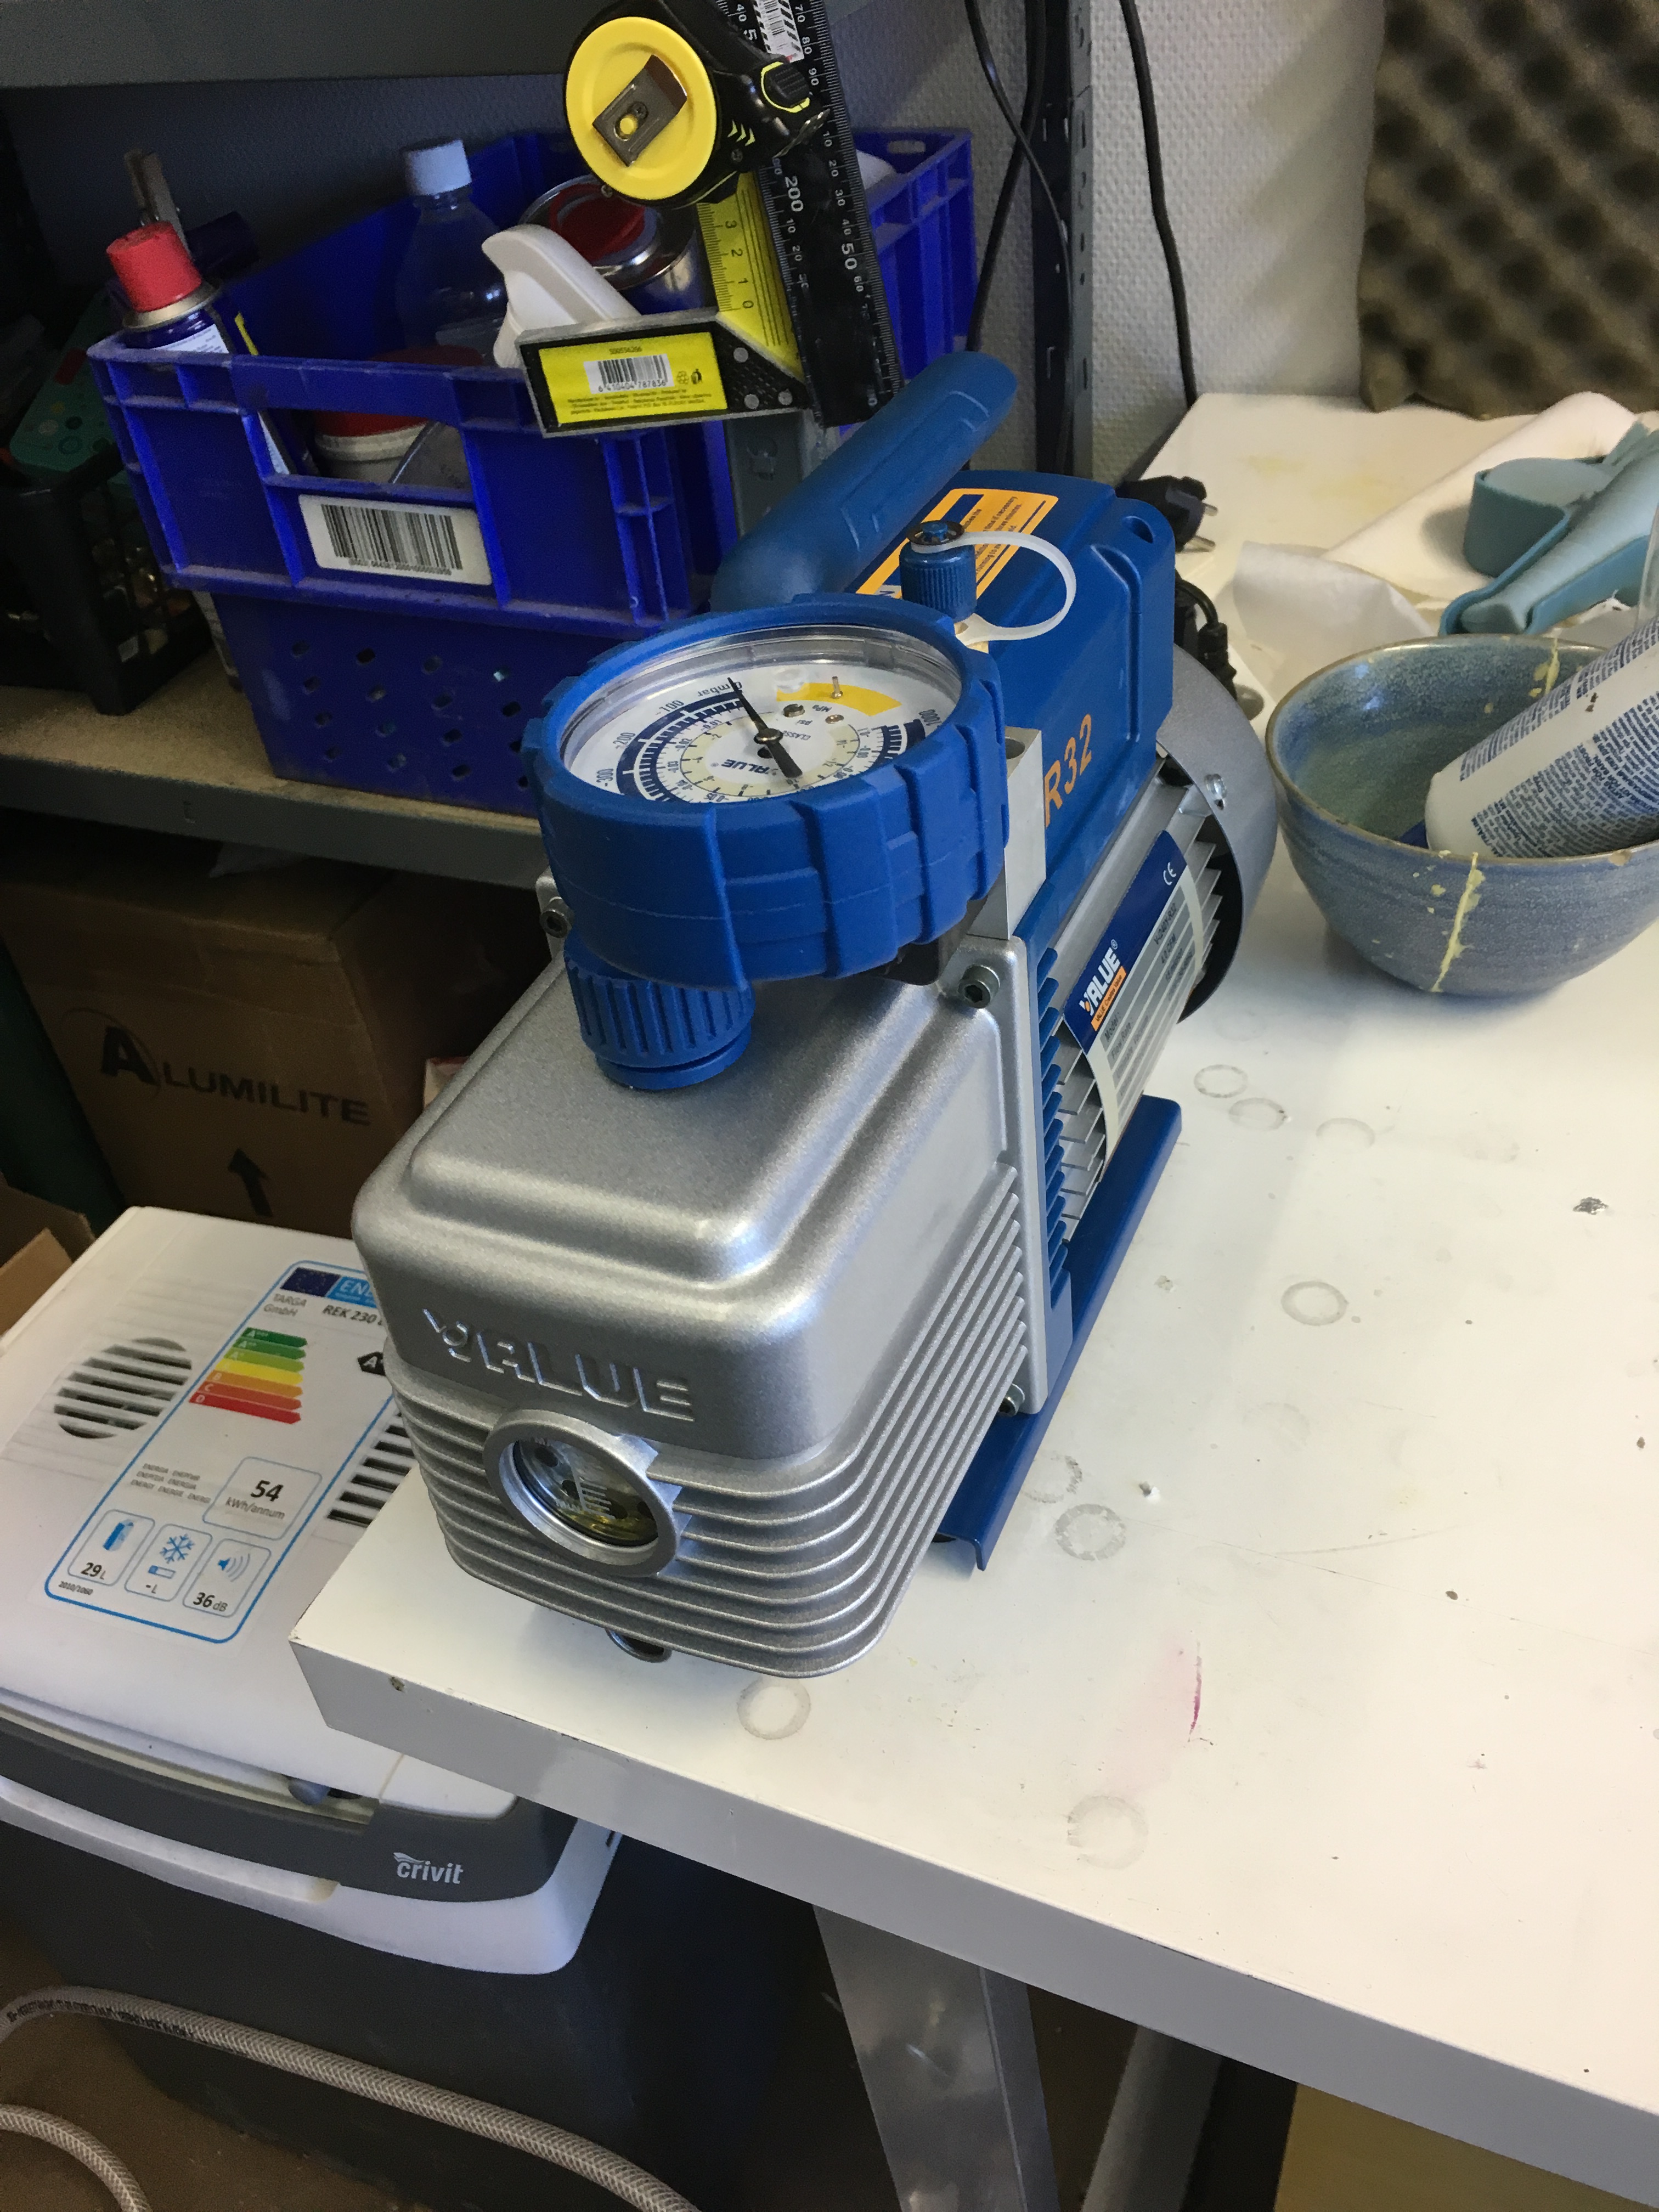
After I accidentally loaded my old vacuum pump with hydraulic oil instead of vacuum pump oil (oops!), it has never worked right again. Overheating. Loud banging noises. Foaming oil in the sight glass … It was bad. I needed a new one.
Thankfully, my buddies at Unicorn Tools had my back and got me a great price on a bigger, beefier vacuum pump. This one is getting pampered, I can tell you that much. They even sent along a spare container of the correct oil. Thank you guys so much! It takes about 3 seconds for this beast to pull all the air out of the vacuum chamber and it hums along like a champ under load. Love it!
And now that I have a working vacuum pump once again, I can cast things! Woo! Back to making swords!
Speaking of making swords …
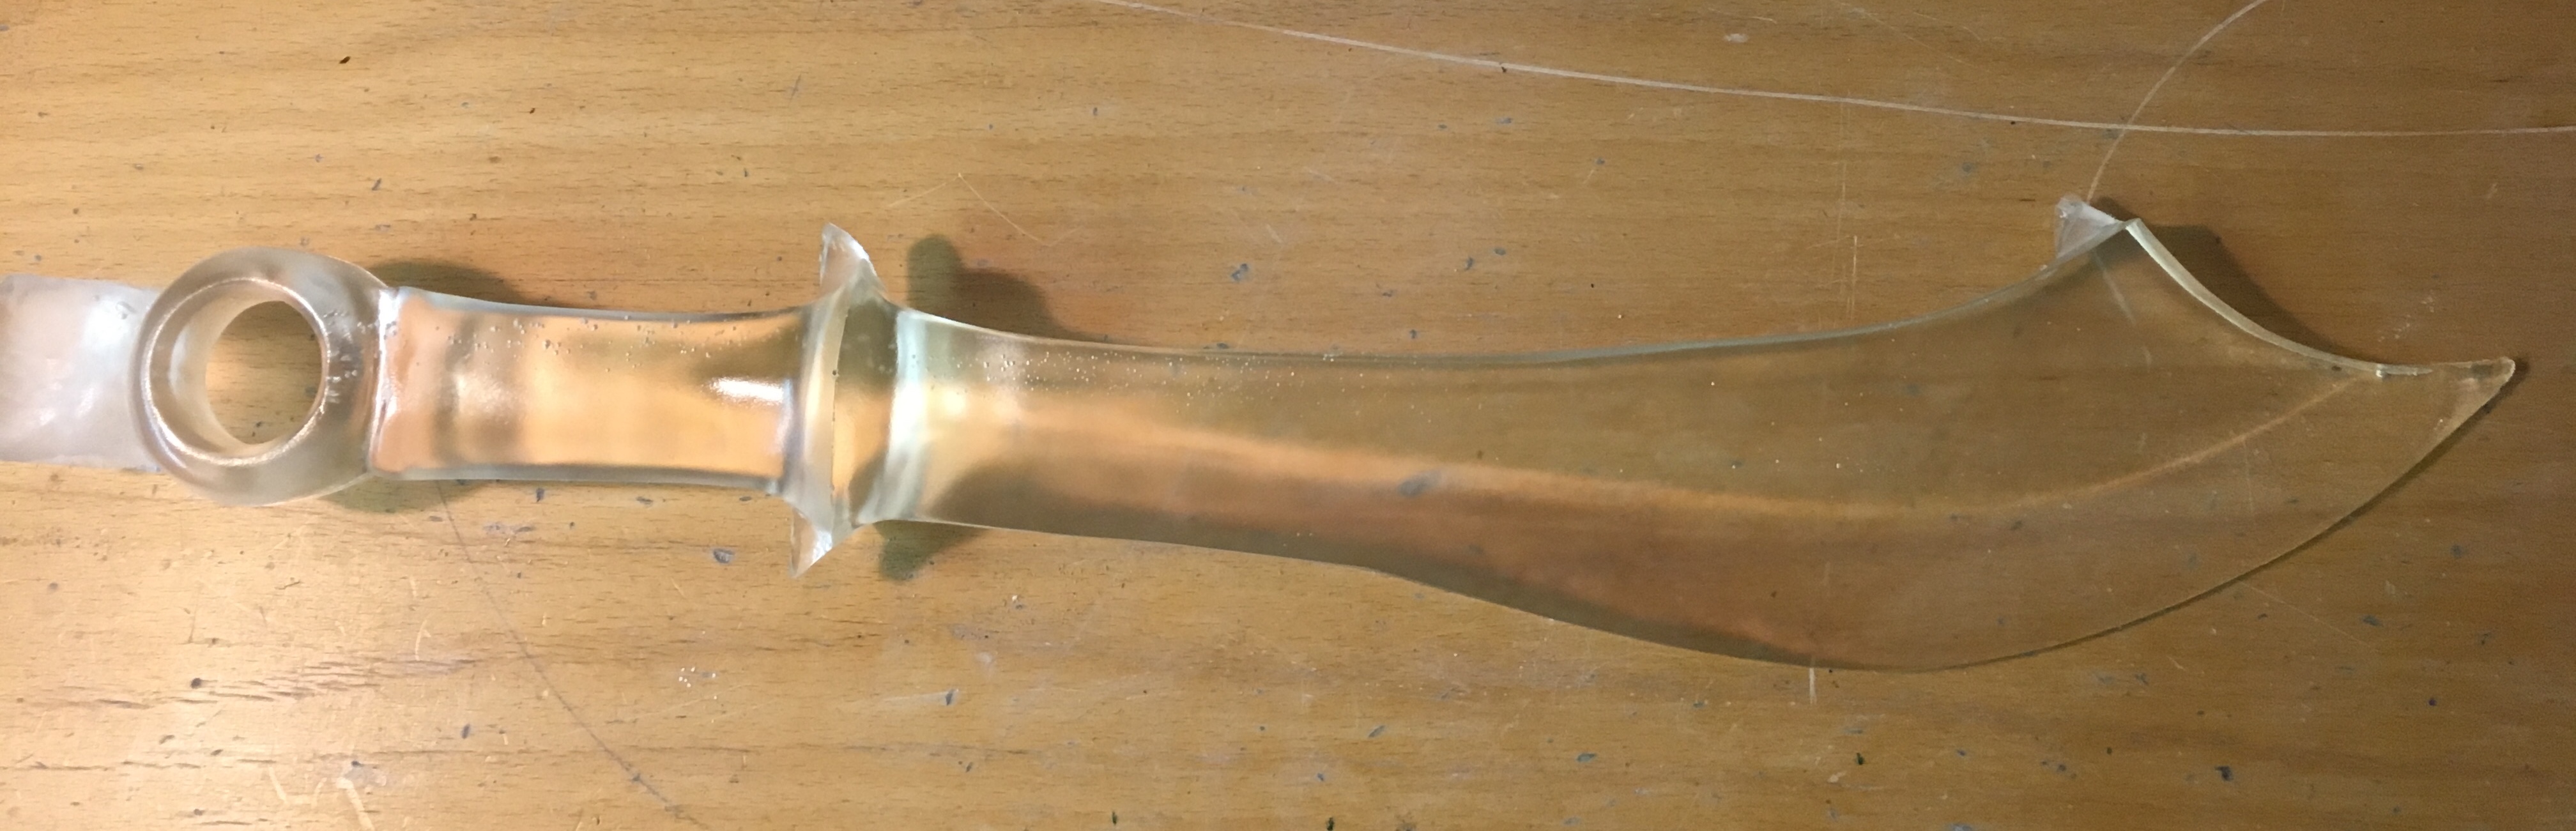
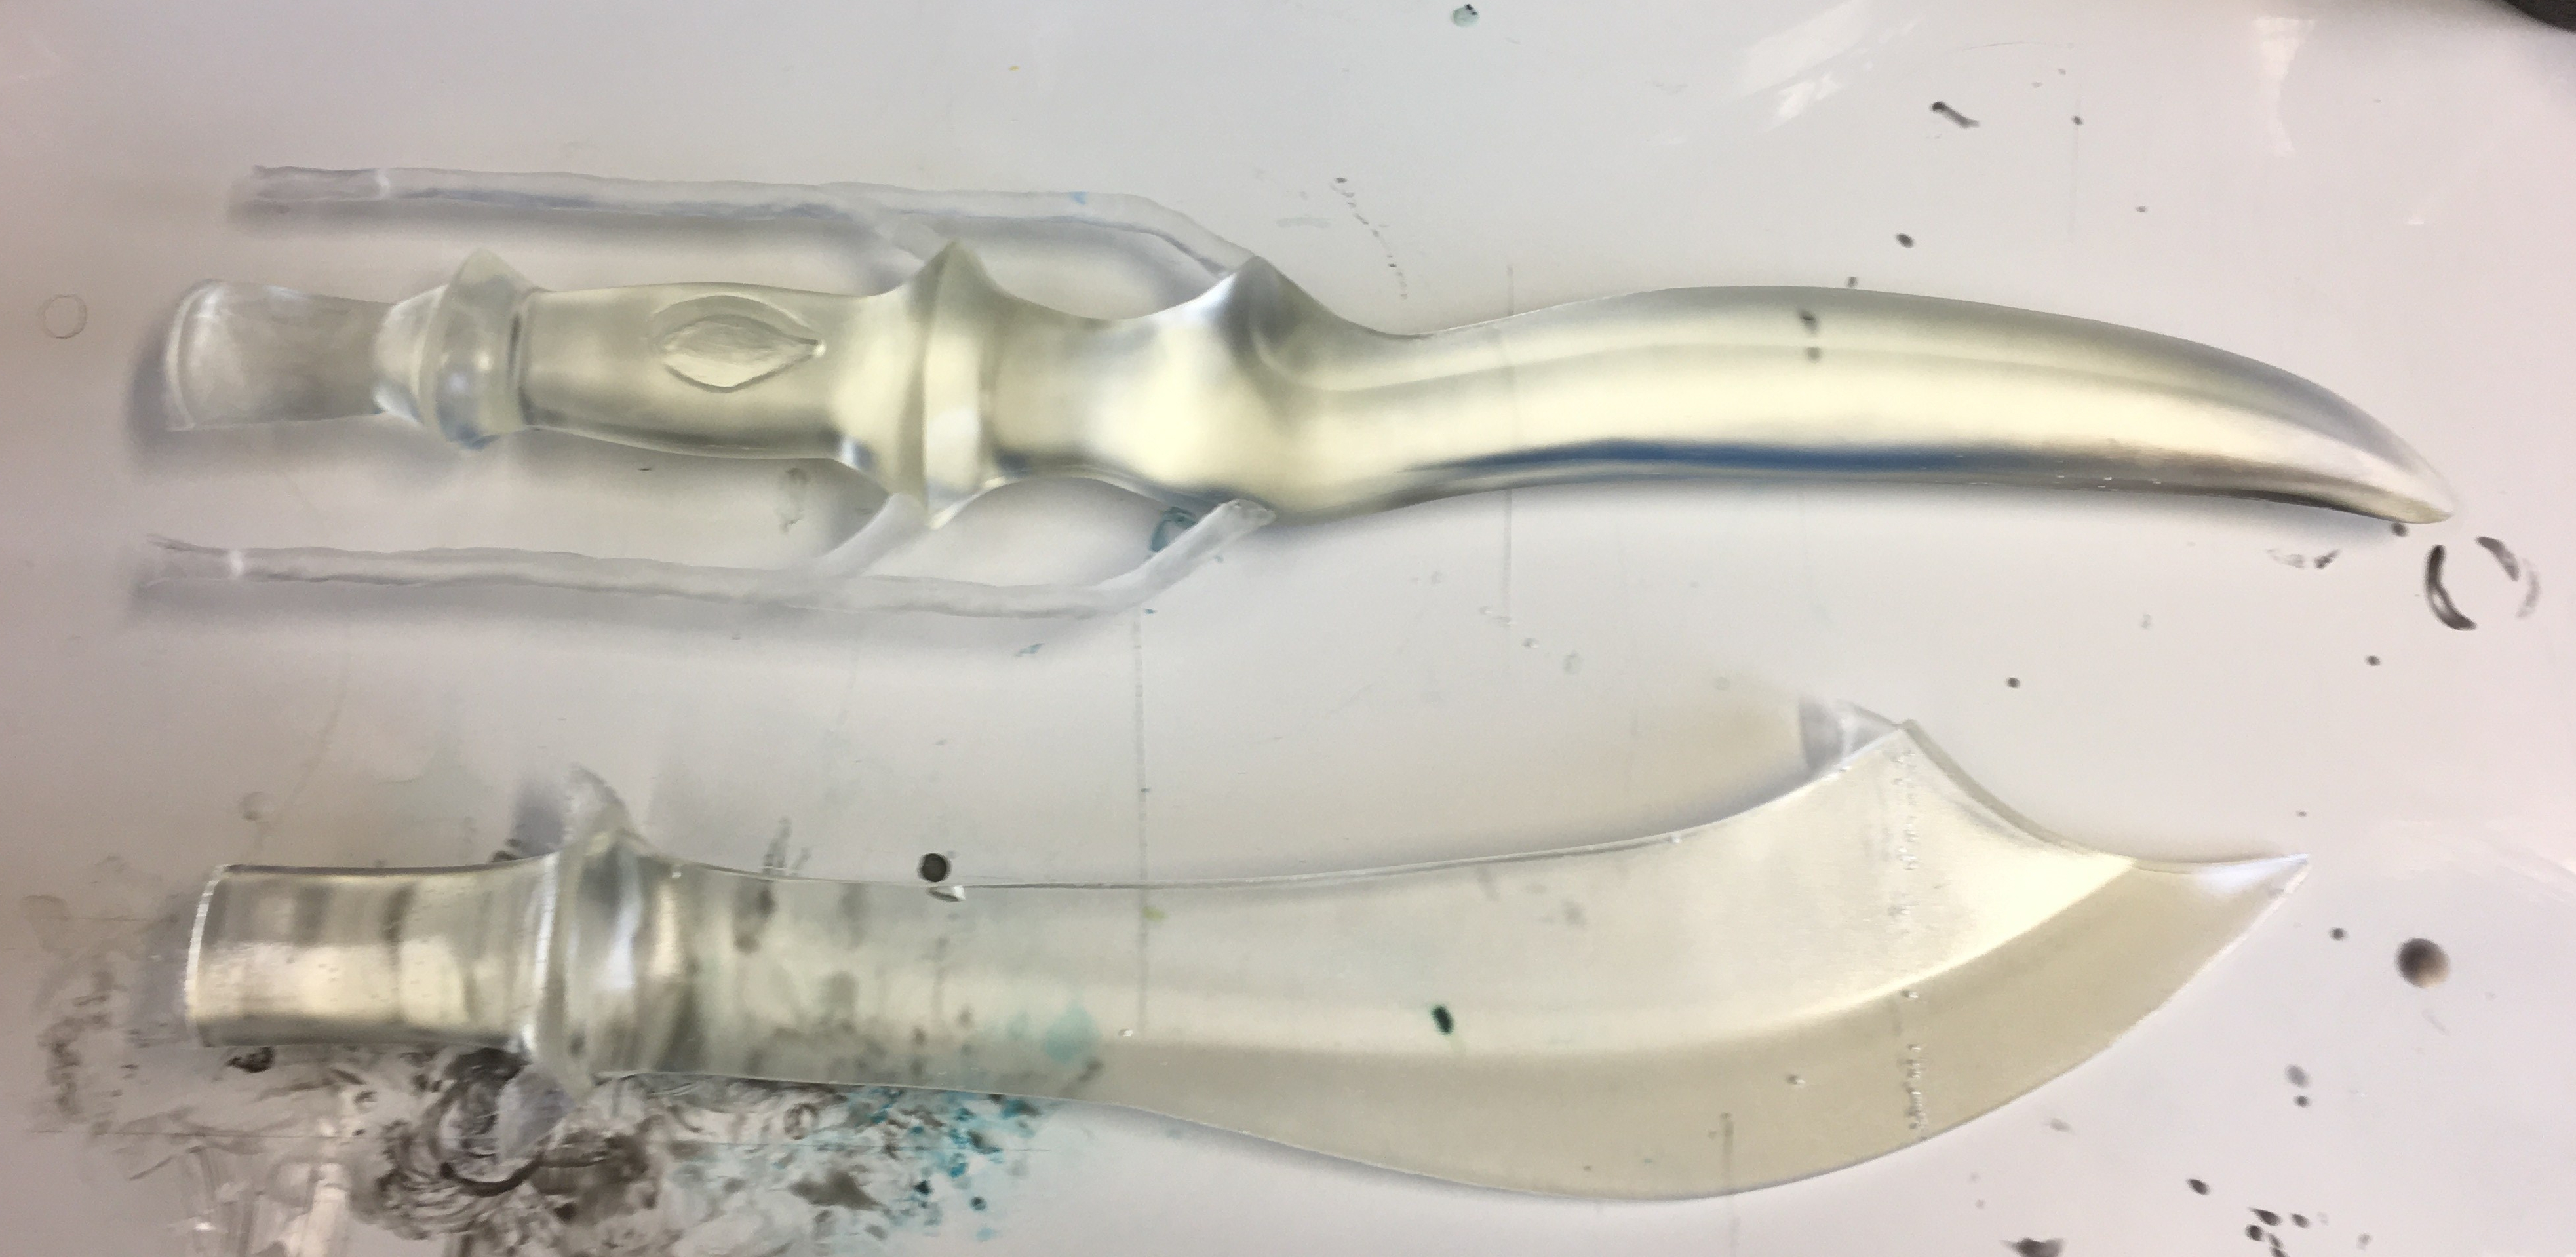
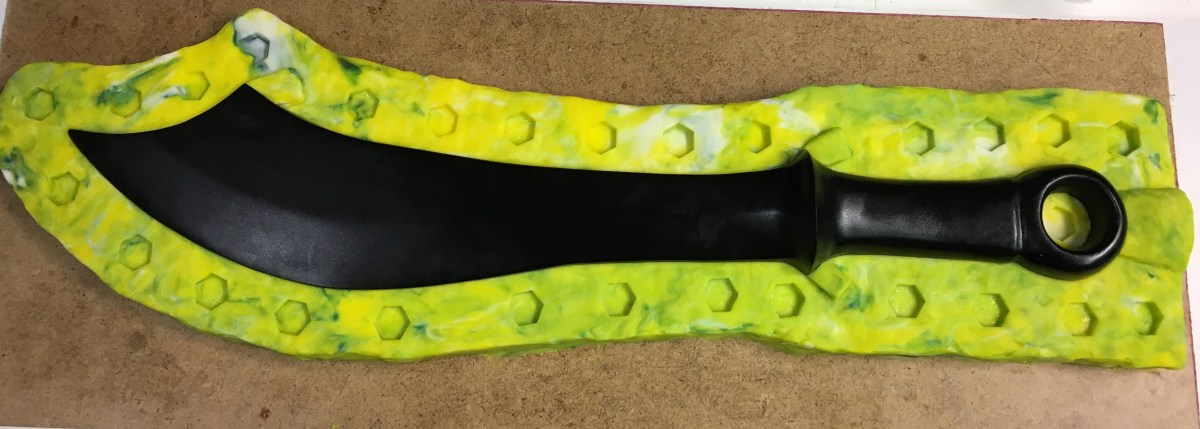
Oh yes I did. Those of you familiar with my models will recognise Zaapiel, the exotic ring-sword inspired blade. The funky “spikes” sticking off of it are simply the little tabs that are created by the bubble traps in the mould. They get trimmed off before sanding and polishing happens.
Now this sword has some bubbles in it due to a resin issue I had, but the person it’s for said it looked cool as-is so we’re going with it. If you look closely, it looks like they’re some kind of magic spell firing down the length of the blade from the hand of some powerful magus.
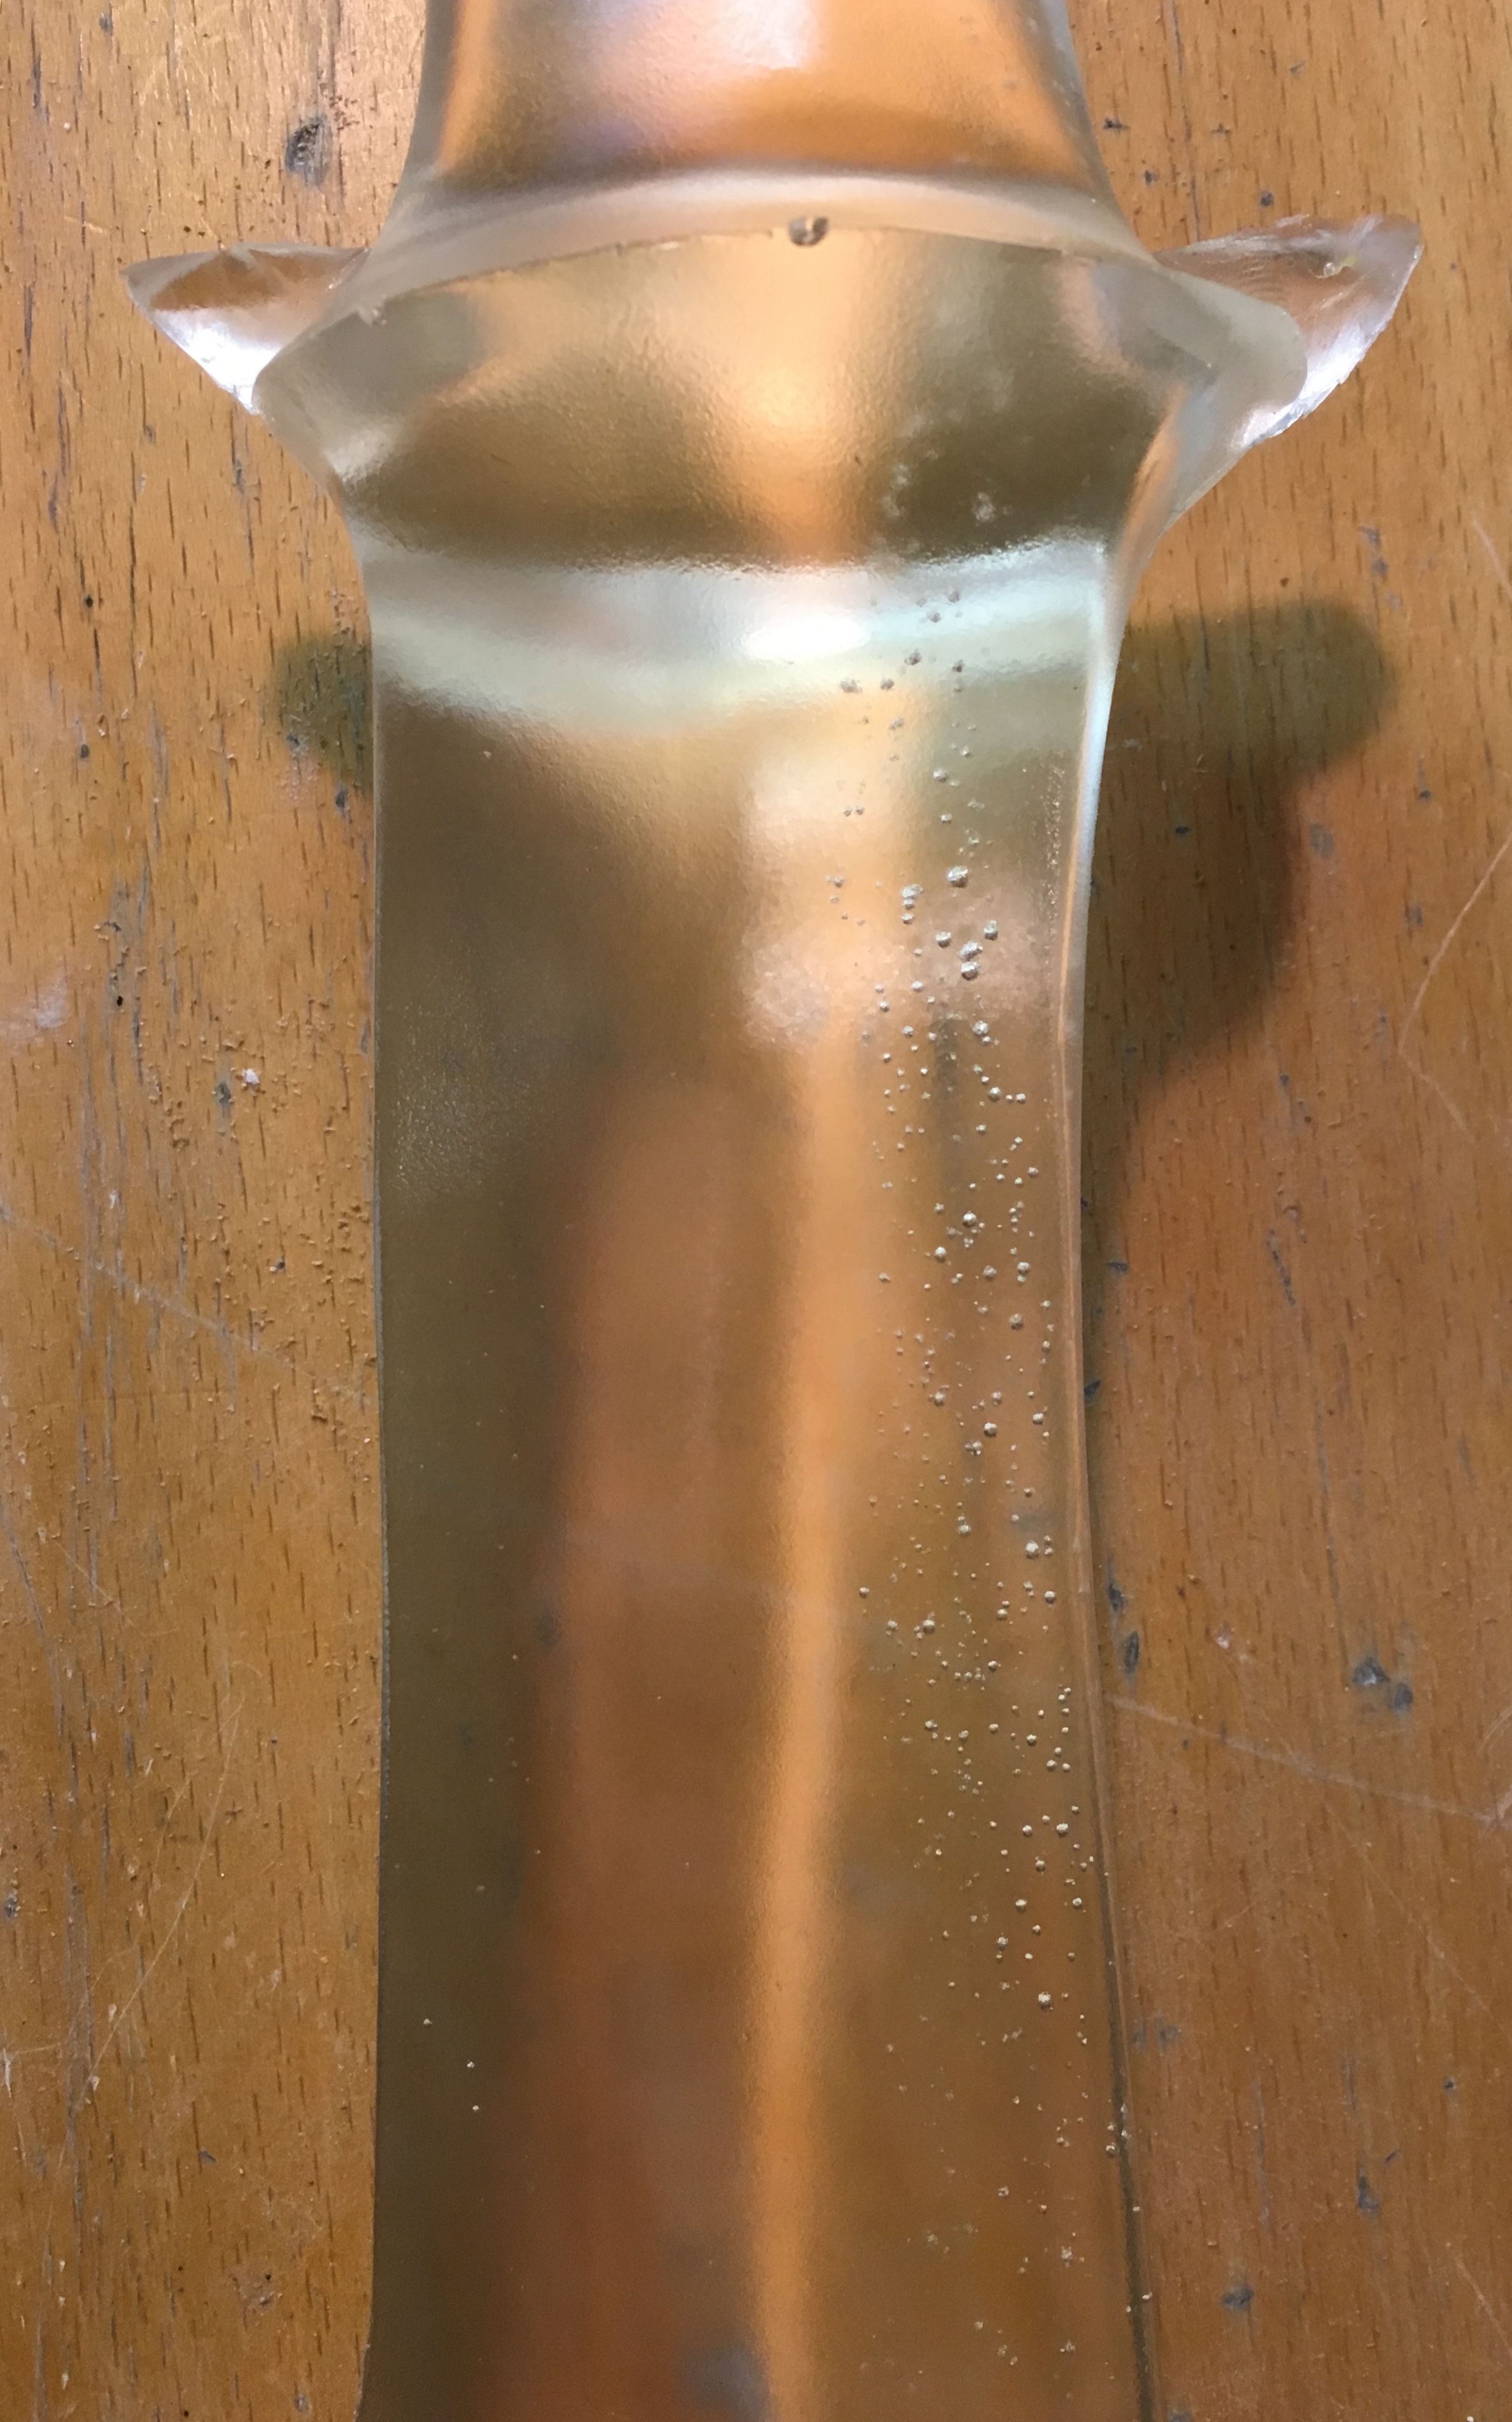
That’s going to look really cool when it’s lit up. 🙂
The issue I was having with the resin was that I was using Alumilite Clear Slow and this resin tends to “gel” up after a few months of not being used. If this happens to you, do not panic and do not throw it away. All you need to do is put it in a water-tight container and give it a hot water bath for a few hours and it will be liquid again.
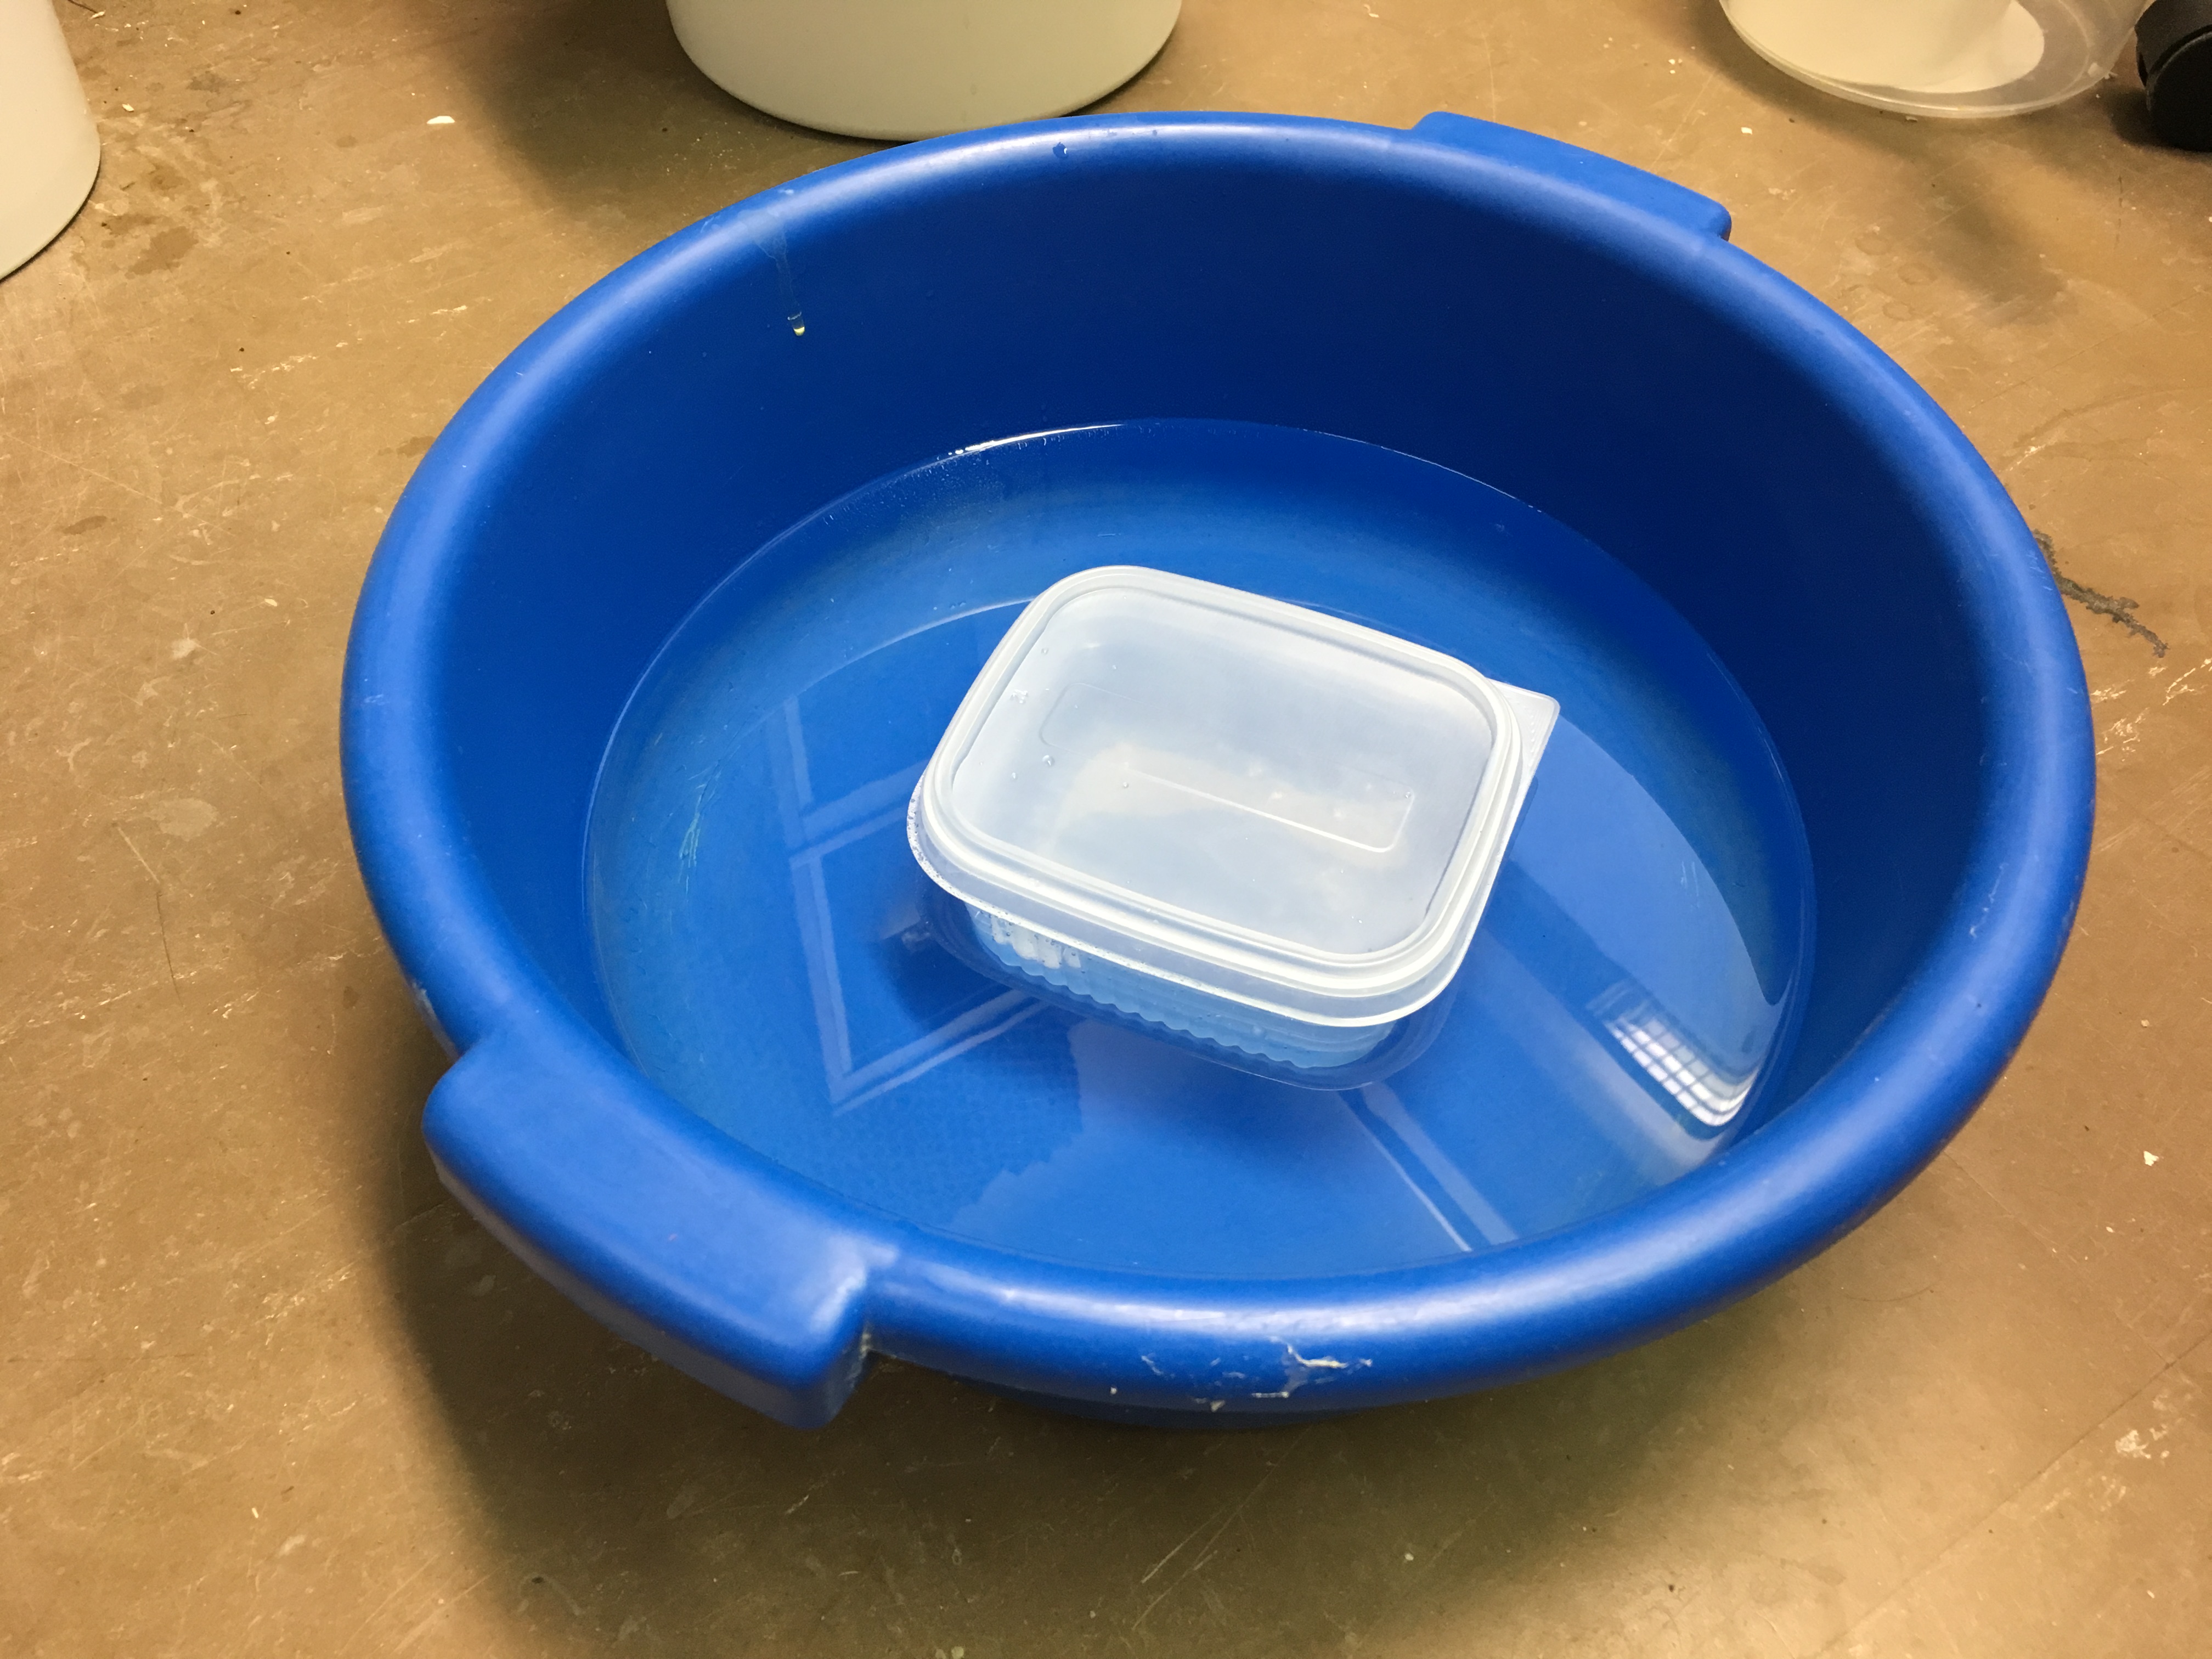
I portioned out about 500mL of resin, stuck it in a Ziploc container, sealed it, and popped it in a hot water bath. Every now and then I took it out, dried it off really thoroughly, opened it up, and stirred it until it was the liquid consistency I wanted. Now, you’ll notice I emphasised “dried it off really thoroughly” and that’s because resin is really, really finicky about moisture. Even a little dampness. So you can imagine what a drop or two of water in the mix would do to it. Be careful when you’re handling it.
So I re-liquefied it, vacuumed it, and still got bubbles in the finished product? Yep. That was my fault. You see, resin cures faster when it’s warm. Annnnd I forgot to cool the resin down after its hot water bath. I just went straight to the degassing and mixing and pouring. Whoops. I got a little too gung-ho and eager to try out this new sword mould. So I should have gotten twelve minutes of working time with the resin but I had slightly less than that because it was quite warm and the bubbles couldn’t escape as well before it hardened.
But we still ended up with a really cool result so I guess I’m learning stuff about mould-making and handling my materials effectively. Yay for learning!
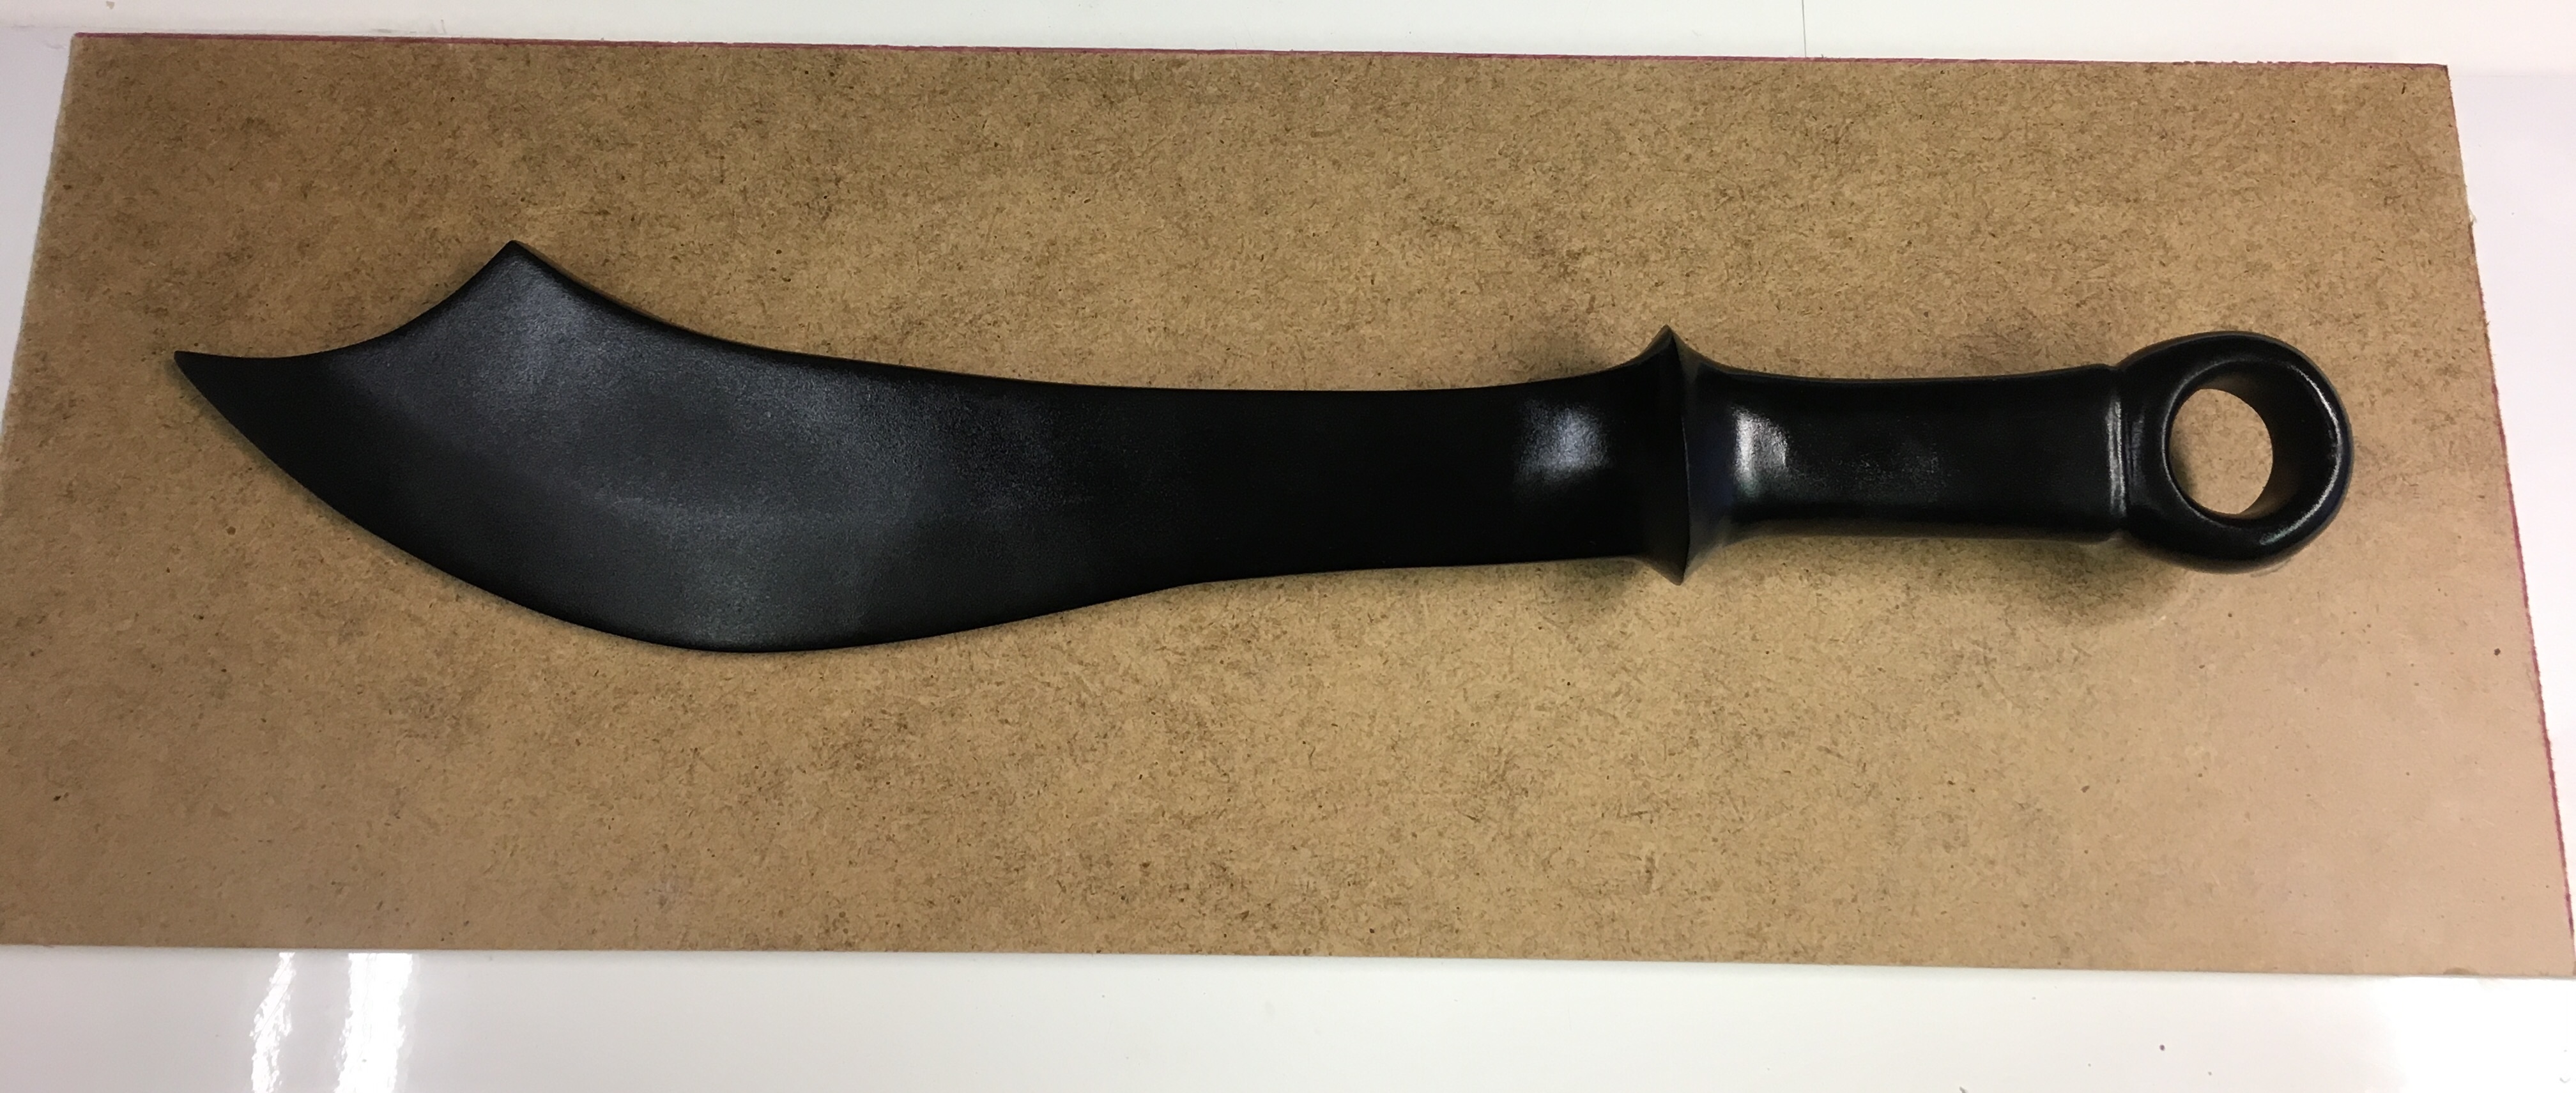
Today, of course, I move on to the next stage of the build and that means wet-sanding the whooooole surface and getting a consistent overall clarity and shine. And that means I’m working from home today where I have running water. Yup. Picture me standing in the bathroom with my hands in the sink for … let’s not think about how many hours. That’s my work day today. LOL
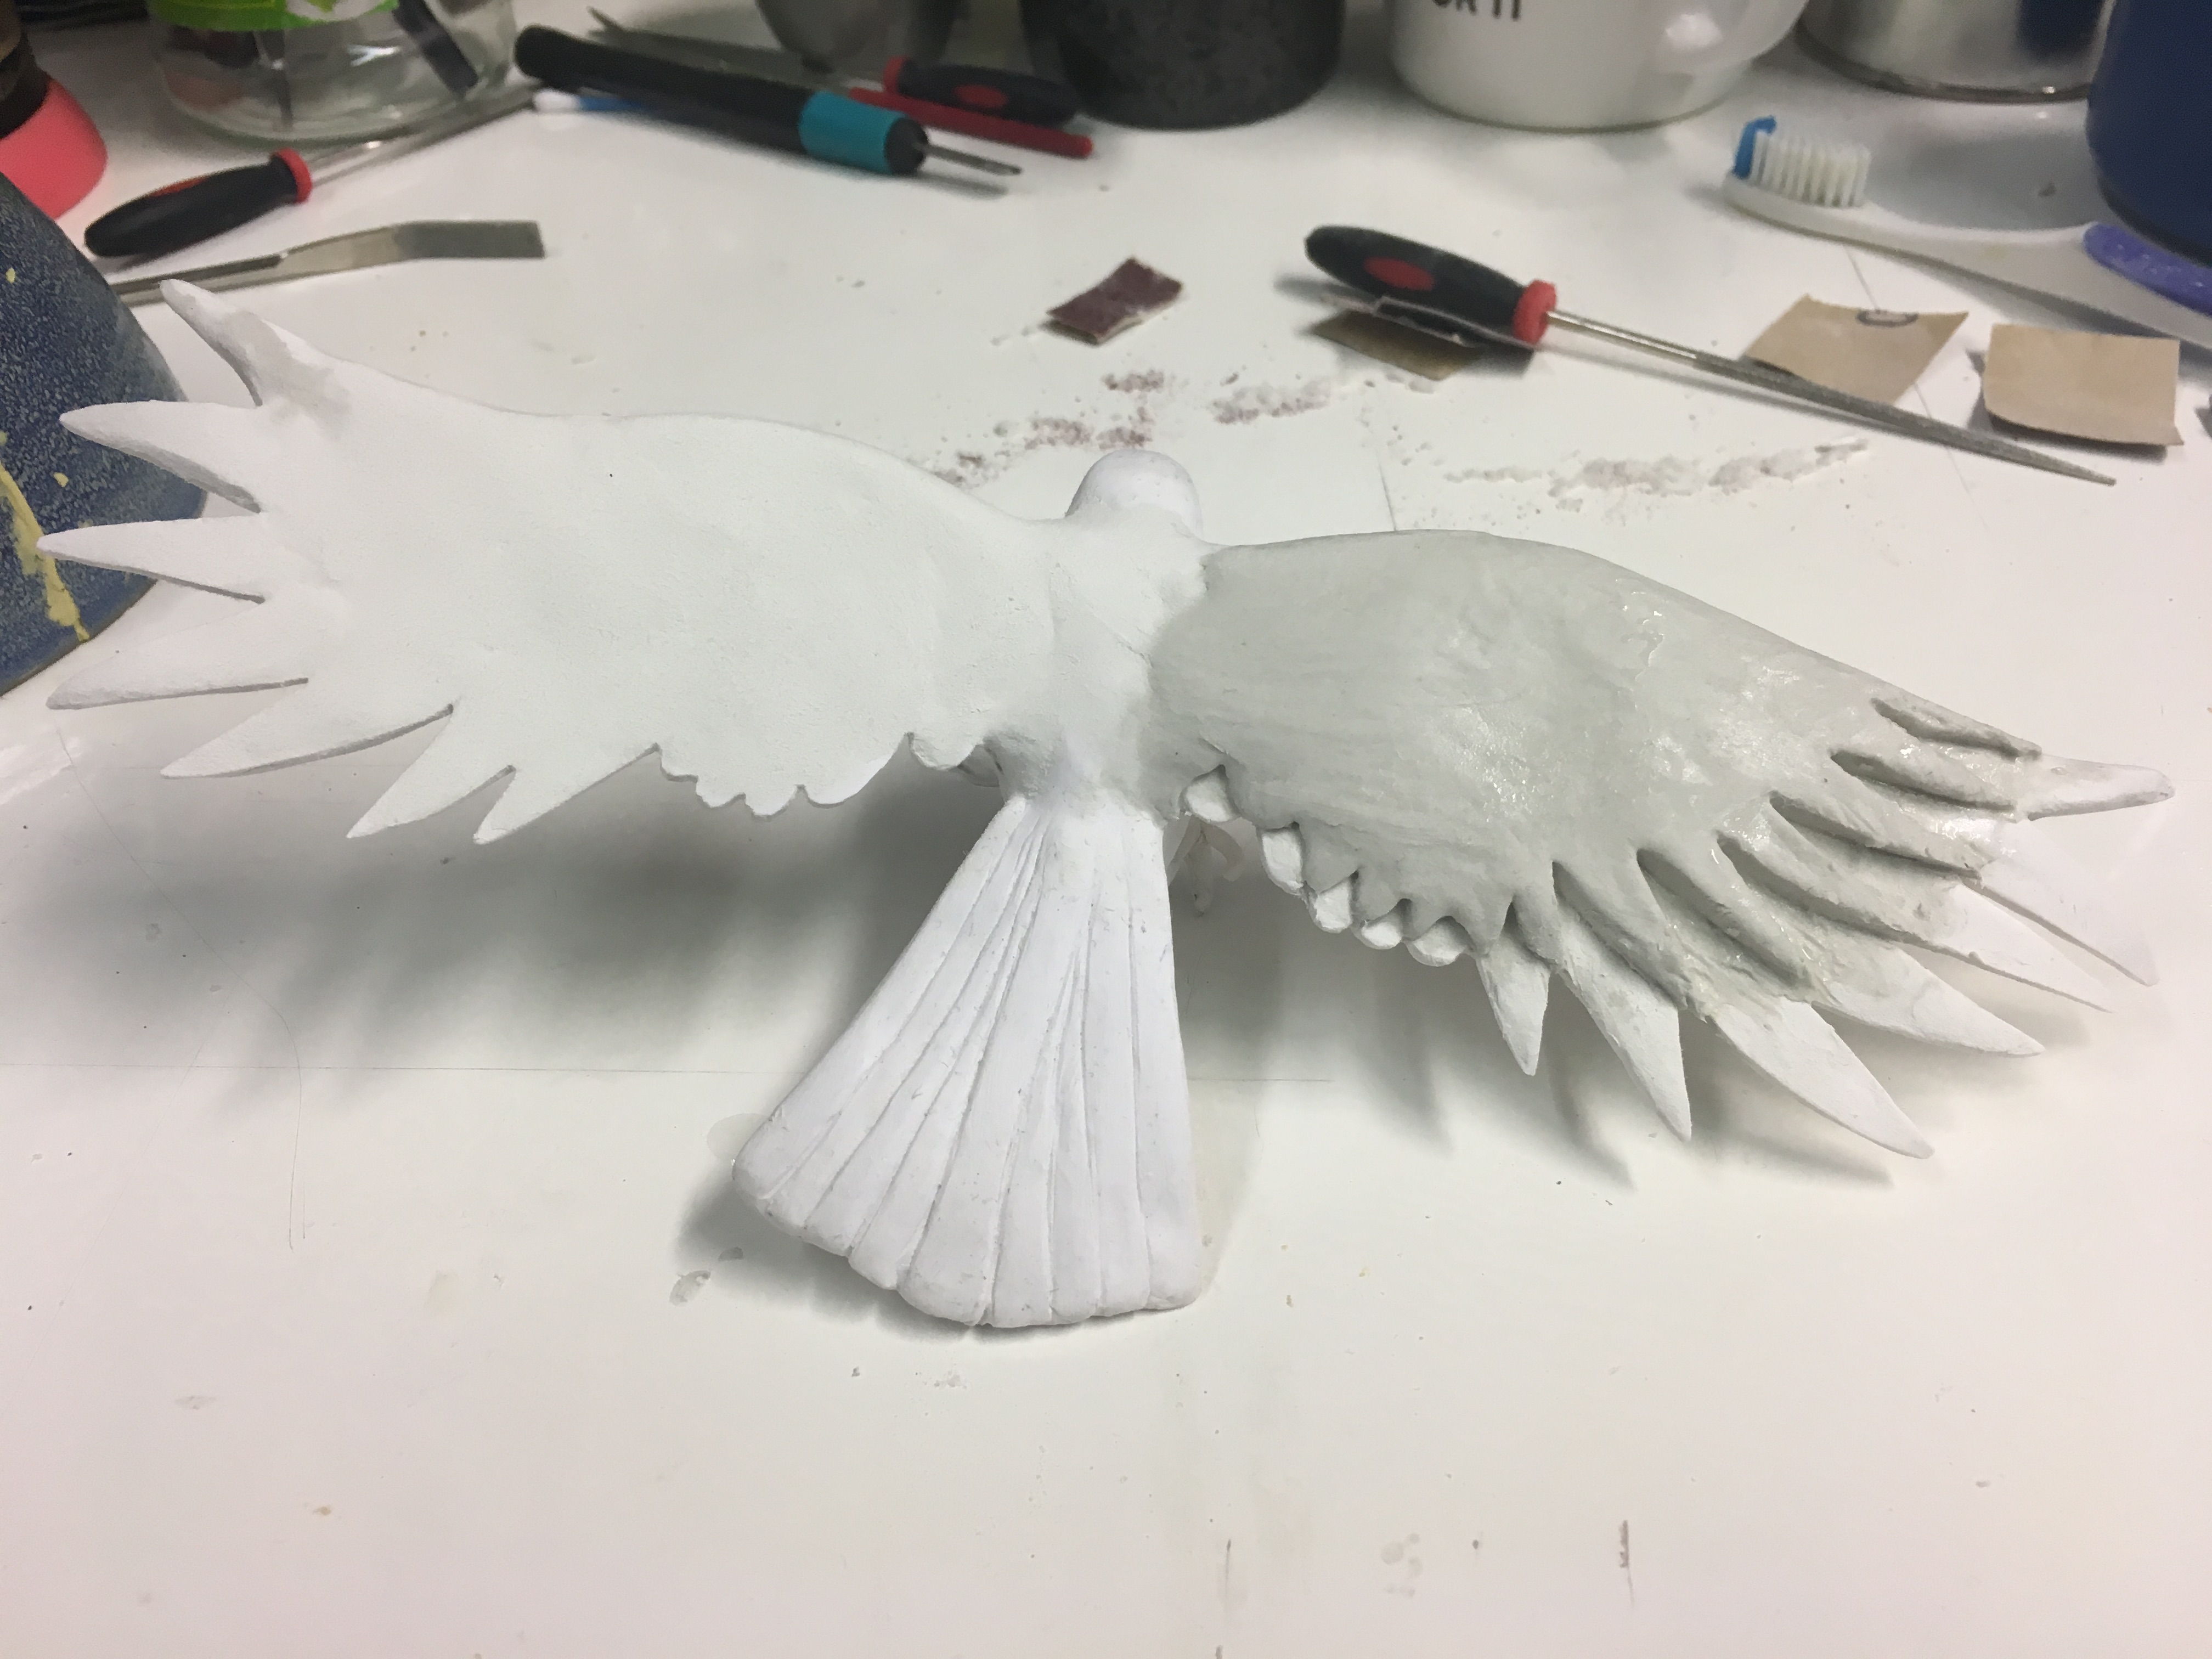
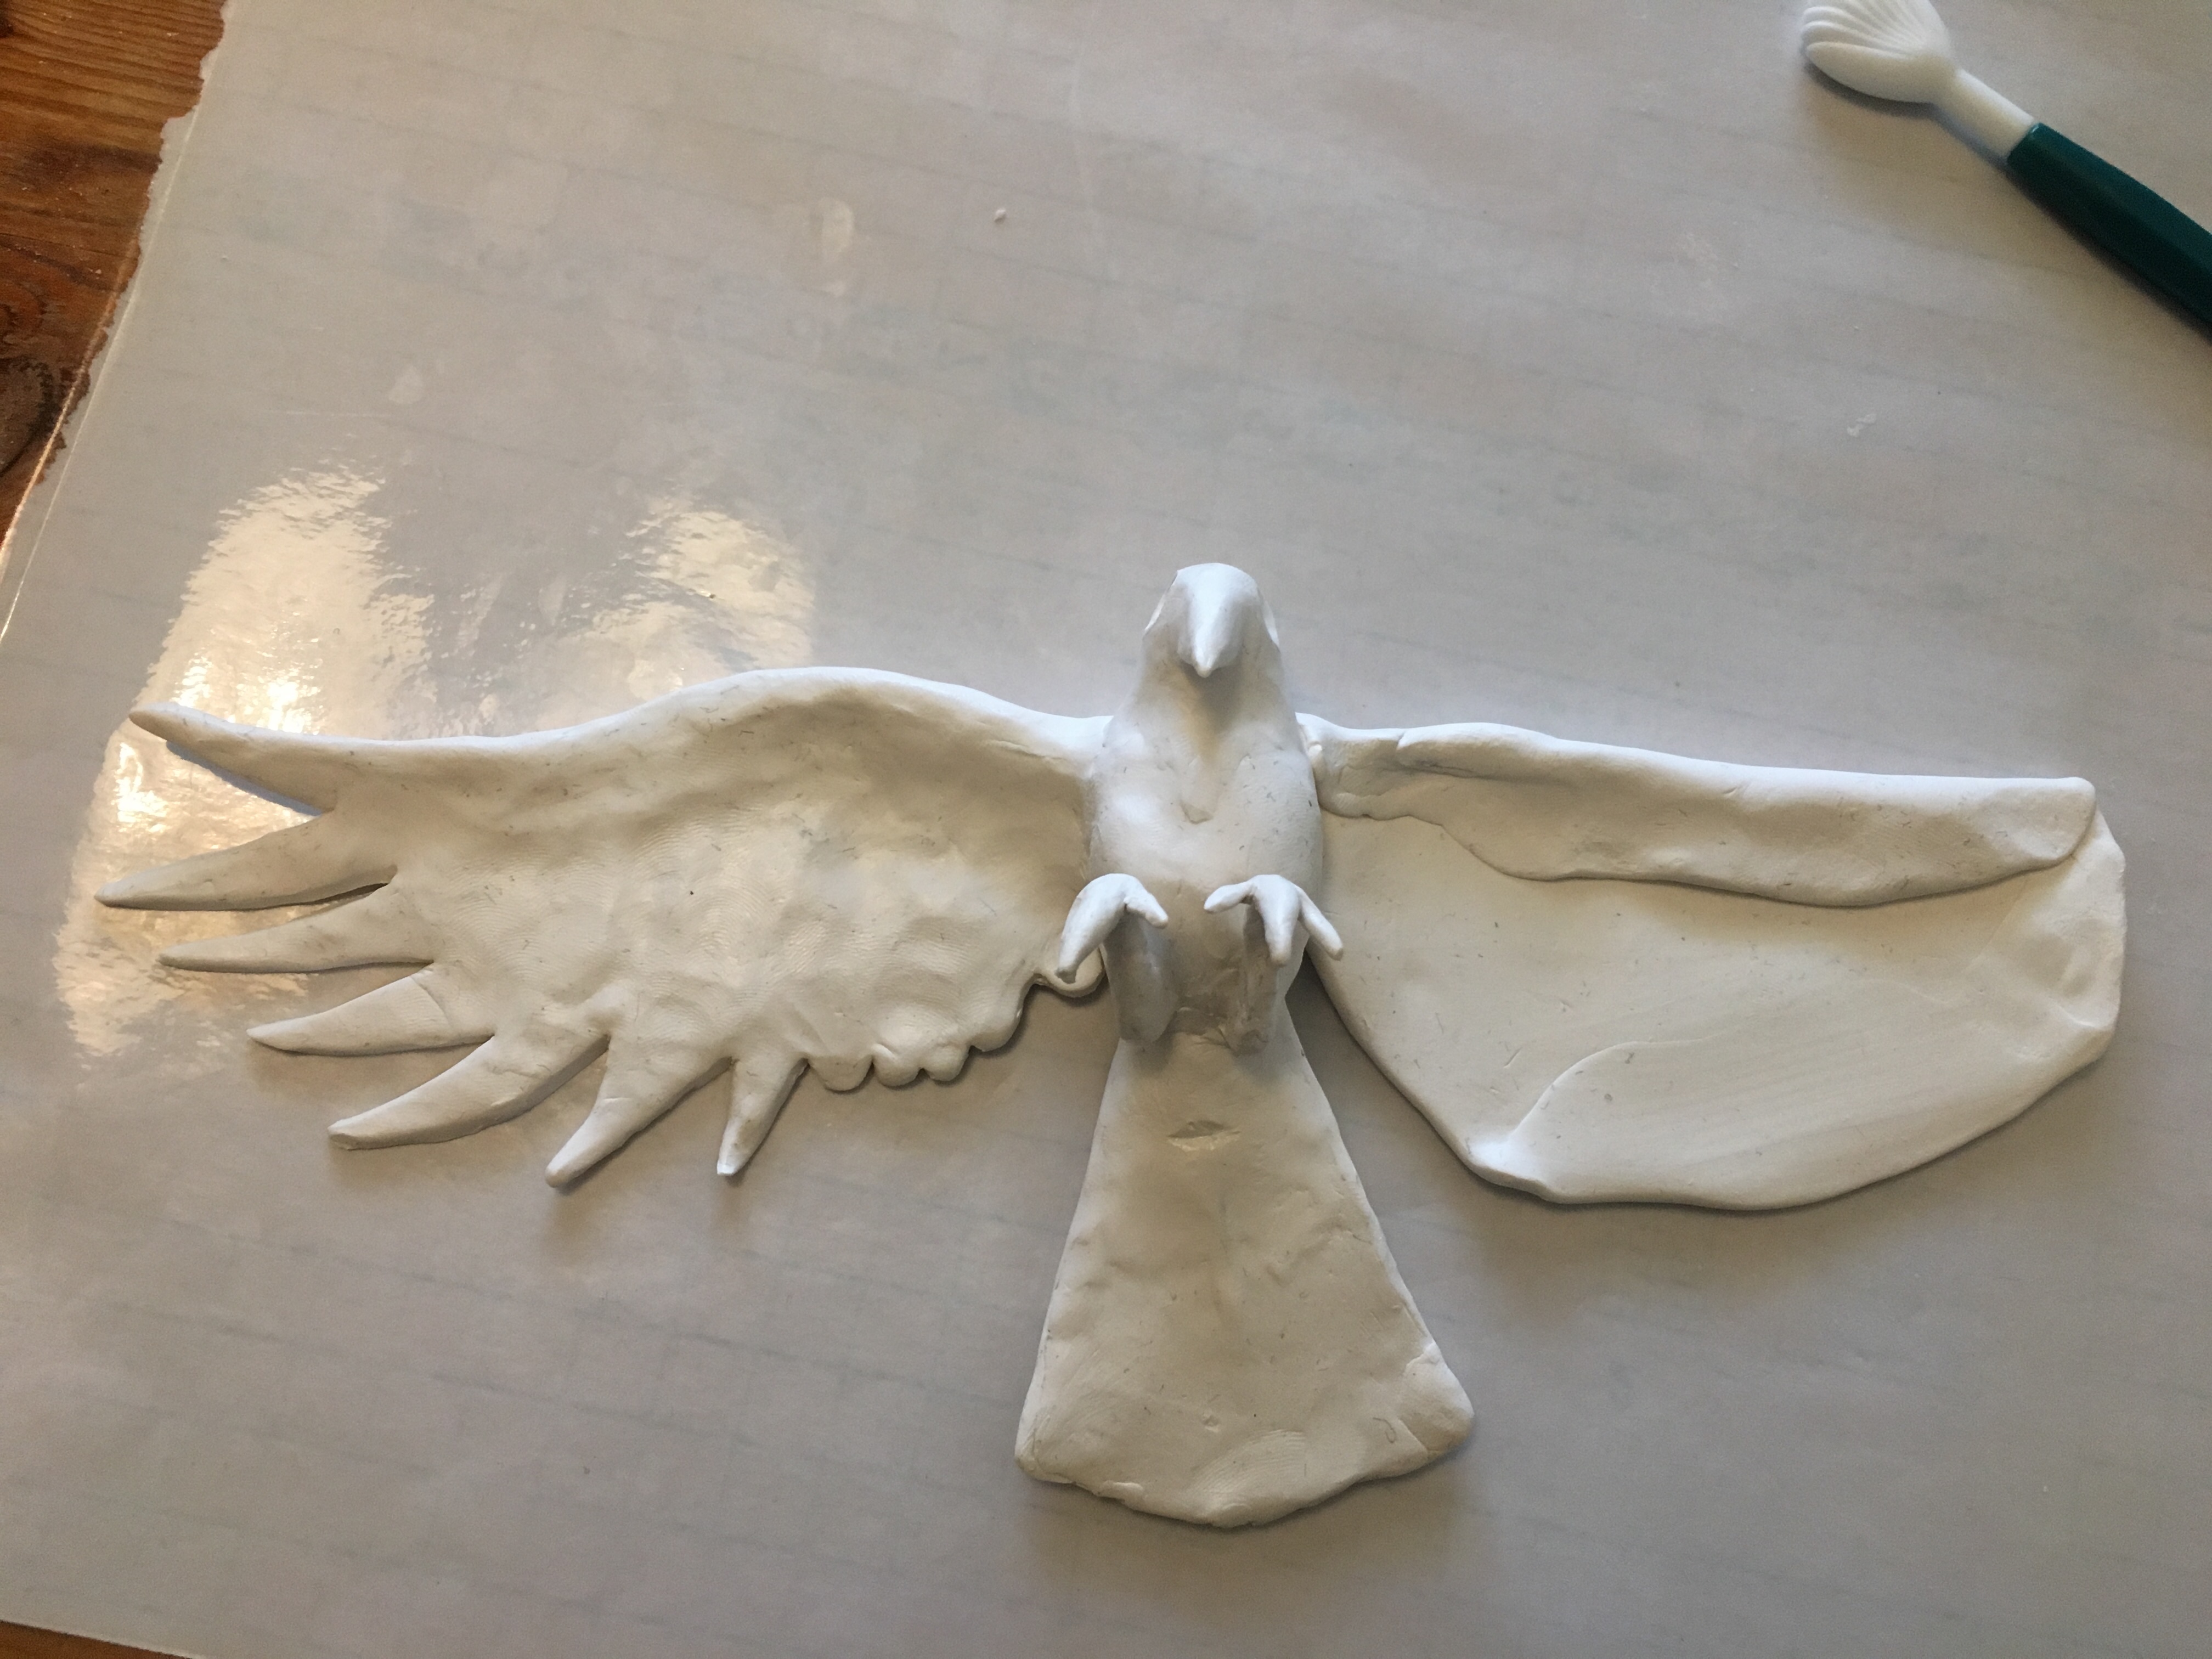
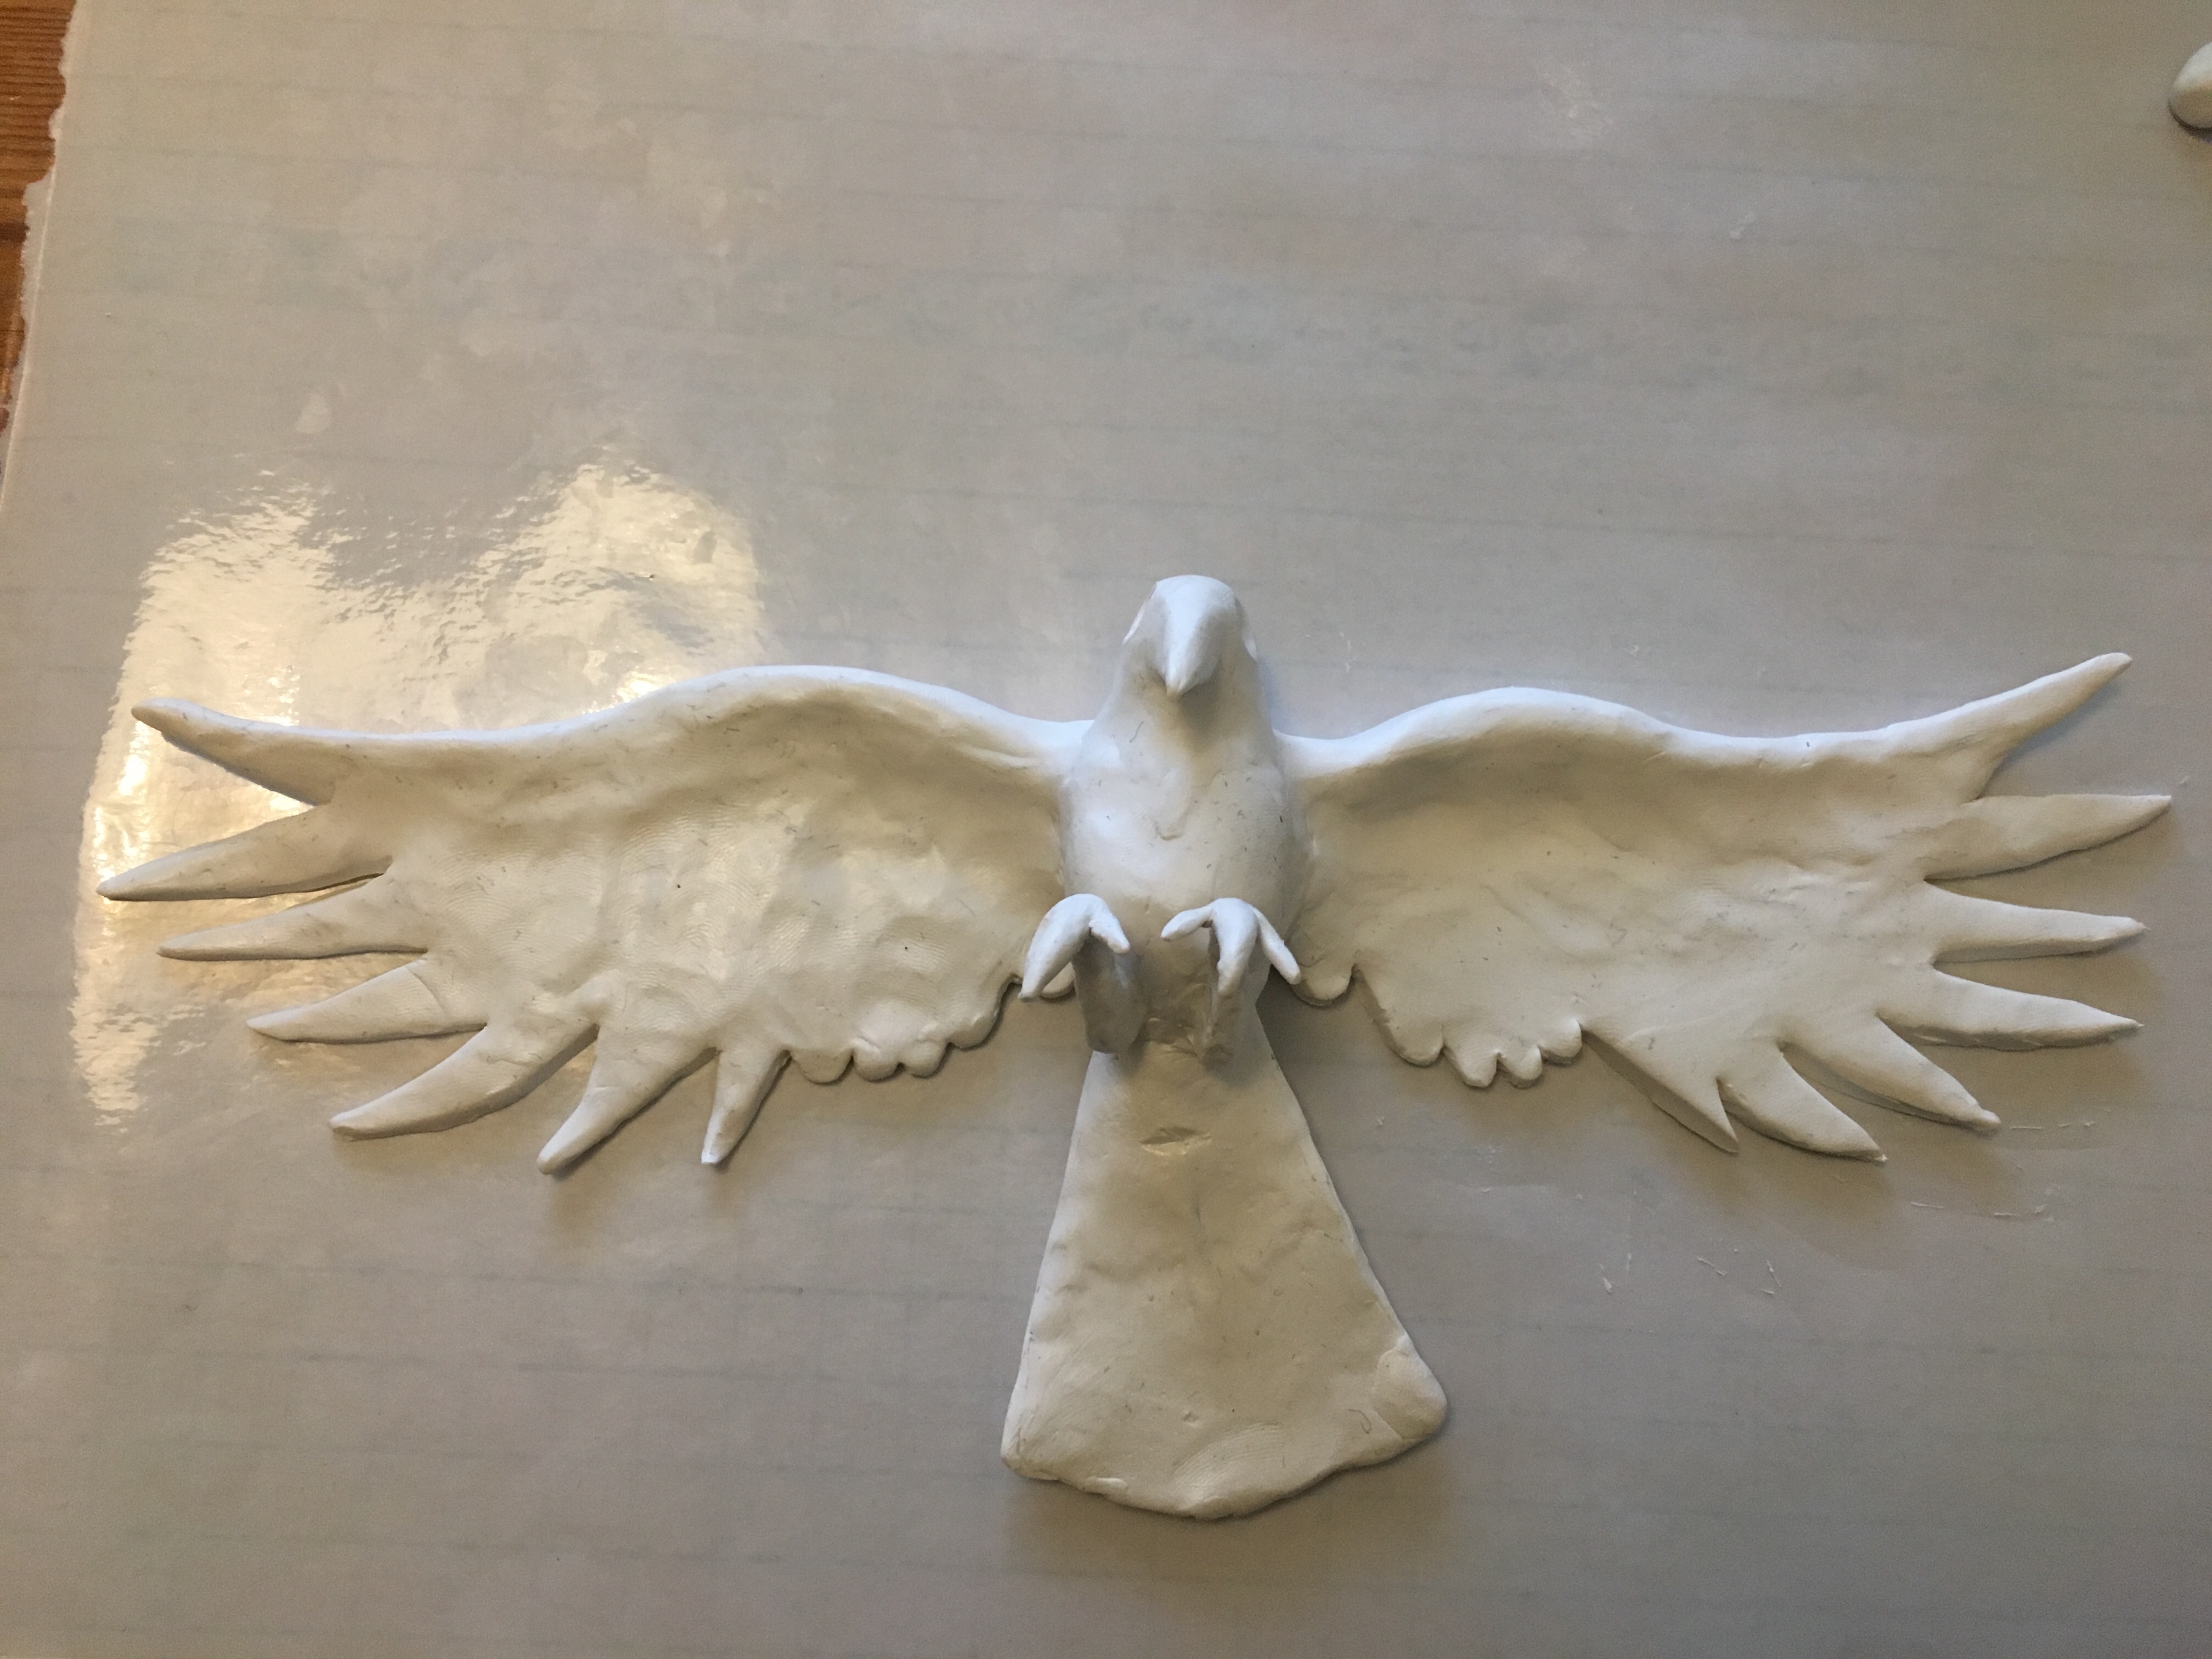
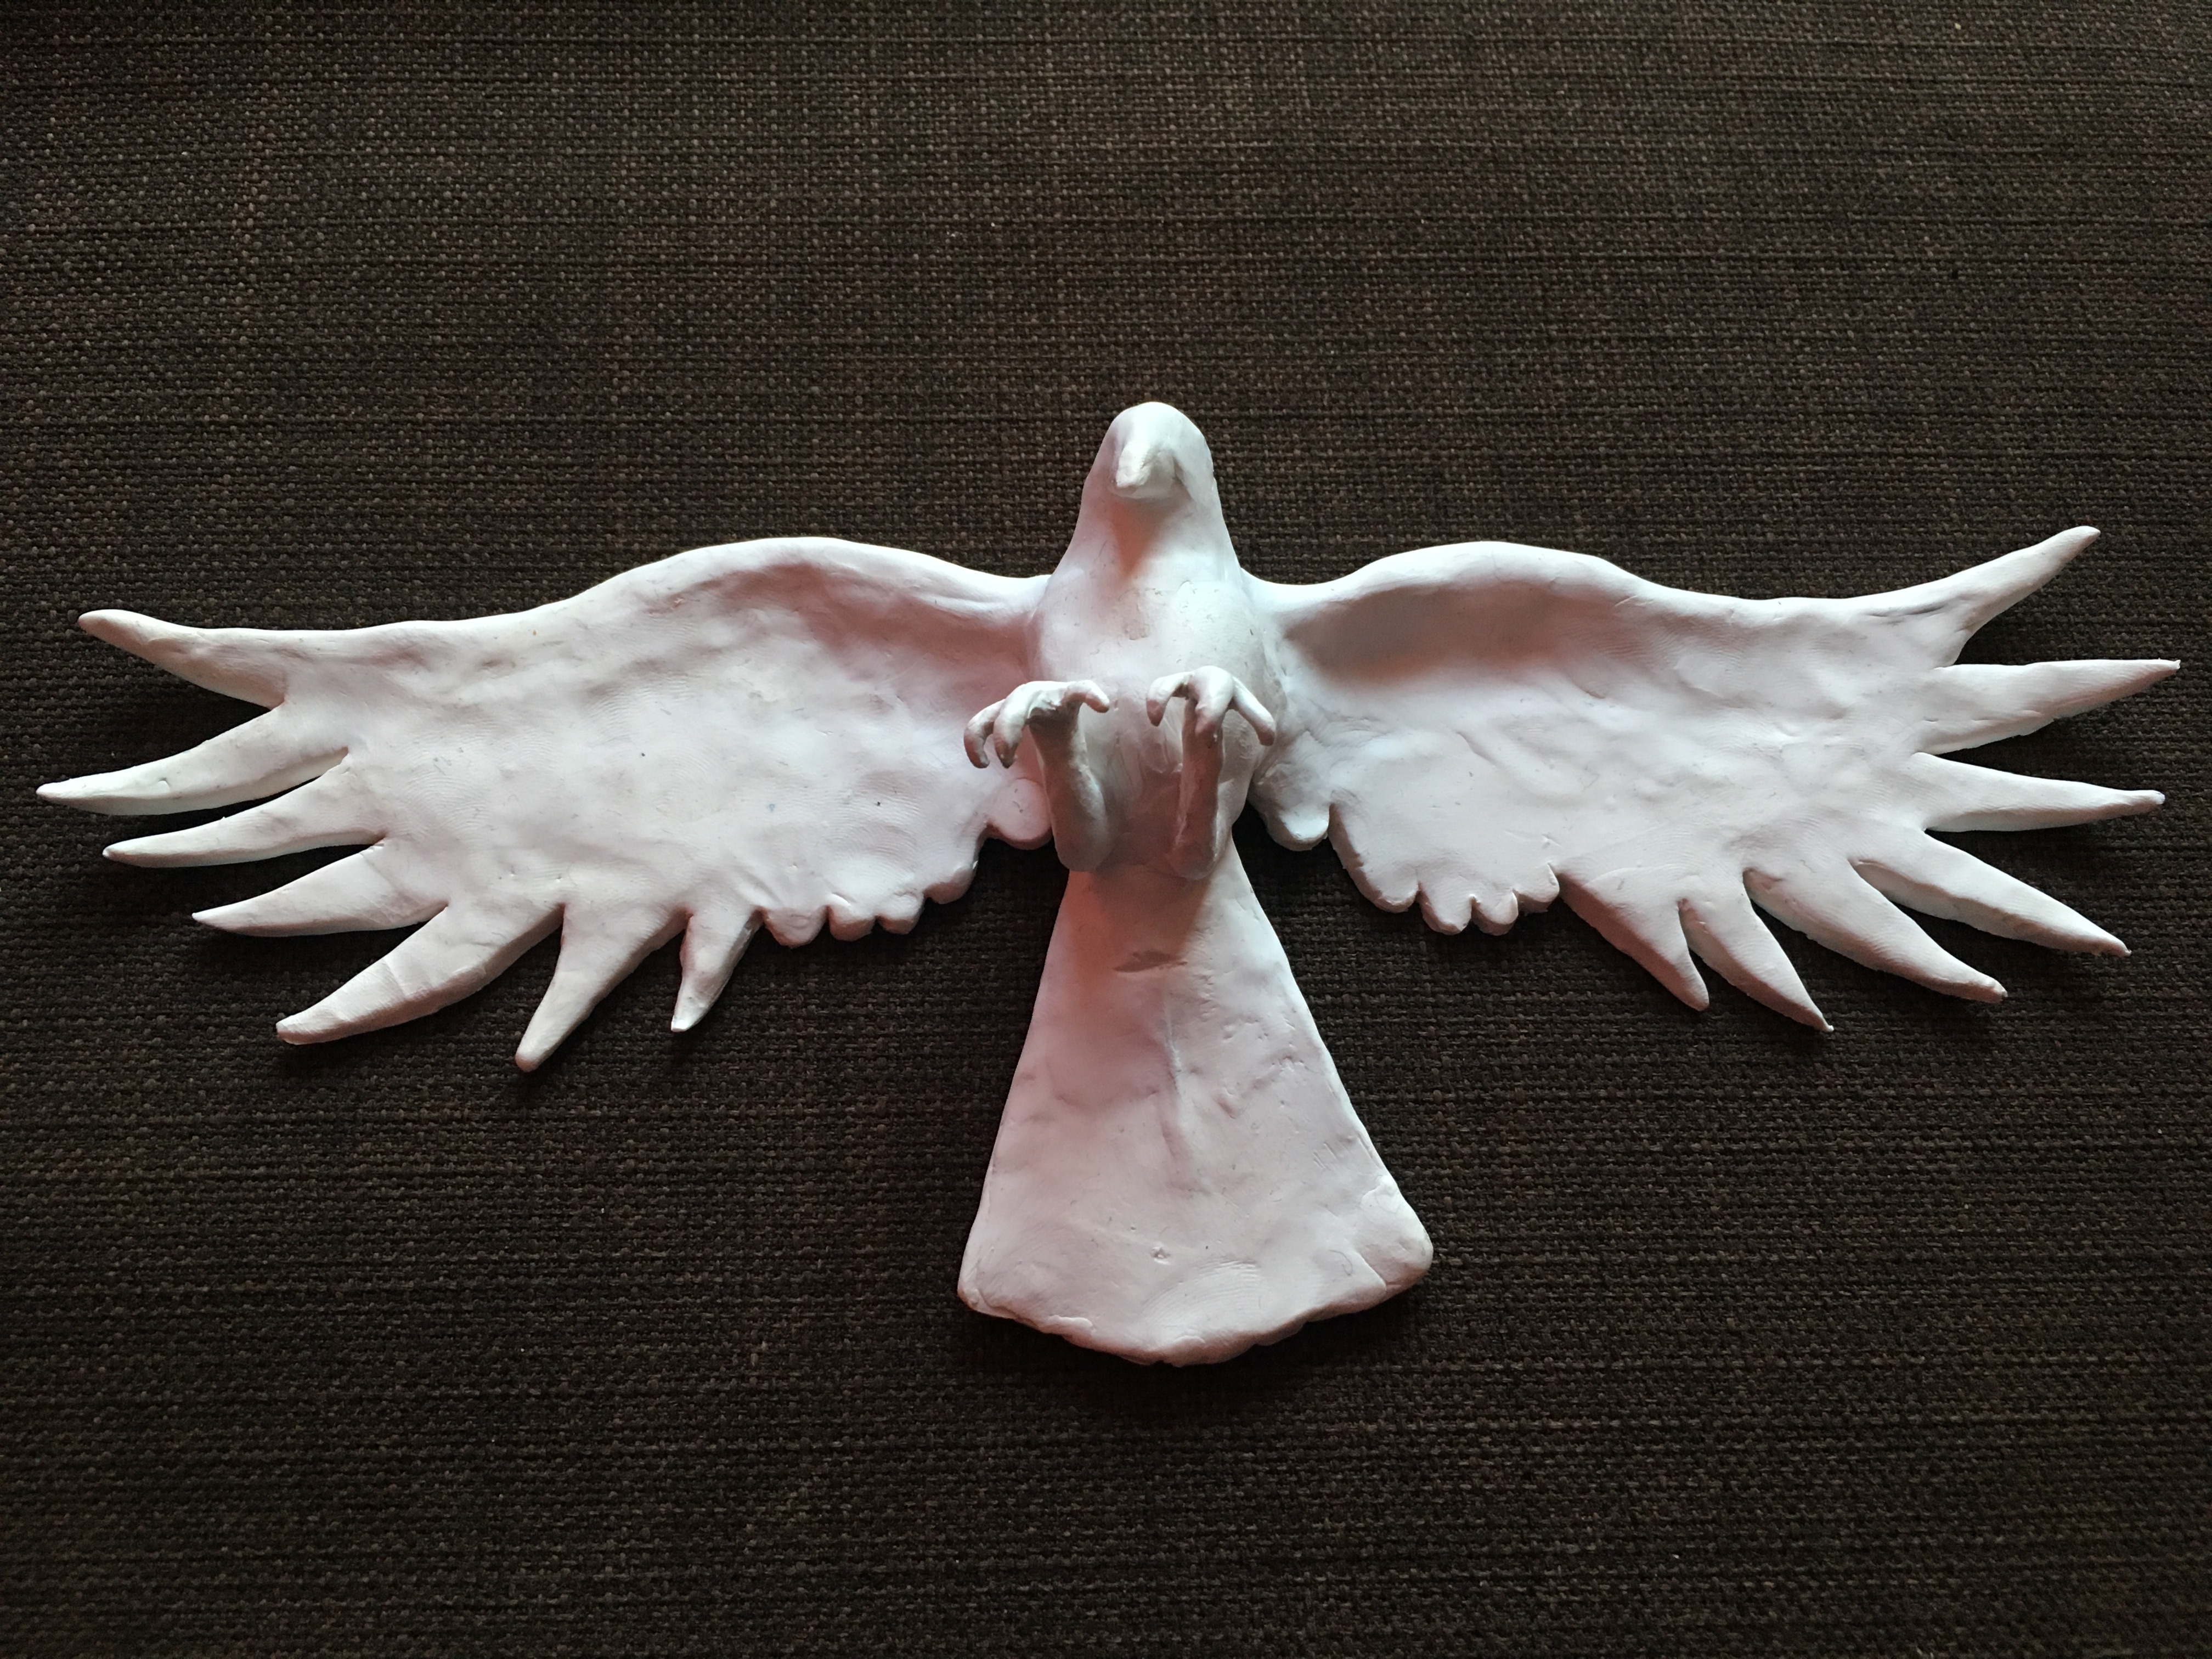
As a little bonus on the end here, check out where we are on the raven statuette!
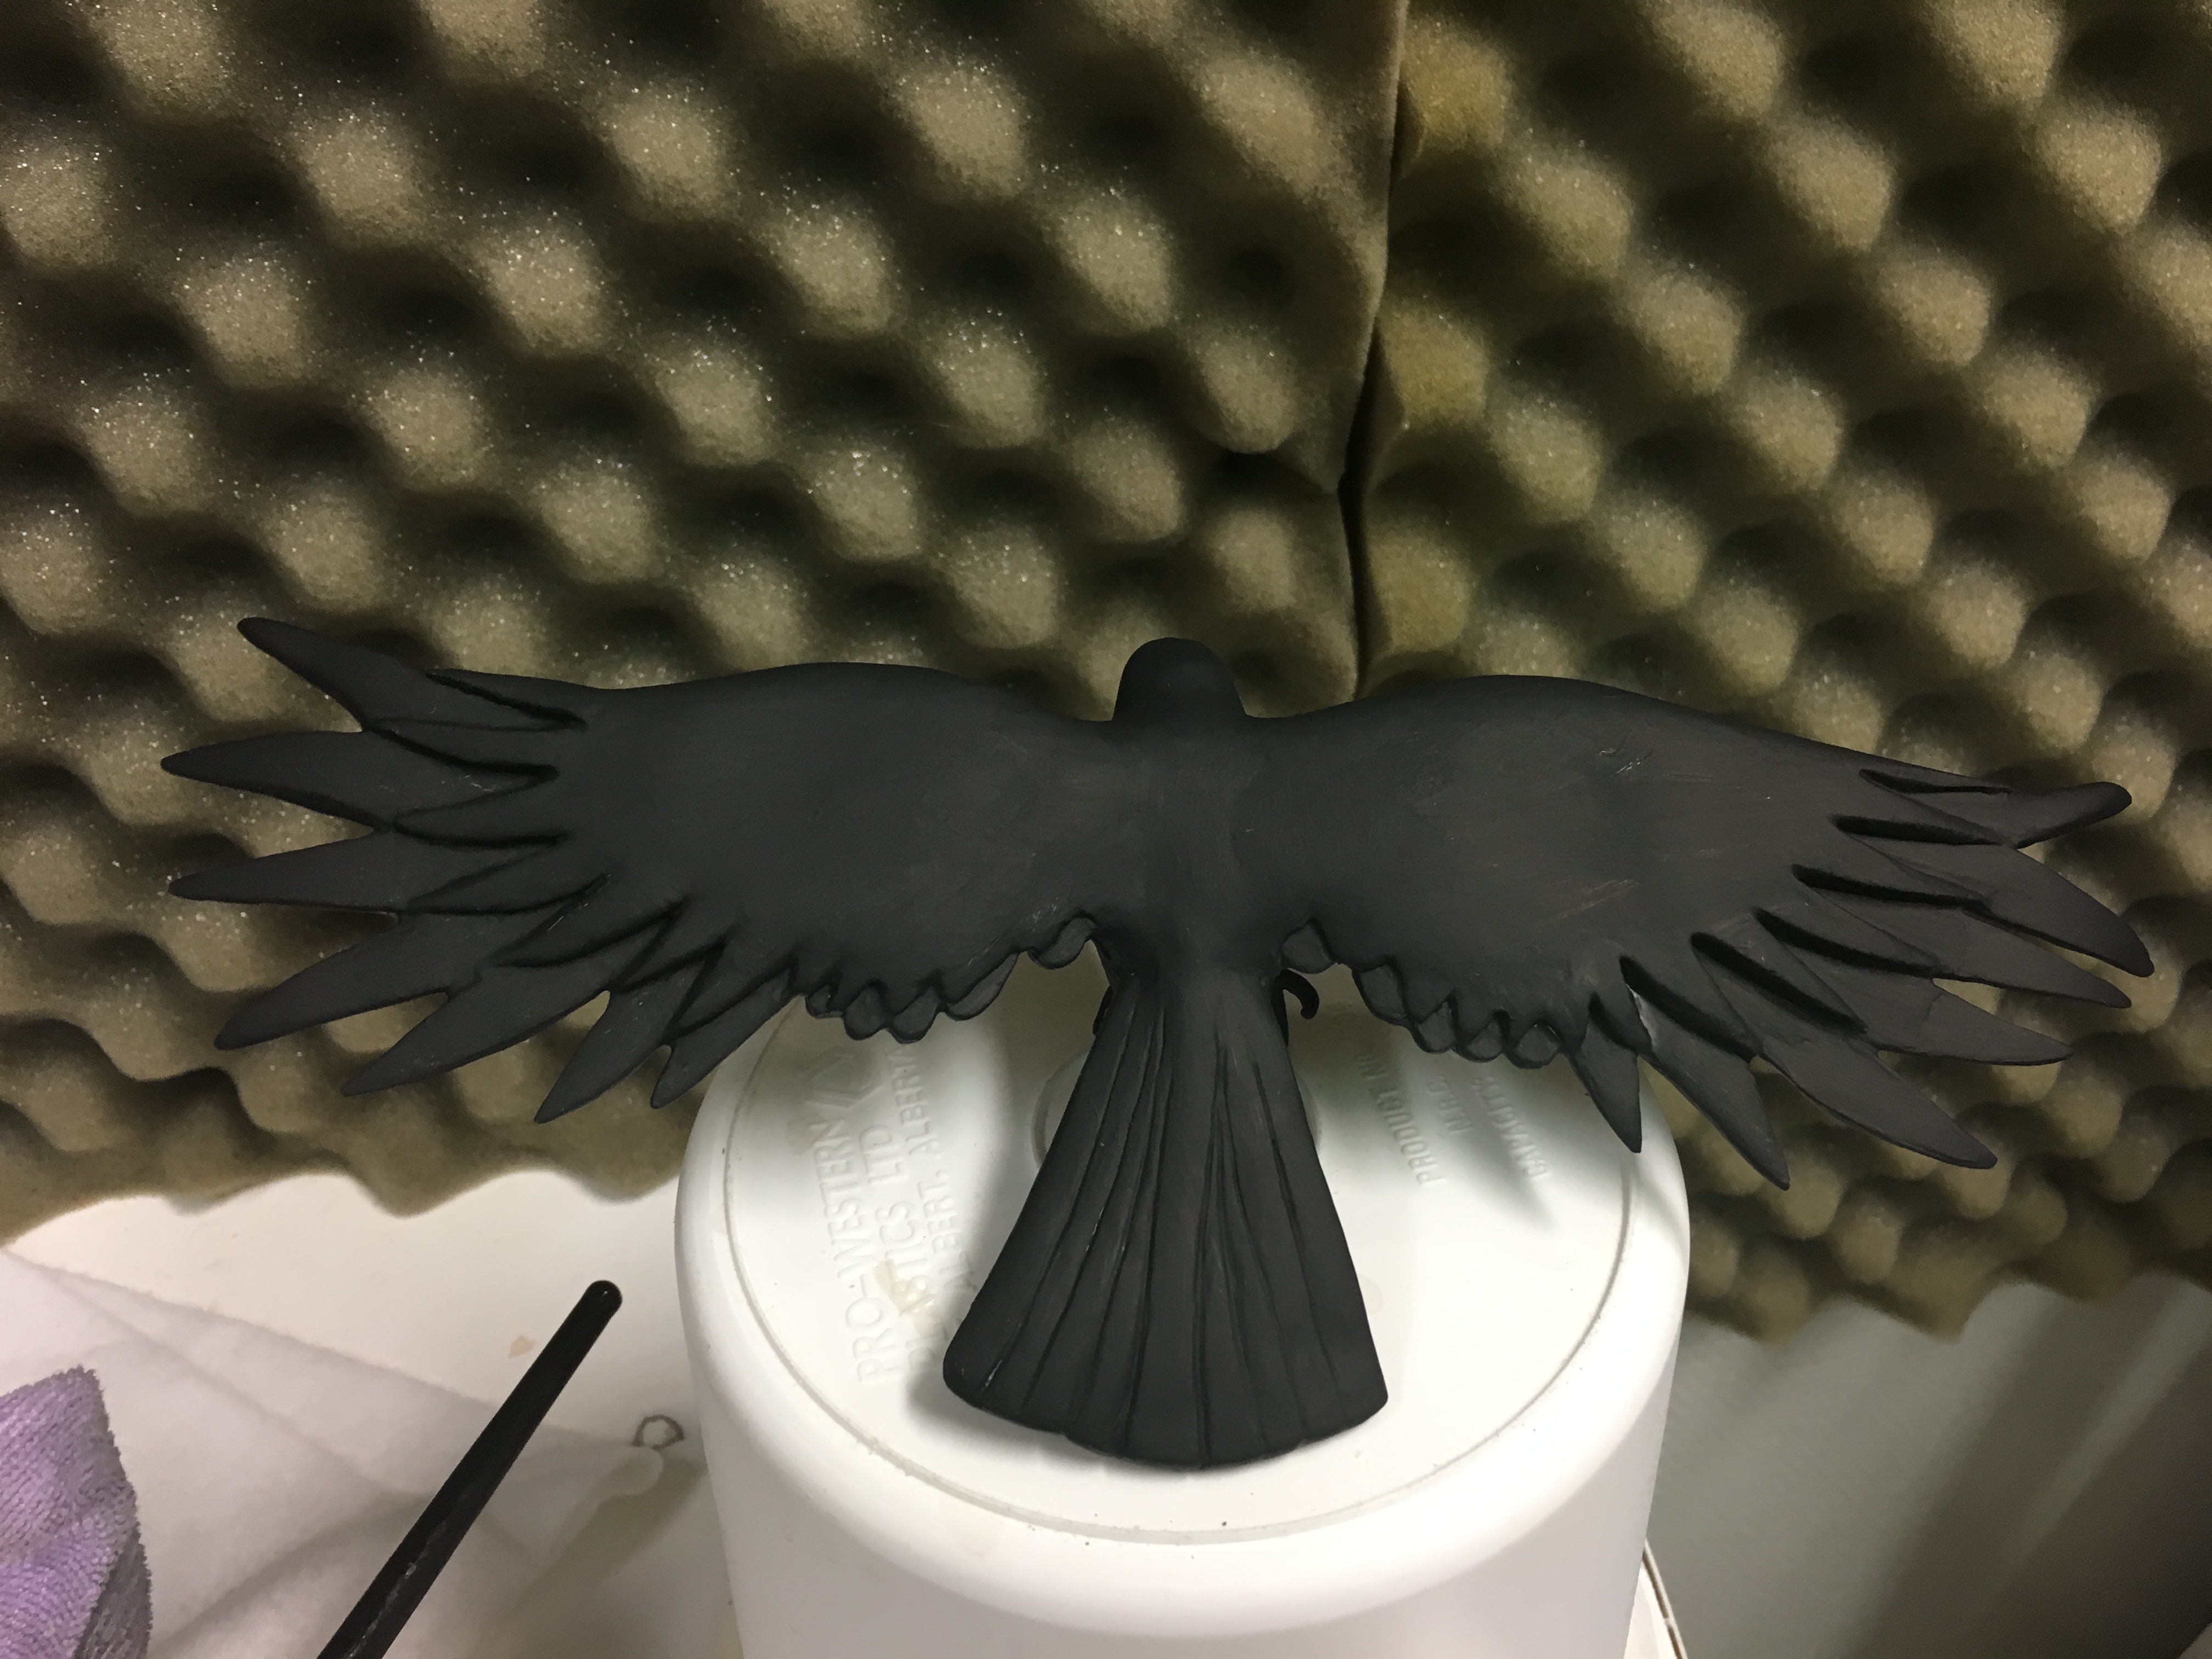

Sorry it’s a little hard to see its features on camera. In person, though, the black paint makes it easier for me to see imperfections and correct them. I noticed that the angle of its beak was a little off on its right side so I had to do some sanding and filing and a little carving to get it the way I wanted it. This piece will be getting some more smoothing, re-painting (to check again for errors), and sealing before I move on to the next part of the project.

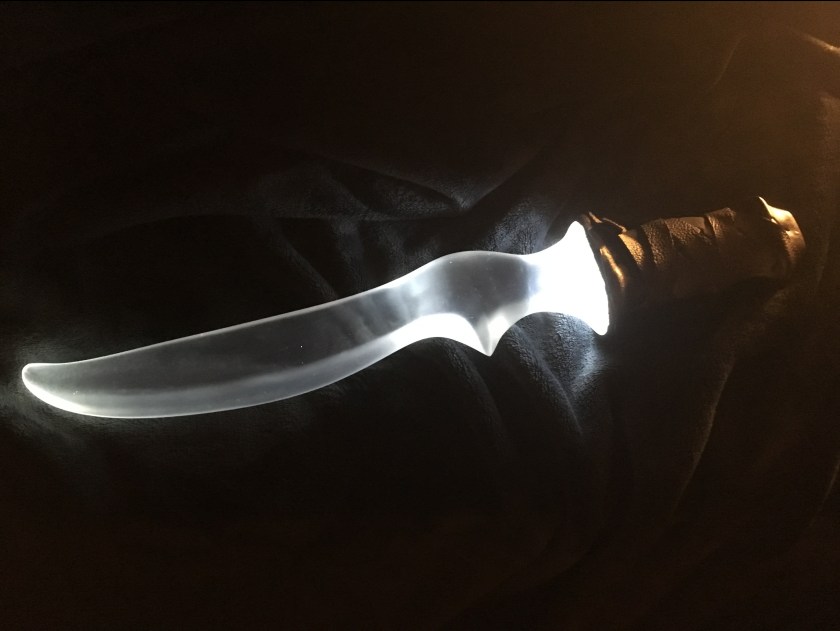
As a bonus-bonus, here is the current state of “Thorn” (working name). It’s so comfortable to hold.

When can we expect to see it appear in my Etsy store? Well … that depends on when the person who asked for it gets back to me. LOL
Okay, time for me to stop yammering and go pick up some more sandpaper. It’s sleeting outside so uh … wish me luck. XD
Share this:

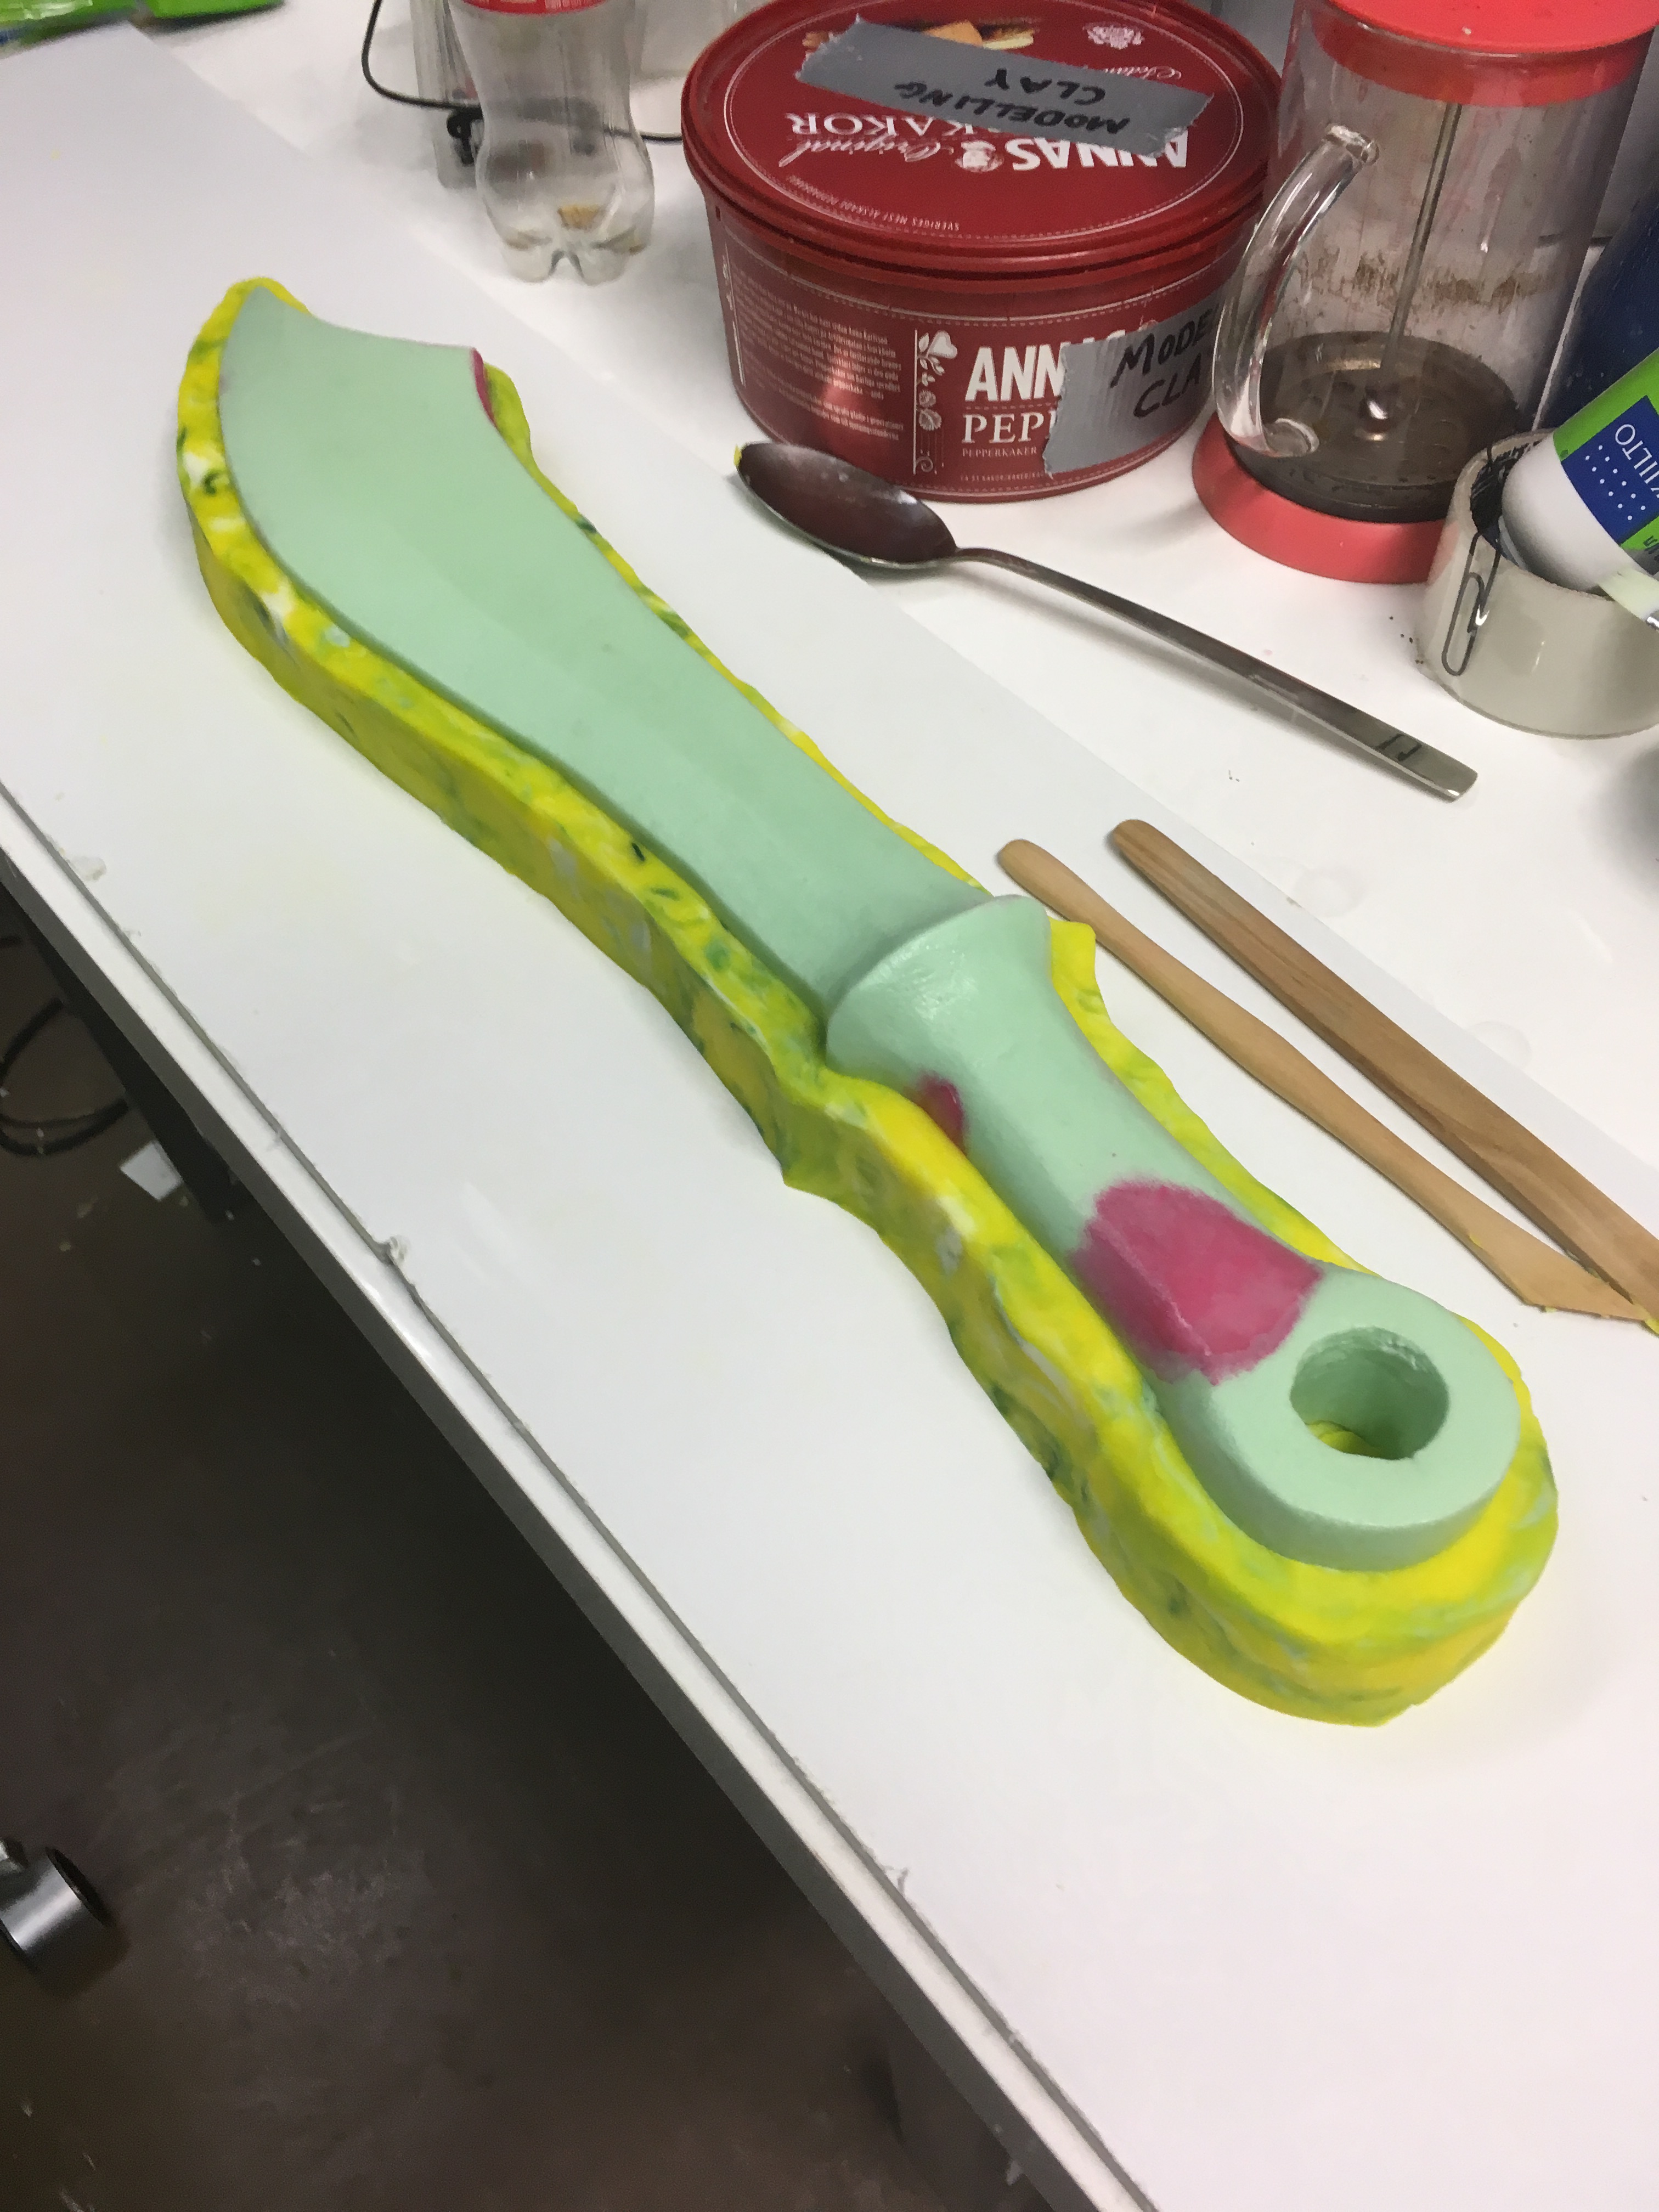
Little Wee Pokey

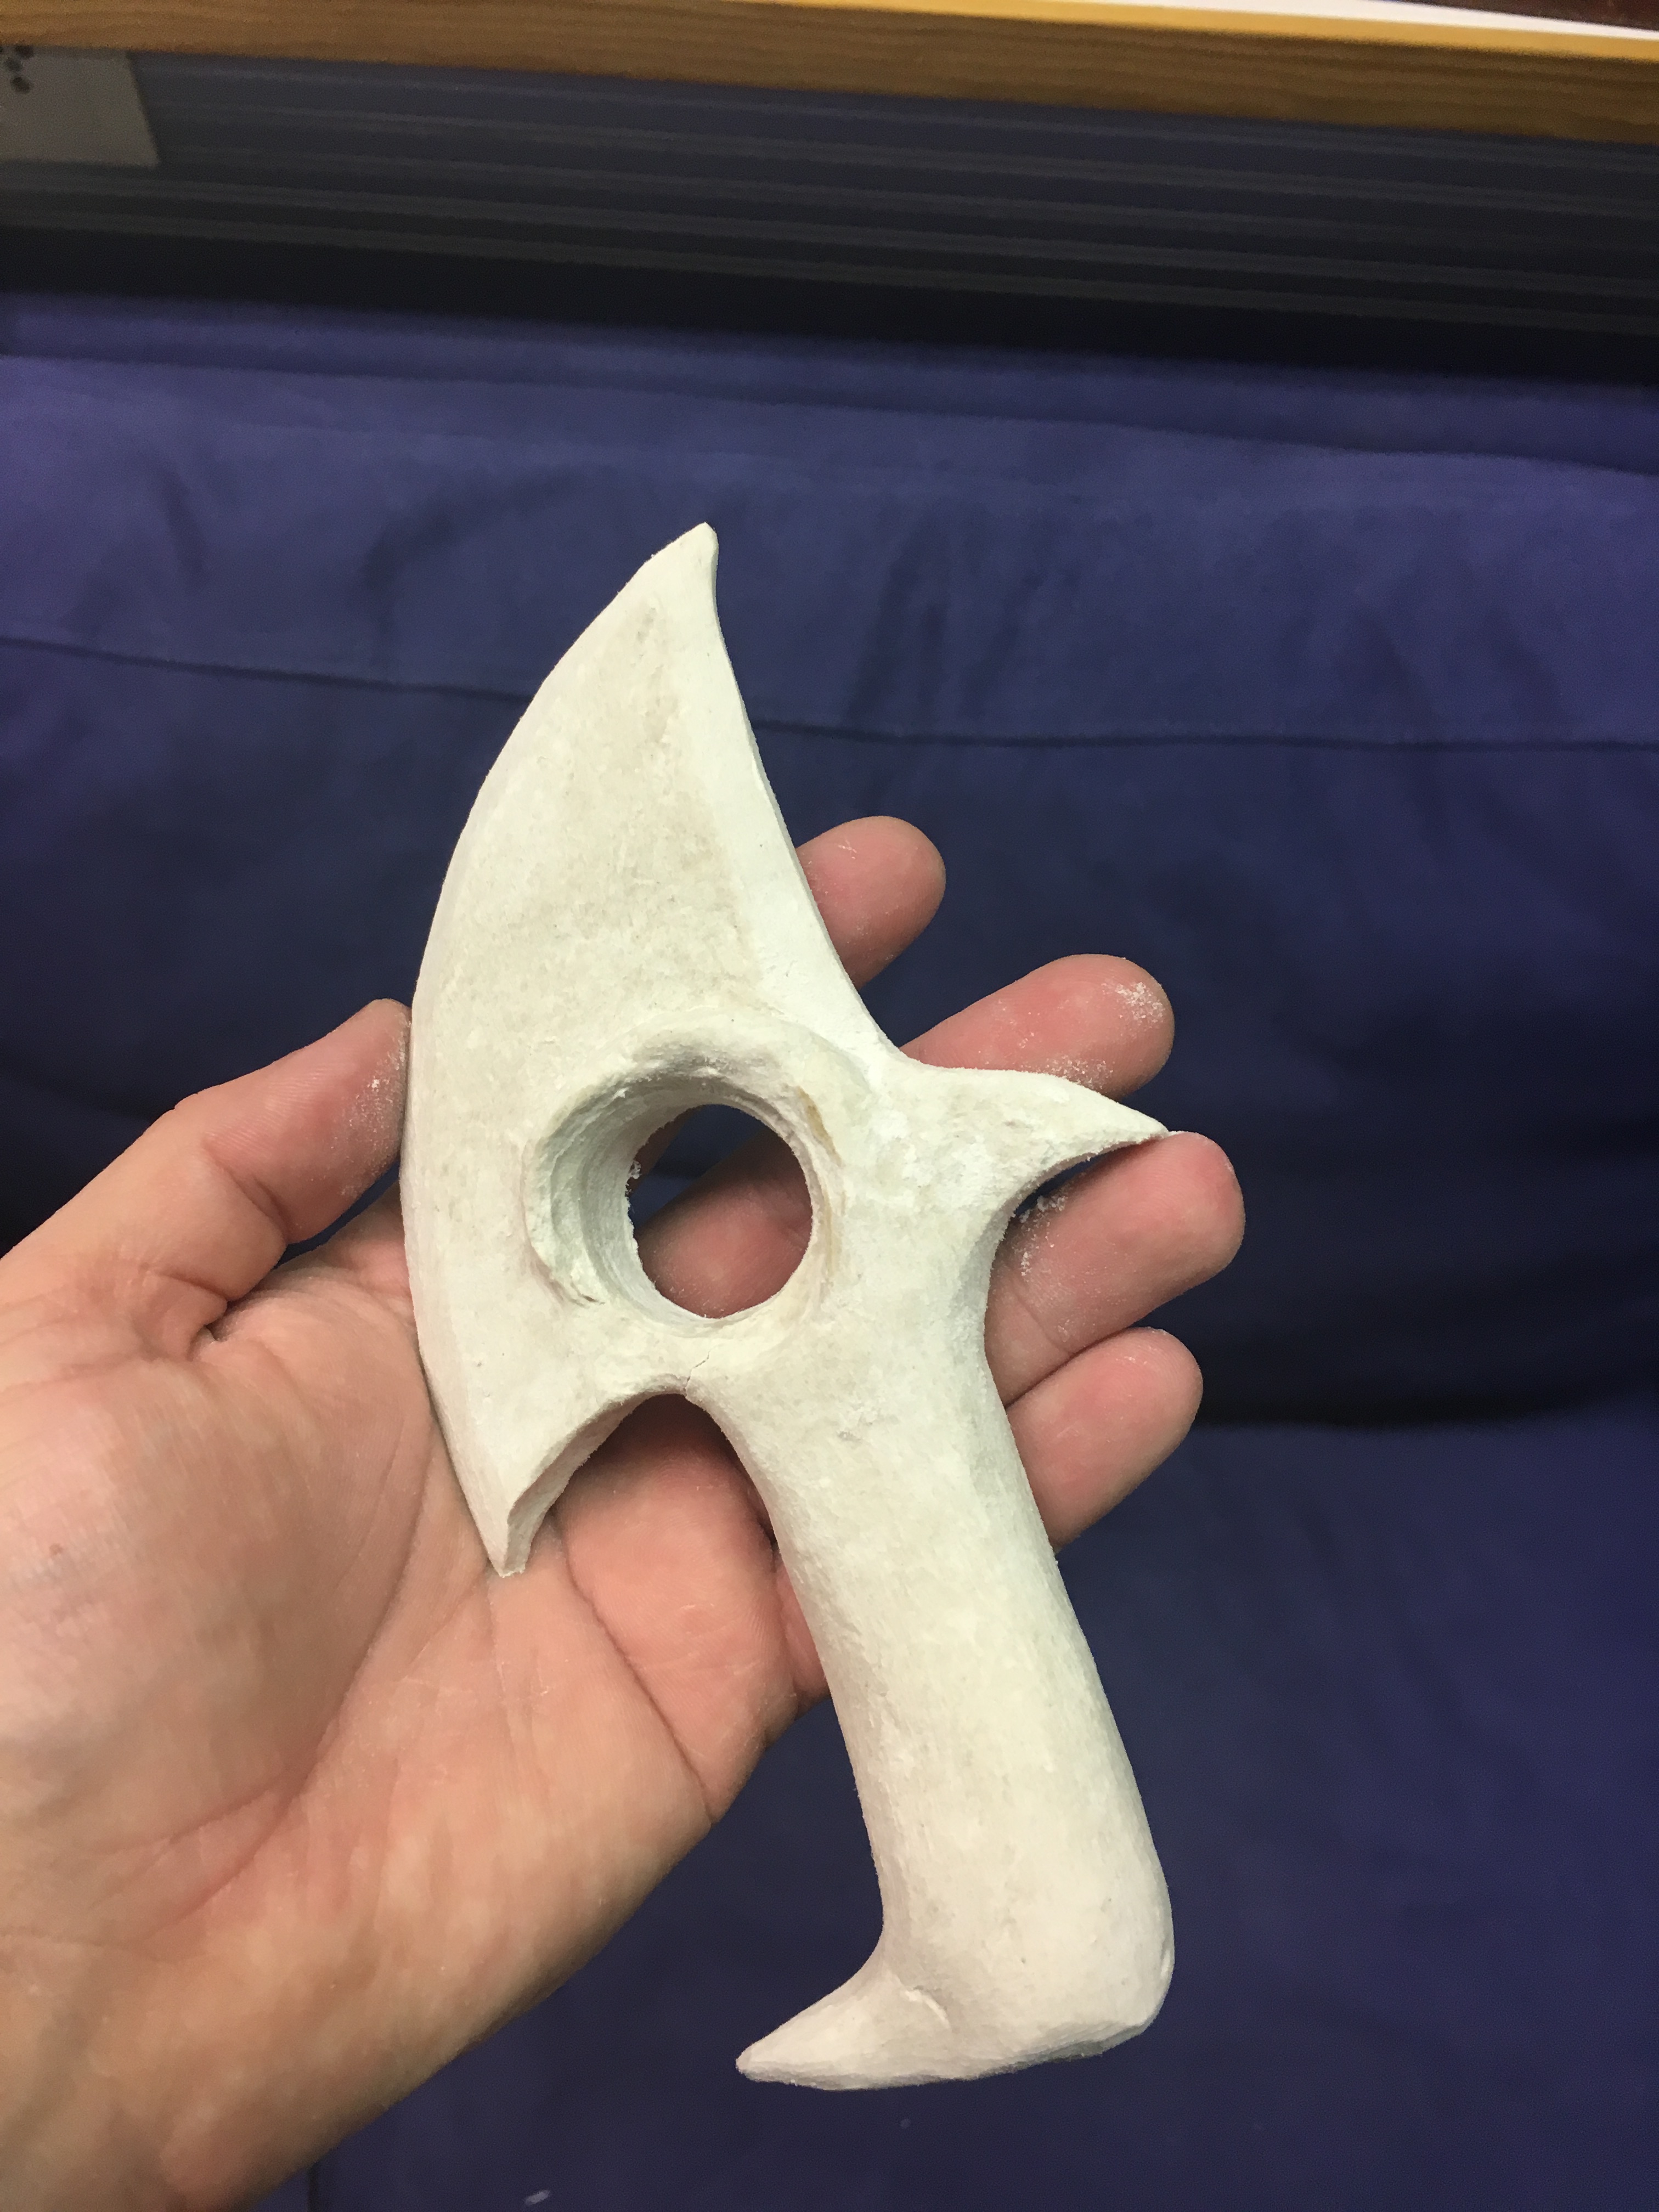
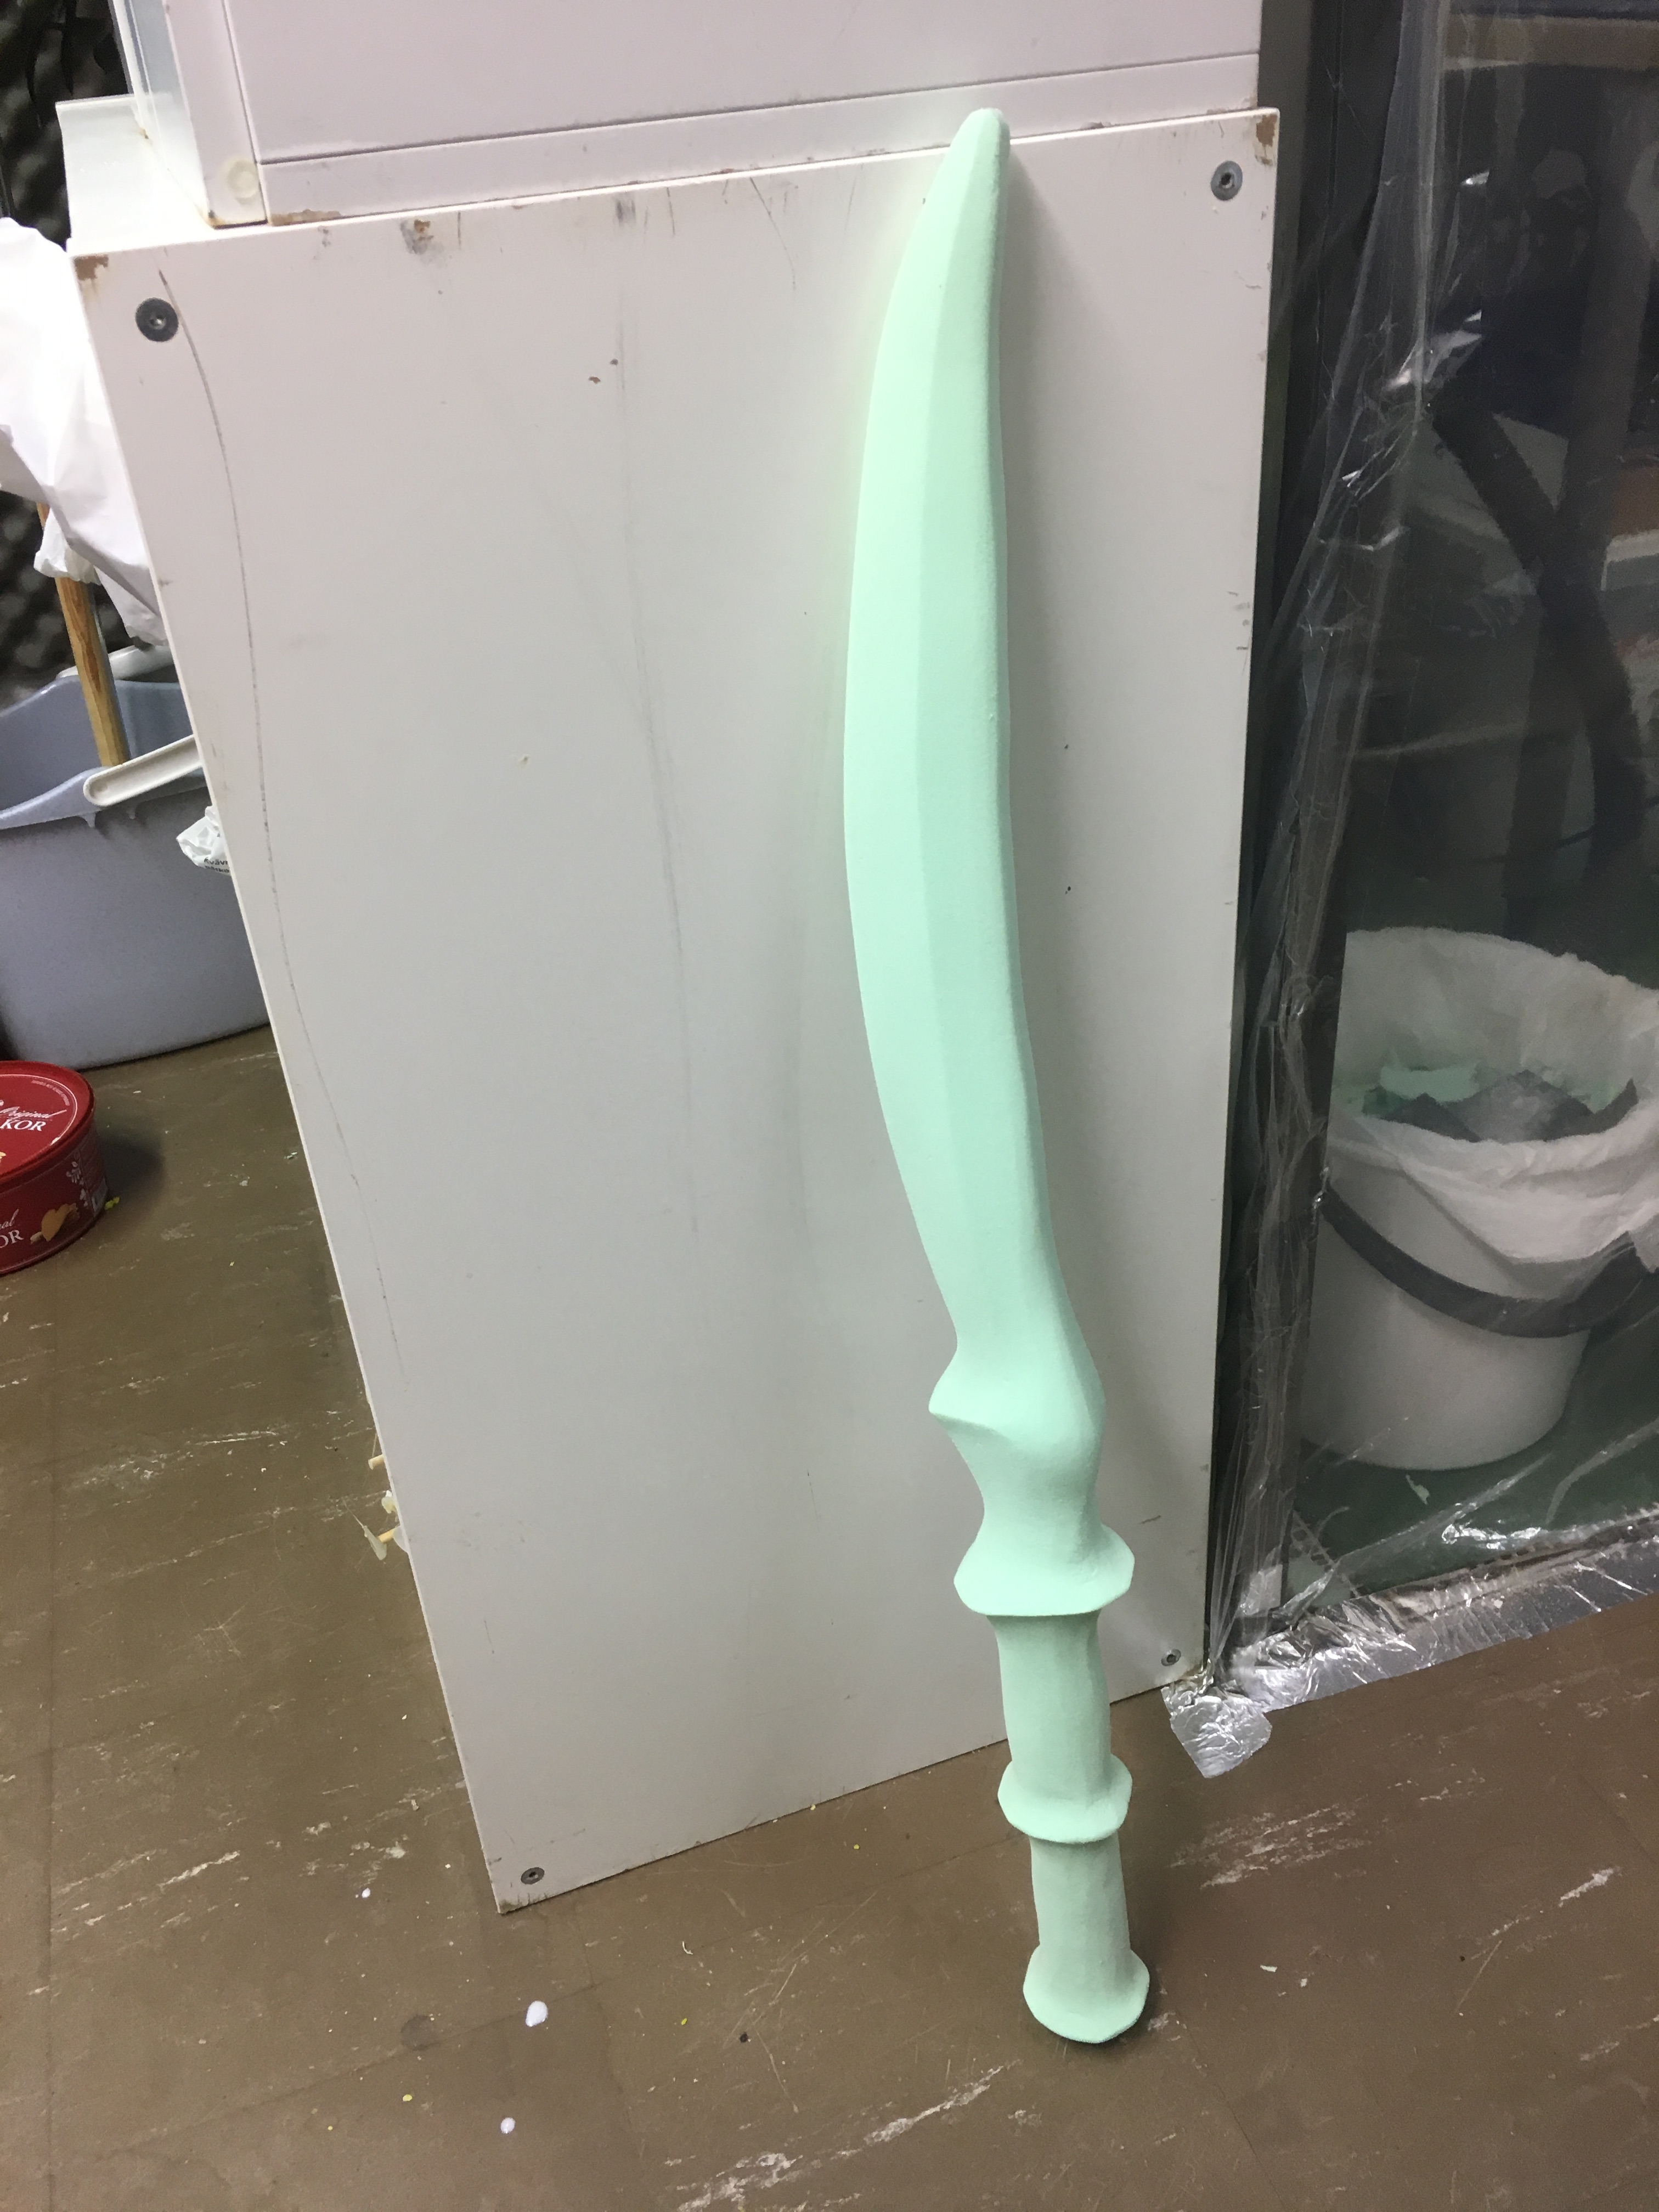
It’s so cuuuuute! This was a really good test of the new DIY paperclay stuff. Light, strong. mouldable, and sandable. I’m quite pleased!

This here knife is currently going by the name of Thorn, just so I have something to call it. It is double-edged for maximum utility (slashing or stabbing) and provides a little bit of protection to the hand while blocking another blade.
Yes, yes, panicking parents, it’s not actually sharp. I don’t make real weapons. I make art pieces. I do envision how a blade would actually work if it were real, though, so my designs at least make some logical sense. So many fantasy weapons just look … preposterous.
Like A: it’s half the size of your body; you’re never going to lift it, and B: if you managed to, you’re never going to successfully stick it in the other guy, and C: if you somehow managed to accomplish that (like if he was asleep or something) you would never be able to get it out again. Or quite possibly D: your dagger has six blades on it they’re all curved at an angle even a snake would find obscene and half of them are pointed back at you what are you doing with your life?
Much more practical.
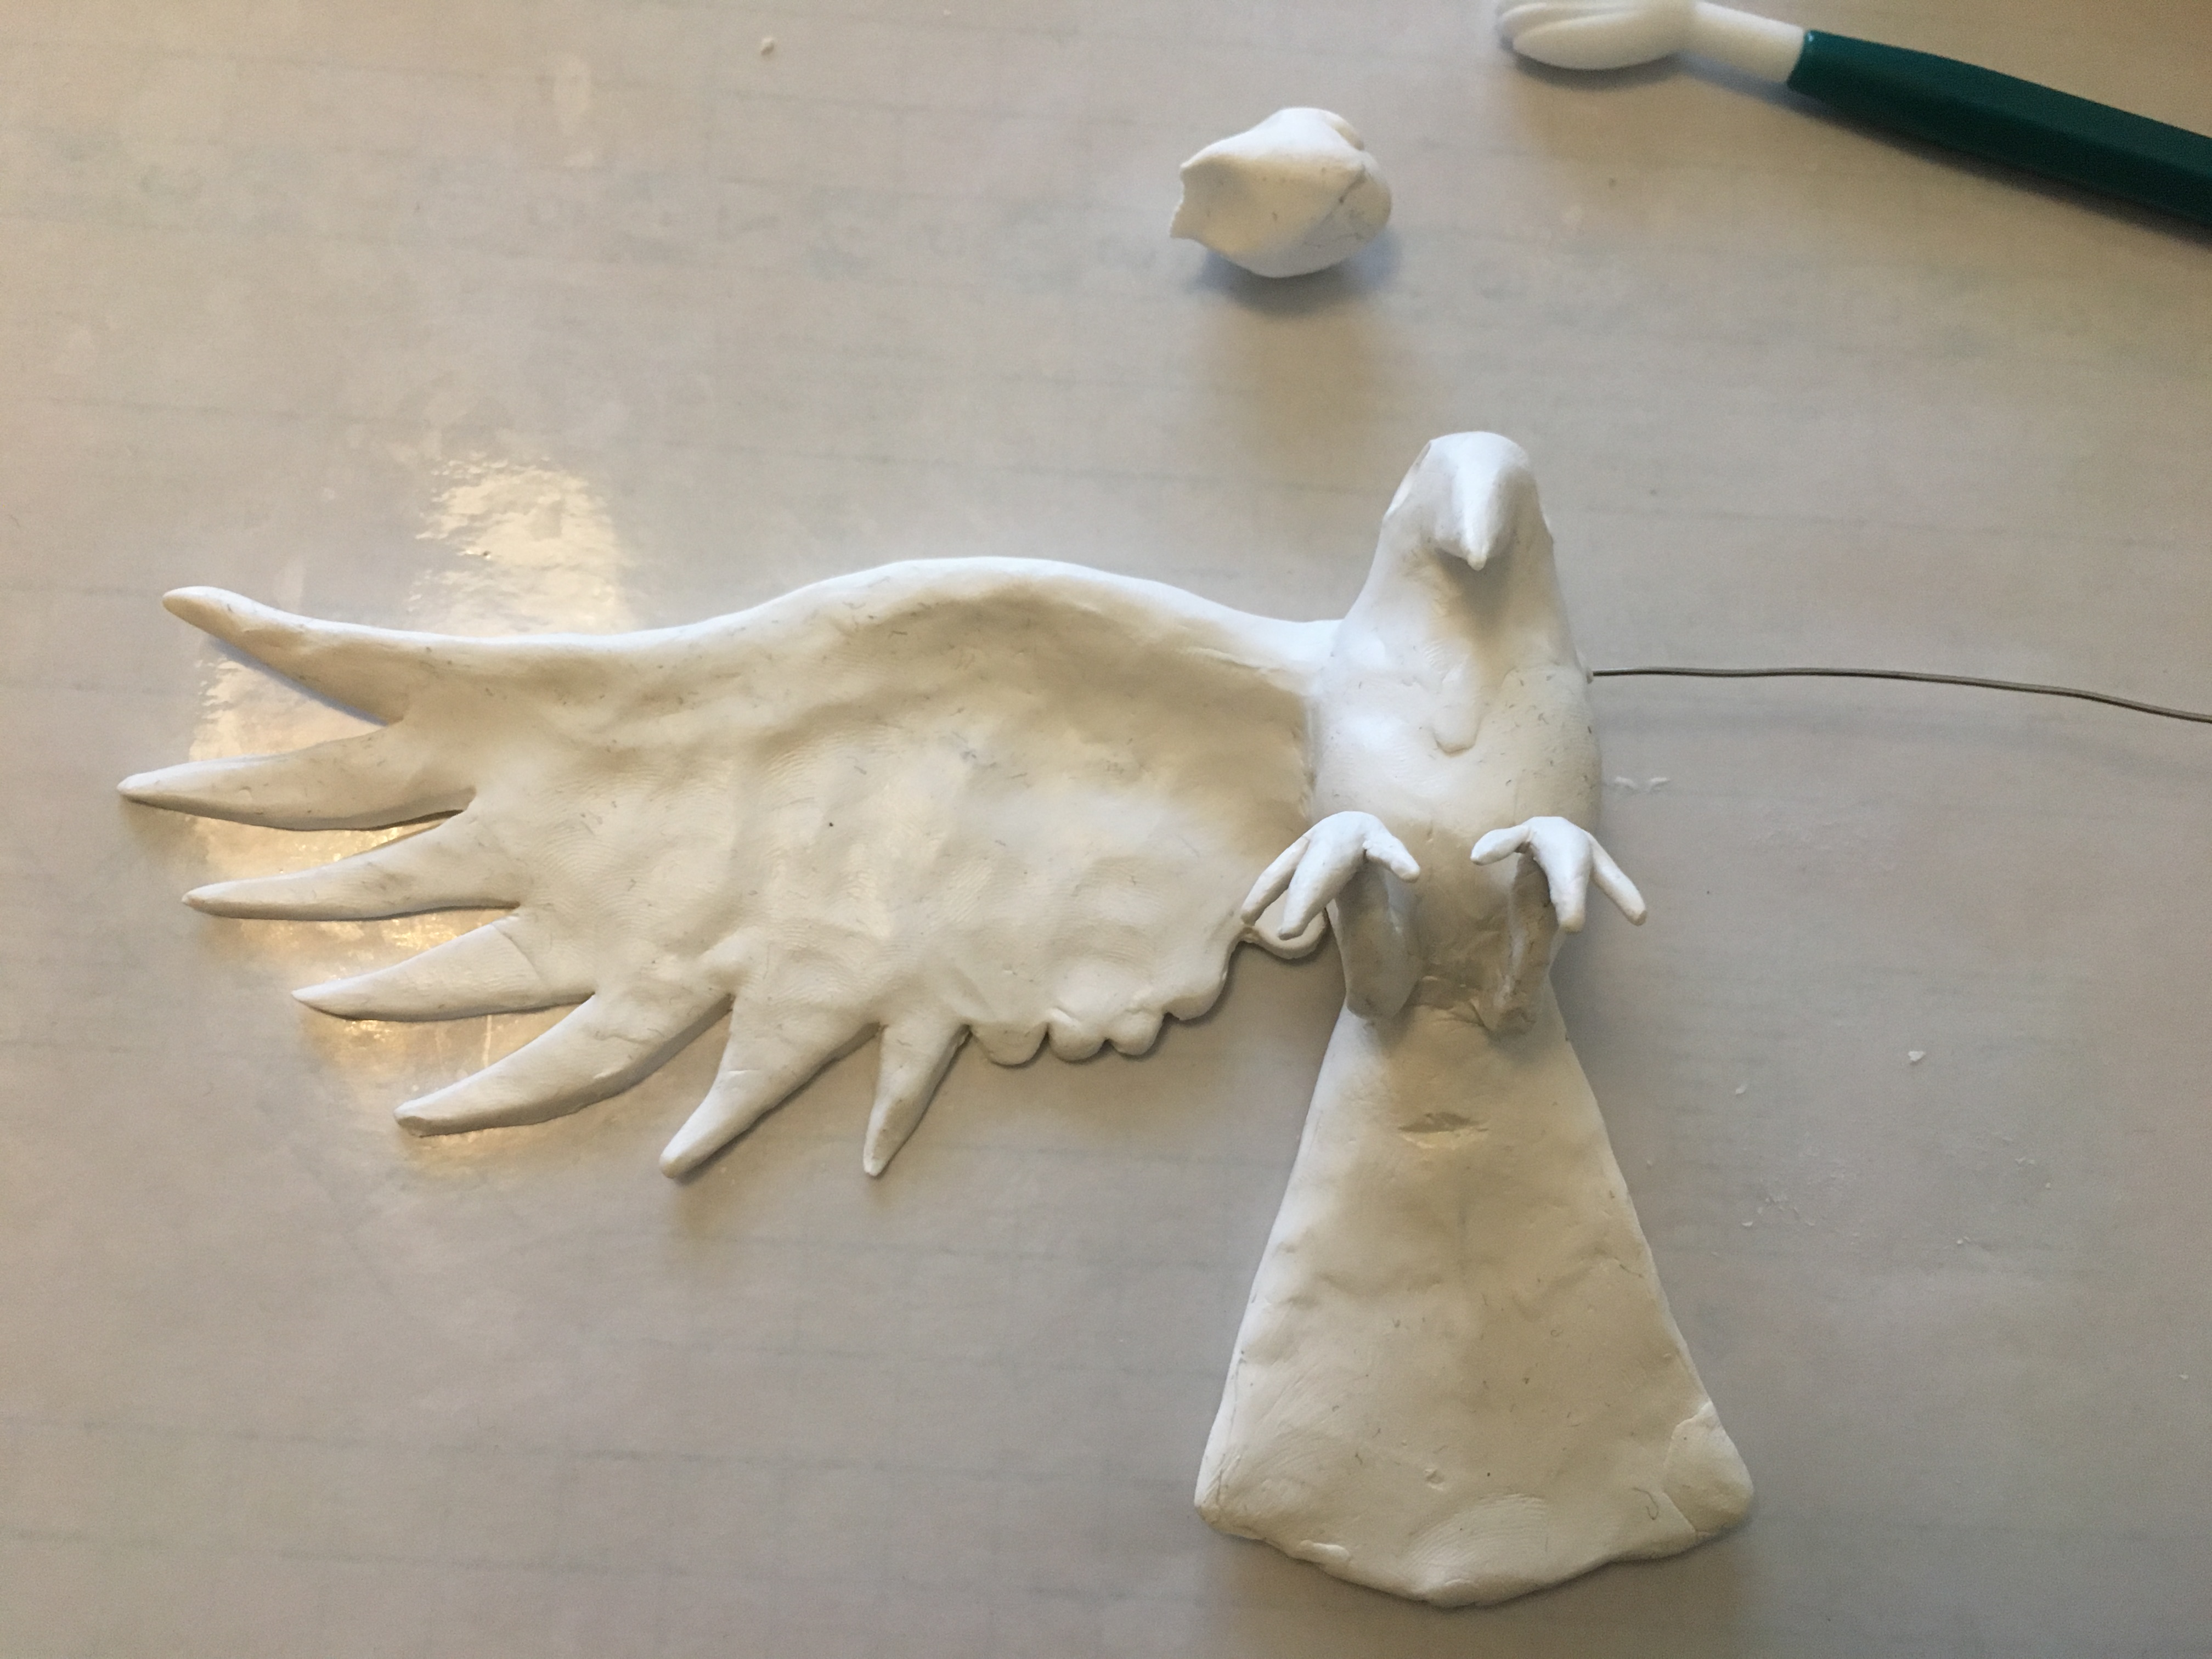
What else have I got for you today? Well, I put some more reinforcement on the wings of the raven.
Cause a cross-guard needs to actually … guard. Yeah. This one is more decorative than anything else though if I’m perfectly honest. I’m okay with that. ^_^
Alright, off to the workshop. Wish me luck!
Share this:

Blades and Birds

Hoo boy do I ever have a lot of pictures to show you today! First, we get to look at the newly created mould for Zaapiel for the super cool Arabian Nights project. Yay! I am so very pleased with how it turned out especially because my vacuum pump was dyyyying throughout the process of degassing it. (Seriously, I need a new one. My wallet is sad. 😦 )
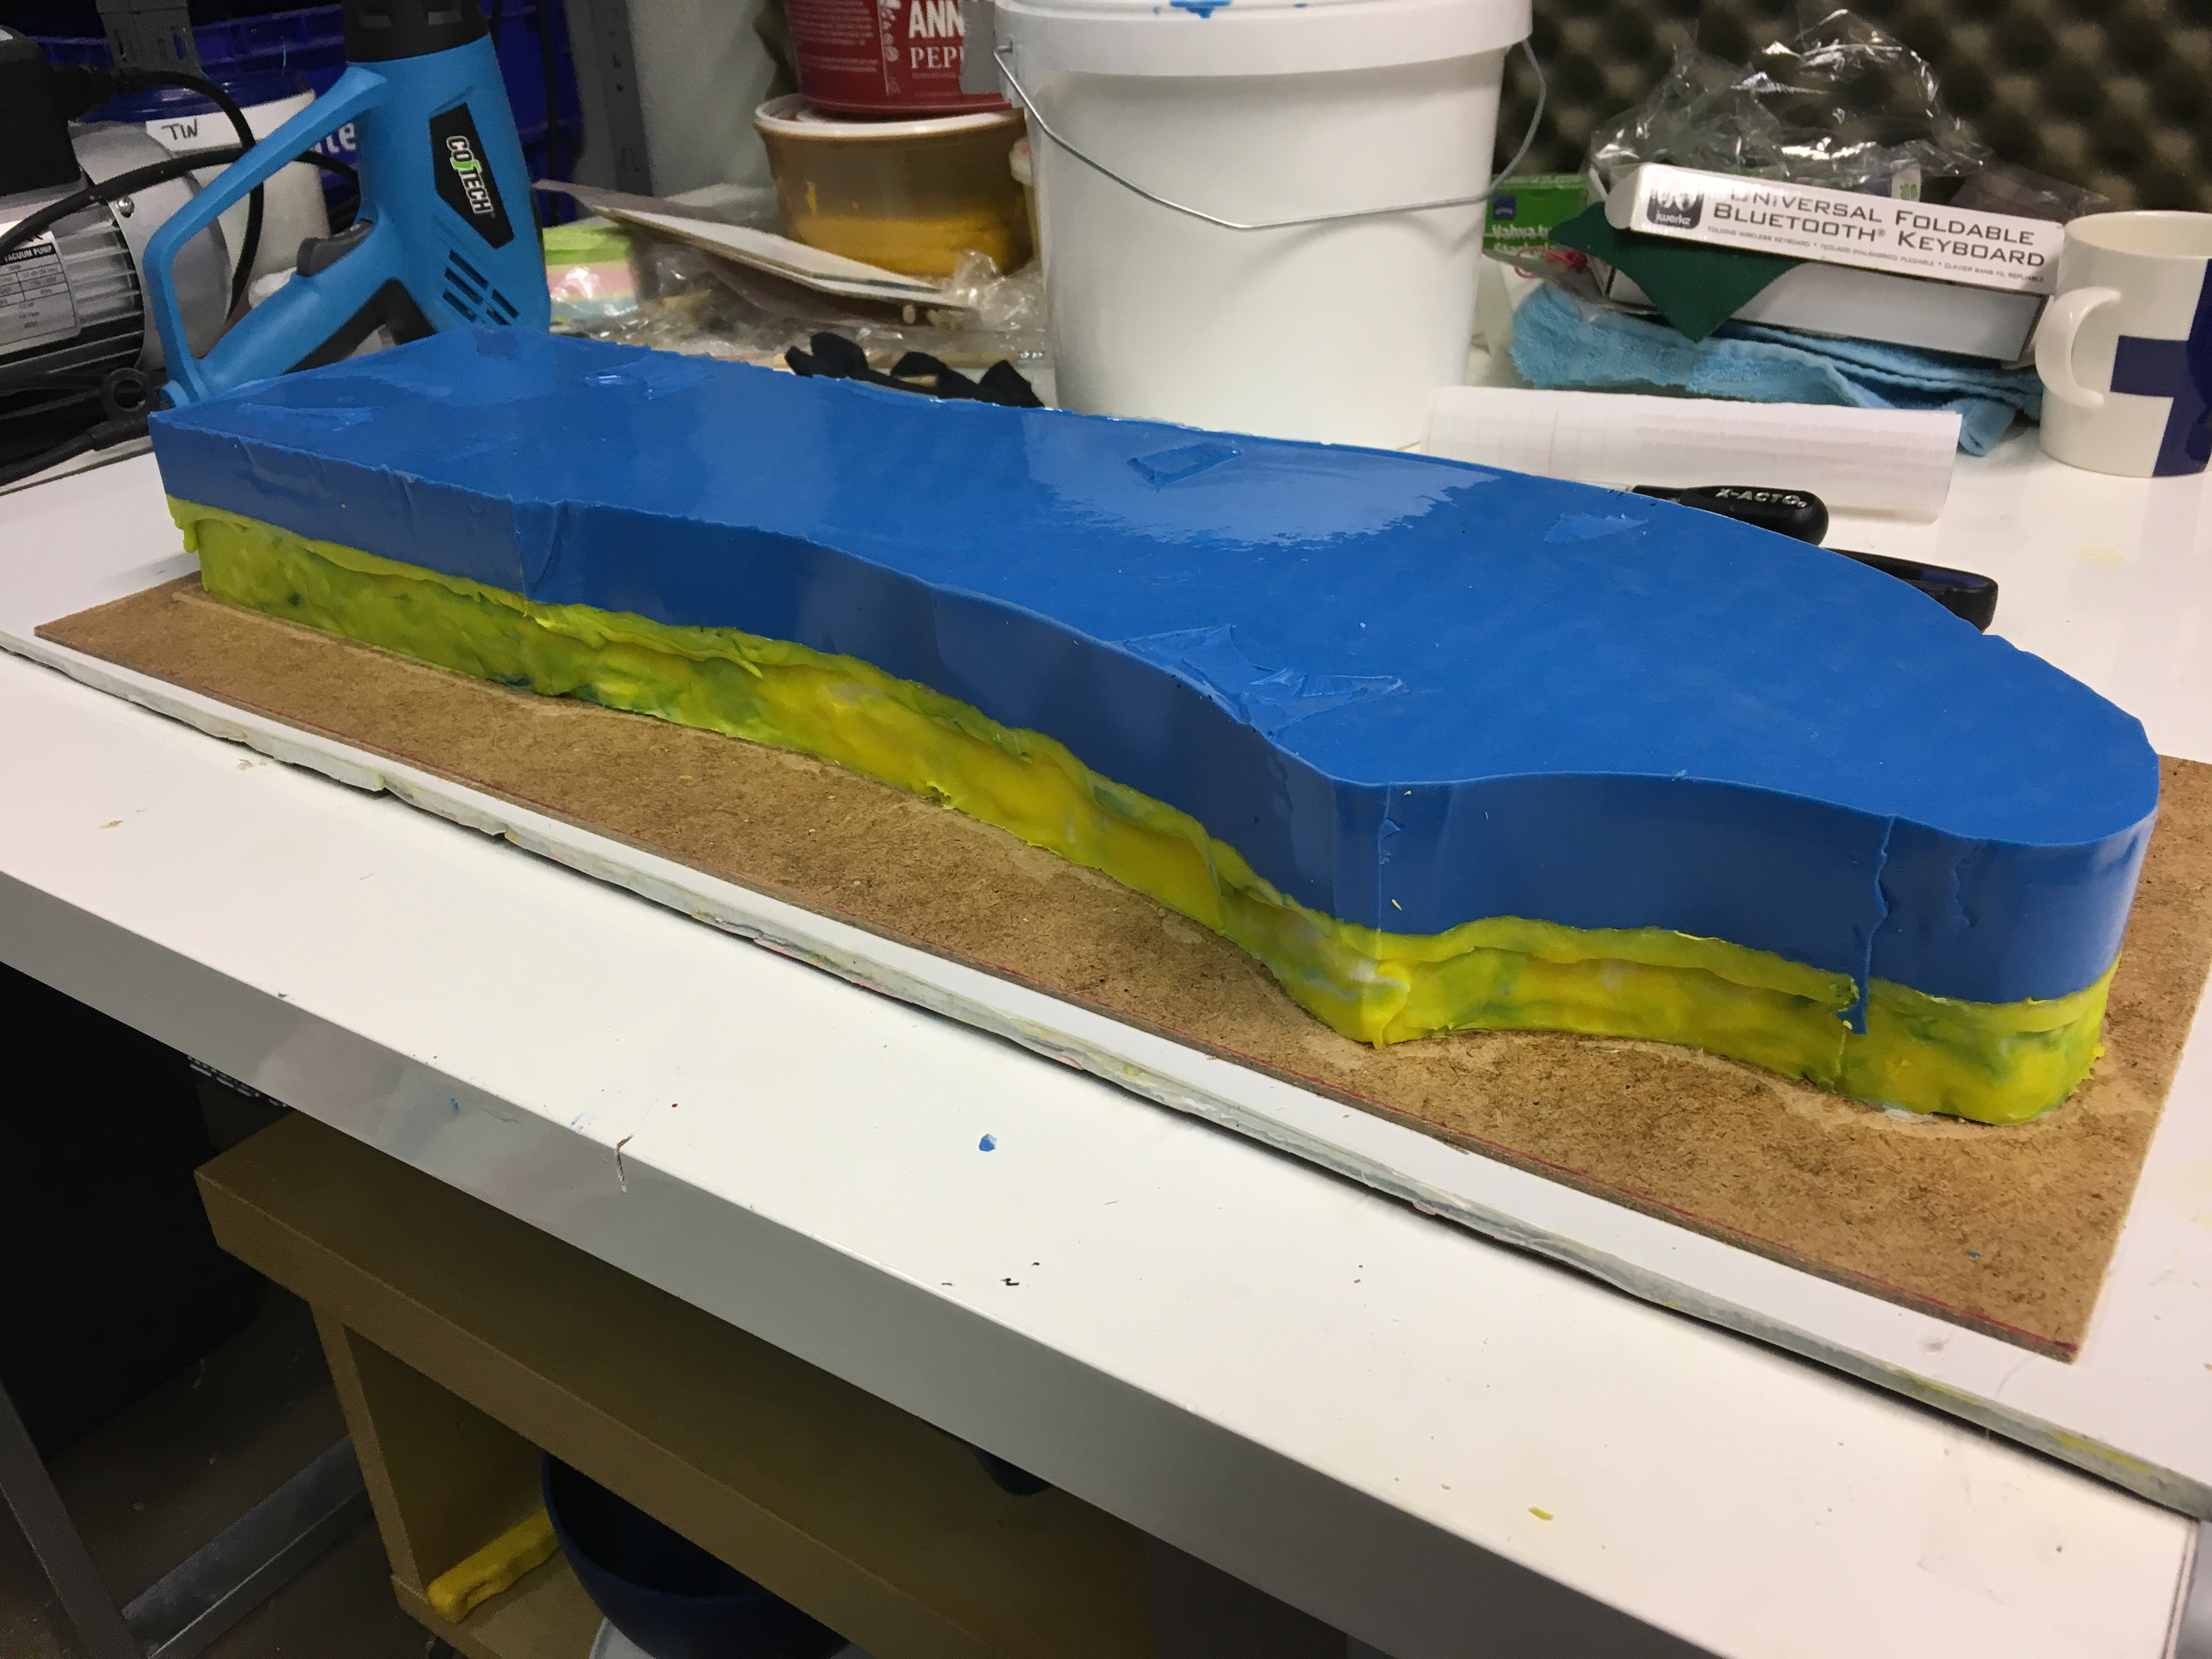
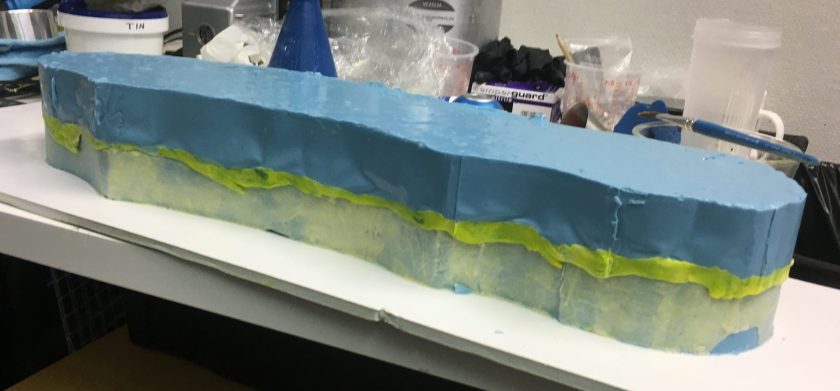
What lurks beneath this slab of blue goo?
It’s a sword! (As if anybody had any doubts about what it was… LOL) That’s the first side done. I actually managed to remember to take photos of the mould box this time.
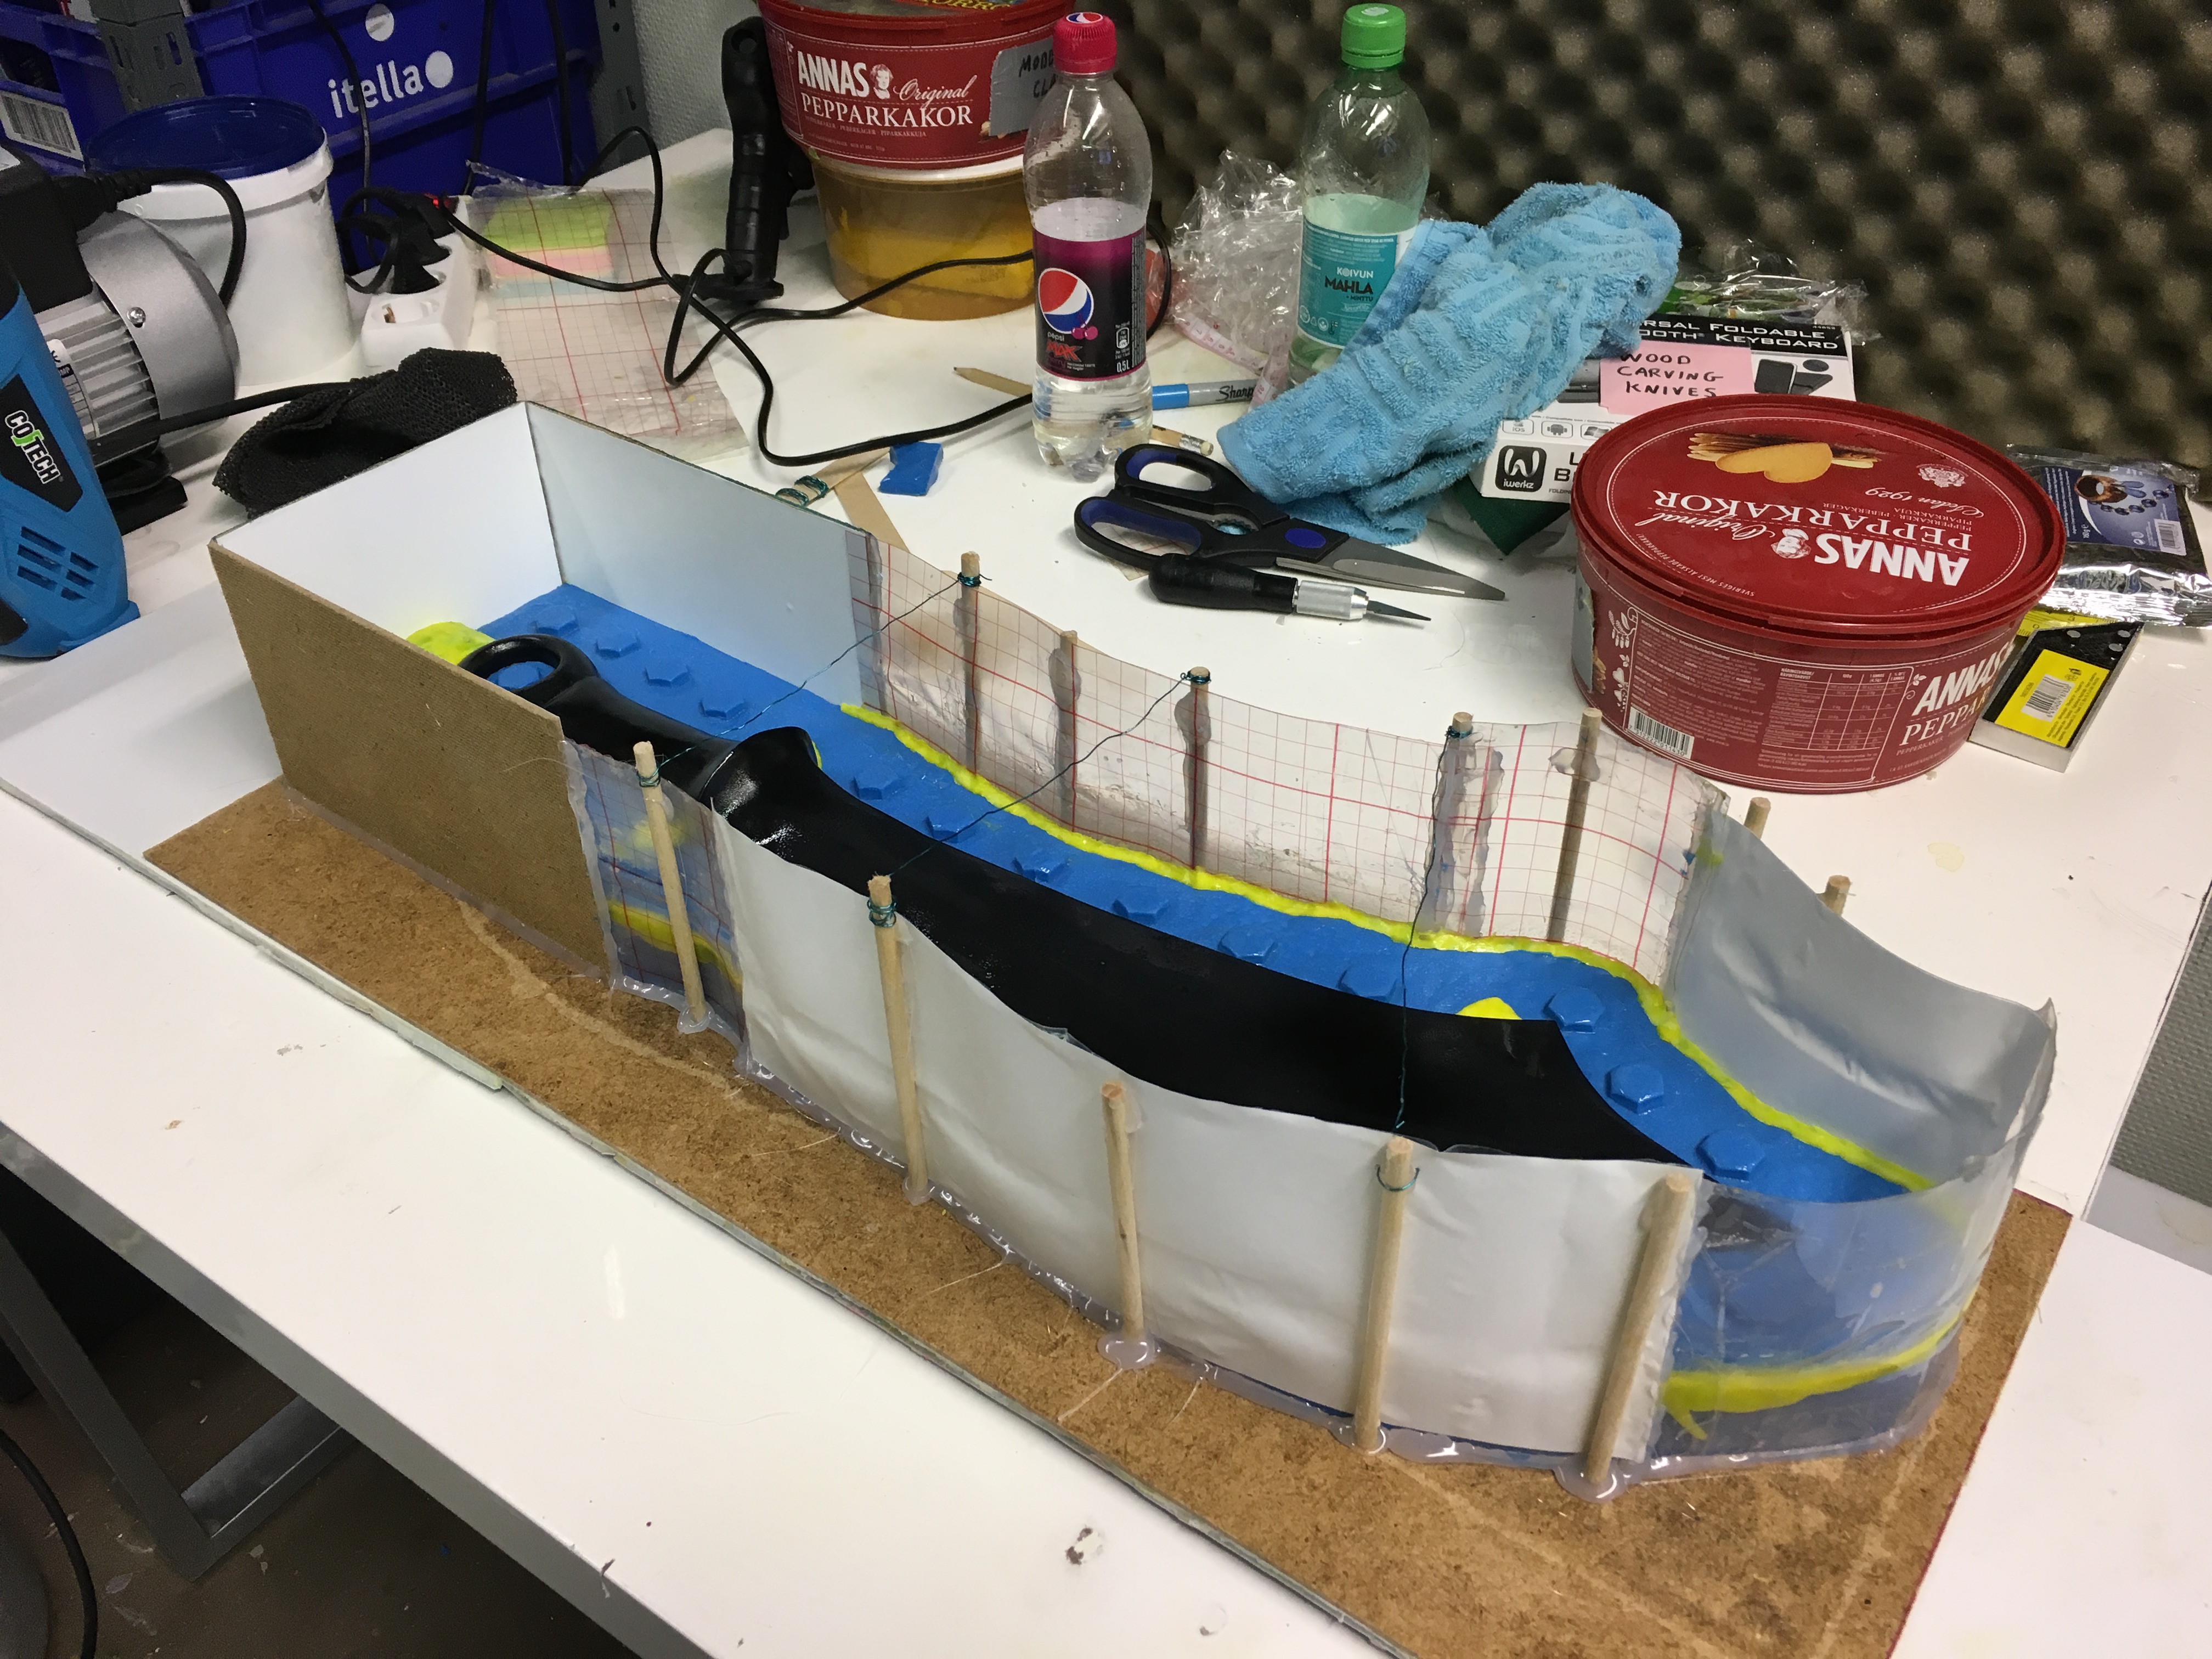
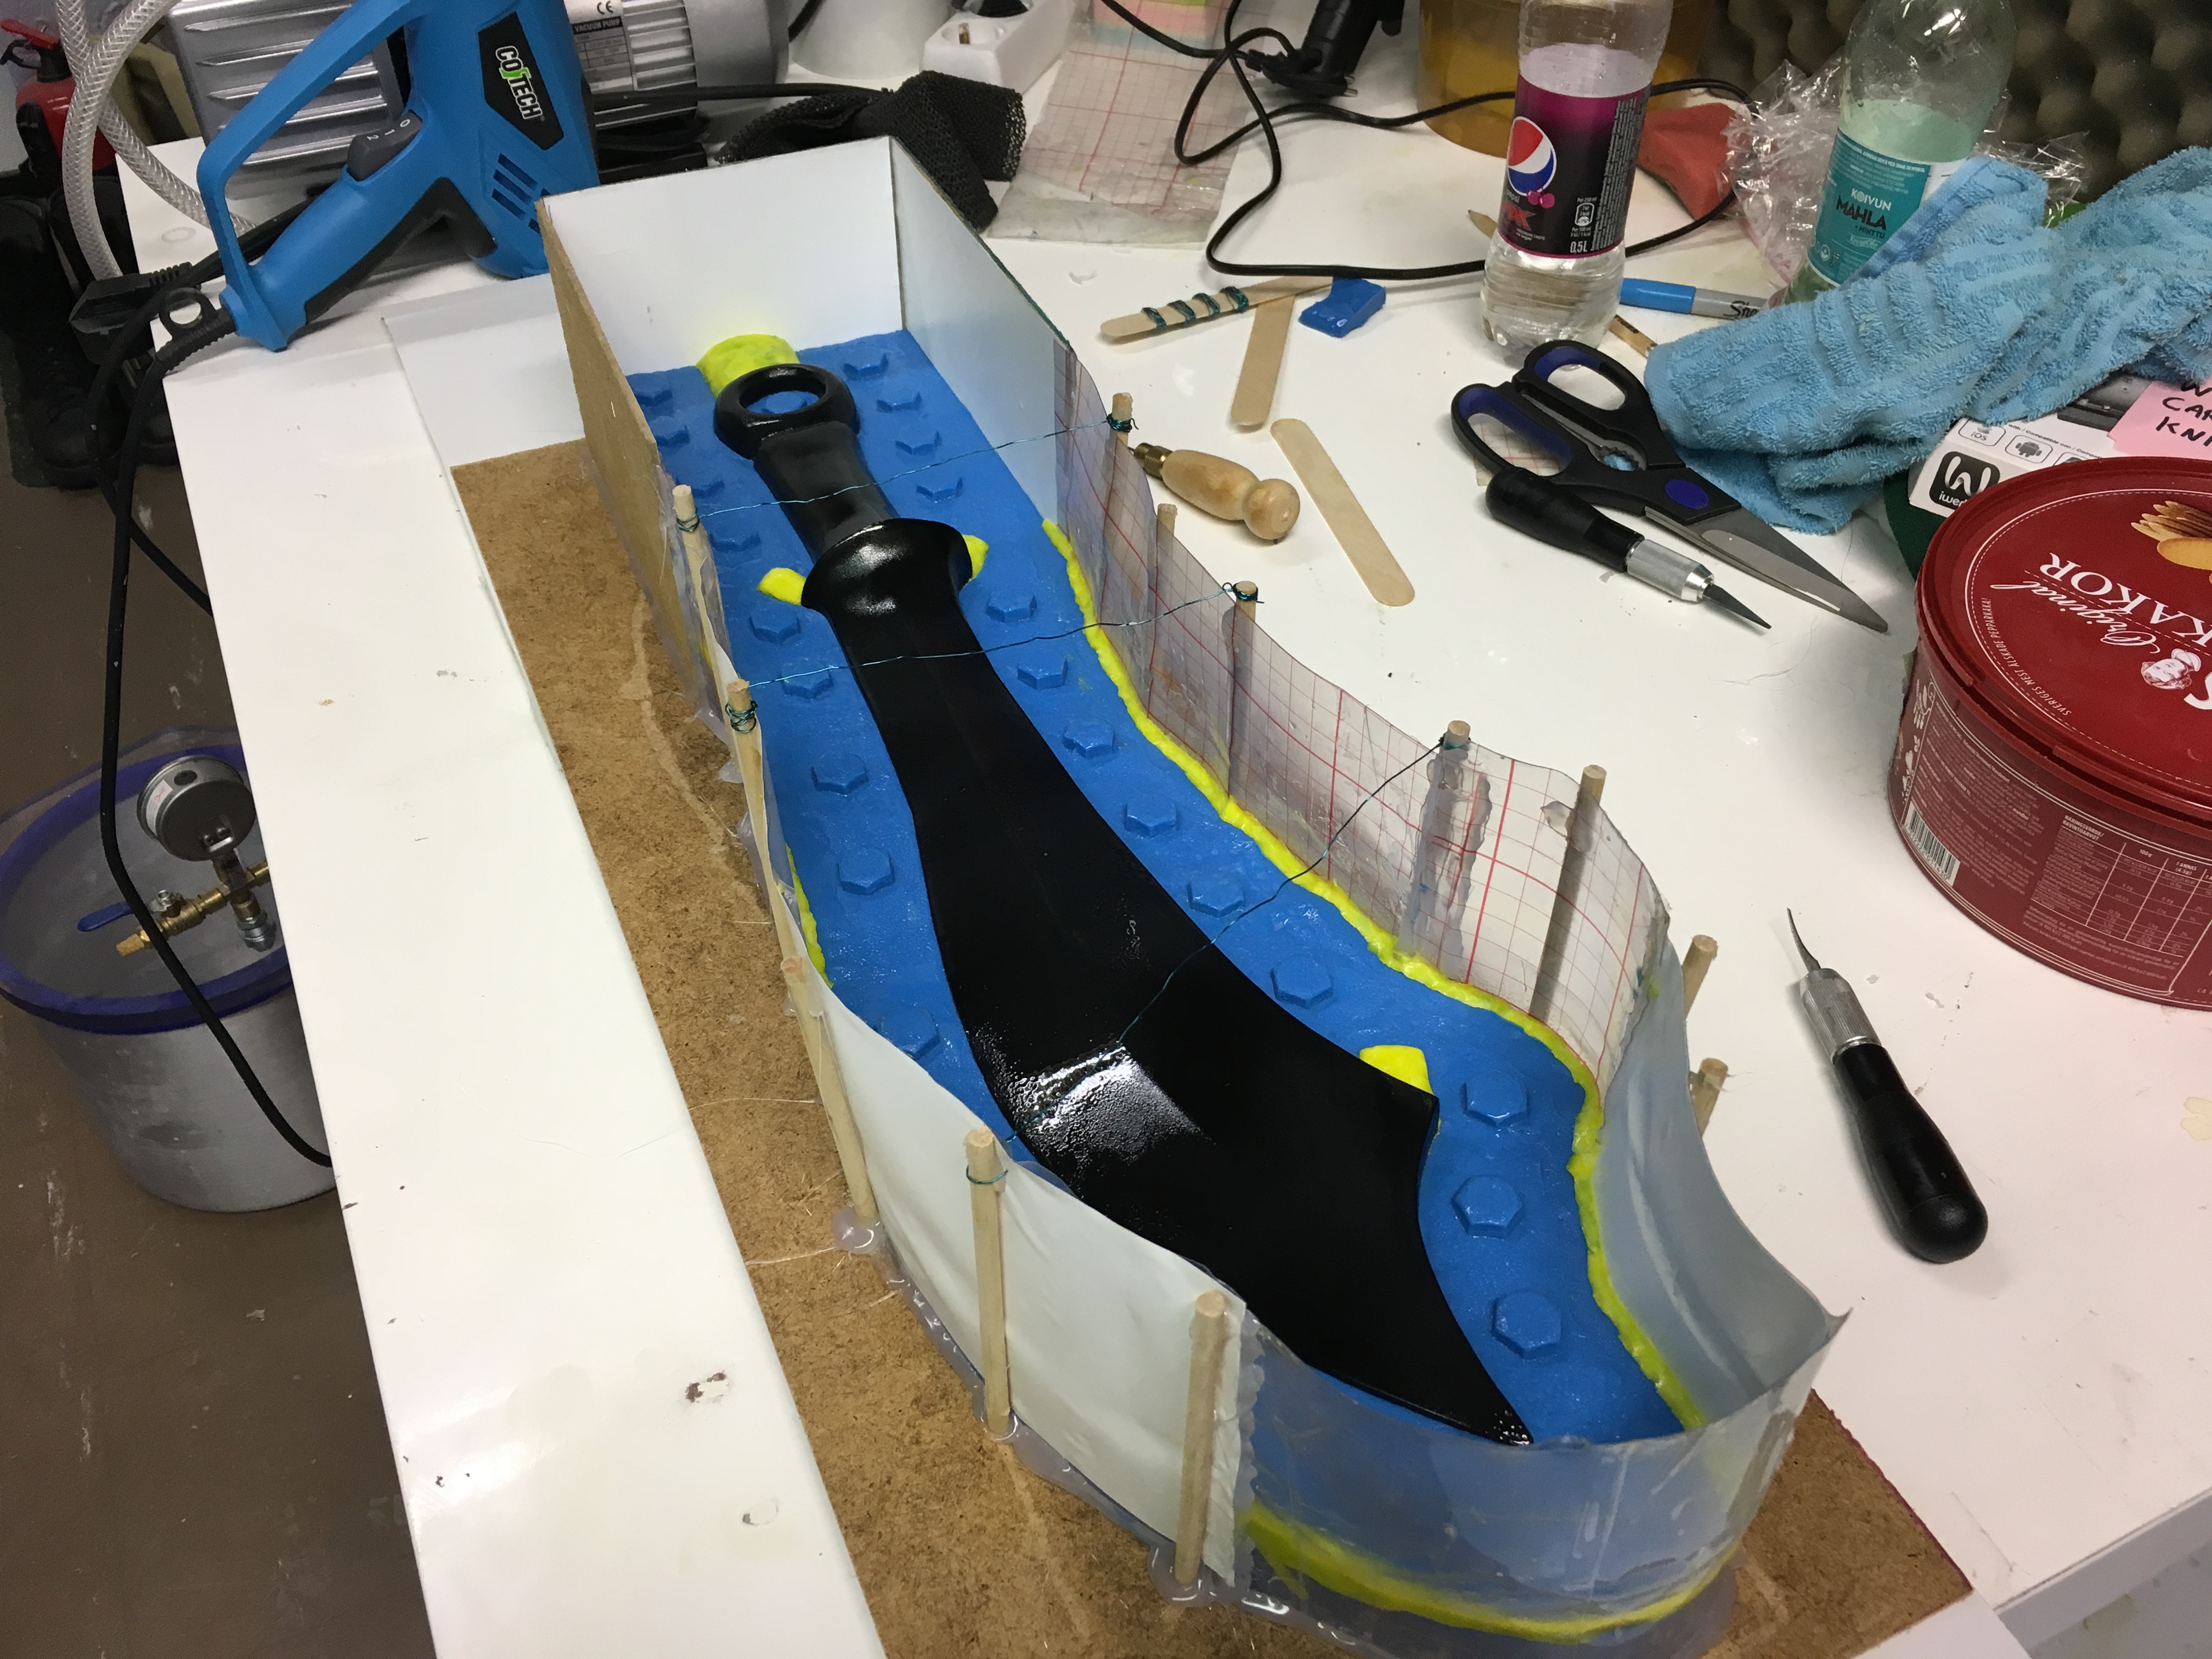
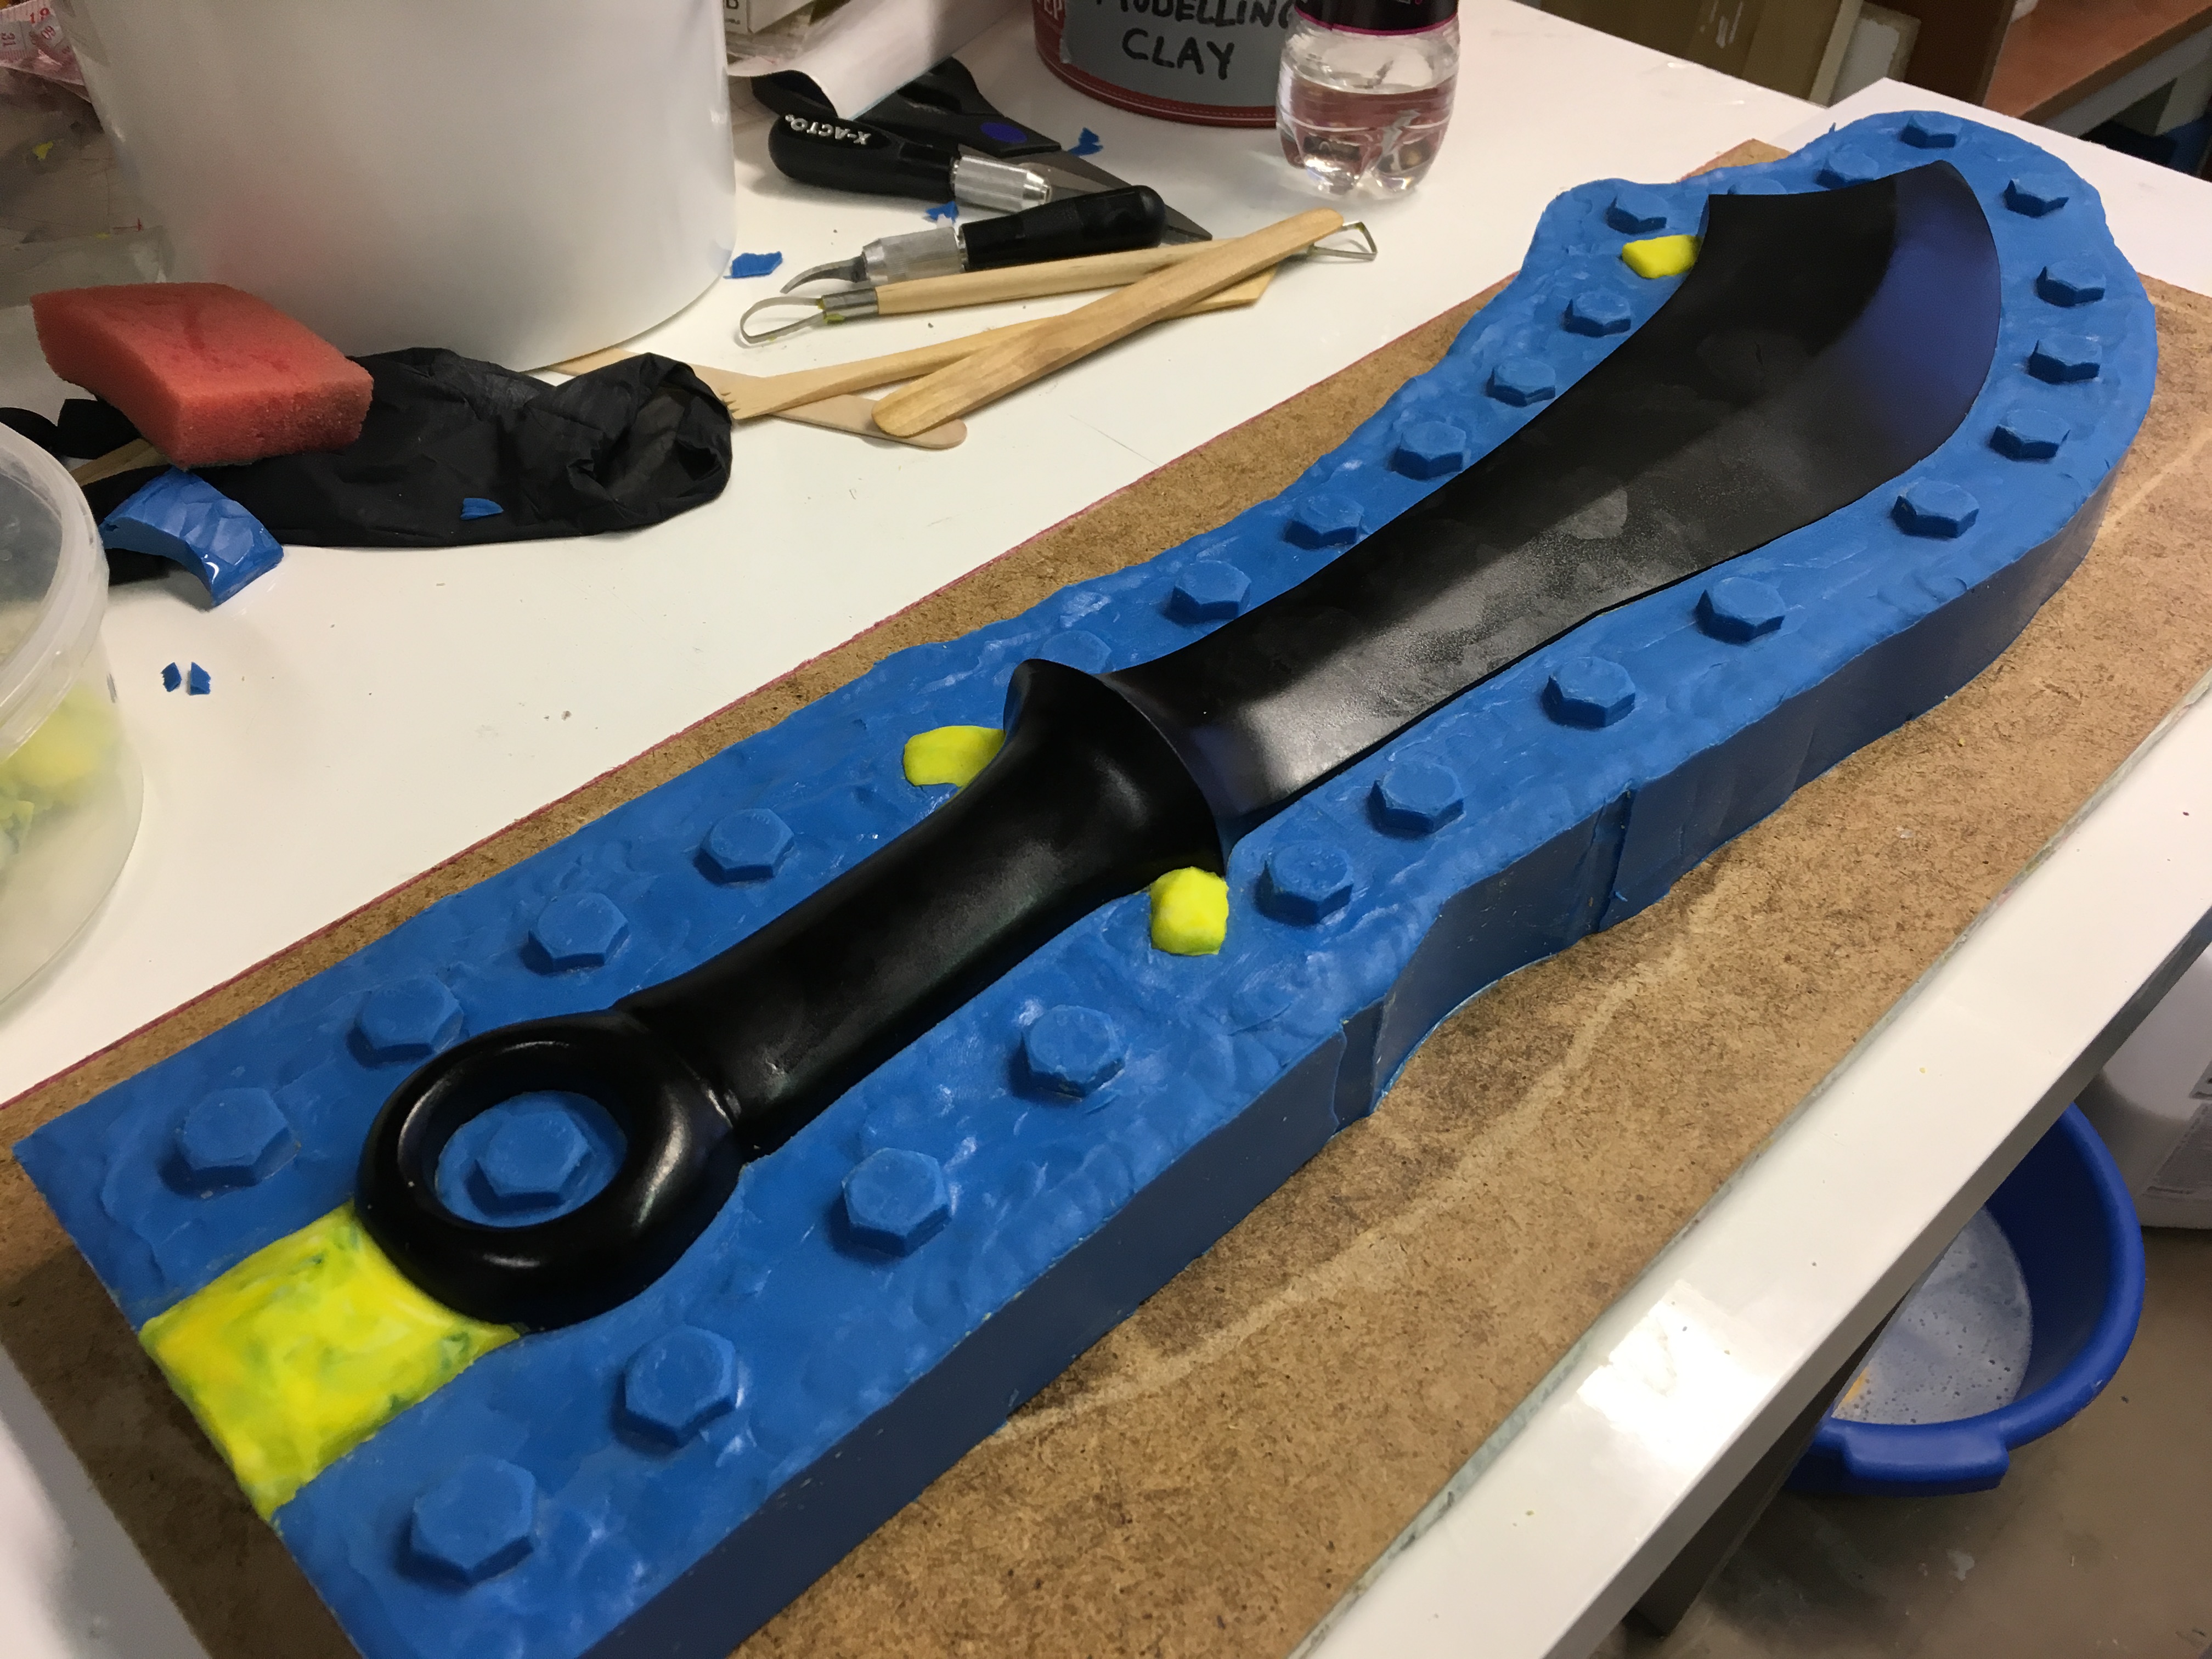
Let’s have a little peek at the anatomy of this mould box here and explore some money-saving tricks! The straight parts near the handle are simple MDF board with laminate on one side to keep things from sticking to its porous surface. The wiggly parts all around the blade are flexible plastic sheet. The upside of using this sort of sheet, is that I can make it the shape that I need instead of one big rectangle every time. This saves money on silicone.
The downside of using the flexible sheet is that it takes longer to set up and it’s more fiddly. It also takes more hot glue to stick together and fill gaps. The wooden sticks you see are there to keep the plastic sheet at a 90 degree angle so the two halves of the mould will actually line up. The wire that stretches across the width of the box in three places helps those six reinforcement sticks from bowing outward when the weight of the silicone starts to push on the walls as it’s poured in.
If you choose to use this method of moulding, take a moment to consider how much you charge (or would charge) customers for your time per hour. Think about how long it will take to get the mould box the way you want it. How much will that time cost? Now compare that to the price of the silicone you will be saving by shaping the mould box more closely to the object you’re moulding. Which will be cheaper?
In this case, I saved approximately 100 euros of silicone. Since I charge 10 euros per hour for my time, and it took me less than 10 hours to fiddle with the mould box, I saved money by using the plastic sheets. Your results may be different, so it’s worthwhile to check!

Back to the pictuuuuures! Here’s the crazy silicone sandwich we all have come to know and love. I’m proud to say I didn’t have any leaks throughout the entire process. Gosh I’ve come a long way from where I began. It seems like only yesterday I —
… you know what, nevermind. Let’s go back to the pictures. Shush.
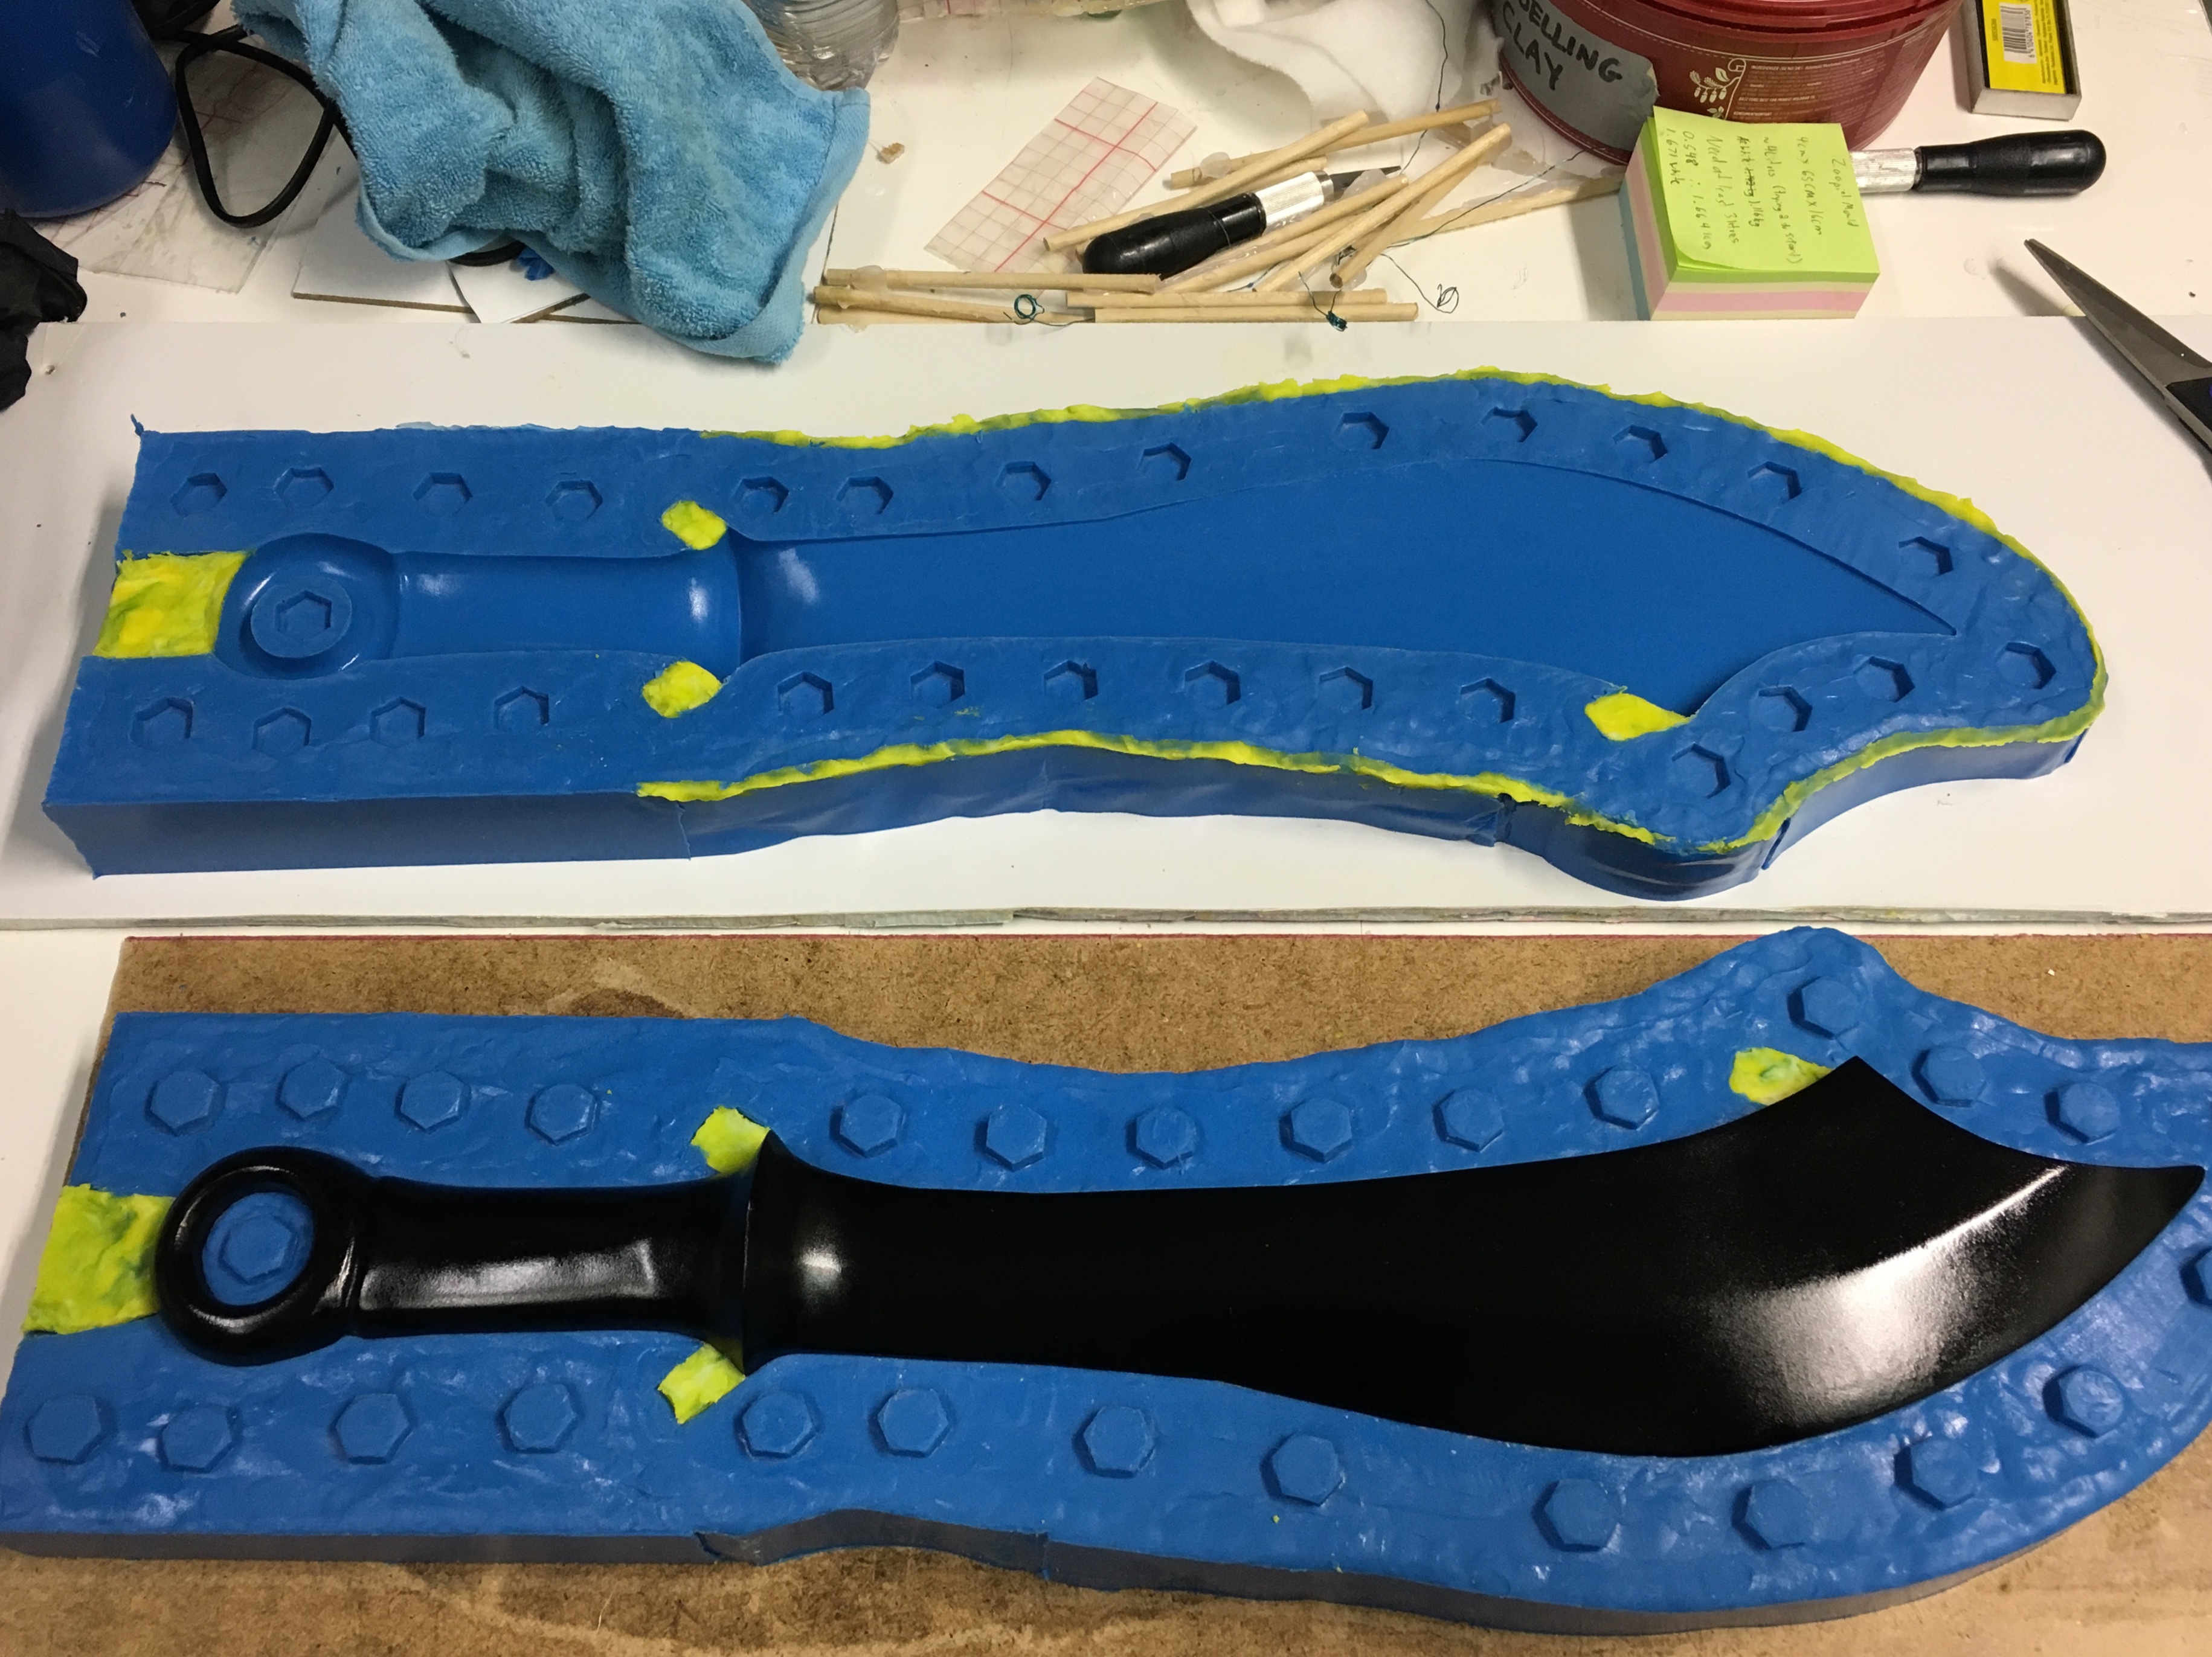
It’s a win! Two beautiful, bubble-free halves of a sword mould. I cannot wait to get resin into this baby and see what it can do. Will my new bubble-trap design work? Is everything truly straight and perfect? I don’t know! We’ll have to find out when I get my new vacuum pump so I can degas the resin properly. No skipping steps! That’s the way to get a crappy result.
Now, I mentioned birds in the title didn’t I? What was that all about? Well! I’m ready to reveal to you the beginnings of a new project. It has nothing to do with Shadowhunters. (*gasp!* I know. It’s crazy isn’t it?) This new project that I’ve been so secretive about is part of a creative vision that has deep personal meaning to me. I hope to share this dream with you so we can all enjoy it together.
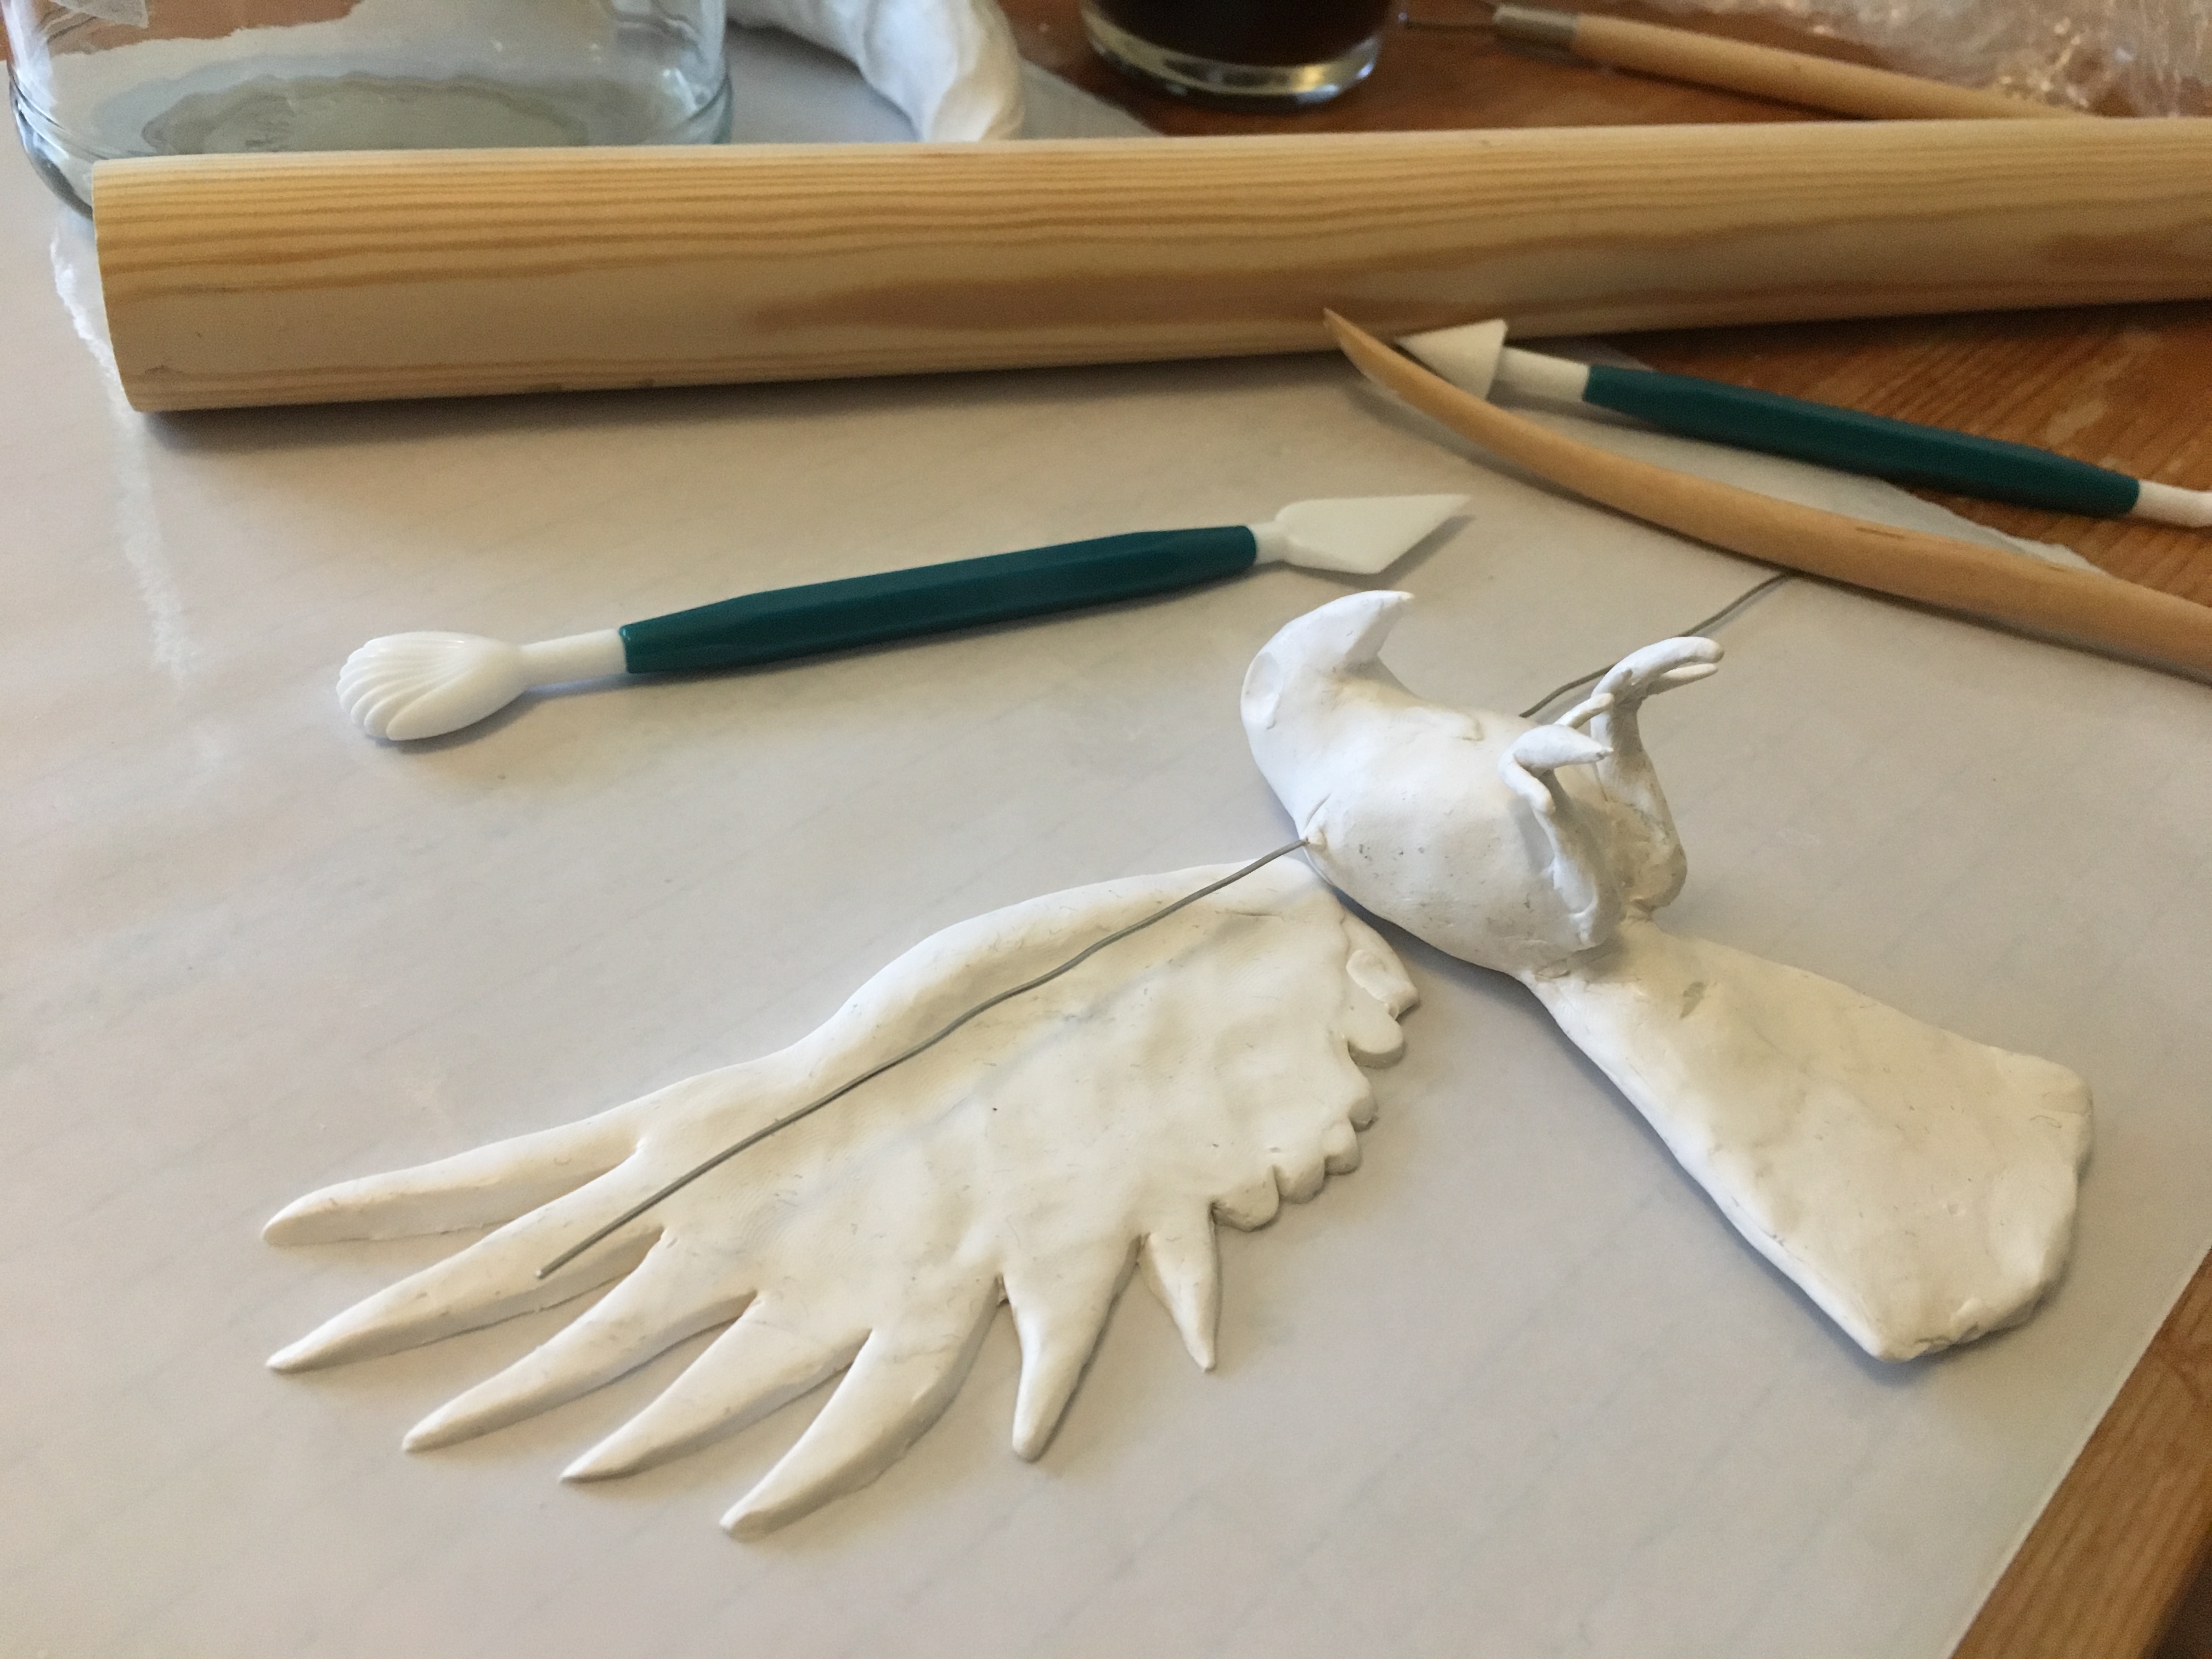
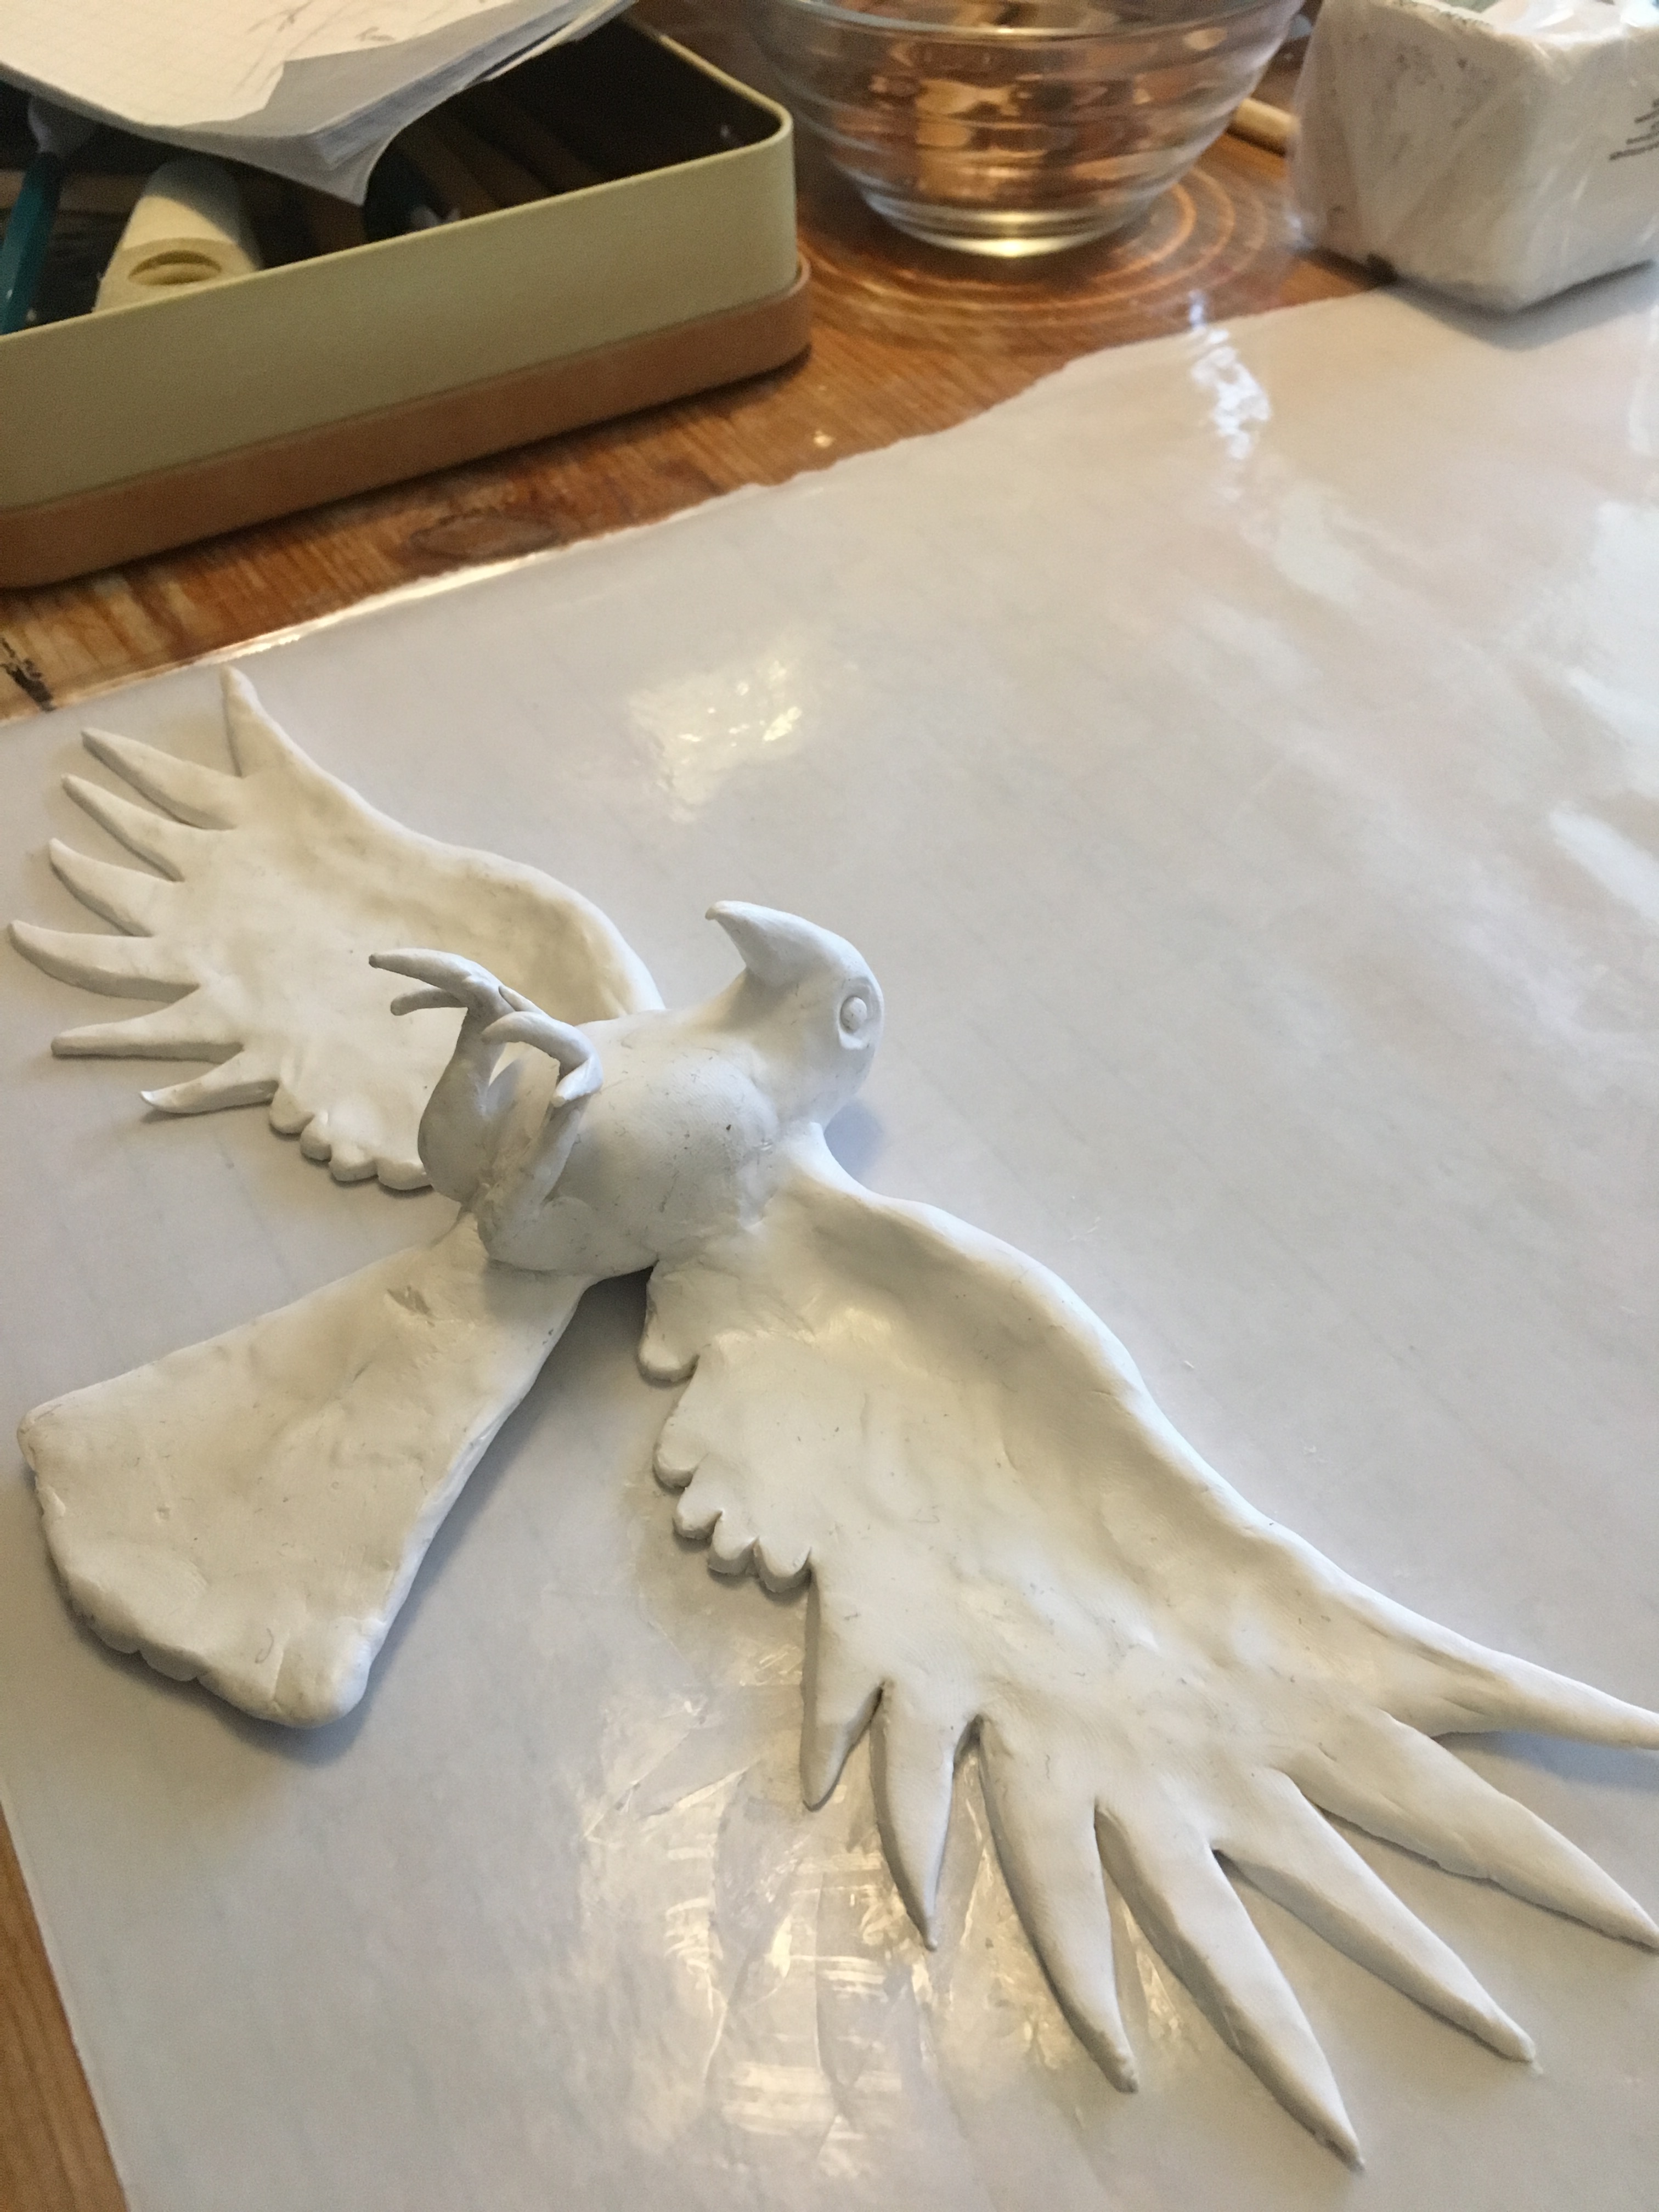

If you guessed “raven” you are correct! This bird is fully baked now so the clay is hard. It still requires a lot of detail work, smoothing, and tinkering, but I had to render the clay stiff enough to support my sculpting tools fixing and fussing around on it without getting bent out of shape. The rest of the shaping will be done with either an air-dry clay or Milliput. I haven’t decided yet.
This project has a long way to go still, I hope you’ll stay tuned for its evolution. Until next time, wish me luck!
Share this:

It’s Goo Time
No that wasn’t a typo. Goo! Sticky slorpy blue goo! It is time to pour silicone all over this beauty!
When you see something halfway buried in clay, you know the wacky wizardry is about to begin.

So right now I have Zaapiel sitting in its mould box (which I didn’t take a picture of because I was dead tired at the end of the day on Friday) awaiting my arrival this morning.

What else is afoot at the workshop? Well, I found a few DIY recipes for air-dry paper clay that I’m dying to try out. If it goes well, I’ll have a supply of much cheaper self-hardening clay I can use to sculpt my prototypes instead of using foam insulation. Foam insulation is not very good for the environment and is also annoyingly porous so it has to be sealed over and over again with layers of glue and paint before I can actually take a prototype mould of it. It’d be great if I didn’t have to do that! Let’s see if I can find those recipes for you and maybe we can try it together.
Yaaay! Let’s go get messy!
Share this:

Clariel is On Sale for Christmas!


I have two crystal-clear, LED-equipped Seraph Blades in my Etsy shop for only 370 Euros each! Is one of them for you? Regular price is 415 Euros so if you want reaaaally want one, this is your best chance.
Share this:

A Fine Mess Indeed!

No really, I’m quite pleased with myself. It is a gigantic mess and I have a lot of cleaning up to do in the workshop today, but this mess has resulted in a major breakthrough. This post marks the sum of months of trial and error, experimentation, swearing, epic messes, and more money than I’d like to admit. I’ve finally gotten something worthwhile out of it all. Let me share my joy with you!
Remember I was making the mould for the prototype of Zaapiel, that fancy Arabian Nights sword? Yesss, I got both halves of that mould completed. I made the mould out of alginate (a moulding compound that is essentially … well … algae), with a coating of wax in between to make 100% sure the sides wouldn’t stick to each other.
Which just might make it the grossest sandwich ever. It smells like washed-up seaweed.
Now, the thing you have to know about alginate is that it’s only good as long as it’s moist. Once it starts drying out, it gets crumbly and it’s not much use for casting anymore. So you have to work quickly and if you’ve got to do the mould in multiple stages or something happens and you have to use it later than you intended, you have to protect it from evaporating off its moisture. Most people put it in a sealed container in the fridge. This … this is way too big for a conventional fridge or normal food container. I improvised with a combination of wax and wet plastic wrap. It was an ugly hack job, but it worked.

Snazzy! Algnate is nice and soft, kinda like tofu in texture. So it’s easy to cut the sprue and the air traps in it. The downside is you have to be gentle when handling it or it will crack or rip easily!
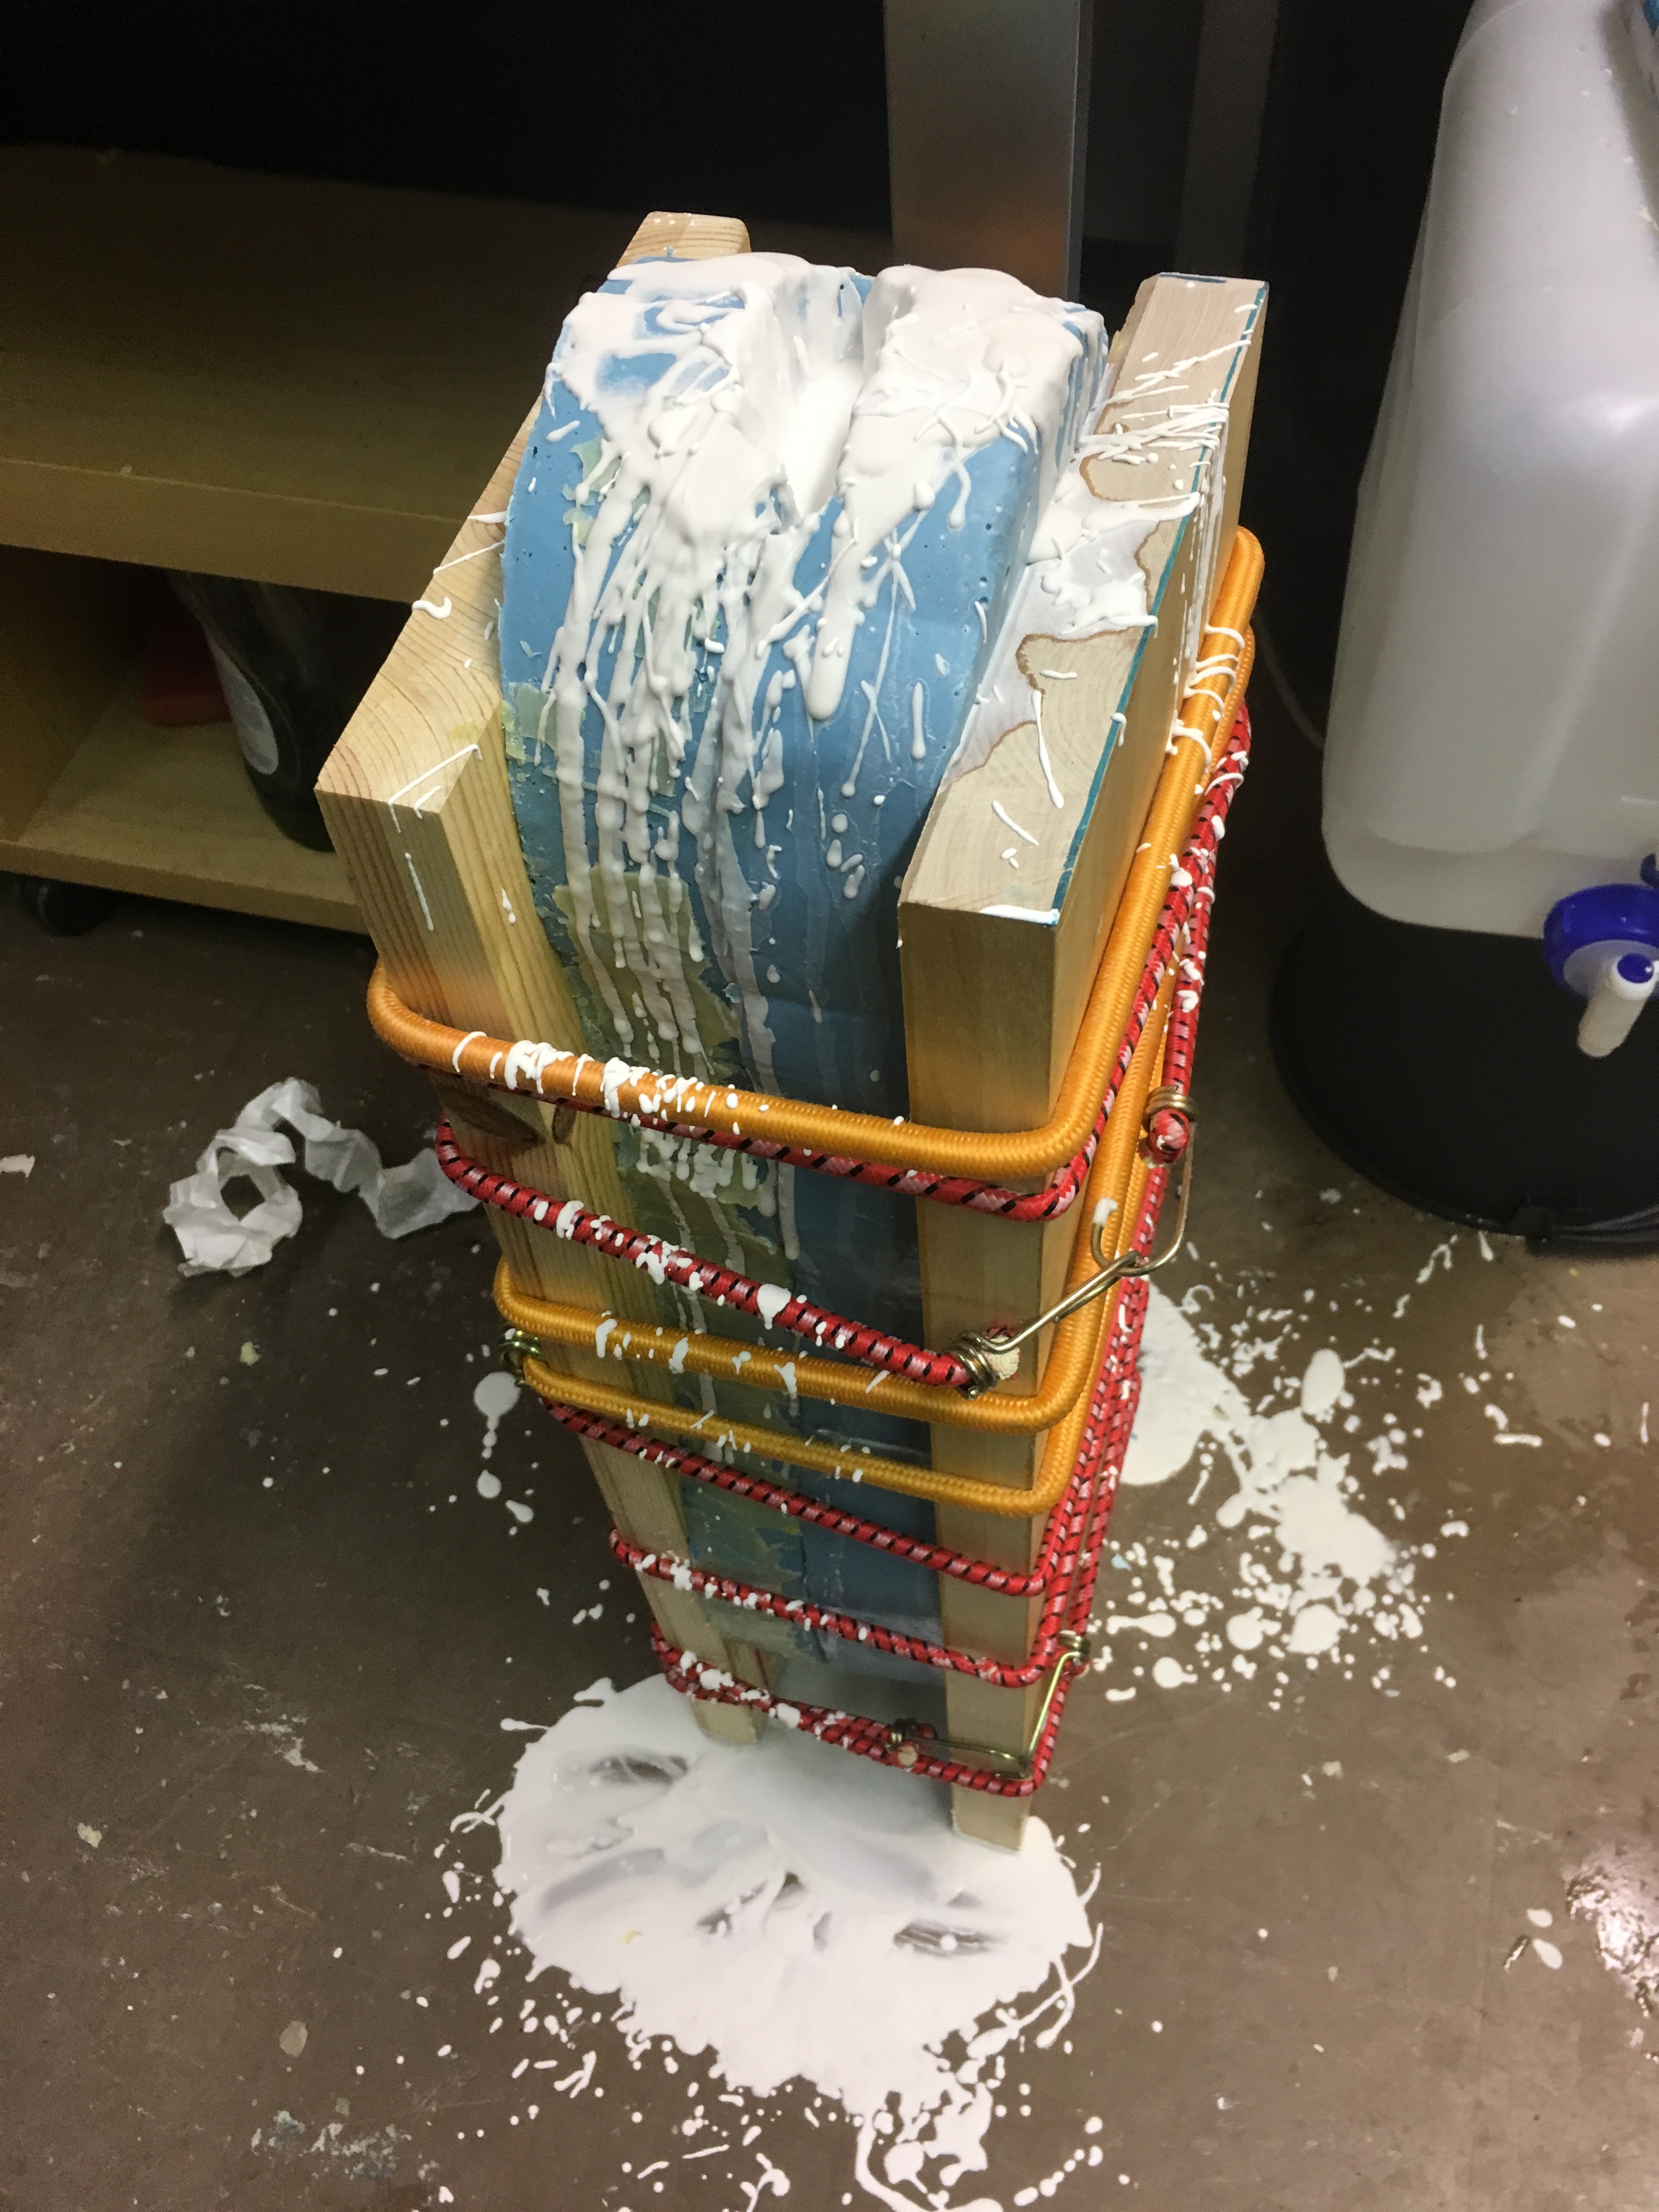
So! I cleaned off all the wax as best I could, put both halves together and strapped it between two wooden boards. Then I mixed up a batch of Artestone (a special gypsum plaster with hydrophobic properties) and poured it into the mould. And that’s when the mess happened.
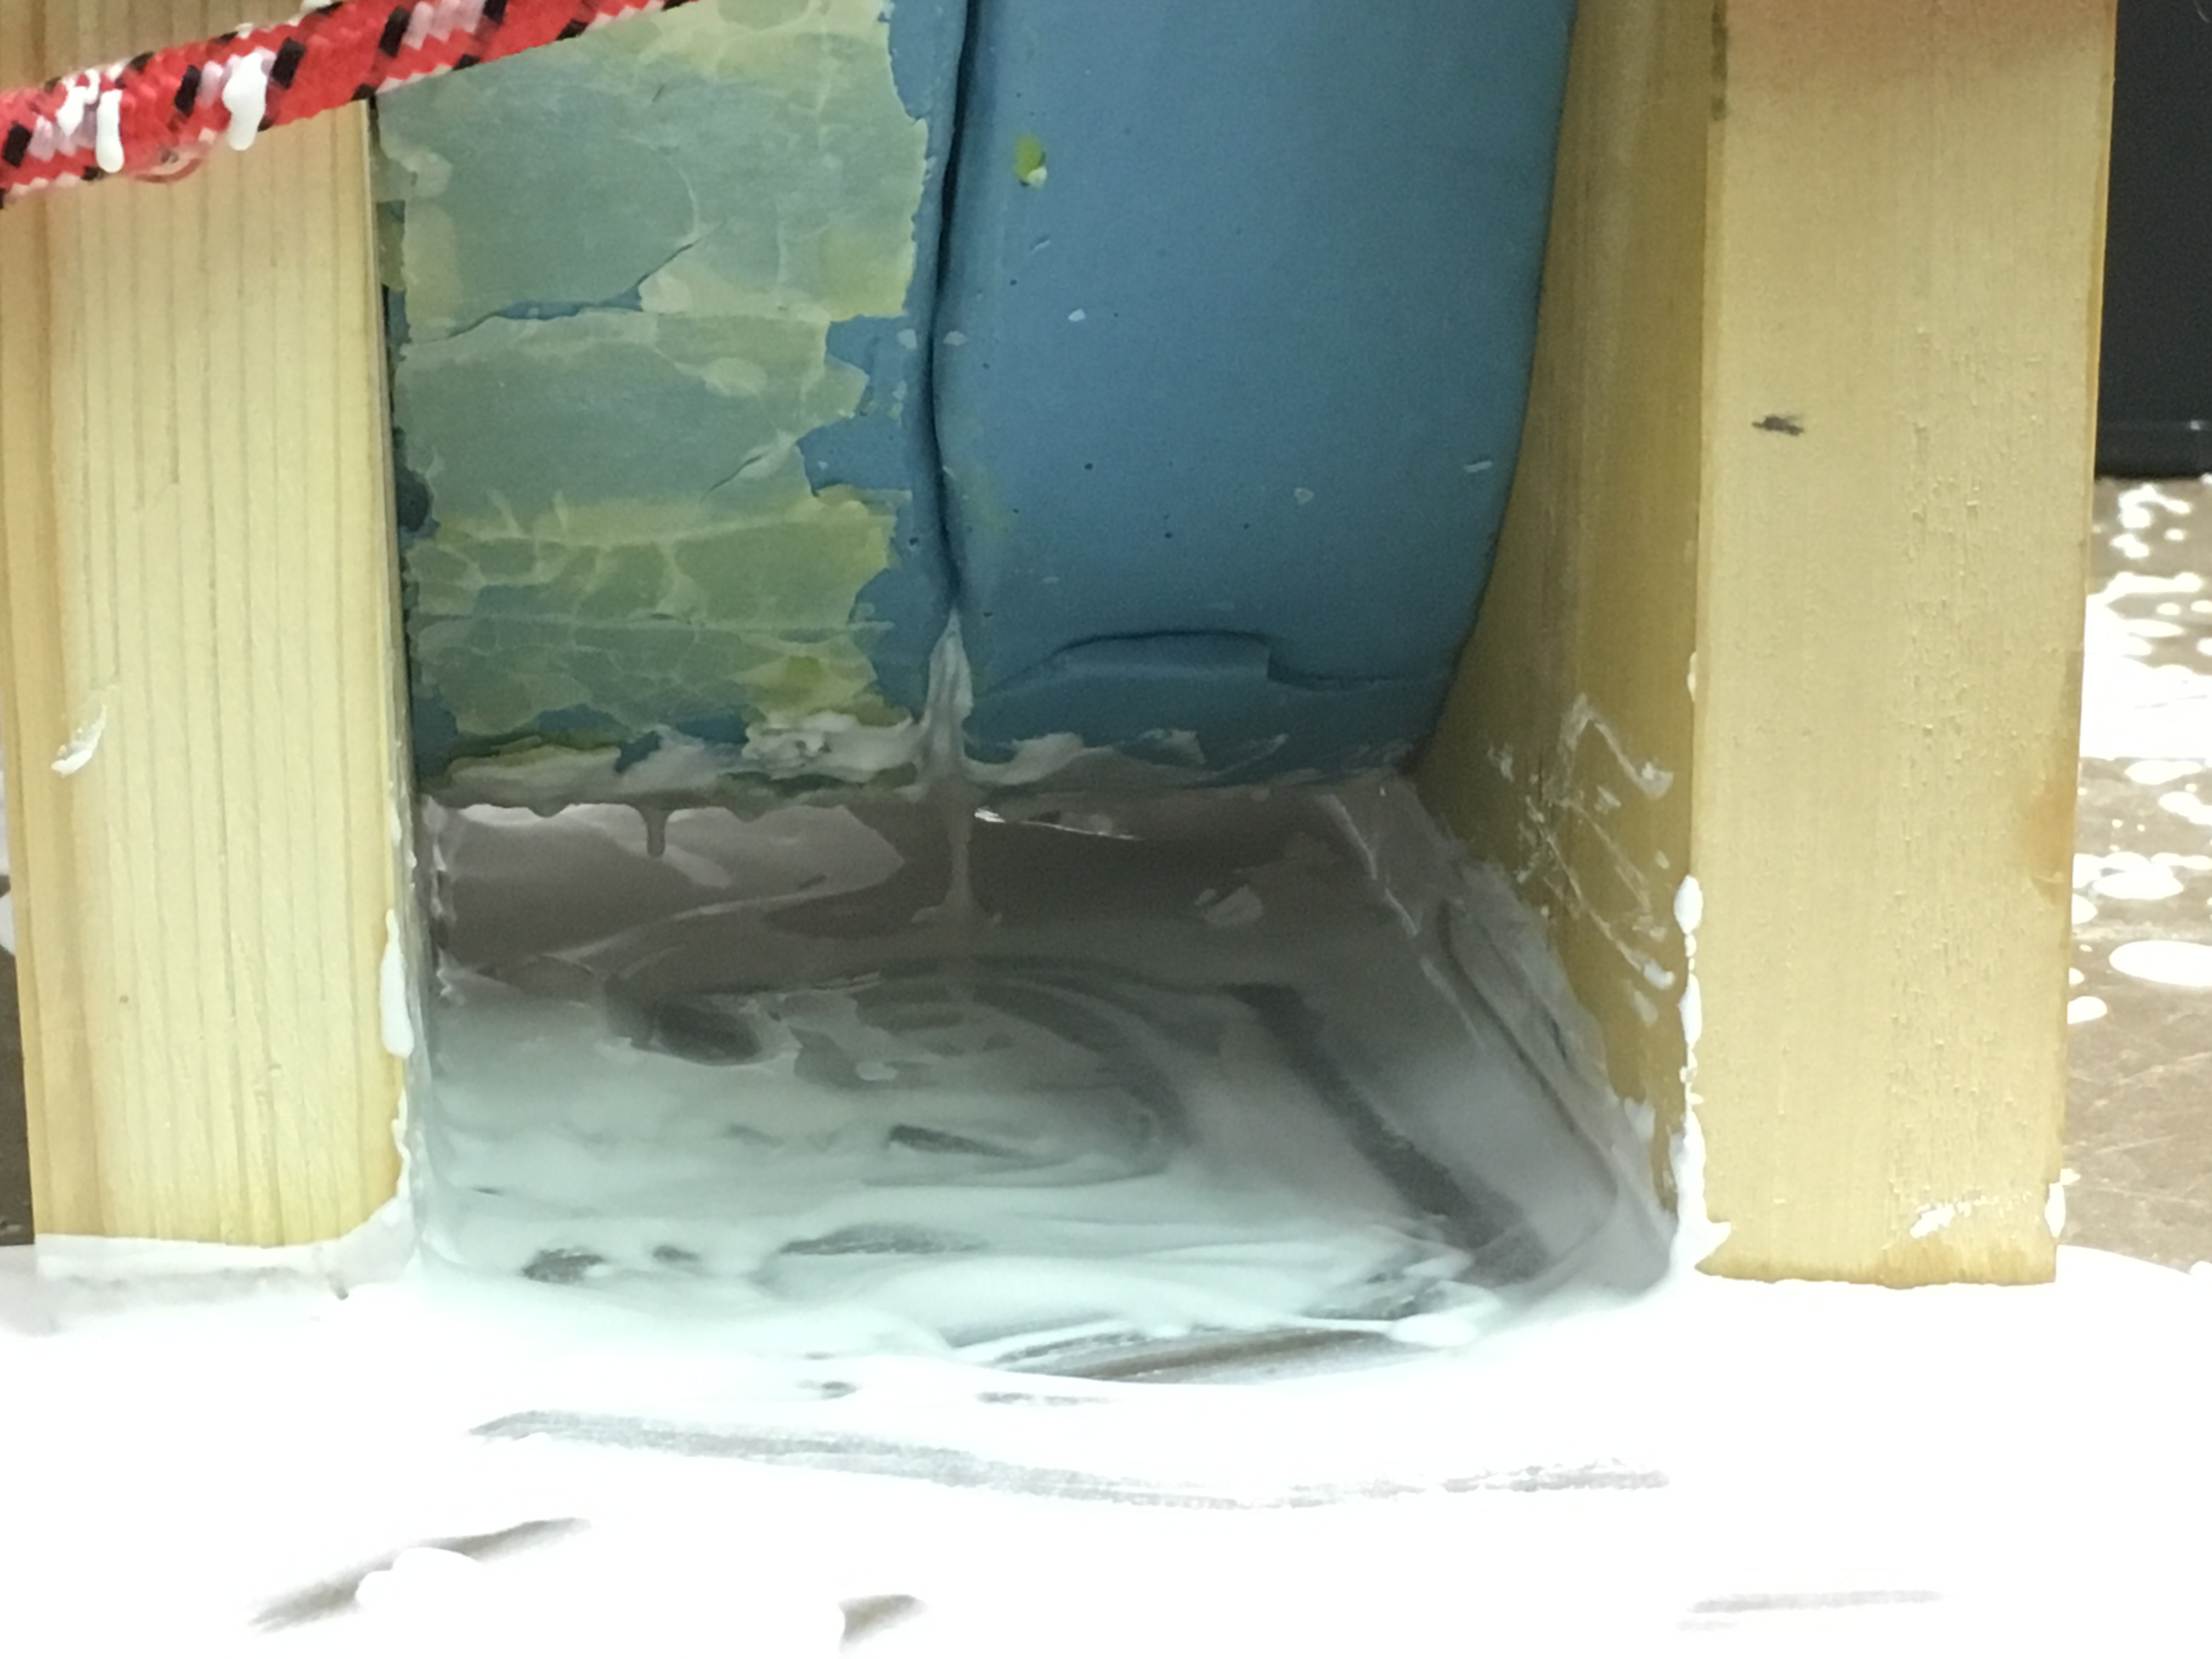
A puddle of white began expanding from beneath the mould and I realised that there was a leak. I had a problem. I couldn’t just stop the whole thing and open up the mould at this point because then all the plaster would pour out onto the floor and I’d have wasted the whole thing. So all I could do was grab the closest thing at hand–a large stirring spoon–and frantically scoop the goo back into the mould until it hardened enough to stop pouring out.
There I was, on the floor, scuttling like a crab from the back of the mould to the front of the mould back and forth, scooping at the puddle expanding on either side of it with a spoon of all things. A stream of plaster coming out of the mould, a stream of profanity coming out of me, and by the time the goo hardened enough to form a seal and stop going everywhere, I was laughing my head off. Really what else can you do at that point?
Seriously, it looks like I got bombarded by a gigantic seagull who ate way too much curry. I had to mix up about 200mL more artestone to replace what was lost out the bottom, but I did manage to complete that pour with no further disasters. My neighbour probably thinks I’m insane now. … He’s probably right. LOL!

Now this looks blobby and weird right now but that is completely what I expected it to be. What I need this prototype sword to be is roughly the right shape and a little larger and chubbier than the finished product is going to be. This is so I can do all the final shaping, sanding, and polishing without it ending up too thin or shorter than I wanted. Basically: It’s way easier to sand things off than it is to add things on. So this baby gave me exactly what I wanted. Woohoo!
That was an adventure!
I am sad to report, though, that we had one casualty during this adventure. One of the straps on my protective face mask broke. That’s the third breakage I’ve had on this mask and there isn’t enough strap left to cobble it back together so I have to replace the strap entirely. That’s going to take a little time that I’d really rather be spending on crafting. But it needs to be in proper working order because there is NO way I am sanding any of the materials I work with without respiratory protection.
Safety gear is NOT optional!

So! If anybody needs me, I’ll be scraping uhhh … 300ish mL of extra-hard water resistant plaster off the floor! 😀 … Pray for me. LOL
Share this:

Wow So Much Stuff to Tell You!

Yep! I’m keeping my Clariel swords on sale for Cyber Monday. Was 415.00 Euros, now 390.00!
What else have we got going on for this week? Well I’ve got an open-house coming up on Friday. That means I have to tidy my workshop. Yey. Uh, wish me luck on that. LOL But I’ll be super happy to see people and show them my little corner of crazy!
If you’re interested and you happen to be in Finland this week, you can stop by at Sahaajankatu 22, Helsinki and ask for me. Liisa will show you where to go. The building is a bit of a maze.
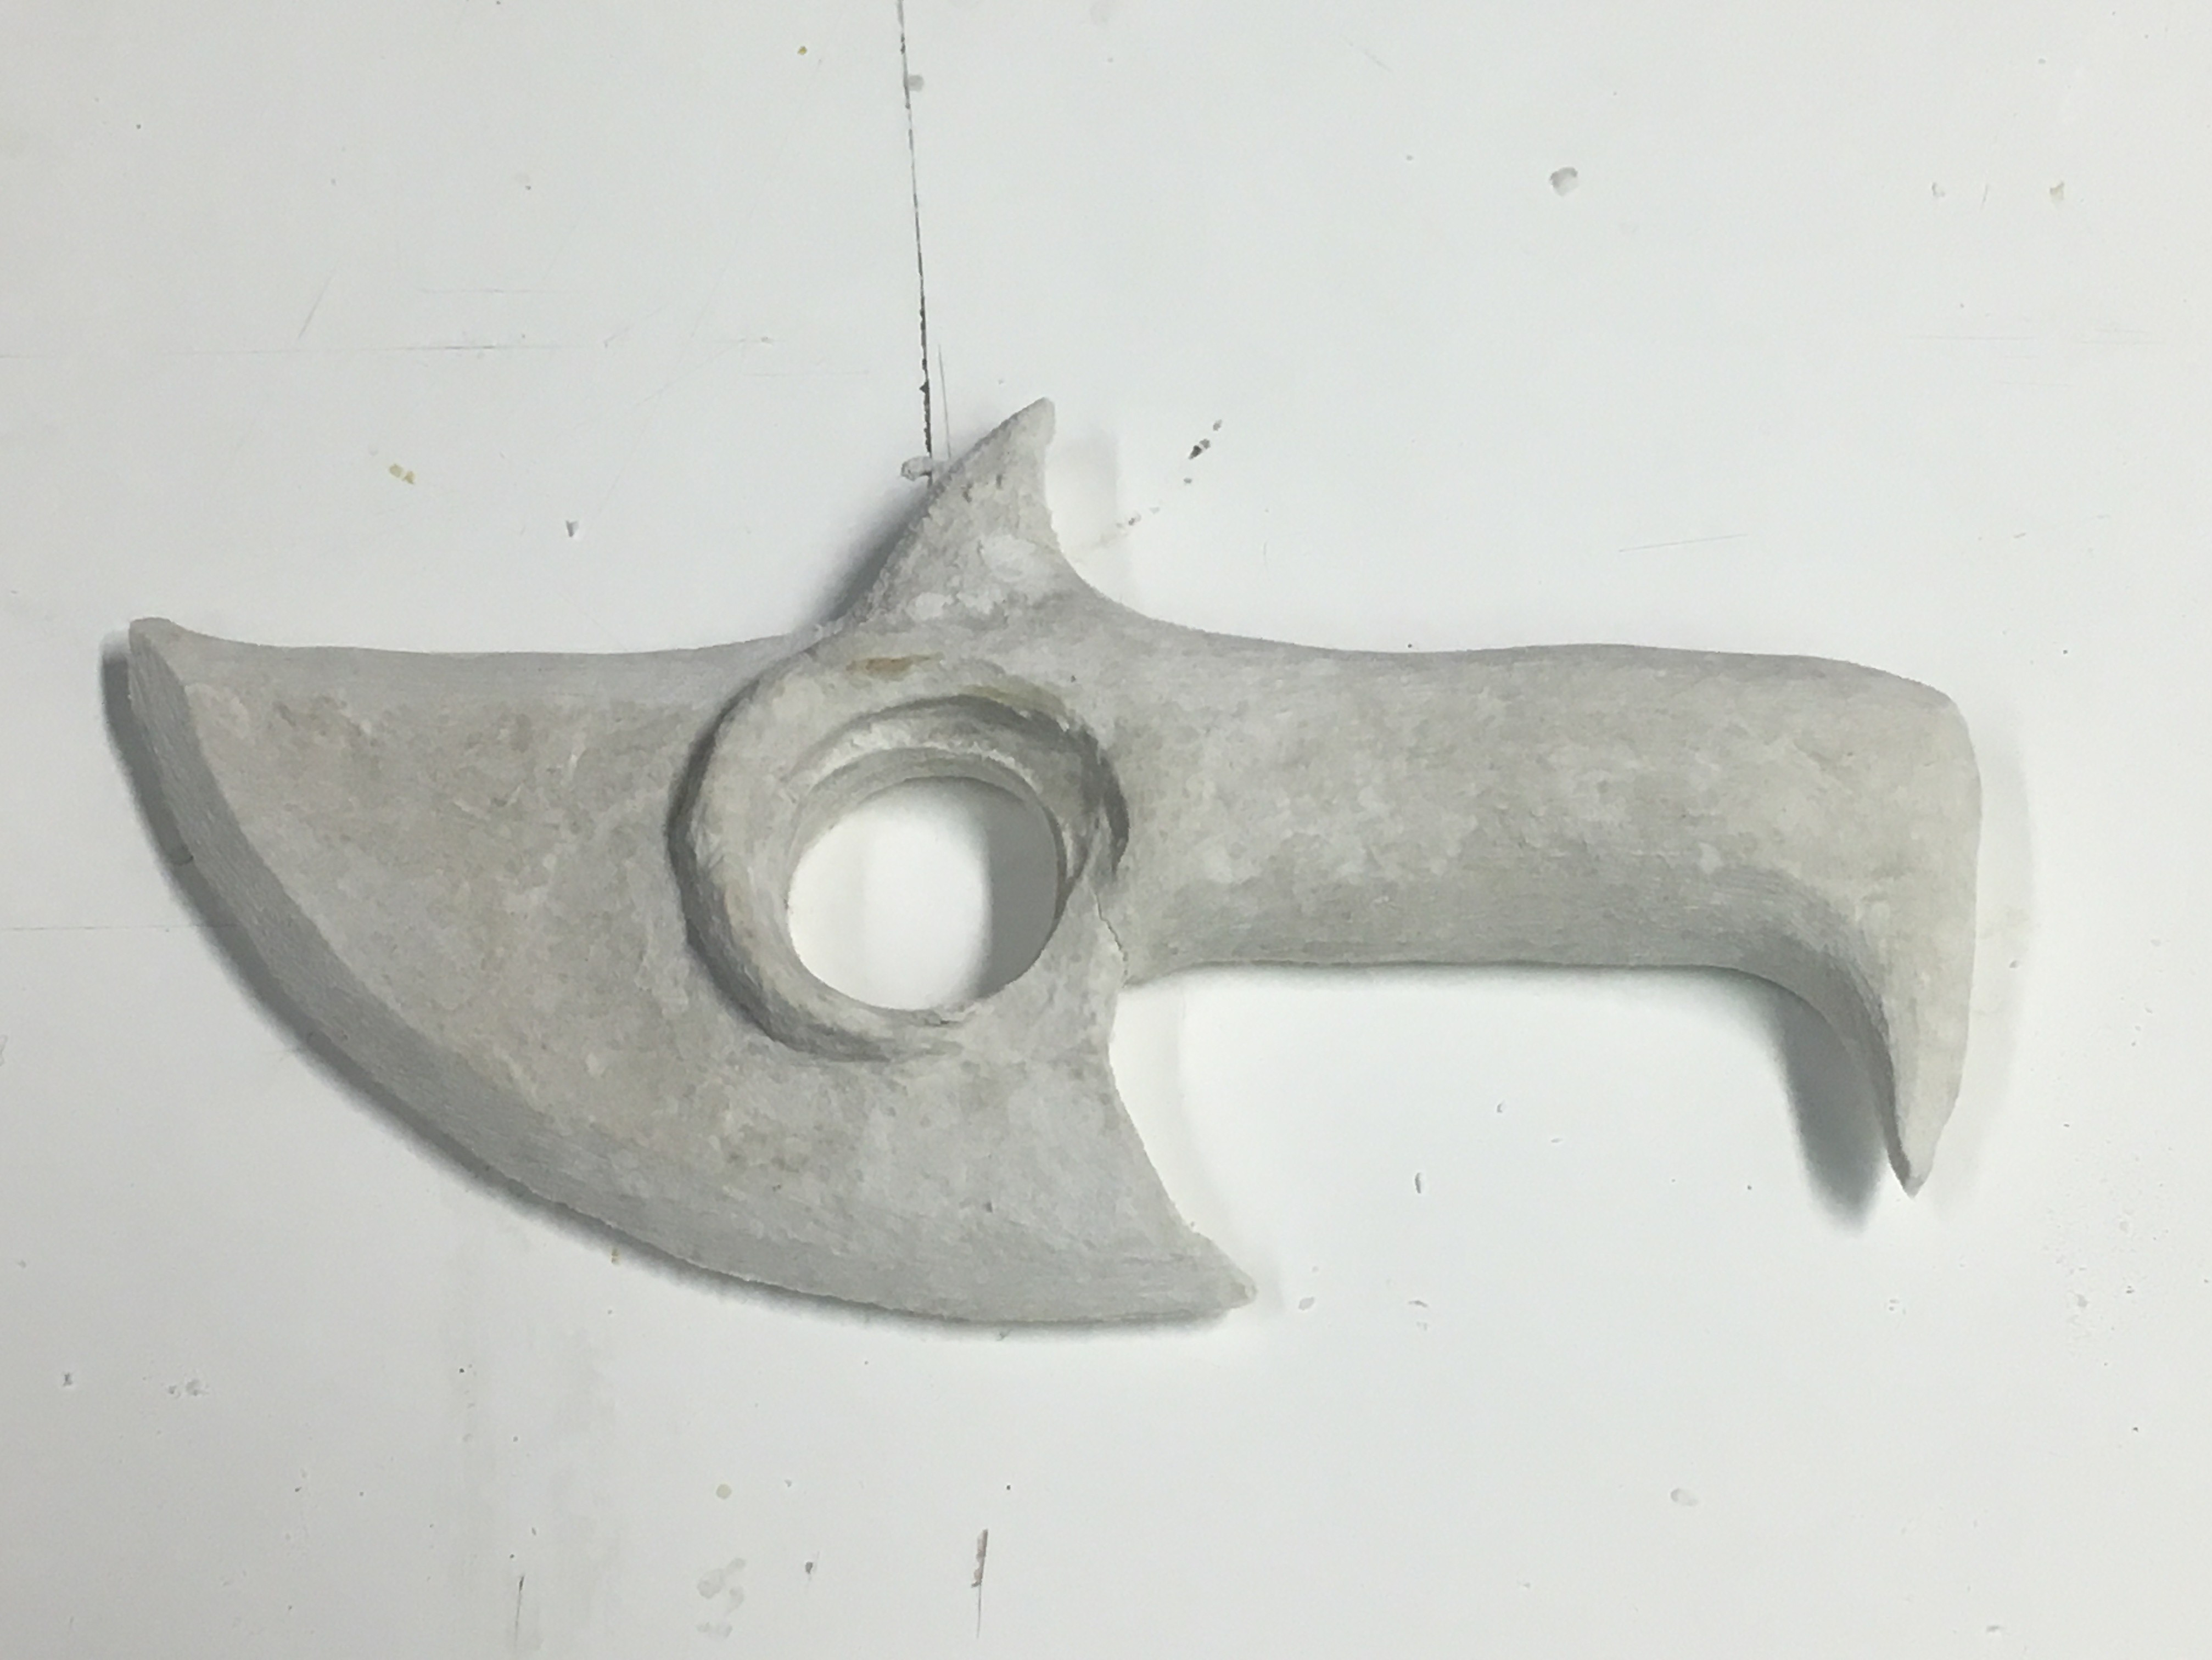
What else is going on this week? Well here we have the newly re-carved Sariel. RE-carved because the experimental prototype moulding process failed and destroyed my original. I may have cried. Shush you! That was three weeks of work. *sulking*
But before Sariel can be moulded again, we haaaaave …
No, it’s not cake. Don’t eat it! Ew. Plasticine doesn’t taste good. Neither does foam insulation. Or glue. Don’t ask how I know these things. All I will tell you is wash the plate before you eat off of it.
Now what happened to the doll heads? Did the shipment get found? It did! Annnd it seems there were a few too many micro-bubbles and sanding mistakes to sell them. *gasp!* Ethan don’t tell them that! Your customers will lose faith in you and think you’re a crappy artist!

Listen guys, my business is small and new, but even so I want to start it off right. I want every part of Inkblade Studios to be ethical. I am constantly working to reduce waste and find environmentally friendly materials to use. I have to haul my plastic waste to the recycling facility myself every week but I do it because I have a responsibility as a manufacturer to clean up the mess I make.
I want my business to be based on a principle of honesty. When I screw up, I will tell you I screwed up, and I will tell you how I am going to fix it. I could cover my mistakes with paint and glue and hope you don’t notice but you know what? That’s not the kind of person I want to be. Lazy and sleazy business practices end up costing more in the long run. You can recover lost money, but you cannot recover a lost reputation.
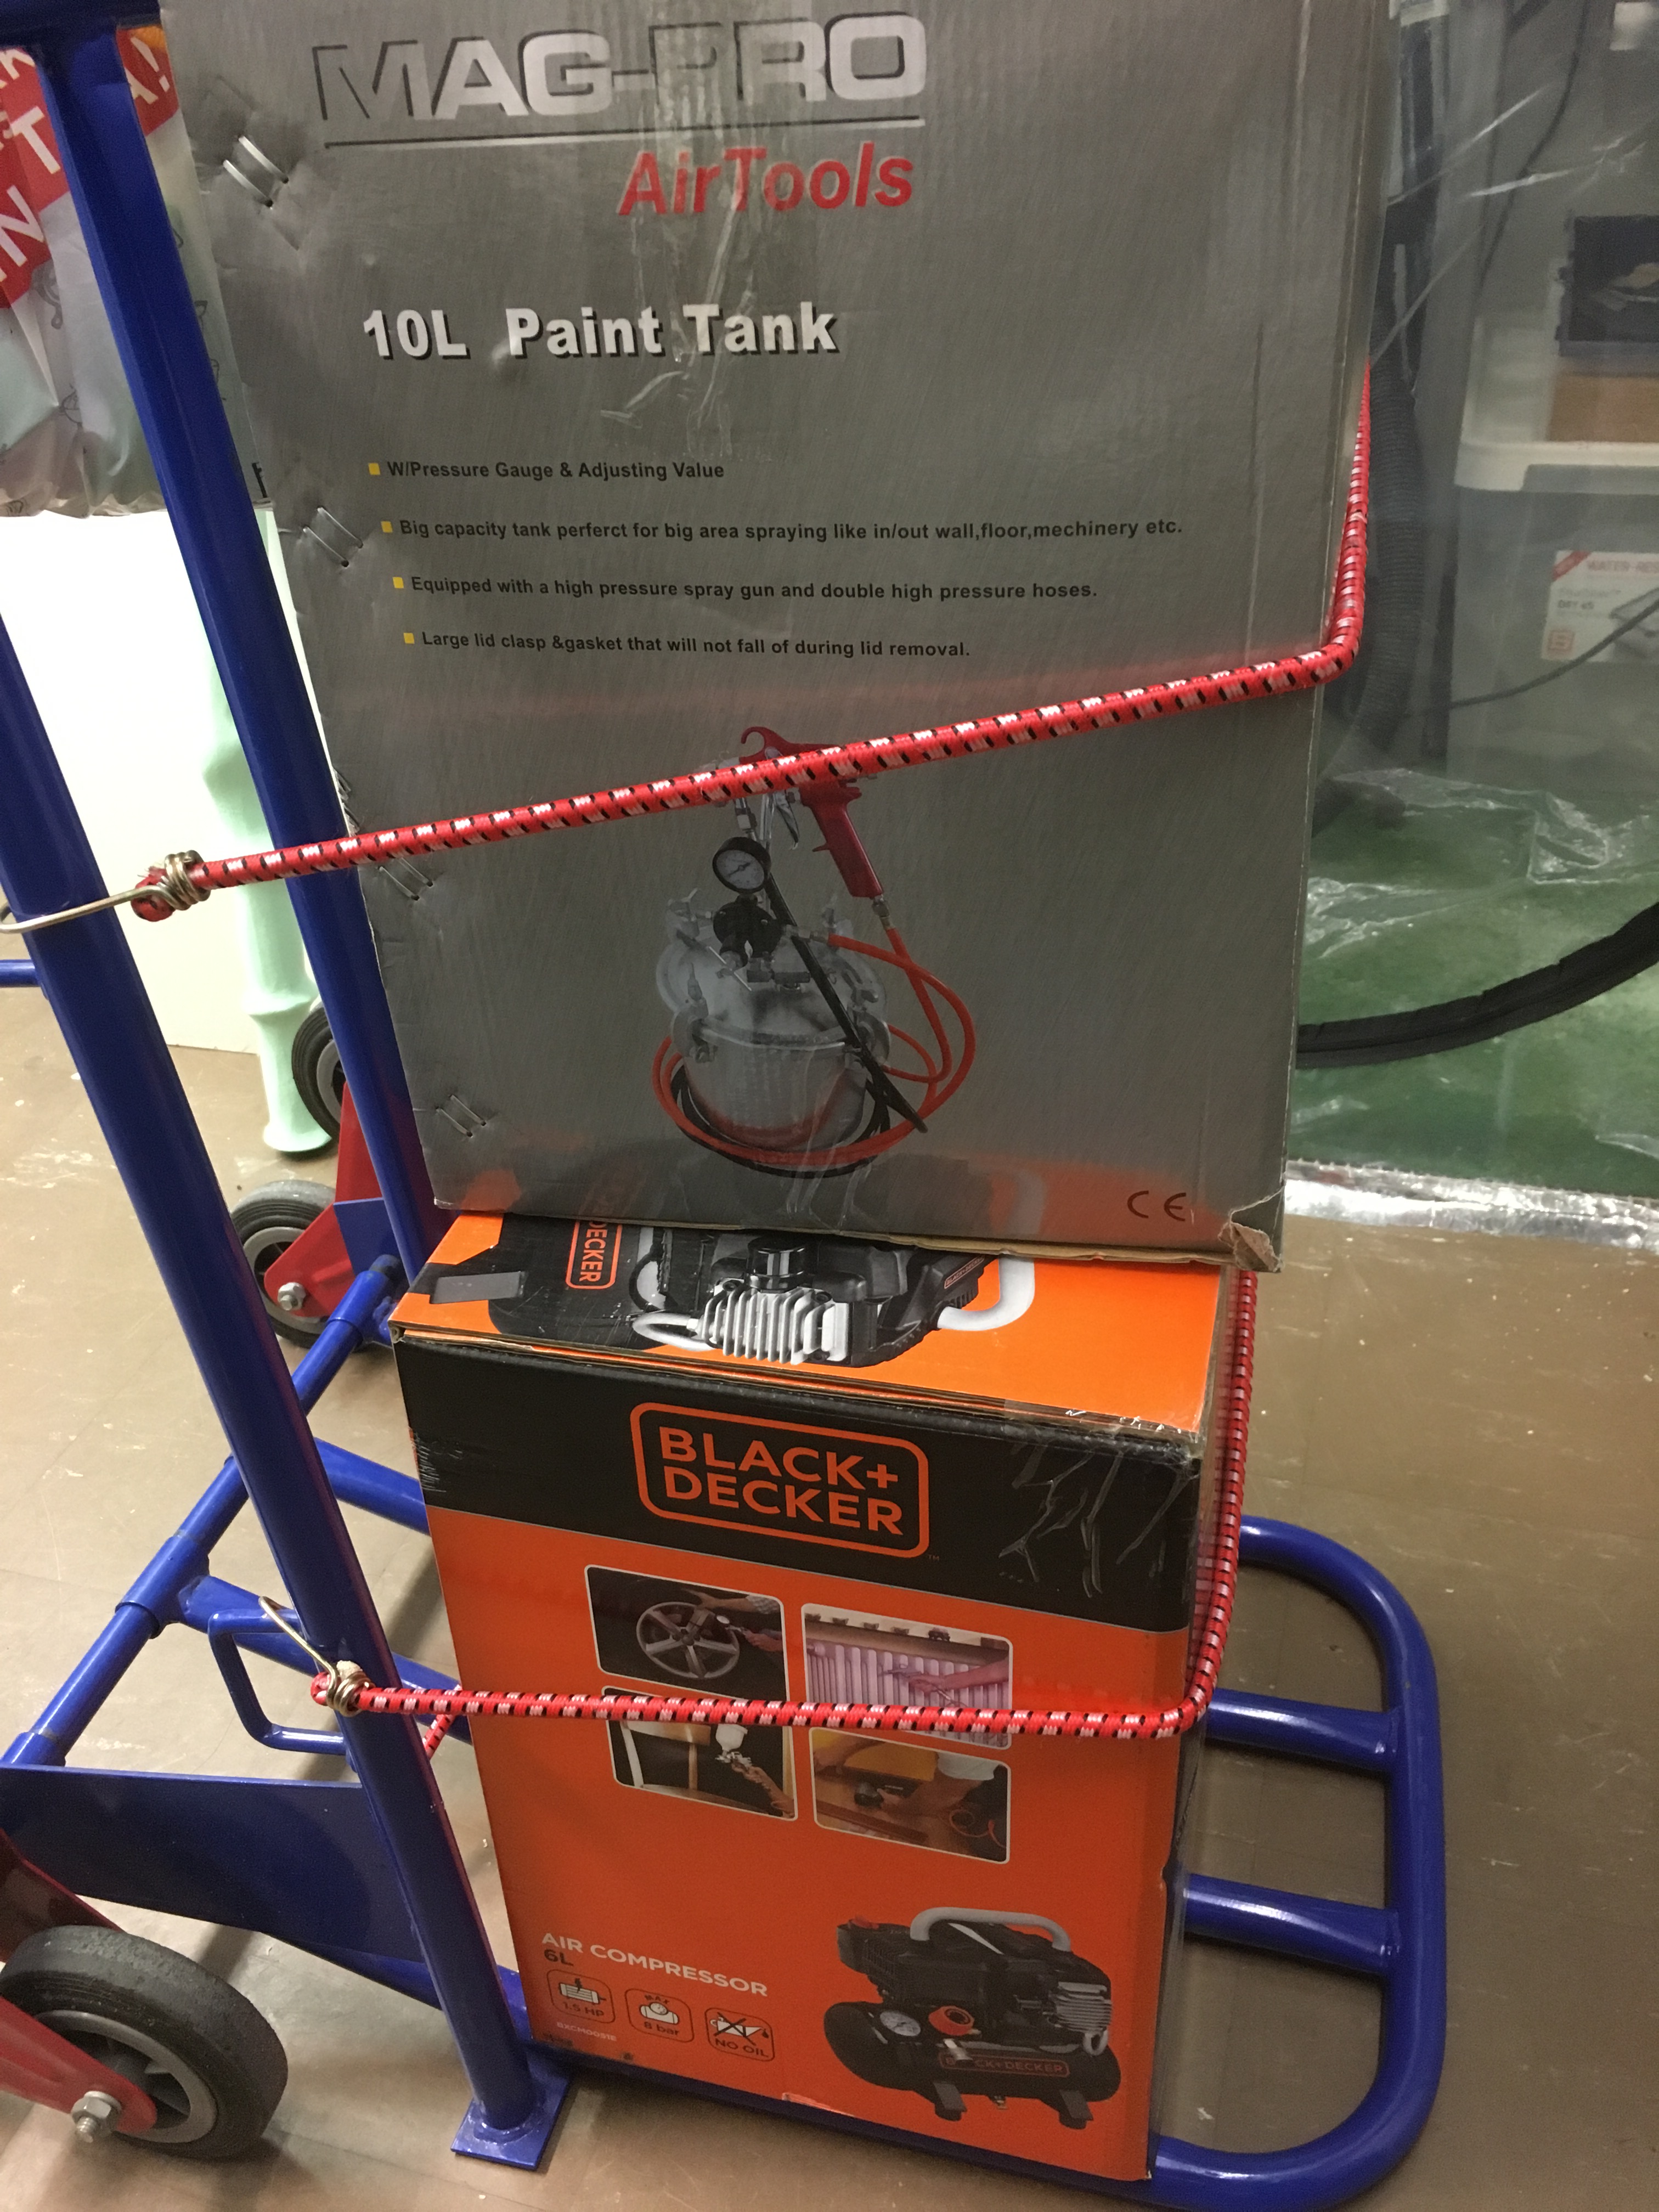
Thankfully, Juliane at Lost Chronicles BJD has been amazingly understanding and kind. We knew from the beginning that this would be a learning experience and that learning experiences are often frustrating. I’m issuing a full refund for the project, and I have bought a brand new compressor and pressure pot.
Unlike a vacuum chamber which pulls air bubbles out of a liquid, a pressure chamber crushes the air bubbles down so small that they can’t be seen by the human eye. This makes a lovely smooth, clear cast. It also forces the resin into all the little small areas and undercuts so that air doesn’t get trapped and end up getting a giant bubble where the nose is supposed to be for example.
The Malechai project taught me that I need this kind of tool now in order to step up my game. I wanted to wait because I knew it would be expensive, but it turns out that not having it cost me more money in the long run. It was a costly lesson to learn but I’m grateful for it. This is not the end of my doll making career, but just the beginning. I’m looking forward to creating more beautiful things and sharing them with you all. ❤
Wish me luck!

