Round Two: FIGHT!

I know, I know, I haven’t got any new pictures for you today. Bad Ethan! 😦 I was so busy getting the mould box reconstructed that I forgot to take a photo of it! I’ll make it up to you and take lots of photos of the process today. Forgive me?

I got my order of silicone in at the end of last week and I am ready to have a rematch with the half of the sword mould that cured too fast! Everybody cross your fingers, toes, and eyeballs for me and hopefully we’ll have a brand new mould ready to rock by tomorrow.

Are you excited? I’m terrified! Let’s go! ADVENTURE! 😀

I hate bubbles.

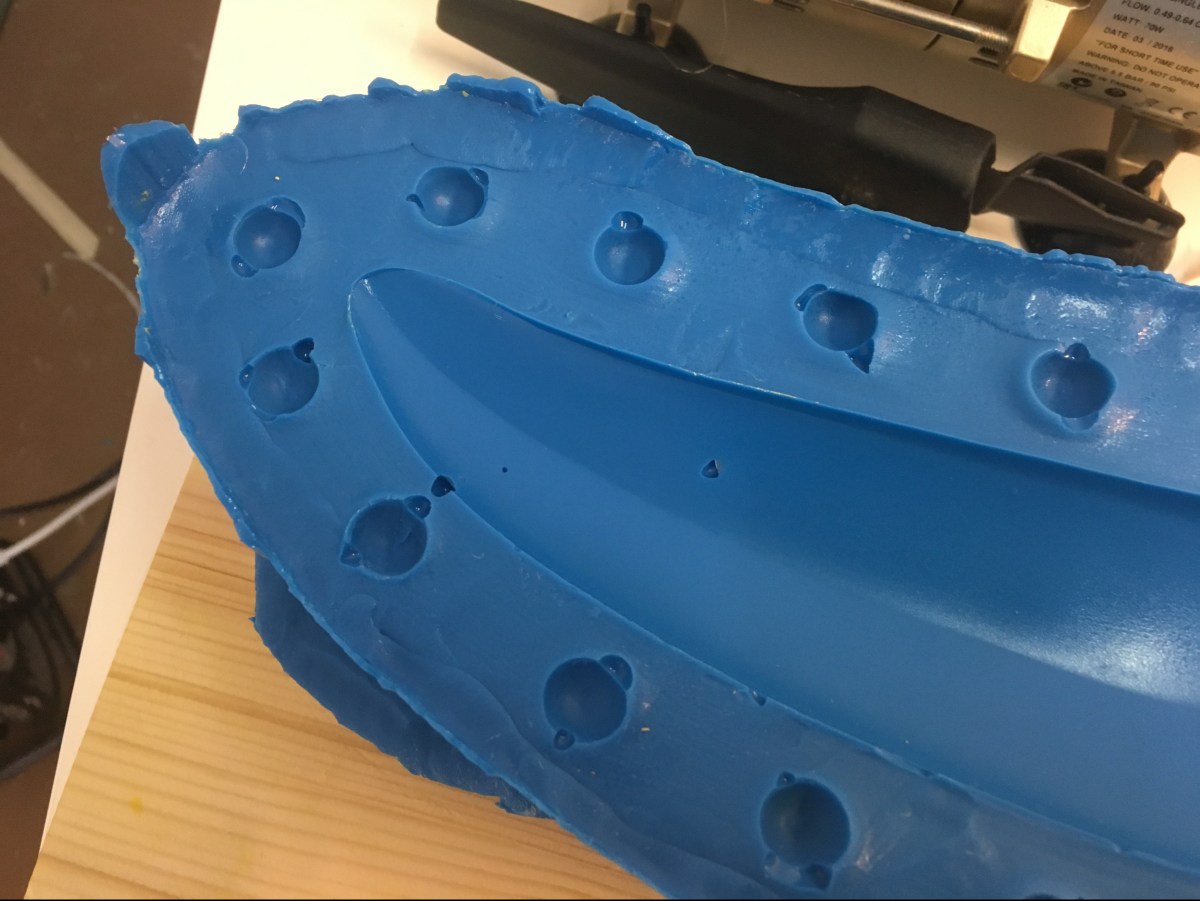
No really. They’re all well and good when you’re blowing them into the air on a sunny summer day, but when they’re in your mould? Sucktastic.

IMG_2642

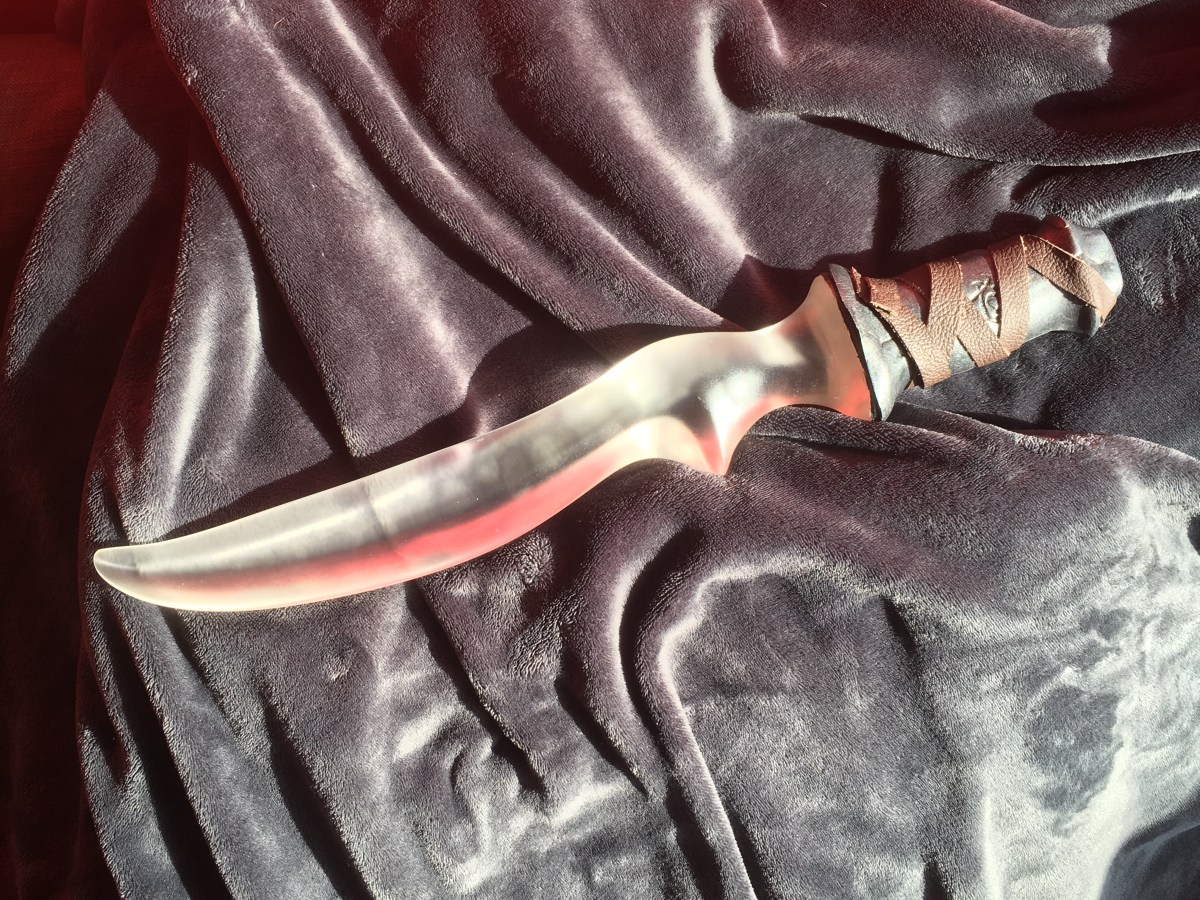
This will not produce a lovely smooth sword. This will produce a mostly lovely smooth sword with weird little warts all over it. Unacceptable.

IMG_2643

So why is it like this? What happened? Well, it turns out that my workshop was hotter last week than I thought it was. Zhermack’s beautiful ZA22 silicone’s normal working temperature is 24 degrees Celsius. That means that, at 24 degrees, this lovely blue goo will set in 60 minutes. If it’s colder than that, it will set more slowly giving you a longer working time. But if it’s hotter …

The setting time is dramatically faster! I was in the middle of degassing it when it started turning into a sticky glop the consistency of cookie dough. I knew I was in trouble. 3 litres of silicone is NOT cheap. I pulled it out of the vacuum chamber and poured it as fast as I could. It was sticking to the inside of the container and I had to shove my hand into it (gloved of course) to pull out the rest because it wouldn’t flow anymore. It was like working with a huge mass of chewing gum.

As you might guess, bubbles got trapped in the silicone because it was just too viscous (thick) for the air to escape.

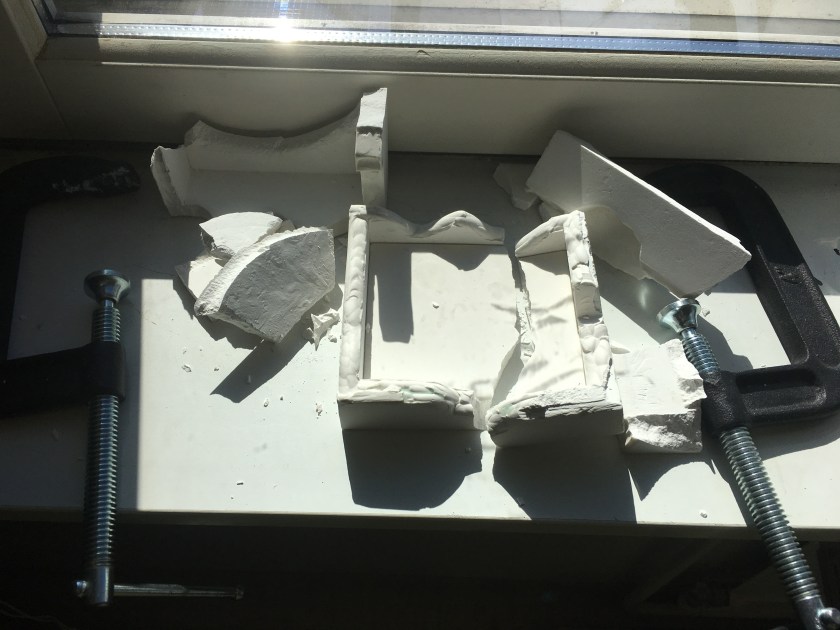
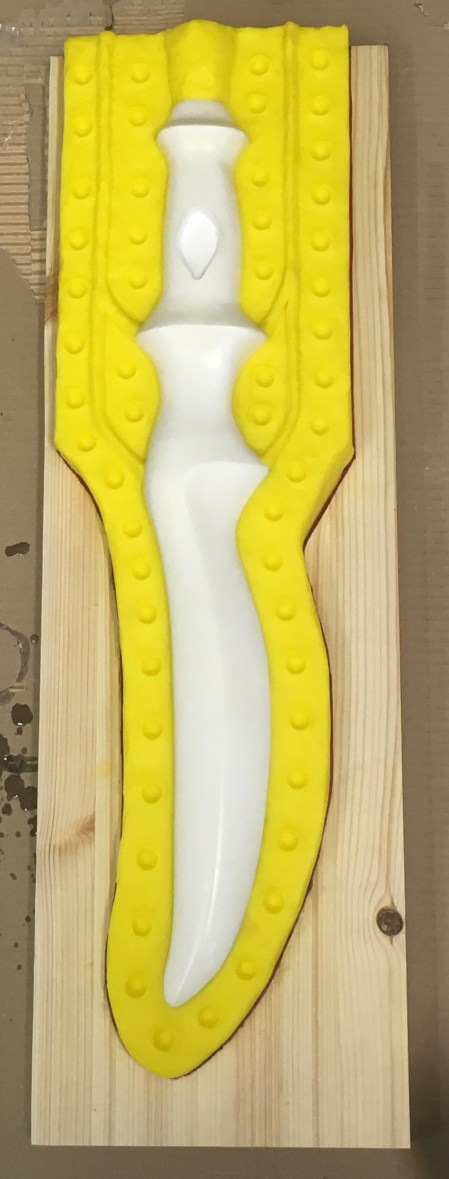
What to do? That right there is about a 108 Euro mistake. Yikes. Well, the important bit is the mould that immediately touches the sword I’m going to be casting. That has to be perfect. The rest of it? Meh. Nobody’s going to see any of that. So I decided to cut out the middle section of the mould and re-pour it instead of re-pouring the entire thing.

I should have re-poured the entire thing.

IMG_2654

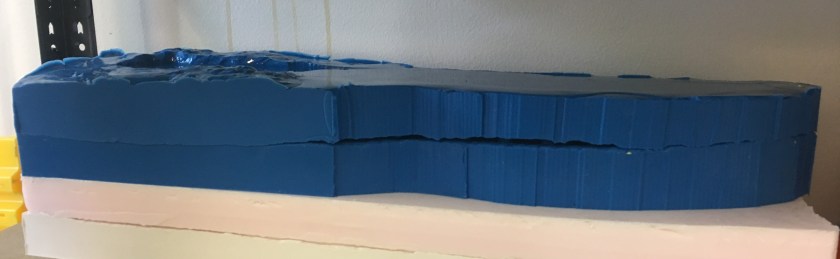
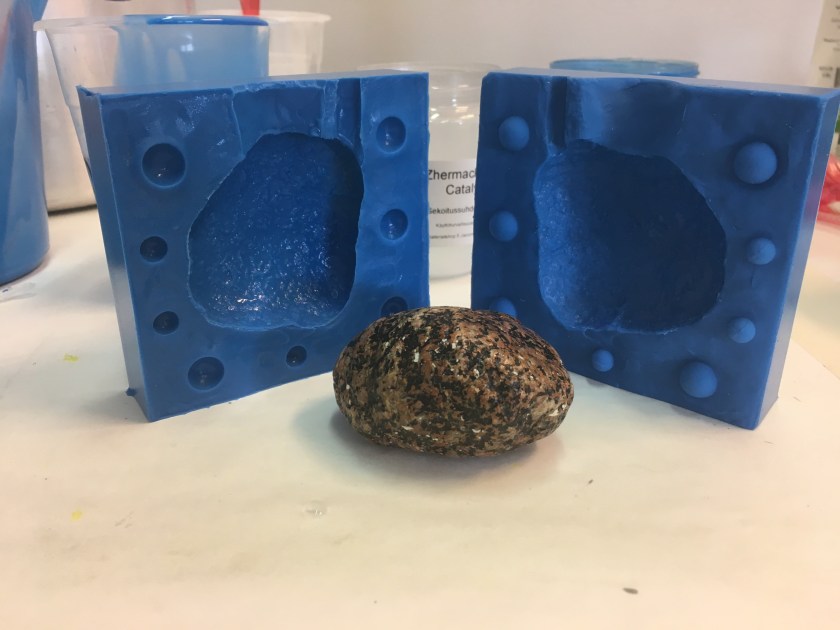
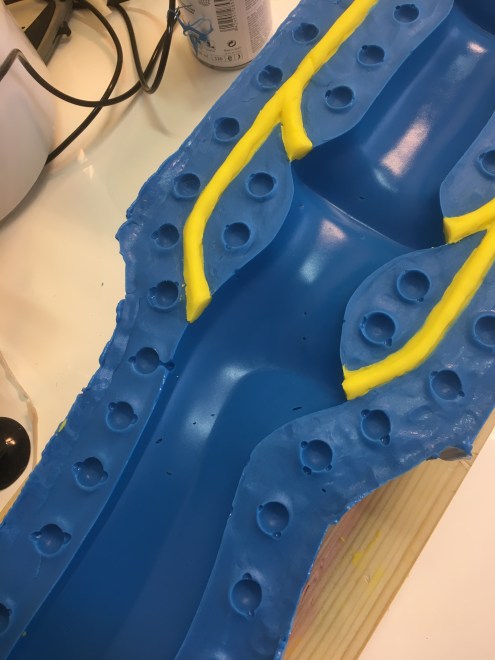
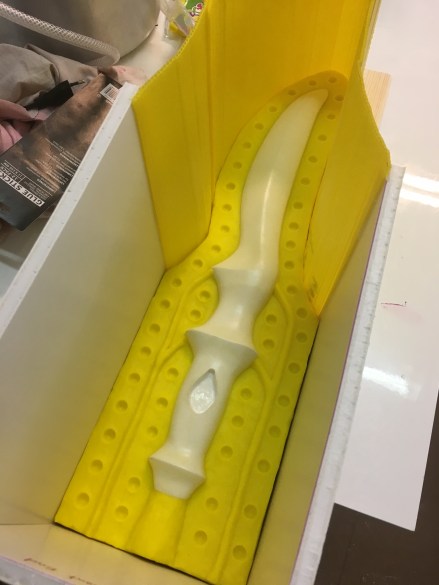
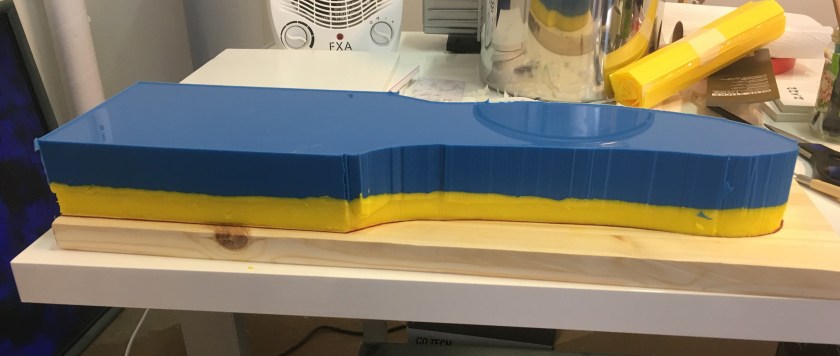
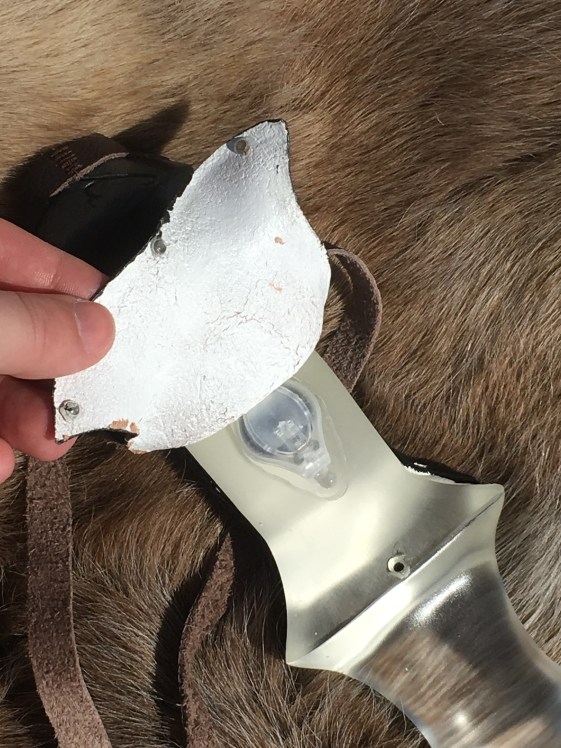
So what’s this crazy deformed blue crocodile thing? That’s the mould. You might notice a slight gap there in the side.

img_2653.jpg

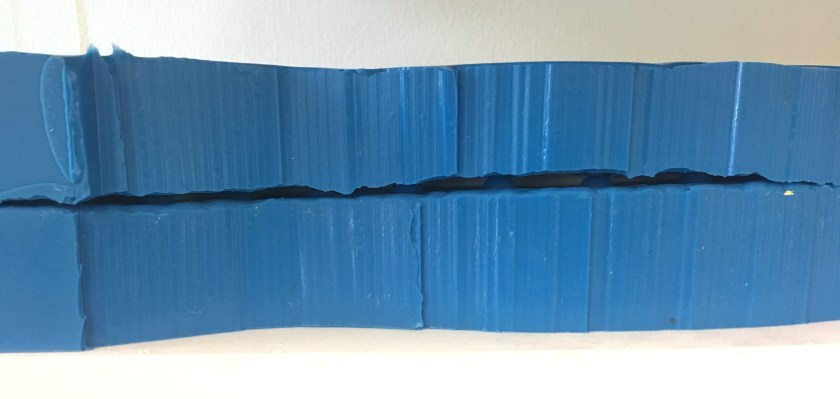
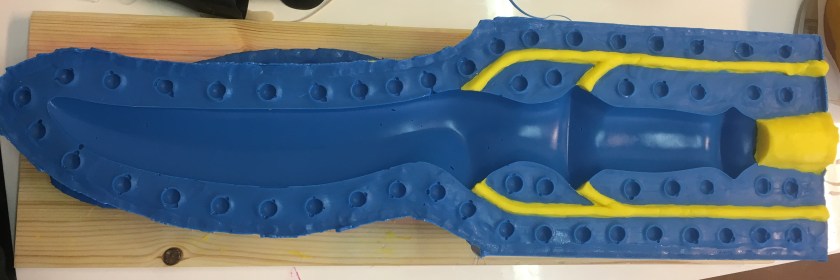
And by ‘slight gap’ I mean it’s wide enough to see the model sword inside the mould when it’s closed. So if I used the mould like this, all the resin would leak out the side. Why did it do this? Well, you might notice that the left side of the mould there has no gap. Let’s have a top-down view so you can better see what I’m about to explain.

IMG_2621

The top half of the mould is where hilt is and also where all those funky vents and the pour spout is. That makes it thicker than the funny banana-shaped bottom half where the blade is. Of course, the thicker bit is heavier. So when I poured the silicone into the middle section that I chopped out, the heavy top half stayed put, but the lighter bottom half floated! Since it only lifted up about a centimetre, I didn’t notice the movement.

The silicone I poured into the middle part to re-mould the sword bonded nicely with the rest of the silicone mould around it. Yay! But the silicone that crept in between the two halves of the mould didn’t stick to either side even though I cleaned one of them really, really well, and sealed the other very thoroughly. It would not obey my wishes and stayed a crazy blue flap just hanging out in between the two halves of the silicone sandwich.

So what do I do? Uhh … well I don’t have enough silicone left to re-pour the half of the mould I messed up. I’m not completely sure my budget can withstand another silicone purchase this month. We’ll have to see. So I’m going to attempt a weird “spacer” where the gap is so I can at least use the mould until I can re-pour the other side. What I’m going to make that out of is still up for debate. Possibly some kind of polymer plastic. Possibly rubber of some kind. Possibly uh … I don’t know. I’m going to experiment with many kinds of goo and see what works.

I have learned a lot from this mistake so it’s not entirely doom and gloom. So I’m trying to look on the bright side. It’s still frustrating for me cause I really wanted to be casting my first sword in the new mould this week. Oh well. The Iron Sisters are stubborn for a reason! Don’t give up!

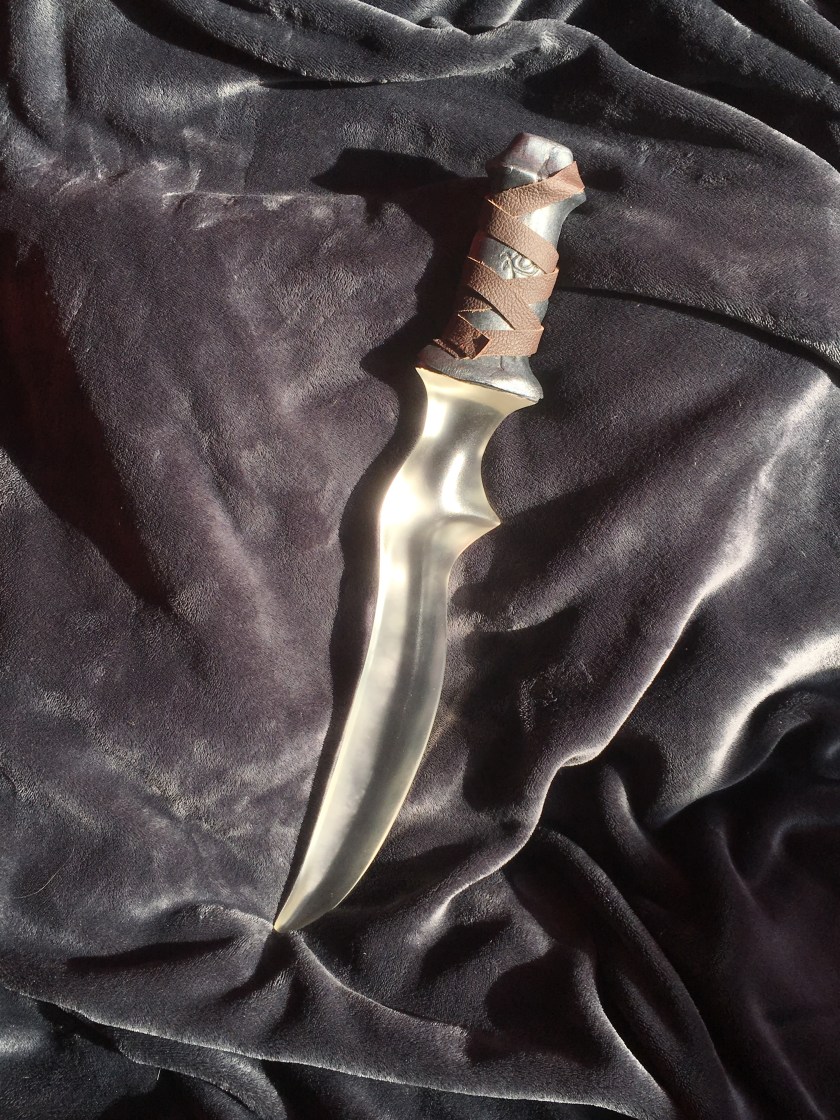
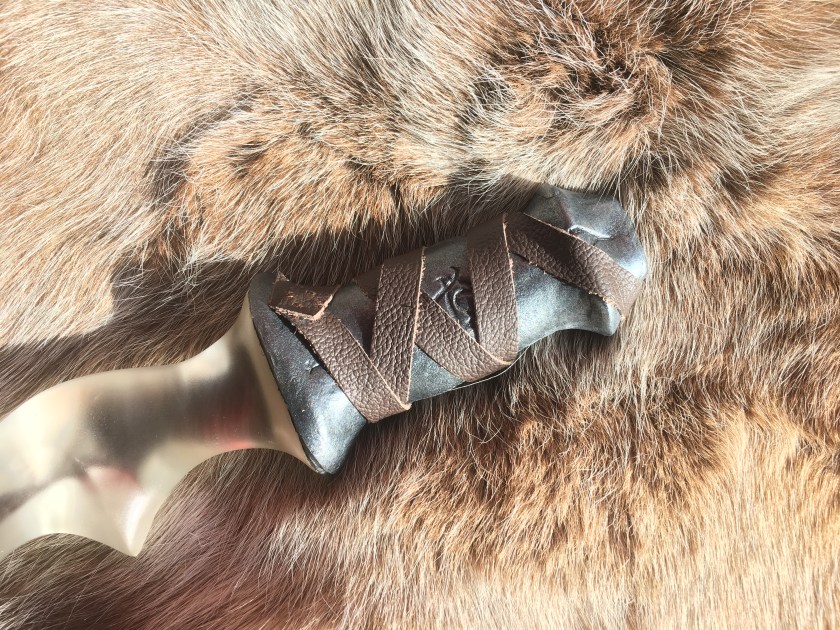
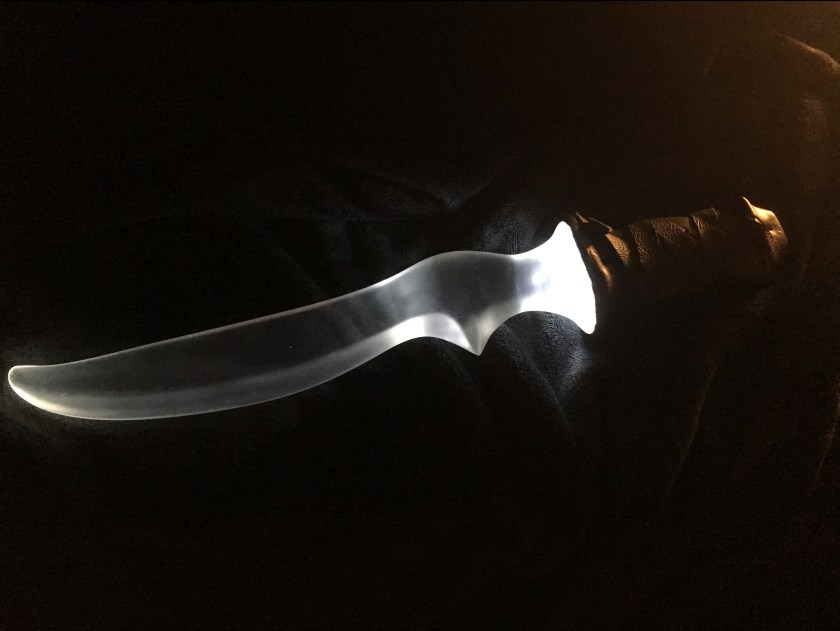
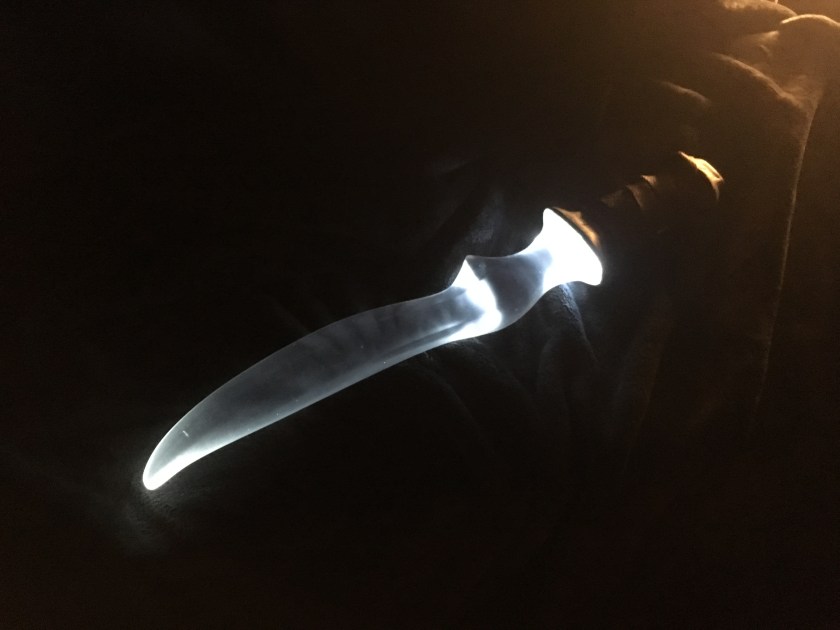
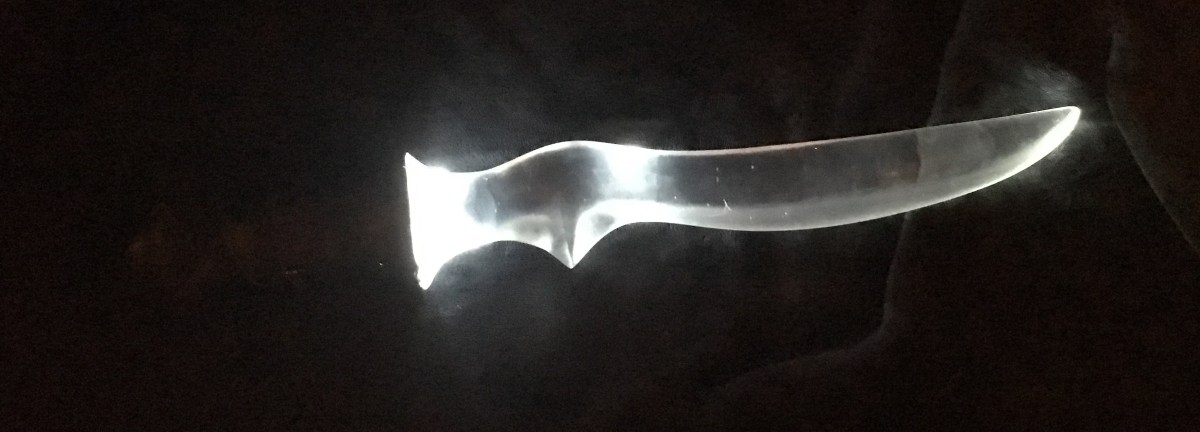
Stay tuned for more exciting news including a brand new sword I just finished. I’ll give you a hint: it has nothing to do with Shadowhunters!

Silicone Sandwich

Otherwise known as the two-part mould. It’s half finished guys! Actually, it might be all finished right now; I have to go to the workshop to check. But I wanted to share with you the progress shots from last week because playing with goo is exciting!

IMG_2610
There’s the mould design sculpted in clay.
IMG_2613
And placed in its box for silicone pouring!
IMG_2621
Some kind of strange Ikea cake …
IMG_2623
Now to clean of allllll that clay. It took hours.
IMG_2632
Then a quick re-sculpt of the spout and air vents.

And it was all ready to go back in the box for the second half! Then I hit a few snags. First, since it’s the other side, the bendy part around the blade had to be put on the other way and when I did that, it somehow ended up about one centimetre shorter. I have no idea how this happened. Oh well! I just added some more corrugated plastic on the end.

Then, I noticed that the straight pieces of foam board I had used for the upper parts of the sword had become badly warped overnight! I tried to patch the gaps with extra hot glue but it just wasn’t working. I had to cut some MDA board instead and use that. That sucked up some extra time.

Then, as I was degassing the silicone for the second pouring, I realised something: it was really hot in my workshop. I thought it couldn’t be more than 24C or so in there and I was really focused on my work, not my comfort. BUT, with this silicone you can accelerate the curing time by increasing the temperature. Handy right? Except when all the bubbles aren’t out of it yet and it’s starting to set! AHHHHH! By the time I noticed what was wrong it was already as thick as cookie dough. I had to stick my gloved hand INTO the bucket of silicone and pull it out glob by glob. It even started curing to my glove and I had a big hand-sized blob of blue slime dangling off my fingers as I desperately waggled it, trying to get it off. It eventually plopped into the mould box with the rest.

So … will it be okay? I don’t know! The top of it won’t be as smooth and glossy as the top of the “Ikea cake” picture there. I’m afraid the silicone had already thickened so much that the last blobs that fell in will probably stay as they are and make the surface bumpy and weird. What does that mean for me? Well, it just means that I’ll have to do a fibreglass jacket around the mould instead of a wooden clamping box. Oh well! I have the stuff to do either one and I was on the fence about which way I wanted to do it anyway.

The real question is: did it cure nicely against the SWORD? Because if there’s bubbles or spaces against the sword, I have to do this part of the mould again. I’m making a pretty new mother mould for every Clariel model sword that will come from my shop. If there’s a mistake in that mould, there will be a mistake in every sword it produces! And I’ll have to take time to fix each and every one. That would ruin the point of making a better mould in the first place! It’s gotta be just as perfect as I can possibly make it.

Wish me luck! I have a feeling I’m gonna need it today.

Quick Update & A Lot of Pics!

Hi everyone! I’m in a bit of a rush today. Lots of running around picking up materials, doing research for tools I’ll be needing in the near future, and trying to get the last bit of work done on the Clariel model sword to create the final perfected mould. Gah! It’s crazy!

And 25 degrees is WAY too freaking hot for me! I’m melting. Seriously, I moved within sneezing distance of the Arctic Circle to get away from being toasted by the evil fireball in the sky …

Stop talking about the weather and give us pictures already Ethan! Okay okay. Yesssss I finished the 2nd cast resin Clariel last week and she is awaiting word from her Australian Shadowhunter to ship out. Here’s the pics I promised.

Shiny in the suuuuun! 😀

IMG_2566

Ahh you runed it! Haaaah terrible pun … *ducks head in shame*

IMG_2569

I’ve been working on getting my rare-earth magnet closures smaller and tidier for a nice sleek look. How did I do guys? 🙂

IMG_2571IMG_2573IMG_2574

Oooooh shiny! Yes it’s in my sauna. LOL I currently have nowhere else that is dark enough to show you the full glory of the sword lit up. But you know what? I’m rather proud to be living and working in Finland so I think it’s kind of fitting that the quintessential Finnish element of the sauna plays a role in my work even if it’s a small one. 🙂

That’s it for me for the day everybody. I’ve got to get going. There is SO much sanding and polishing to do and OMG I almost forgot!

IMG_2507

This one. This one is not yet claimed! If you want this Clariel for your very own, I have an Etsy listing for you to pounce on right HERE. And since it’s not yet finished, YOU get to choose what kind of finish you want to have on it. Lit? Unlit? Runes? No runes? Some runes? Different runes?! It’s up to you. Your wish is my command! 😉

Have a great day everybody! I’m off to … everywhere, probably all at once. LOL

Second Clariel

I’m so excited guys! I’m almost finished the second cast resin Clariel sword and it is gorgeous.

IMG_2546[1]

The handle is all painted to simulate the look of weathered steel and the whole thing has been given three layers of high-gloss sealer. This sealer protects the sword from scratches and the yellowing effect that UV rays can have on resin over time.

IMG_2550[1]

I’m committed to making items that stand the test of time so it’s very important to me that each sword has adequate protection against wear.

All that’s left to put on this sword is the handle strap and it will be ready to go to its new home! This Clariel is promised to a lucky Shadowhunter already but the 3rd resin cast Clariel is still unclaimed! Will it be yours?

IMG_2507

Engraving Runes

Hi guys! I’ve been hammering away at this Clariel here. Using some new techniques and some old ones too.

IMG_2528[1]

I’ve also been doing some more research on the Shadowhunter runes in order to discover which ones, exactly, appear on the hilts of the blades in the TV show.

Clary Blade Hilt copy

Which rune is that on the pommel? I’ve done quite a bit of hunting and I have not found that precise one in the Codex or anywhere else for that matter. Is it meant to be a rune known only to the Iron Sisters? Something involved in the creation process of the Seraph Blades? Or did the props team simply screw up?

After painstakingly comparing the design on the prop to the runes we know of, I settled on this rune as the one they most probably intended:

IMG_2524[1]

Things can get hairy when working with clay and I wouldn’t be at all surprised if a Heightened Speed rune got a little smooshed during the crafting process and then accidentally reproduced that way without the mistake being caught.

What about the rune in the middle of the hilt though? It’s almost totally obscured by the wrappings.

Clary Seraph Blade

All I have to go on is that little Y-shaped stick at the top. That’s not much of a hint. I had about four guesses, and settled on one that would make the most sense for a seraph blade.

IMG_2523[1]

Accuracy. Flexibility might have also worked but it’s C-shaped and would probably be showing the other end of the C above the wrappings and would have to be turned on its side to look like that. Power could have been a possibility but, again, the other end of the Z-shape would probably be showing as well? Stamina was another possibility but it would have had to be tilted diagonally to avoid showing the other part of the “t” above the wrappings. Accuracy seemed like our most likely candidate.

Hang on, but isn’t Accuracy already on the sword at the bottom? Well … as you’ve probably already discovered while studying the runes for yourself, some of them have been re-labeled between adaptations from book to movie, and movie/book to TV show. The rune at the bottom there appears as “Calm Anger” on the Shadowhunter wiki.

What’s an Iron Brother to do? Well, keep doing my research and maintain my commitment to bringing you the very best art I can! I started making Seraph Blades for the sheer love of Cassandra Clare’s The Mortal Instruments series and that affection has not faded with time. It can be a bit of a struggle to make a judgement call on whether to follow the books or the TV show when a discrepancy arises. I tend to side with the books, personally, because there’s more info available and because it’s closer to Clare’s original concept of the Shadowhunters world.

Do feel free to respond to any of my posts either here or on my Facebook page. It’s just not as fun if it’s only me here talking. LOL! Let me know what you want to see me make! Ask questions! It’s all good. I answer whenever I can on weekdays. 🙂

Ciao for now everybody. I gotta go get painting!

Ooh Shiny!

So I played with my new silicone mould last week as I continue my witchlight experimentation. I thought you might like to see the results. I was delayed a little bit at first since the plaster mould jacket I made broke.

IMG_2452
Whoops.

So I had to make a new one out of wood. That whole incident took a couple days more than I was expecting but I bounced back fairly quickly. And of course, I learned things! Time spent learning is never wasted. 🙂   (and my clamps may have learned a few new curse words …)

Aaaaanyway. Look! A shiny rock!

IMG_2458
Yaaaaay!

It’s flat on the bottom so I can more easily work on the whole internal electronics stuff. The resin is so clear, it looks like it’s hollow, but it’s actually solid!

IMG_2459

So next for this little treasure? I’ll be messing about with tiny electronics and figuring out how I’m going to hide a light inside a clear object. I’m thinking it will probably be similar to the witchlight you saw in The Mortal Instruments film that was kind of cloudy inside with some imperfections like a natural stone would have. Kind of like quartz?

Witchlight
You know the one I mean.

It’s fairly safe to say that adamas would look something like this before it’s refined and worked by the Iron Sisters. At least as far as we can estimate by looking at how mundane metals and crystals behave. I’ll be playing with pigments, dyes, and different kinds of inserts to see what yields the best and most natural looking crystal, while still being able to light up. Y’know just … the usual high wizardry.

I’m sure I’ll figure it out. My superpower is stubbornness.

But! I didn’t spend my entire week on a rock. Nope! I was levelling up my crafting skill finishing off the first ever cast resin Clariel sword!

IMG_2476
Super DUPER shiny. 😮
IMG_2478
The hilt is a combination of polymer clay and leather.

I’m working on making the seams smoother so it’s more difficult to see where the handle opens up. This sword, like the ones before it, has an invisible light switch. Wait, it lights up?

IMG_2487
Of course it does!
IMG_2489
We must have the very shiniest! 😀
IMG_2490
Also functions as a flashlight. Y’know. Just in case.

So does this mean I’m taking orders now? Kinda? I have a mould but I want to make a better quality one since this one has some imperfections in it that I have to spend extra time buffing out when I finish each sword. Rawr! Since silicone is quite expensive, I’ll be selling the three Clariel blades I currently have so I can actually afford to do that.

Of course, those who have been waiting patiently on the contact list get first dibs on the blades up for sale cause that’s only fair. BUT! I can add your order to the list and let you know when one becomes available. I can’t give actual dates quite yet as to when I can complete those orders but I am definitely working on that. And no, you don’t have to put down any kind of payment on the order before I have a completion date for you. I’ve done that before and it’s really stressful on both me and the nice Shadowhunter waiting for their sword!

This whole ordering process thing WILL get easier in the future. Once I’ve got things the way I need them to be (ie: a quality mould I’m happy with and reliable crafting times from start to finish) I will be opening an official web shop for you to find my stuff and buy what you want. I’ll still be taking custom orders, of course. I just need to streamline the crafting process so I actually have time to make custom pieces again.

Enough blathering from me! I must go to the workshop and get busy finishing those other two blades. See you later!

New Silicone Test

Woo! I got some new platinum based moulding silicone from Materialshop.fi and oh my gosh it is the best stuff I have ever worked with. I wish I had started working with this from the very beginning. It would have saved me so much time and money!

I got a small test batch to see how it would work since I’ve only ever worked with tin based silicones before and I was nervous about messing it up. I decided to try casting a stone that has about the size, shape, and texture that I want for the much-requested witchlights. (I know you guys have been asking for them and I promise they’ll be available as soon as I get through all the design challenges!)

Enough jabbering. Let’s have some pictures!

IMG_2429
Step 1: Seal object to be moulded.
IMG_2432
Step 2: Cover object to be moulded in clay up to the halfway mark.
IMG_2443
Step 3: Pour in silicone. Wait. Take out finished mould.
IMG_2446
Step 4: Flip it over. Seal the completed half of the mould. Pour in more silicone. Wait. Take out your finished mould!

What’s next for this week? Well, I will be testing out this baby with some resin and fiddling with some light fixtures. (Have I mentioned how freaking hard it is to hide electronics inside a transparent object? AAAAHHHHH!) And I will also be finishing the closure on the Clariel sword I have almost ready to go. Then some very patient Shadowhunter will be getting an email they’ve been awaiting for a long time!

Thanks everybody for sticking with me and supporting me while I go through the hurdles of designing, improving, and crafting. I’m doing my best to make my art works available for everybody. It has forced me to make big changes, innovate, learn, and step so far out of my comfort zone I’m not sure where it is anymore. HA! But seeing the results makes it all worth the blood, sweat, and tears.

Wish me luck everybody! Off I go to make some more magic.


Let there be light!

Last week I finished up the electrics in the Clariel I’m working on. Yay! My customers have given me really valuable feedback and yes I absolutely have been listening. (Thank you! <3)

People are keen to have their Seraph Blades’ light stay on without holding onto the handle so they can take pictures of it. (Previously, I just wrapped a band around the light mechanism to take photos.) Since I was unable to find a pre-made light and switch combo that was low-profile enough to fit in the sword handle, I had to design and make the electronics myself. I’m happy to say that it worked beautifully.

What’s next for this lovely blade? I’d just like to place a small, light insert into the slot with the electronics to make sure the mechanism sits snug and secure in there and doesn’t rattle around. (That kind of ruins the magic.) And I also want to make a small adjustment to the way the flap closes on the handle so no extra light peeks out of any gaps between the leather and the blade.

I’ve plopped a sneak preview of the sword lit up sitting on my office chair. Sorry it’s not a gorgeous and well-composed shot. I intended to take some more shots on Friday but there was some sort of accident in one of the washrooms involving a couple of the toilets backing up and exploding and … stuff going everywhere. (You don’t wanna know.) It was all cleaned up by the time I got to work on Friday so thankfully I didn’t have to actually see what happened but the smell was so horrific I had to leave a couple hours early.

But don’t worry! If they haven’t managed to de-stink the place over the Easter long weekend, I’ll just bring the sword home with me and do the final photo shoot here. Just like in the old days!

That’s all from me for now. Have an awesome day everyone!

Chuggin’ Right Along

Last week was quite productive. IMG-2383

Got the leather measured, cut, and shaped for the handle. And I also got all the runes engraved. The leather shrunk more than expected as the leather paint dried so I decided to smooth and bulk out the edges with an air-drying polymer clay.

Clariel leather

It’s messy at the moment but I let it be so that it would dry nicely. I can sand the edges today and get it all prettied up. I liked working with the clay so much I think it might be the beginning of a new way to do the handles! We’ll see what the end result is to know for sure. I keep working toward my dream of a beautiful seamless sword.

There’s no such thing as impossible; only things we haven’t learned how to do yet.

IMG-2389