Wild Week

Yes I’m updating today instead of Monday. It’s been crazy.

My water jug decided to leak onto the table all weekend. Apparently the table was mostly made of cardboard and the entire end of it was ruined.

damaged table

So I had to take an entire day to chop the end off my work-table and reattach the legs. The seatings for the bolts were apparently laminated into a block, inserted into the table, and then laminated over so it was impossible to just move them and re-bolt. I had to use wood screws, which ended up being too long and pierced the top of the table, and a couple of G-clamps which are now a permanent fixture helping to hold the stupid legs on. Yay.

So. much. swearing.

IMG-2955

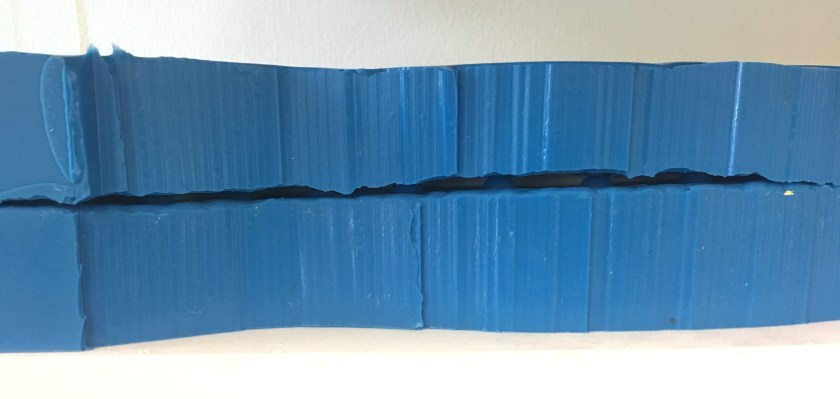
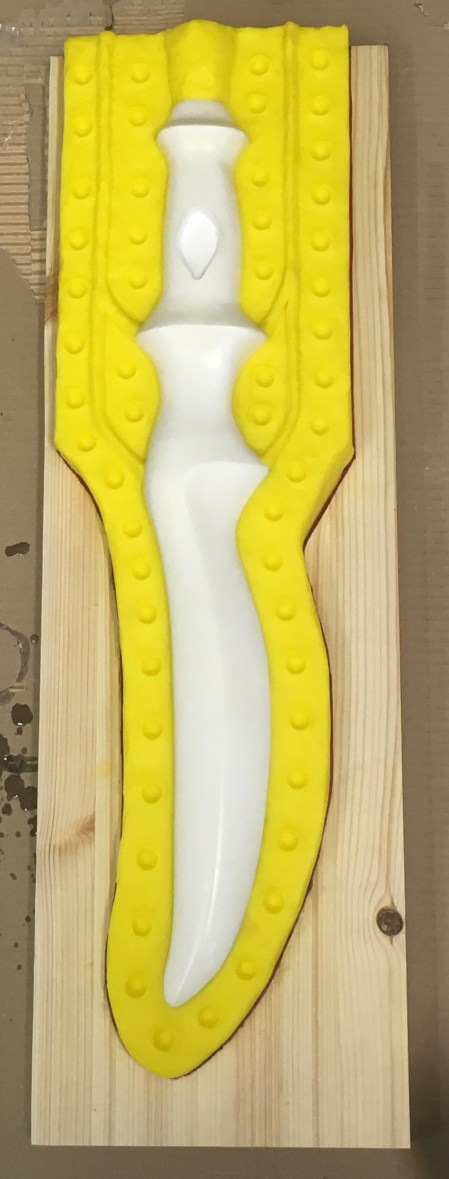
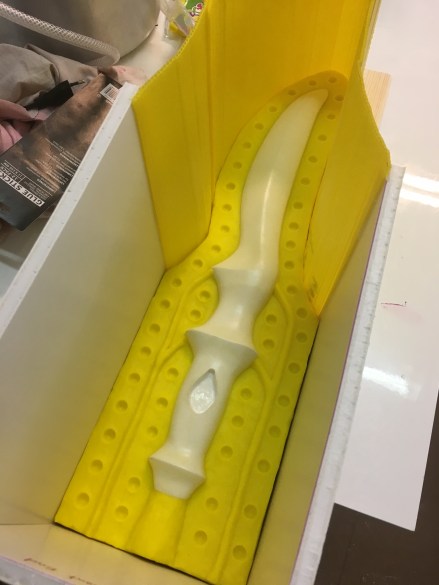
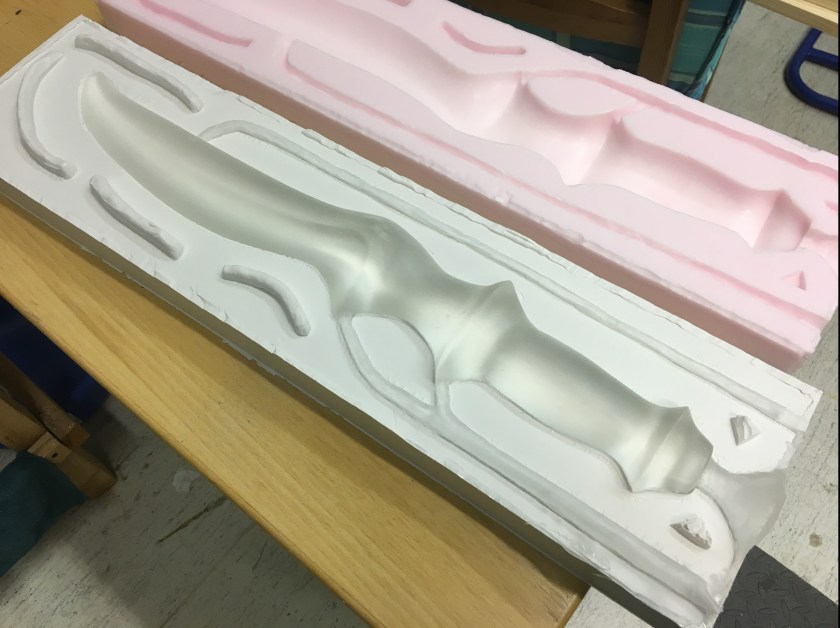
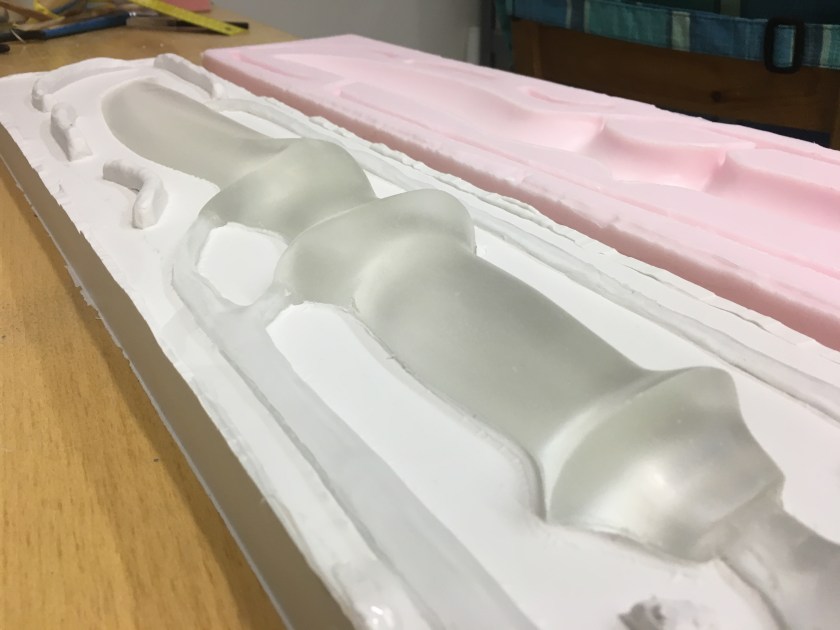
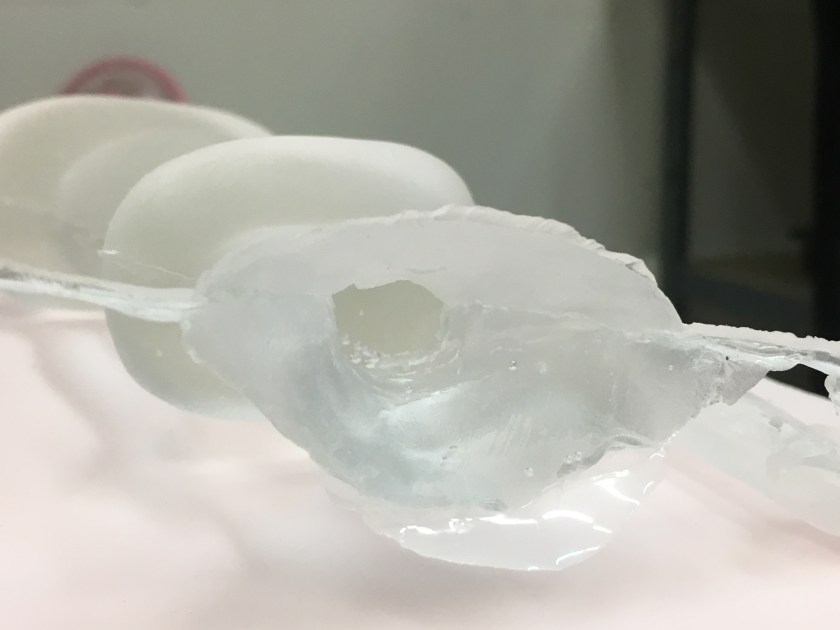
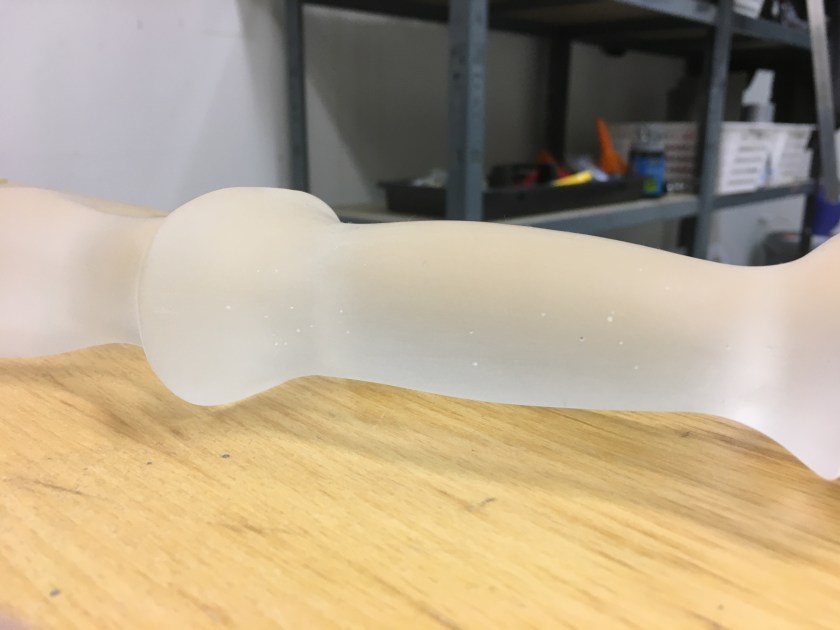
I did some experimenting with a product called ComposiMold. It is a re-meltable, re-usable moulding compound. Poor Malechai looks a bit like Han Solo frozen in carbonite here. LOL

IMG-2957

I also discovered that I can close the eye and neck holes with draft-stop tape. I’ll remember this trick for the future!

bubbles

Now, what I learned from this experience is that ComposiMold tends to retain some bubbles. Currently not sure if I can actually get them OUT before the moulding compound hardens. But, since it’s a reusable substance, and the bubbles are quite small, I can use it to create prototypes of the items I make without having to buy more moulding products each time AND without creating more environmental waste to make a mould that will only be used once.

Nice!

geode2

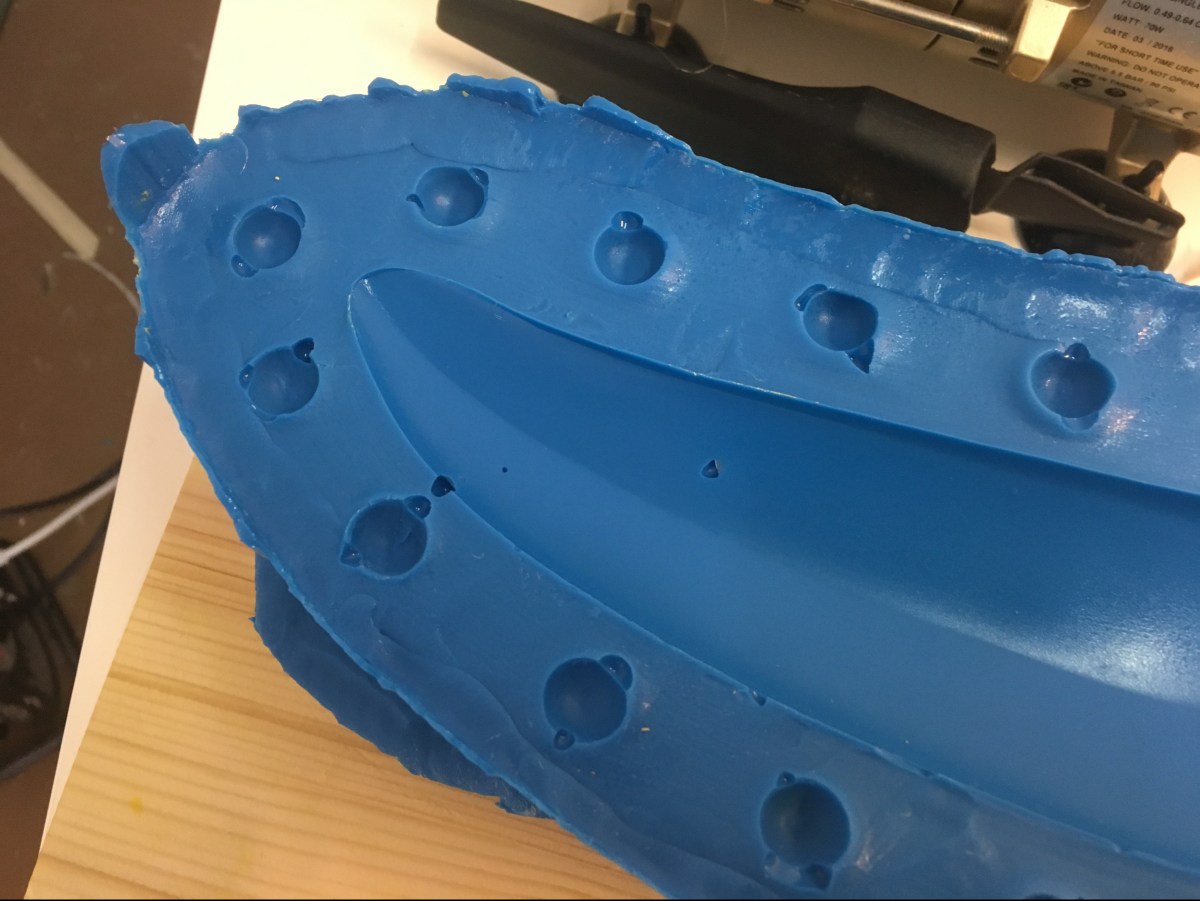
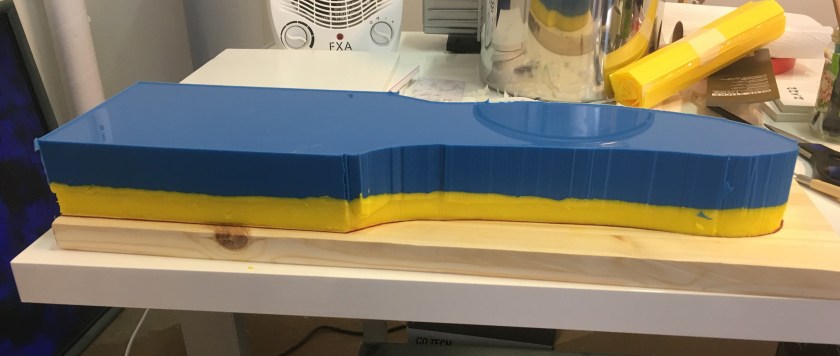
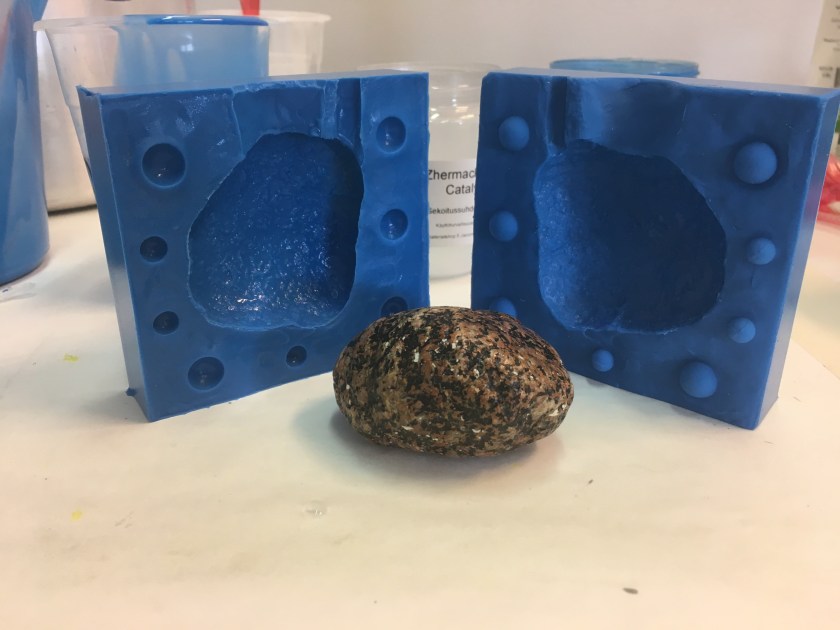
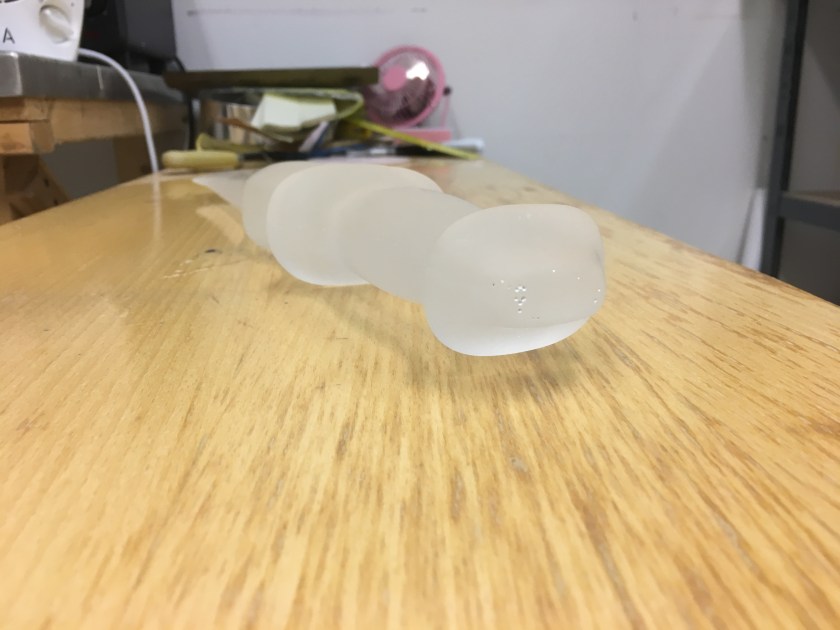
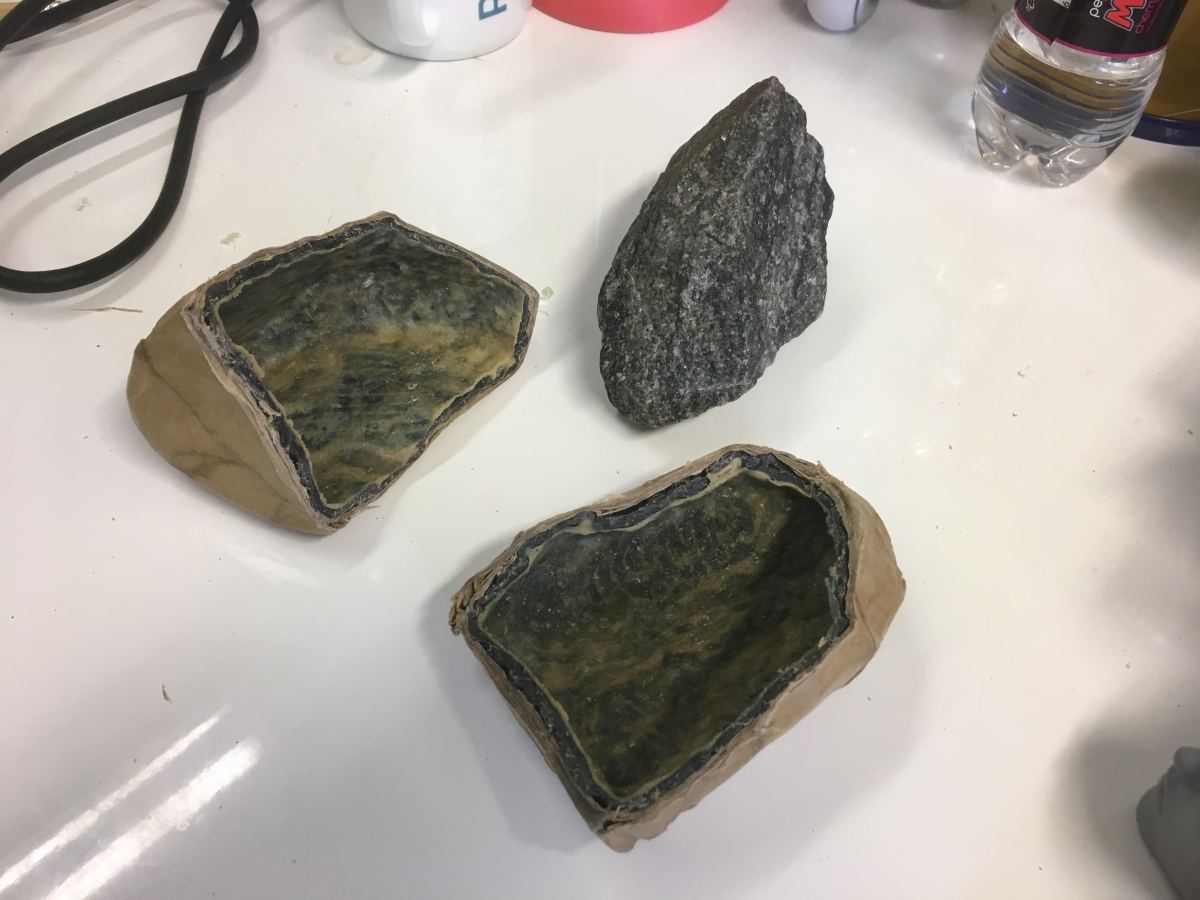
Now what have we got going on with this crazy little geode thing here? This is a prototype mould I made with a new technique I’ve been trying out. I’m constantly working on making things more cheaply so that I can lower my prices and make my stuff more accessible.

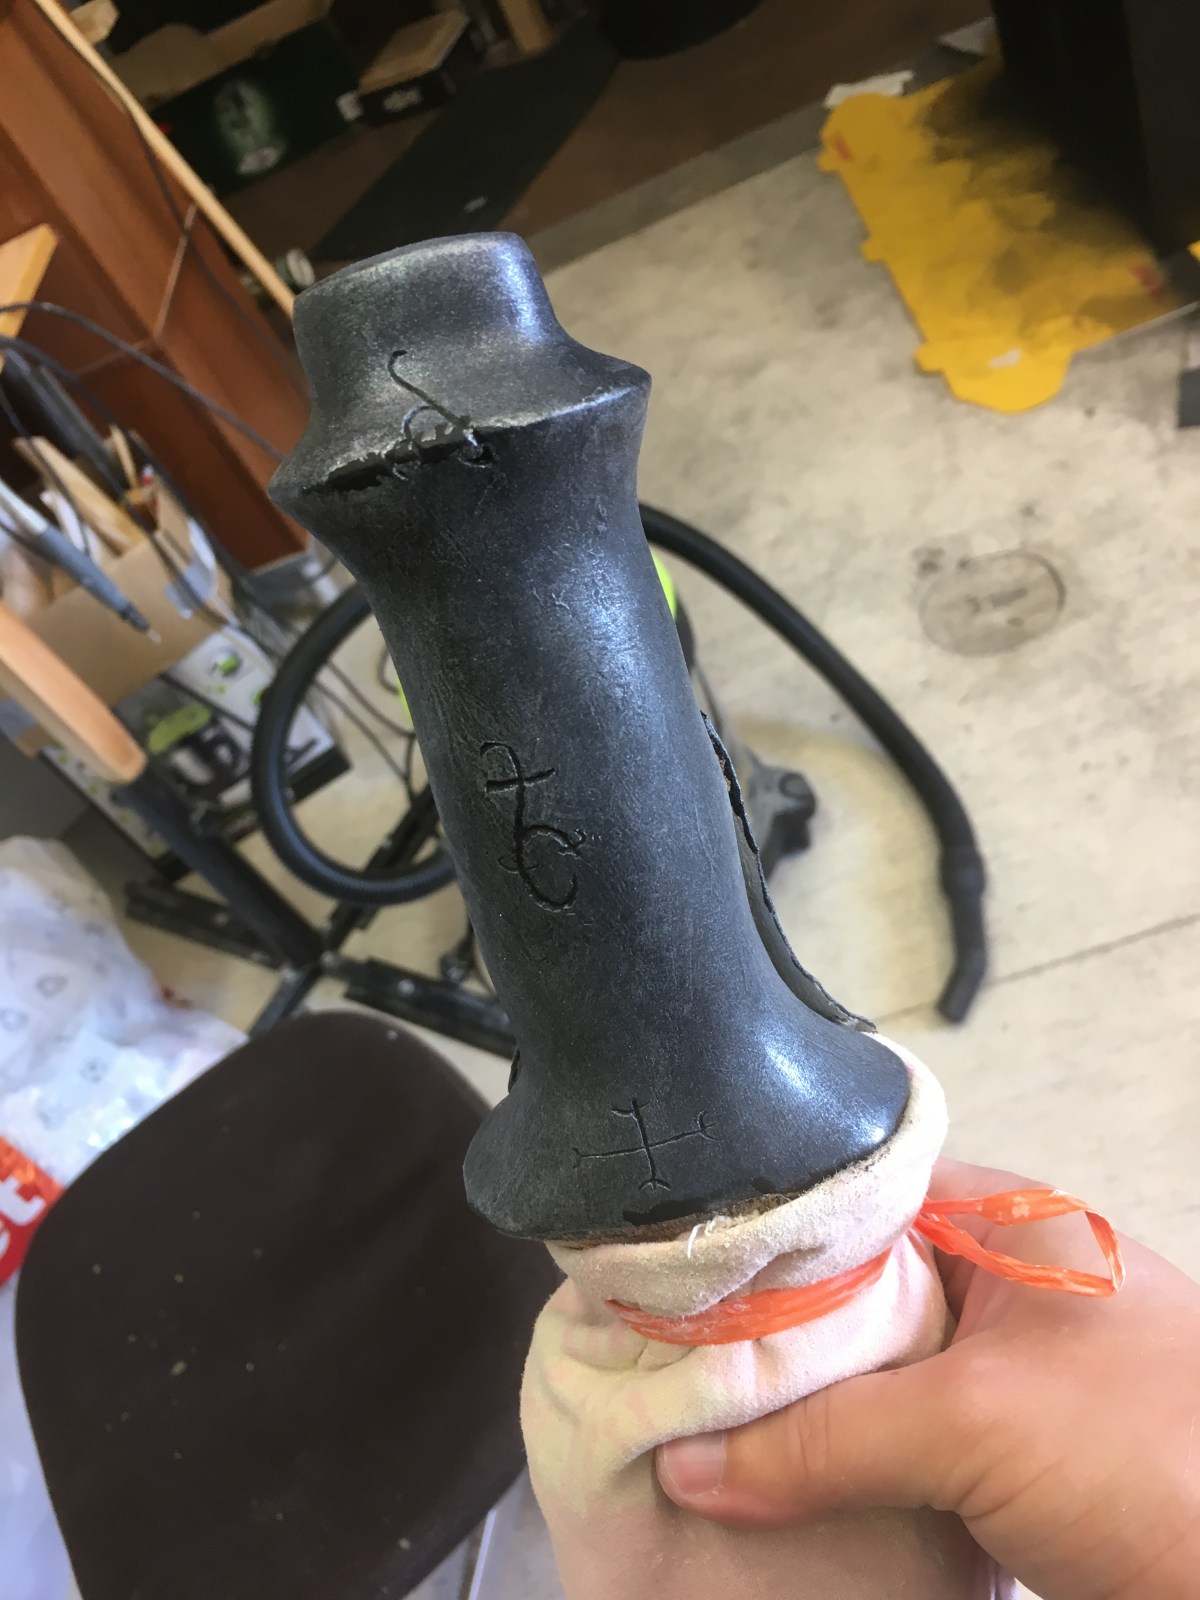
This is a moulding of a rock I’ll be using for the shape of my new witchlights. I’m still unsure of the size. It might be a little big, but we’ll have to see.

Now, here’s the really exciting part:

This is a touch-activated circuit that I have been working on. The final model of witchlight that I will be selling will light up when placed in the palm of your hand. No buttons, no slide switches. Magic. My aim, as always, is to make the prop look like it is activated by the power of the person holding it. I strive to hide the electronics and mechanics to the point where nobody but you can find the button. It’s a secret trick that you get to reveal (or not!) at your own discretion.

I want to take a moment to again thank the people who have been ever so patient while I tinker with these projects to get them working just right. It means a lot to me to bring something to you that I can be truly proud of, not just something that’s “meh good enough”.

That’s all for me for today. I’ve got to get back to makin’ magic! Have a great weekend guys. ❤

Trying New Things

Hi guys! In spite of the heat, I’m still trying to get stuff done. I managed to get most of the way finished one of the Clariel swords on my table. It just needs its protective glossy sealant and the strap around the handle.

IMG_2784[1]


That’s a handle made of Milliput. Milliput is a two-part epoxy paste. You smoosh it together, knead it thoroughly, and do whatever it is you want to do with it. It’s a lot like modelling clay in consistency. After 3-4 hours it sets hard as a rock. Much more solid and robust than the polymer air-dry clay I’ve been using before.

The downside to Milliput is that because it’s so much harder, it takes longer to shape, sand and polish. The paste is stiffer and harder to mould than softer clays so I have to do some shaping with the Dremel tool after it’s set and then sand those tool marks away before I can begin polishing. It’s also harder to engrave. It’s also a bit more expensive than the air-dry polymer clay.

In addition, any patching of gaps or fine details that I want to do with the Polymer clay (which is softer and easier to accomplish these things with) has to be done after polishing the Milliput. Milliput is hard enough that I have to wet-sand it to smooth and polish it if I want to work with any kind of speed. But the air-dry polymer clay softens with water and can become crumbly before its had its protective coats of paint and sealer put on it.

So the procedure has to go like: Mould handle with Milliput. Wait 4 hours. Shape with Dremel. Wet-sanding. Install leather flap for the light cavity. Smooth over any seam-lines with polymer clay. Dry-sanding. Install magnet closures. Engrave. Paint. Paint. Paint. Seal.

Do I like this procedure? Uhh … I’m still working on tinkering with it. But I do like the structural hardness of the Milliput and will definitely be keeping it on hand for anything that needs reinforcement. I totally recommend getting some to play with. It’s fun!

IMG_2781[1]


Here’s a different style of Milliput handle I also tried out. I wanted it to be all one piece so I could slide it on and off the sword to change the light battery when needed. Buuuut Milliput bonds with resin. On the one hand: that’s great! I can put stuff on my swords and be 100% sure it’s not going to come off. On the other hand: I wanted it to come off.

I even put a layer of liquid latex all over the handle before I started moulding the Milliput on. But Milliput forms itself absolutely perfectly to the object you’re sticking it on, so it formed an air-tight suction seal that I couldn’t pull free. I had to cut out a section of the front to do a conventional leather-flap for the light cavity.

IMG_2780[1]

Of course that broke the suction seal. And it came off just like I originally wanted to but far too late. I had already altered the design by slicing a section out of the front. GAH! That was a frustrating day guys!

But now it’s all epoxied into place and smoothed and patched. Ready to have its flap adhered in place

Will I be at the workshop today? I don’t know! I was supposed to have an air conditioner delivered to my apartment last week and they didn’t come. 😦 So I have to figure out if they’re coming today or not and if they are, I have to stick around and wait. But I won’t be doing nothing. I received my electrical components for the witchlights last week so I can begin tinkering with that until my AC arrives. (Hopefully.)

Wish me luck guys!

I’m Melting!

Okay, so, it’s really freaking hot in my workshop. Still. It’s been a couple weeks or so of 30C, in Finland. What the crap?! I didn’t move within spitting distance of the Arctic Circle for this garbage! Rawr!

IMG_2765[1]
Pls send ice cream.
I’m going slightly bonkers. Still trying to get work done. Somehow. I stand directly in front of the fan and wear a cooling vest so I don’t lose quite as much water via sweat but it’s a daily struggle. Just trying to keep my head clear enough to work without messing things up. Gah!

But the good news is I am well on my way to completing my latest couple of swords (the ones I saved and made gorgeous with the crazy resin glaze experiment). I’m also trying a new product (new to me anyway) called Milliput for the handles. It is a two part epoxy paste that hardens into a very strong plastic in about 4 hours. I absolutely love it so far! Today I’m going to be sanding off all the lumps and bumps and smoothing it into the shape we all know and love. 🙂

More exiting news! I have just ordered the electronic components for the new witchlight design I’m working on! I have many hurdles to overcome with this project which is why it has taken so long. Several of you have requested witchlights and I have not forgotten you! Let me just run over the problems I’m trying to solve:

  • How to hide the electronics inside a transparent substance?
  • How to make the electronics as small as possible?
  • How to conceal the on-off switch?
  • How to conceal the opening? (You’re going to have to change the battery sometime…)
  • How will it open and close?
  • How will the on-off switch work? (Touch? Click? Slider?)
  • How can I keep costs as low as possible so people can afford them while still managing to pay rent on my workshop?
  • How do the Iron Sisters work in a freaking volcano when I can’t even concentrate at 30C?

All this and more on the next episode of What the Crap am I Doing?! Stay tuned.

A New Look!

Whoa! Dude! What happened to the site? Don’t panic guys; I changed my logo. Everything’s still here.

I took a recommendation from a friend to check out Turbo Gold Media  to get my very own logo designed for me. I liked the work they did on her logo so much that I decided to give it a whirl. I was immensely pleased with their services and I found their prices to be quite reasonable for the quality I got. They’re very quick and responsive and took my feedback seriously.

InkbladeStudC12a-A04bT01a-Z

I felt the need to change my logo because the old one didn’t really fit the direction my company was going. Originally, it was my plan to make a career of both writing novels and making cool costume props. Well, it turns out that making costume props is a heck of a lot more work than I thought and takes almost all the energy and time I have and I still don’t get everything done that I need to. On top of that … well … books just don’t sell. I don’t really care about worldly riches but I do need to eat and pay rent.

So, yes I still write, but it’s a hobby now. It was a brutally difficult decision to make but I had to be real with myself and admit that it was time to adjust my priorities. Maybe once I can afford to hire an employee or two to help me out and I don’t have to do everything myself, writing will be able to take a bigger role in my life. Until then, I need to focus on improving my prop-making business and get a stable income so things aren’t so financially tight for me.

Running a company is hard guys! O_o

Enough yammering about my new pretty picture! What’s up in the workshop? Well! I had a crazy failure in casting a couple of swords. I think the resin got contaminated or is a little too old or quite possibly the heat/humidity is too high in my workshop right now. It’s 30 degrees Celsius and because there is no air conditioning, I have no way to bring the temperature down.

Either way, I had this bizarre snowflake-pattern delamination on two swords.

IMG_2743[1]

Now, that would be rather cool if it was what I was going for, but since I wanted crystal clear and perfectly smooth … nope. Bad news for me. 😦 As you can see (maybe) there’s a bajillion little bubbles there and each one has flaky resin coming up around it in a flower/snowflake pattern. Boo!

What to do? I didn’t want to waste all that resin. So I sanded the swords as best I could manage to get alllll those little air bubbles and flakes off the surface. I got it as smooth as I could and then tried something weird: I mixed some glazing resin (the stuff you normally use to seal a painting or piece of wooden furniture) and carefully dribbled it down the sides of one of the swords until it was completely coated and left it hanging to dry.

It was an unconventional solution to be sure, but desperate times call for desperate measures. Either it would work and the sword would be saved, or I would have to admit defeat and throw it away. And you know how crazy I get over wasted plastics!

IMG_2751[1]

Whoa. Just whoa.

Why did I never think to do this before!? That is the clearest, smoothest, most pristine finish I have ever been able to get on a sword EVER. I cannot wait to get back to the workshop today to handle it and inspect it now that it’s all cured.

What do you guys think of it? I mean … this is more than crystal clear. It looks like a liquid that just decided to hold the shape of a sword! Should I offer this option as a possible finish you could choose for your blade? What should I call it? Ahhhh I’m so excited! I gotta go to the workshop now and give this beauty a handle!

Round Two: FIGHT!

I know, I know, I haven’t got any new pictures for you today. Bad Ethan! 😦 I was so busy getting the mould box reconstructed that I forgot to take a photo of it! I’ll make it up to you and take lots of photos of the process today. Forgive me?

I got my order of silicone in at the end of last week and I am ready to have a rematch with the half of the sword mould that cured too fast! Everybody cross your fingers, toes, and eyeballs for me and hopefully we’ll have a brand new mould ready to rock by tomorrow.

Are you excited? I’m terrified! Let’s go! ADVENTURE! 😀

I hate bubbles.

No really. They’re all well and good when you’re blowing them into the air on a sunny summer day, but when they’re in your mould? Sucktastic.

IMG_2642

This will not produce a lovely smooth sword. This will produce a mostly lovely smooth sword with weird little warts all over it. Unacceptable.

IMG_2643

So why is it like this? What happened? Well, it turns out that my workshop was hotter last week than I thought it was. Zhermack’s beautiful ZA22 silicone’s normal working temperature is 24 degrees Celsius. That means that, at 24 degrees, this lovely blue goo will set in 60 minutes. If it’s colder than that, it will set more slowly giving you a longer working time. But if it’s hotter …

The setting time is dramatically faster! I was in the middle of degassing it when it started turning into a sticky glop the consistency of cookie dough. I knew I was in trouble. 3 litres of silicone is NOT cheap. I pulled it out of the vacuum chamber and poured it as fast as I could. It was sticking to the inside of the container and I had to shove my hand into it (gloved of course) to pull out the rest because it wouldn’t flow anymore. It was like working with a huge mass of chewing gum.

As you might guess, bubbles got trapped in the silicone because it was just too viscous (thick) for the air to escape.

What to do? That right there is about a 108 Euro mistake. Yikes. Well, the important bit is the mould that immediately touches the sword I’m going to be casting. That has to be perfect. The rest of it? Meh. Nobody’s going to see any of that. So I decided to cut out the middle section of the mould and re-pour it instead of re-pouring the entire thing.

I should have re-poured the entire thing.

IMG_2654

So what’s this crazy deformed blue crocodile thing? That’s the mould. You might notice a slight gap there in the side.

img_2653.jpg

And by ‘slight gap’ I mean it’s wide enough to see the model sword inside the mould when it’s closed. So if I used the mould like this, all the resin would leak out the side. Why did it do this? Well, you might notice that the left side of the mould there has no gap. Let’s have a top-down view so you can better see what I’m about to explain.

IMG_2621

The top half of the mould is where hilt is and also where all those funky vents and the pour spout is. That makes it thicker than the funny banana-shaped bottom half where the blade is. Of course, the thicker bit is heavier. So when I poured the silicone into the middle section that I chopped out, the heavy top half stayed put, but the lighter bottom half floated! Since it only lifted up about a centimetre, I didn’t notice the movement.

The silicone I poured into the middle part to re-mould the sword bonded nicely with the rest of the silicone mould around it. Yay! But the silicone that crept in between the two halves of the mould didn’t stick to either side even though I cleaned one of them really, really well, and sealed the other very thoroughly. It would not obey my wishes and stayed a crazy blue flap just hanging out in between the two halves of the silicone sandwich.

So what do I do? Uhh … well I don’t have enough silicone left to re-pour the half of the mould I messed up. I’m not completely sure my budget can withstand another silicone purchase this month. We’ll have to see. So I’m going to attempt a weird “spacer” where the gap is so I can at least use the mould until I can re-pour the other side. What I’m going to make that out of is still up for debate. Possibly some kind of polymer plastic. Possibly rubber of some kind. Possibly uh … I don’t know. I’m going to experiment with many kinds of goo and see what works.

I have learned a lot from this mistake so it’s not entirely doom and gloom. So I’m trying to look on the bright side. It’s still frustrating for me cause I really wanted to be casting my first sword in the new mould this week. Oh well. The Iron Sisters are stubborn for a reason! Don’t give up!

Stay tuned for more exciting news including a brand new sword I just finished. I’ll give you a hint: it has nothing to do with Shadowhunters!

Silicone Sandwich

Otherwise known as the two-part mould. It’s half finished guys! Actually, it might be all finished right now; I have to go to the workshop to check. But I wanted to share with you the progress shots from last week because playing with goo is exciting!

IMG_2610
There’s the mould design sculpted in clay.
IMG_2613
And placed in its box for silicone pouring!
IMG_2621
Some kind of strange Ikea cake …
IMG_2623
Now to clean of allllll that clay. It took hours.
IMG_2632
Then a quick re-sculpt of the spout and air vents.

And it was all ready to go back in the box for the second half! Then I hit a few snags. First, since it’s the other side, the bendy part around the blade had to be put on the other way and when I did that, it somehow ended up about one centimetre shorter. I have no idea how this happened. Oh well! I just added some more corrugated plastic on the end.

Then, I noticed that the straight pieces of foam board I had used for the upper parts of the sword had become badly warped overnight! I tried to patch the gaps with extra hot glue but it just wasn’t working. I had to cut some MDA board instead and use that. That sucked up some extra time.

Then, as I was degassing the silicone for the second pouring, I realised something: it was really hot in my workshop. I thought it couldn’t be more than 24C or so in there and I was really focused on my work, not my comfort. BUT, with this silicone you can accelerate the curing time by increasing the temperature. Handy right? Except when all the bubbles aren’t out of it yet and it’s starting to set! AHHHHH! By the time I noticed what was wrong it was already as thick as cookie dough. I had to stick my gloved hand INTO the bucket of silicone and pull it out glob by glob. It even started curing to my glove and I had a big hand-sized blob of blue slime dangling off my fingers as I desperately waggled it, trying to get it off. It eventually plopped into the mould box with the rest.

So … will it be okay? I don’t know! The top of it won’t be as smooth and glossy as the top of the “Ikea cake” picture there. I’m afraid the silicone had already thickened so much that the last blobs that fell in will probably stay as they are and make the surface bumpy and weird. What does that mean for me? Well, it just means that I’ll have to do a fibreglass jacket around the mould instead of a wooden clamping box. Oh well! I have the stuff to do either one and I was on the fence about which way I wanted to do it anyway.

The real question is: did it cure nicely against the SWORD? Because if there’s bubbles or spaces against the sword, I have to do this part of the mould again. I’m making a pretty new mother mould for every Clariel model sword that will come from my shop. If there’s a mistake in that mould, there will be a mistake in every sword it produces! And I’ll have to take time to fix each and every one. That would ruin the point of making a better mould in the first place! It’s gotta be just as perfect as I can possibly make it.

Wish me luck! I have a feeling I’m gonna need it today.

New Silicone Test

Woo! I got some new platinum based moulding silicone from Materialshop.fi and oh my gosh it is the best stuff I have ever worked with. I wish I had started working with this from the very beginning. It would have saved me so much time and money!

I got a small test batch to see how it would work since I’ve only ever worked with tin based silicones before and I was nervous about messing it up. I decided to try casting a stone that has about the size, shape, and texture that I want for the much-requested witchlights. (I know you guys have been asking for them and I promise they’ll be available as soon as I get through all the design challenges!)

Enough jabbering. Let’s have some pictures!

IMG_2429
Step 1: Seal object to be moulded.
IMG_2432
Step 2: Cover object to be moulded in clay up to the halfway mark.
IMG_2443
Step 3: Pour in silicone. Wait. Take out finished mould.
IMG_2446
Step 4: Flip it over. Seal the completed half of the mould. Pour in more silicone. Wait. Take out your finished mould!

What’s next for this week? Well, I will be testing out this baby with some resin and fiddling with some light fixtures. (Have I mentioned how freaking hard it is to hide electronics inside a transparent object? AAAAHHHHH!) And I will also be finishing the closure on the Clariel sword I have almost ready to go. Then some very patient Shadowhunter will be getting an email they’ve been awaiting for a long time!

Thanks everybody for sticking with me and supporting me while I go through the hurdles of designing, improving, and crafting. I’m doing my best to make my art works available for everybody. It has forced me to make big changes, innovate, learn, and step so far out of my comfort zone I’m not sure where it is anymore. HA! But seeing the results makes it all worth the blood, sweat, and tears.

Wish me luck everybody! Off I go to make some more magic.


Good news!

It has been decided that I will have a new residency permit given to me and I can continue living and working here. That’s a big relief for me. I was afraid I’d have to go somewhere else and start all over again.

Where does that put us in terms of sword-making? Today I am making some alterations to the mould I have in hopes of reducing the bubbles that I’m still getting in the finished product. I feel that you deserve professional quality in your sword and and I’m determined to get it just as perfect as I can.

While I’m waiting on resin to cure, I’ll continue testing the resin polishing paste I bought in the hopes that it will reduce the amount of time I have to spend on the surface of the swords and result in a smoother, glossier finish. I’m still not sure if it’s as good as the wet/dry sandpaper. So I’m buffing up one sword with the polishing paste and another sword the “traditional” way with the sandpaper to see which yields a better finish.

After that, we move on to the electronics. I’ve already got the LEDs, batteries, and casings to play with but I’m still hunting for just the right kind of switch.

First Resin-Cast Clariel!

I waited until today to show you guys this because I wanted to have a full set of photos from start to finish. It was a tough wait! This is so unbelievably exciting for me! A lot of you know how very frustrated I was with this project because there was just so very much to learn.

The fact is: you can read tutorials and articles and watch all the videos you like, but when it comes right down to it, practice is the most essential part of learning any skill. How firm or squishy will the silicone be when it’s fully cured? How warm does the container of mixed resin feel when it’s beginning to catalyse? How fast will it cure with the temperature and humidity of the room I’m working with? How does a vacuum pump sound when it’s running well versus running poorly? All these questions can only be answered by getting your hands on the materials and working with them.

Every mistake is a learning experience, but when your materials are this expensive, every mistake is costly. I’ve ‘wasted’ about 80-100 Euros worth of silicone to get where I am now and I have a lot more learning to do.

So you can imagine, after weeks and months of materials not arriving on time, machines not working, chemicals doing weird unexplained things, how overjoyed I was to open up the mould and see …

IMG_2308

Perfect. It looked perfect. I couldn’t believe it. I had expected to fail, yet again, as I had failed so many times before. Expected it with such certainty that I could not accept that it had actually worked. I had convinced myself, with every heartbreaking flop that I was too stupid to get it right.

I poked the little side tubes where the air vents are because I was so afraid of messing up the sword after all this struggle. It was solid. No stickiness. No softness.

I put my fingertips on the blade of the sword, expecting to encounter a gummy, gluey surface. It was completely smooth. It was still warm from the exothermic catalysing process and it felt like a living creature.

IMG_2310

Honestly, I teared up. I was so exhausted from fighting with this project and now it was finally here. All I could do for several minutes was just run my hands over it and marvel at how a bucket of thickish goo could become something like this.

IMG_2314

I had been worried about clarity, unsure if this resin would be as beautifully transparent as the PMMA resin I’d been carving. Well, I snapped a photo straight down the pour-spout. I think I have nothing to be worried about. It’s so clear it looks hollow.

IMG_2316

After nipping off the extra resin from the air vents and the spout (I affectionately call them ‘umbilical cords’ since that’s really what they looked like!) I buzzed off the seams around the edges with the Dremel tool. In this shot, I haven’t even started polishing it yet.

IMG_2318

The edges are still scratchy from the Dremel. Can’t have that! The finish must be even!

IMG_2336

This is polished. I gave it my favourite frosted finish (800 grit polish).

This sword is one I’m going to keep for myself and not just because it’s the first and very special because of that. There are some tiny air bubbles in it. I think it’s from when the mould started leaking because it wasn’t clamped tightly enough during the pour. The bubbles are only in the handle, mostly in the pommel which is exactly the point during the pouring that the resin started seeping out at the seams.

IMG_2330

IMG_2332

You can tell that these little imperfections are barely the size of a needle-point but you know what a stickler for perfection I am! I will be experimenting on this sword to see if I can get the bubbles filled with epoxy or other type of liquid resin and get the surface totally flawless. The bubbles that are encased in the resin I can’t do anything about, but that’s okay. I’m pretty sure no one but me can see them.

I want to make an even better quality mould with this sword since it’s smoother than the plaster prototype and I would have even less work to do with the polishing. That means better quality swords straight out of the mould, and less time taken with buffing so they can be in your hands sooner. Yay!

So what’s next for Clariel and when will I have swords available to sell? Well, technically, I could start putting out unlit blades right now, but for everybody wanting their swords with LEDs equipped, I’ve got to cast another sword, decide on the light mechanism I want to implant, mill out a slot for the light to go in, check and make sure the electronics work the way I want them to, make a mould for all the swords that will have lights in them.

Easy … peasy? Man I hope so after all this but I fully expect a “Mistakes with Metal” photo series to be coming up. Haha! Wish me luck okay?

Before I scamper off to the workshop, I want to thank you all from the bottom of my heart for being so supportive through all my frustrated yowling. Those of you who have commented on my page, in person, here on my website, the hugs, the suggestions, the shares, the likes, the kitten pictures, the coffee … it all helped so very much to keep me somewhat sane … okay functional while throwing myself at this project. The demon Depression is the scariest of all; it steals your will to fight, to even try. It needs a full team to defeat and it’s great to know you’re all part of my posse.

Stay awesome everybody. I’m off to make cool stuff.