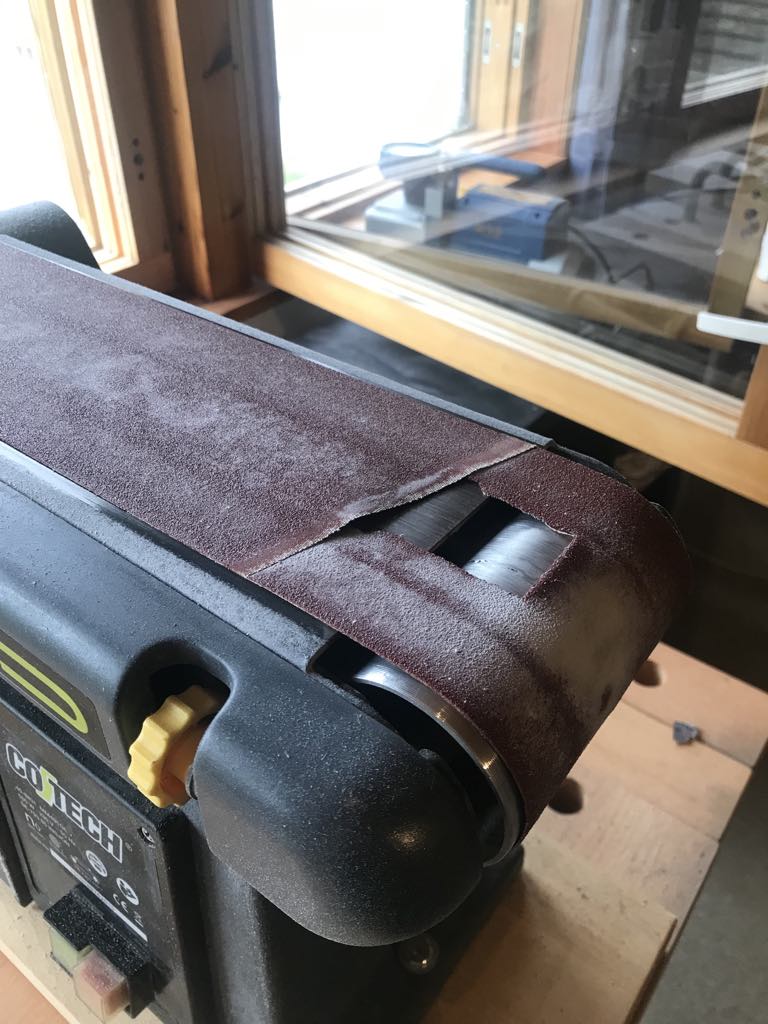
So, in all my years of doing this crazy job, I’ve never had a sanding belt break. Today, I had two of them fail on me.
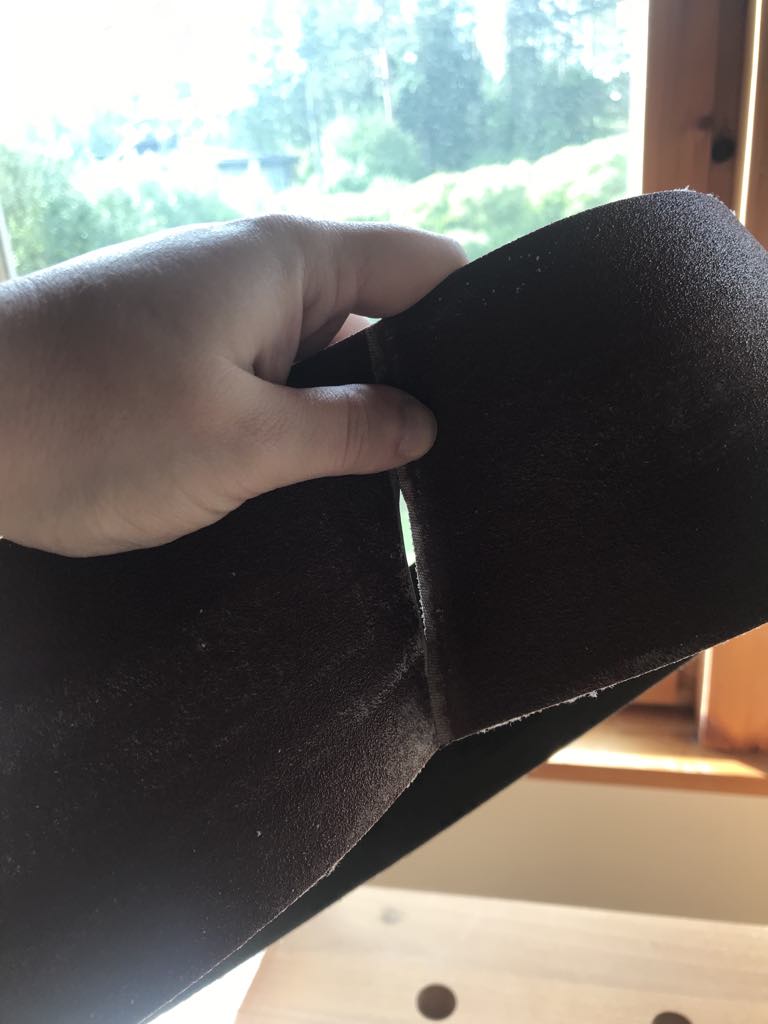
Both of them failed in the same place. Right at the seam. I don’t know if it’s because they’re old or because I should have used a coarser grit for this stage of shaping or some other reason I’m not seeing. What I do know is that Those were my last two belts and I’m not sure how I’m going to finish the project. I’m not exaggerating when I say I’m broke right now.
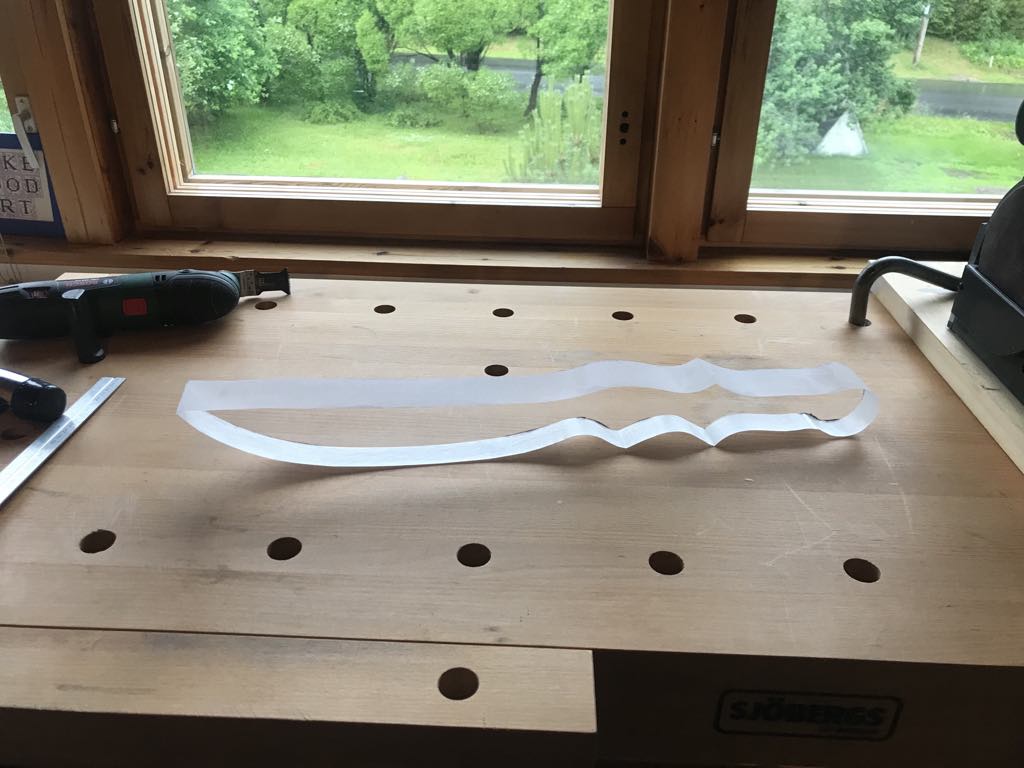
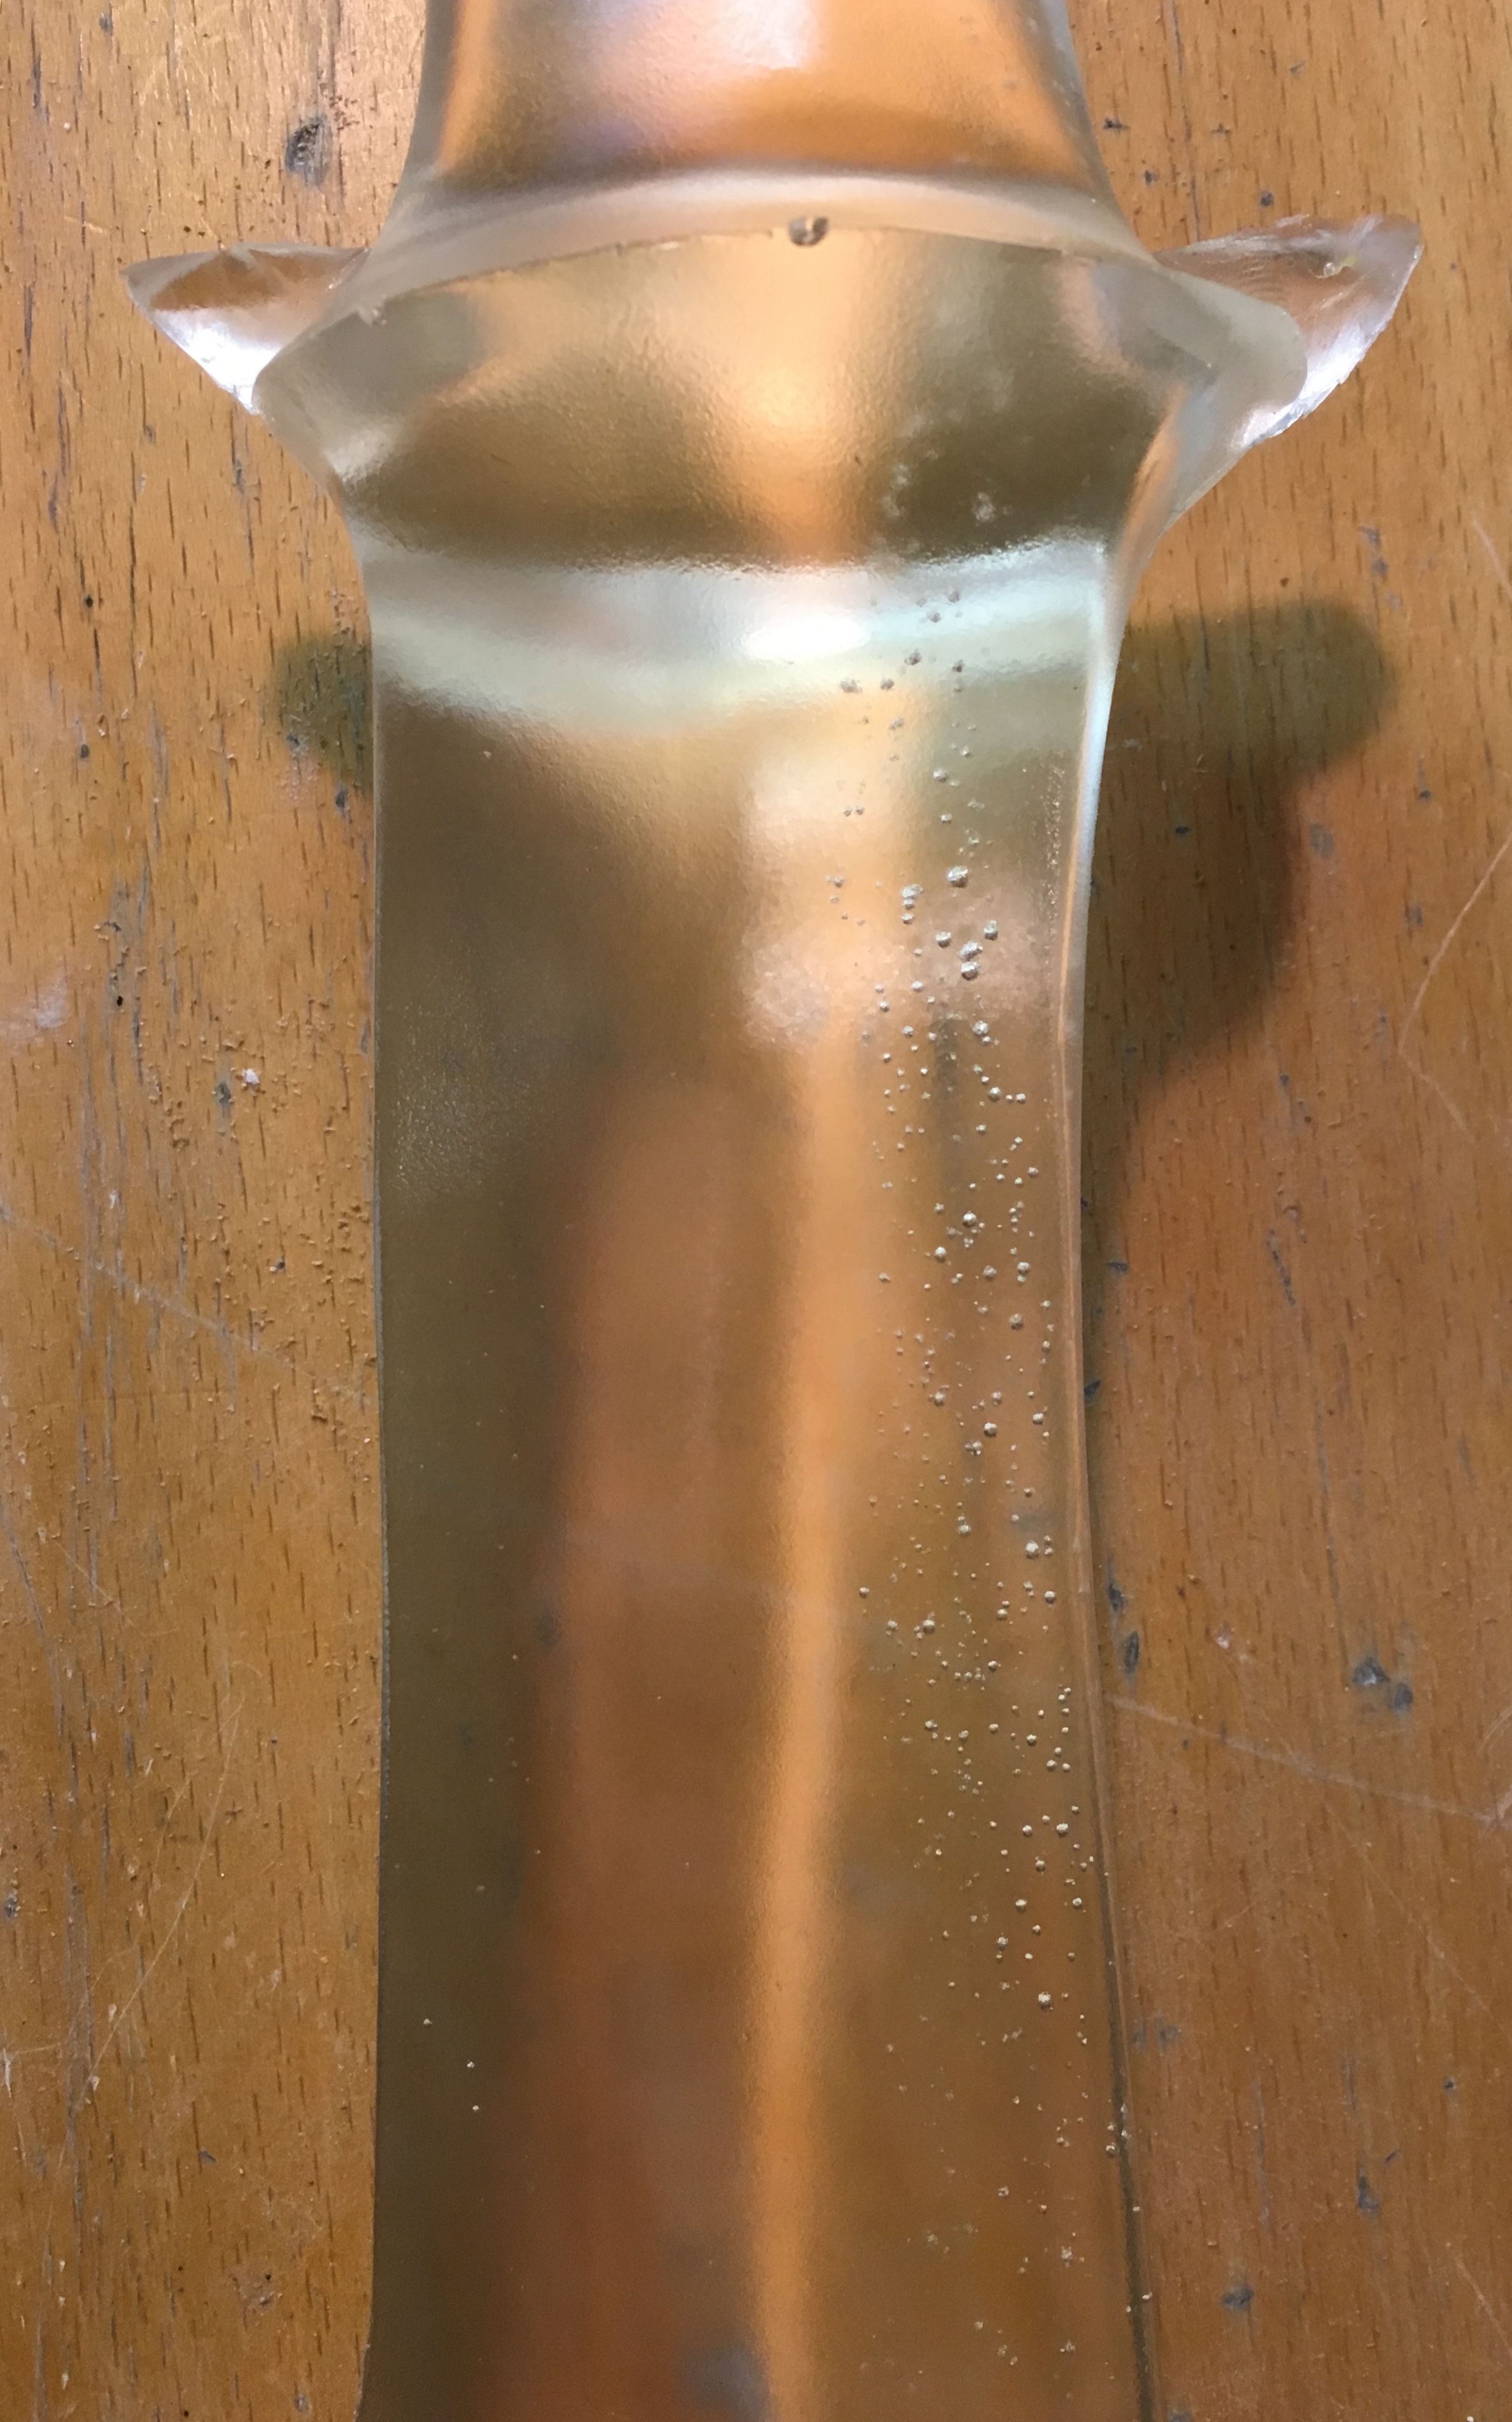
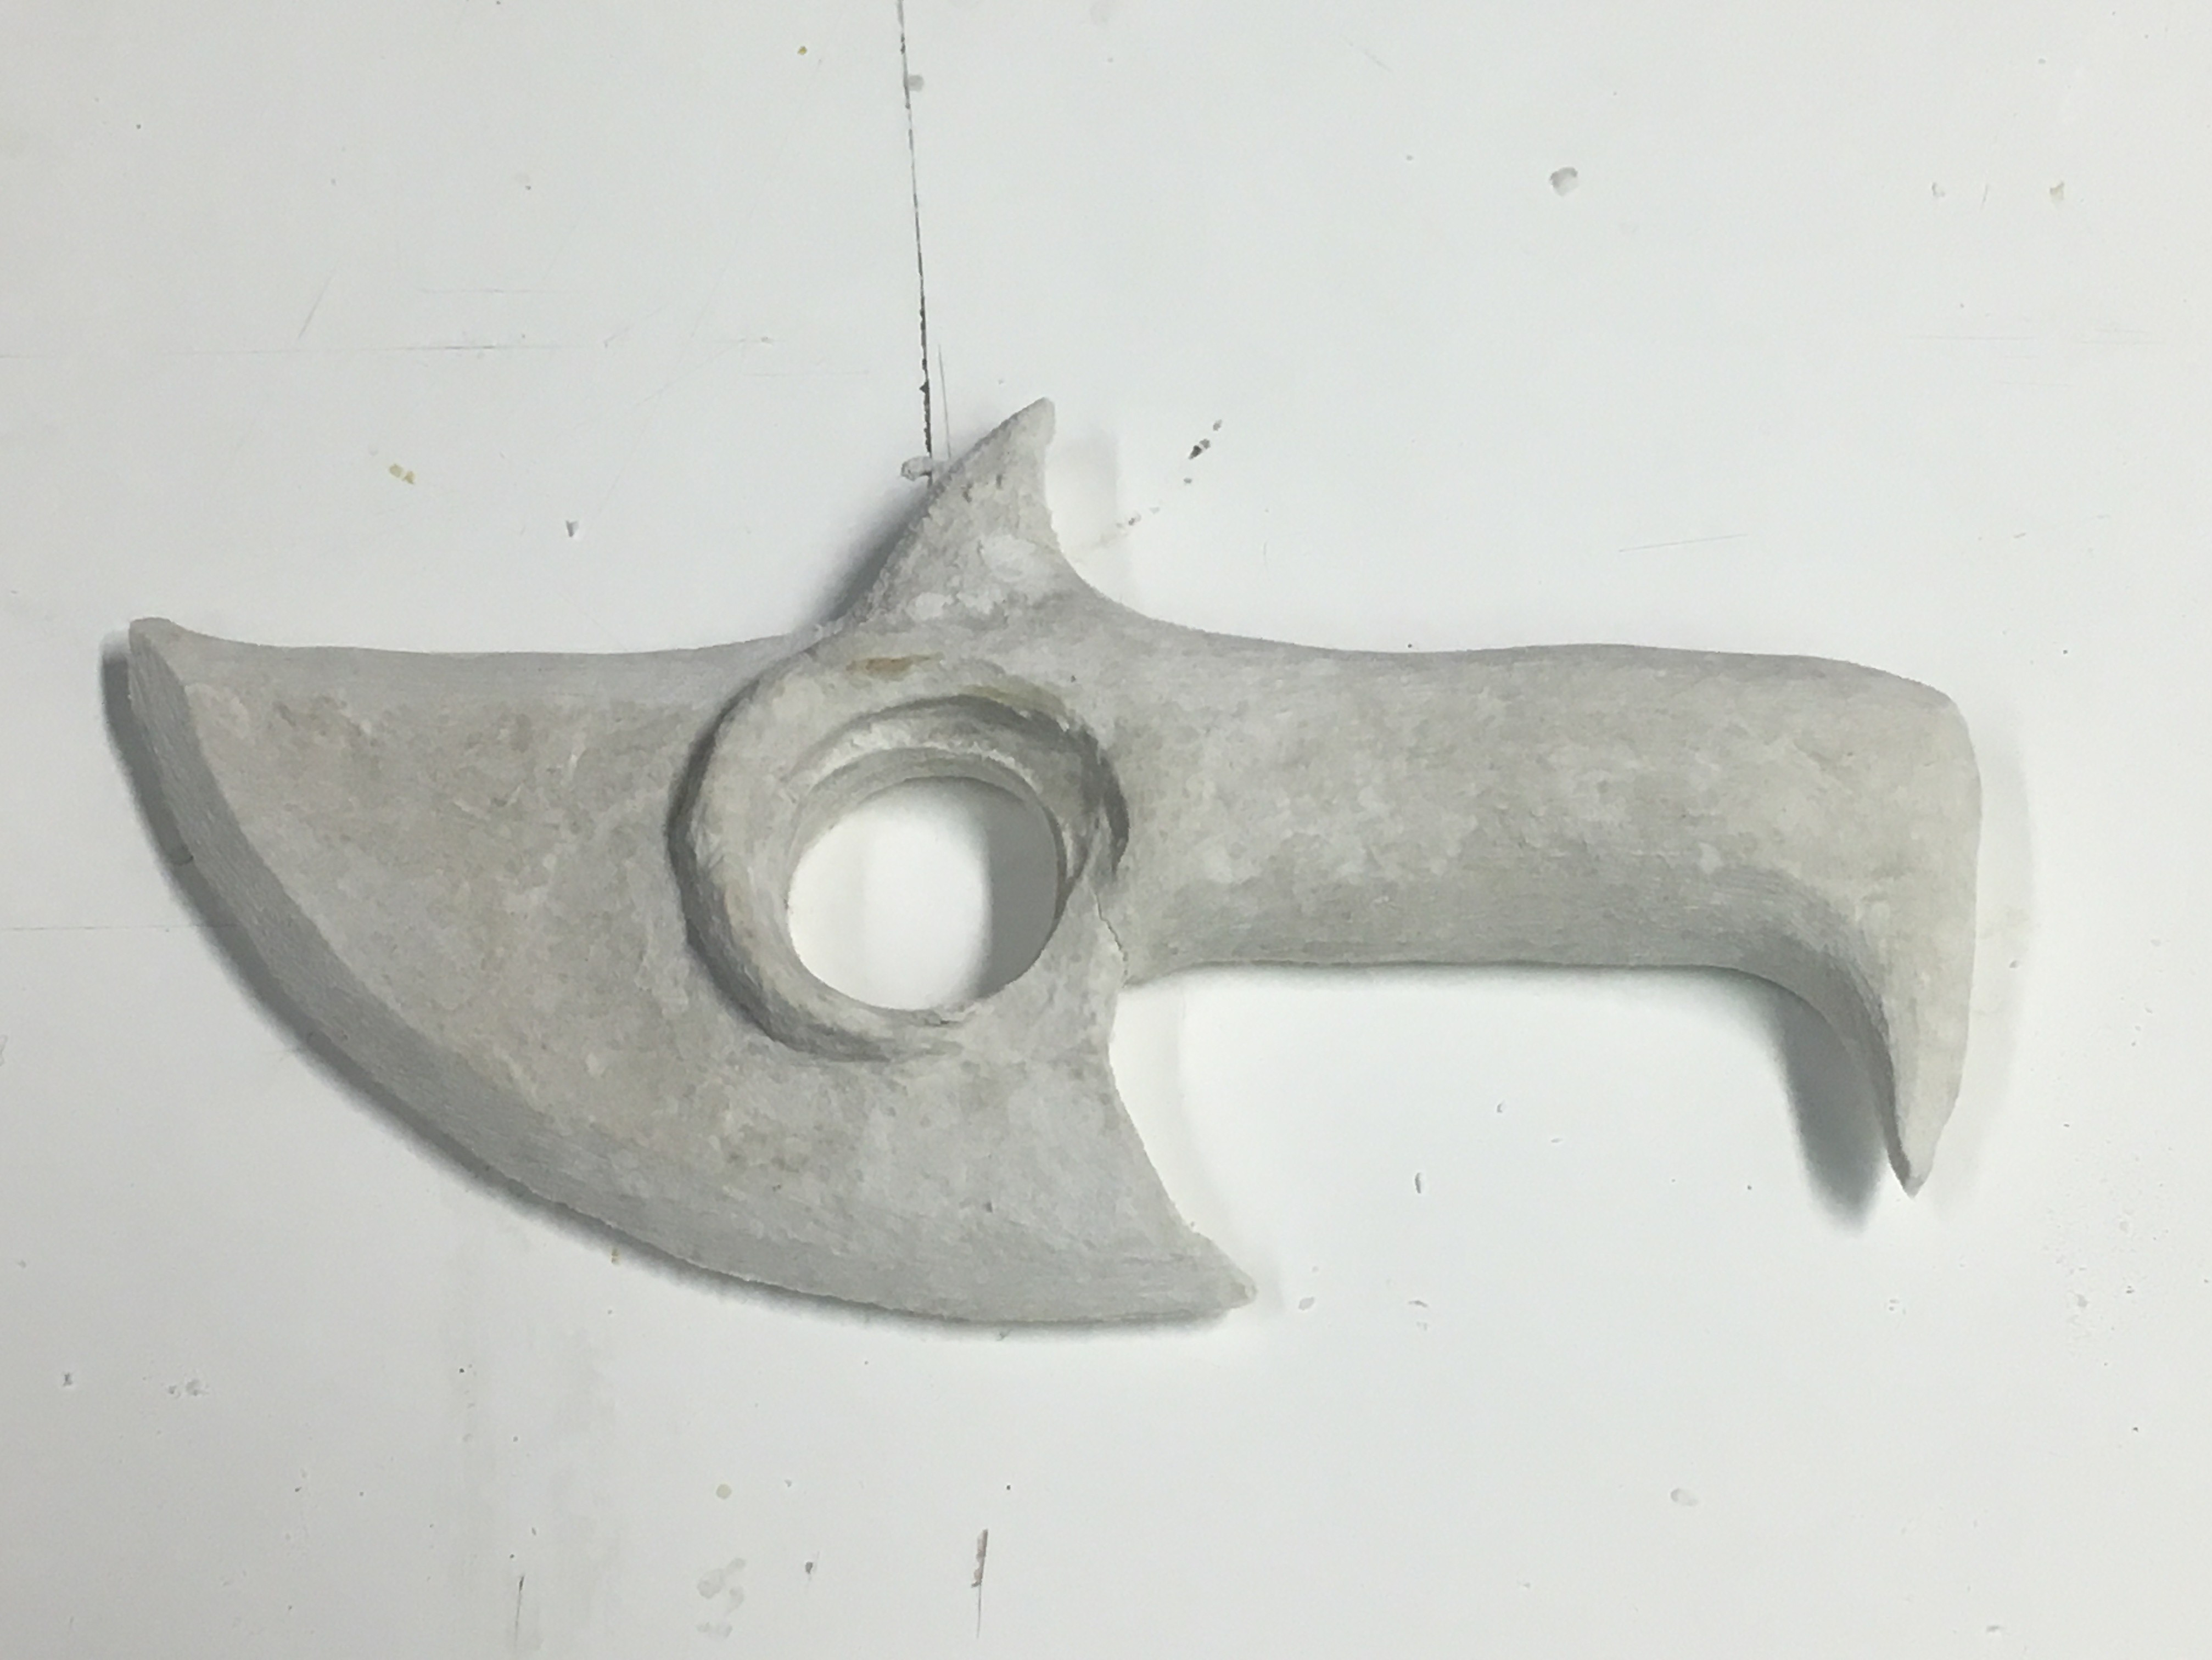
The good news is that I got the seraph blade all sanded around the edges and I can at least get it measured and marked up for shaping. It’s really important that all those edges make a nice 90 degree angle with the sides (which we know for sure are flat). That lets me make sure I get the edge of the blade right in the middle and not curving off in one direction or the other.
So what now? Well, I shut my machine off and cleaned up the workshop, swore at the broken belts (as is customary), and went for a shower. Now I’m gonna work at clearing my head and conferring with my wife about what sort of budget we can spare for this project. I can’t afford to sink money into it until it’s done which was my way of doing things before financial disaster hit us.
Today, I’m going to tell you about my day using pictures.
ScreenshotScreenshot
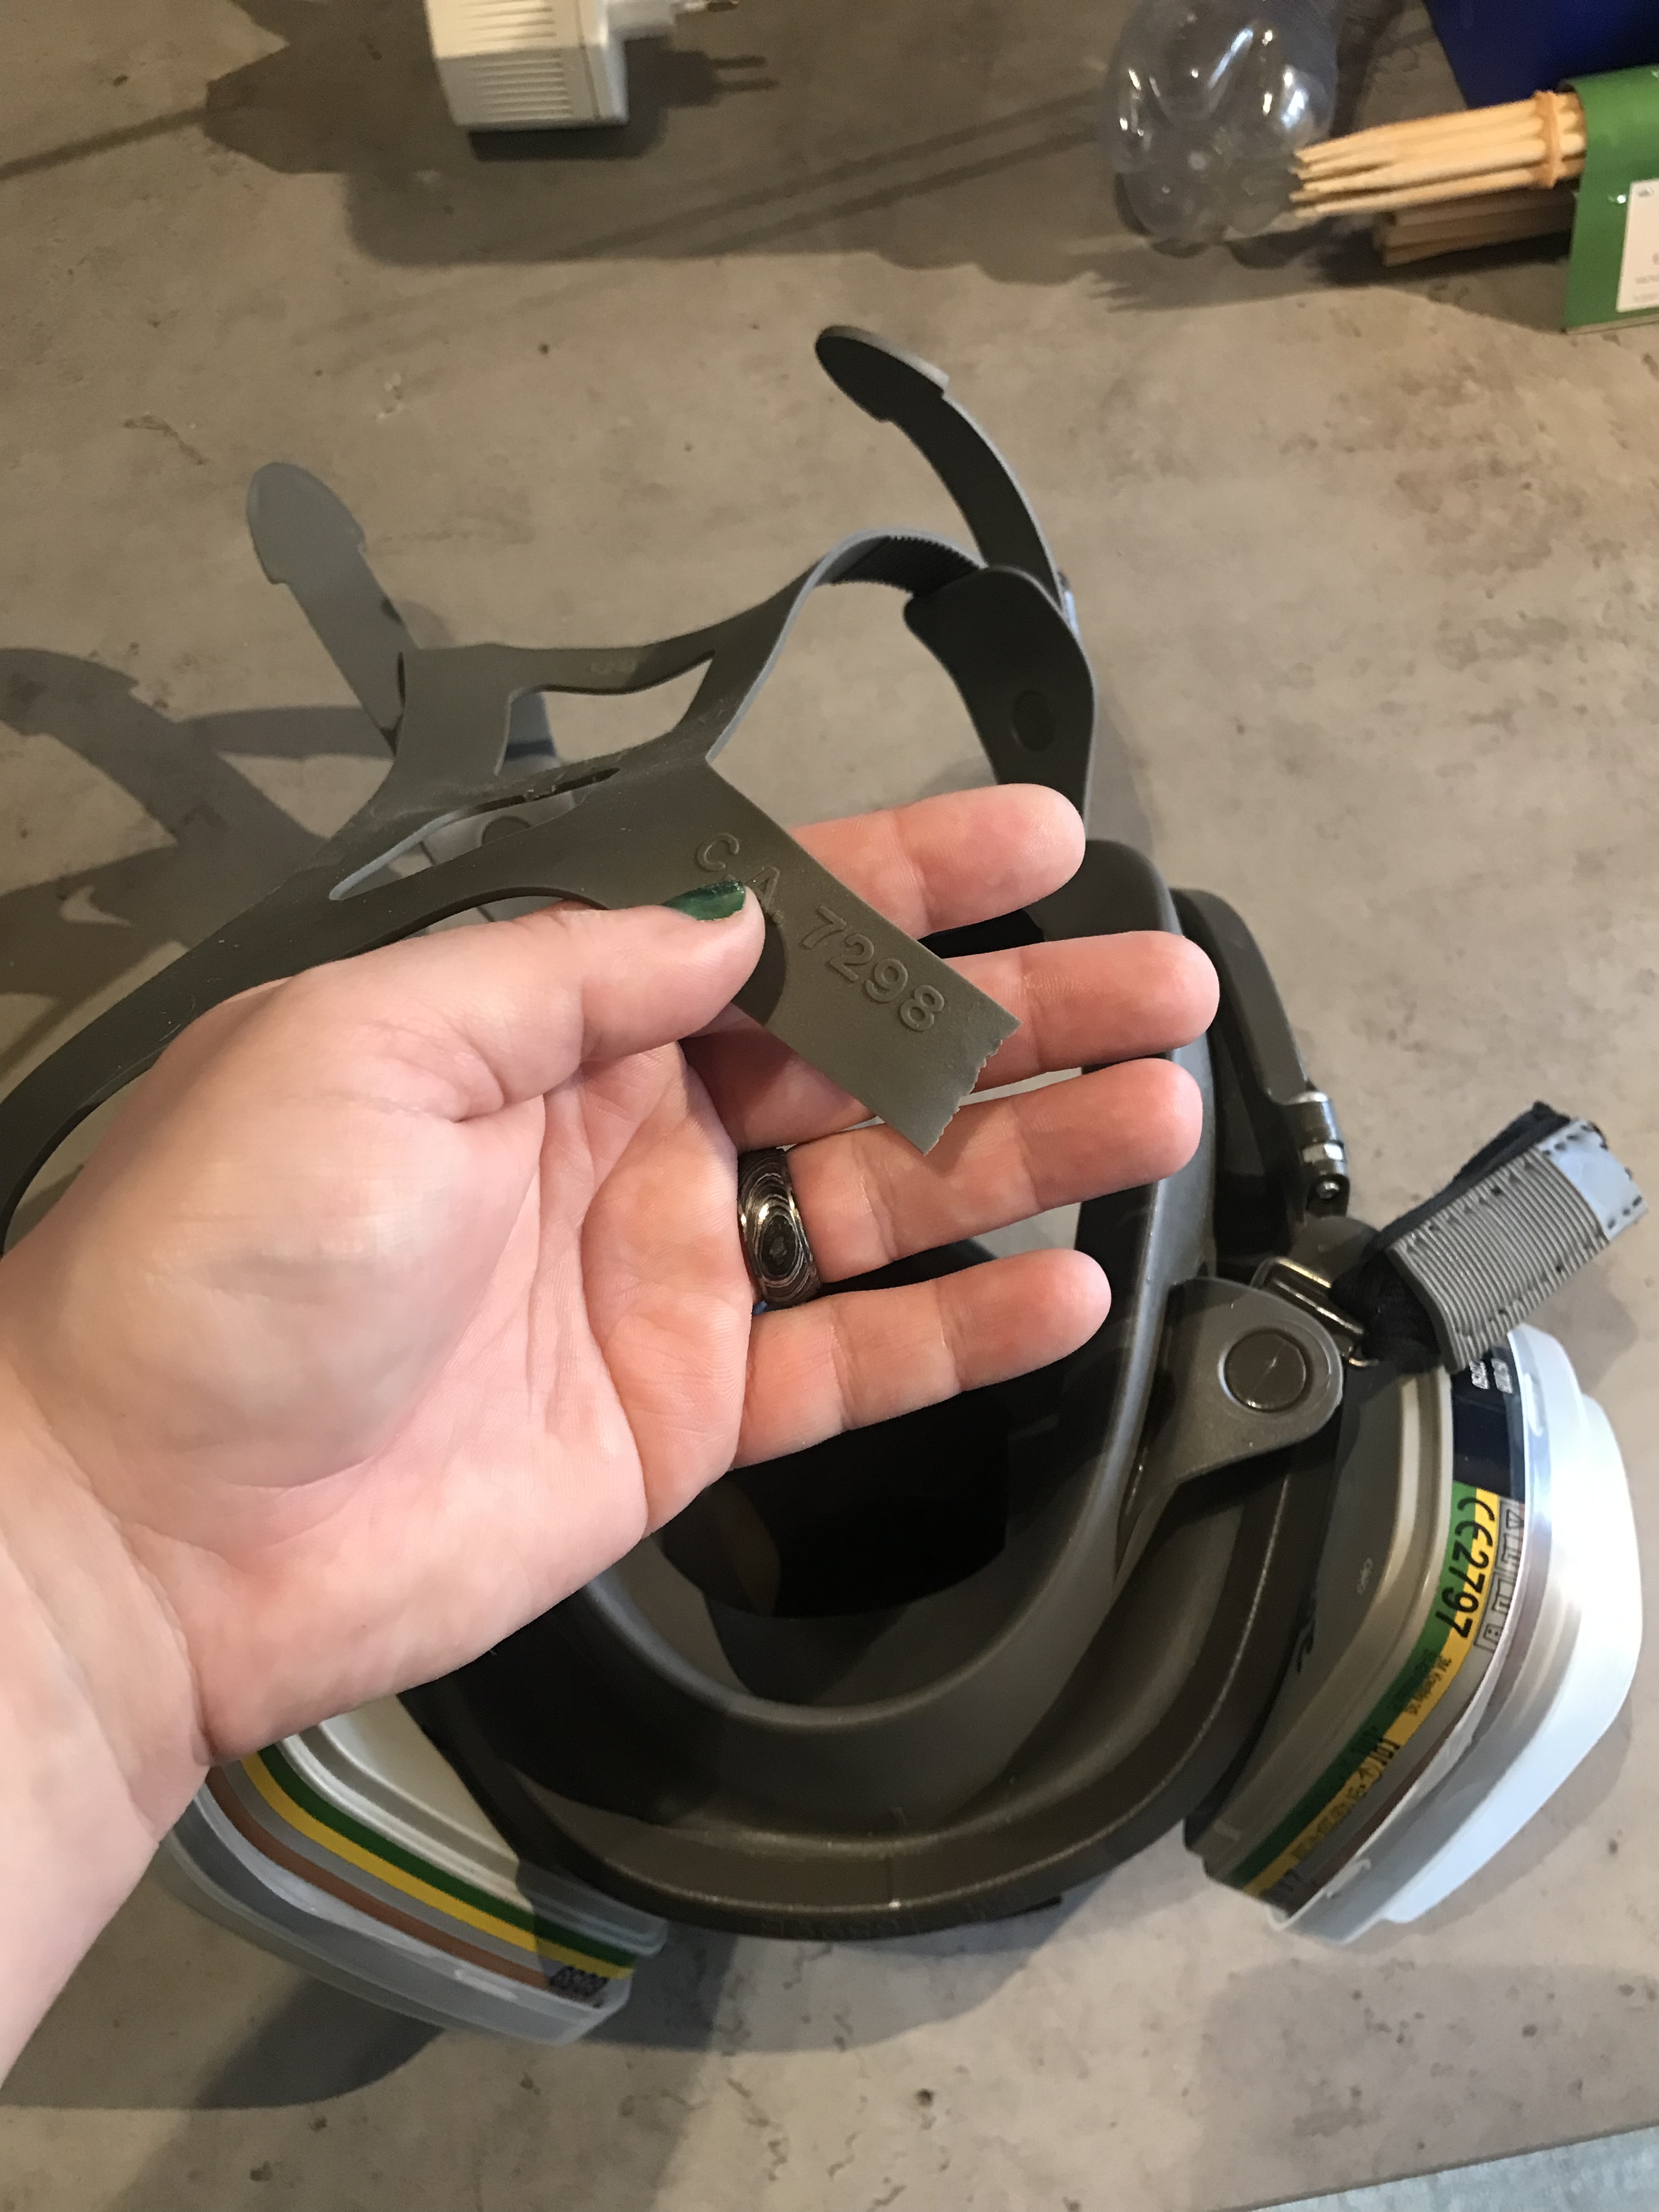
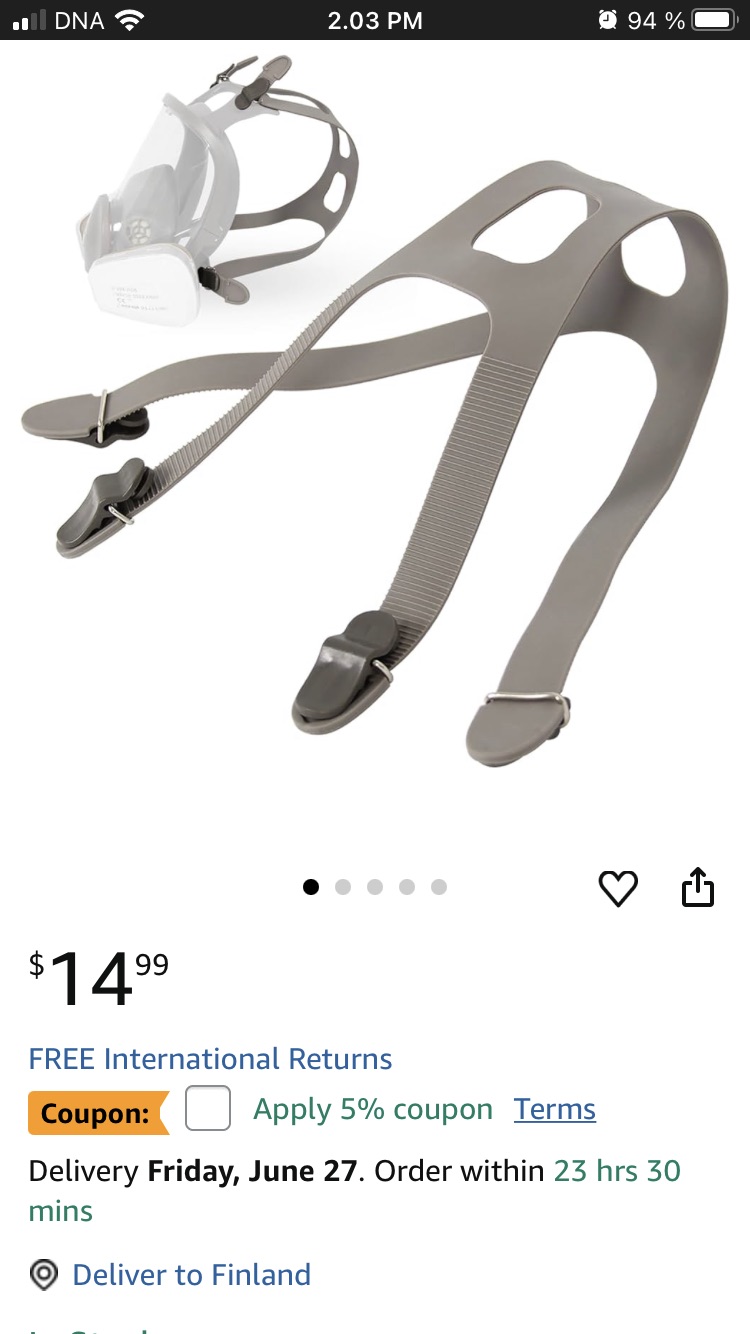
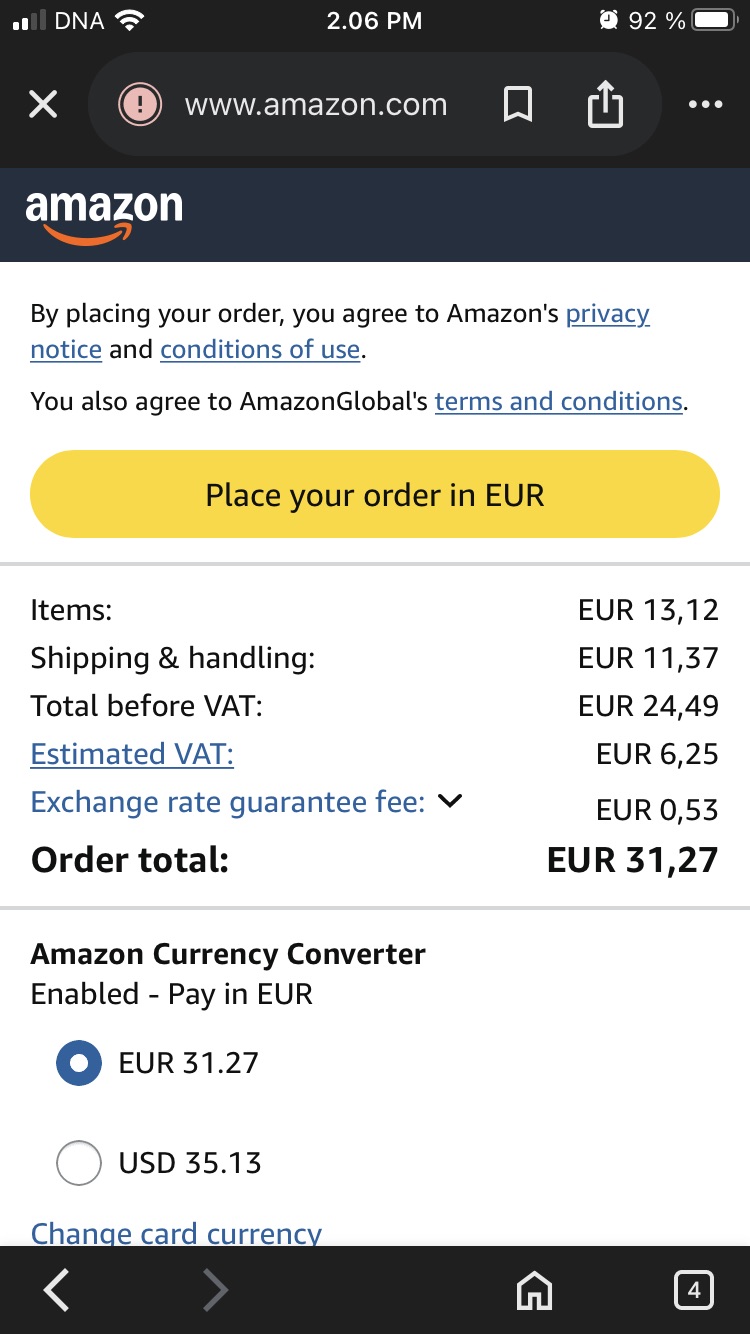
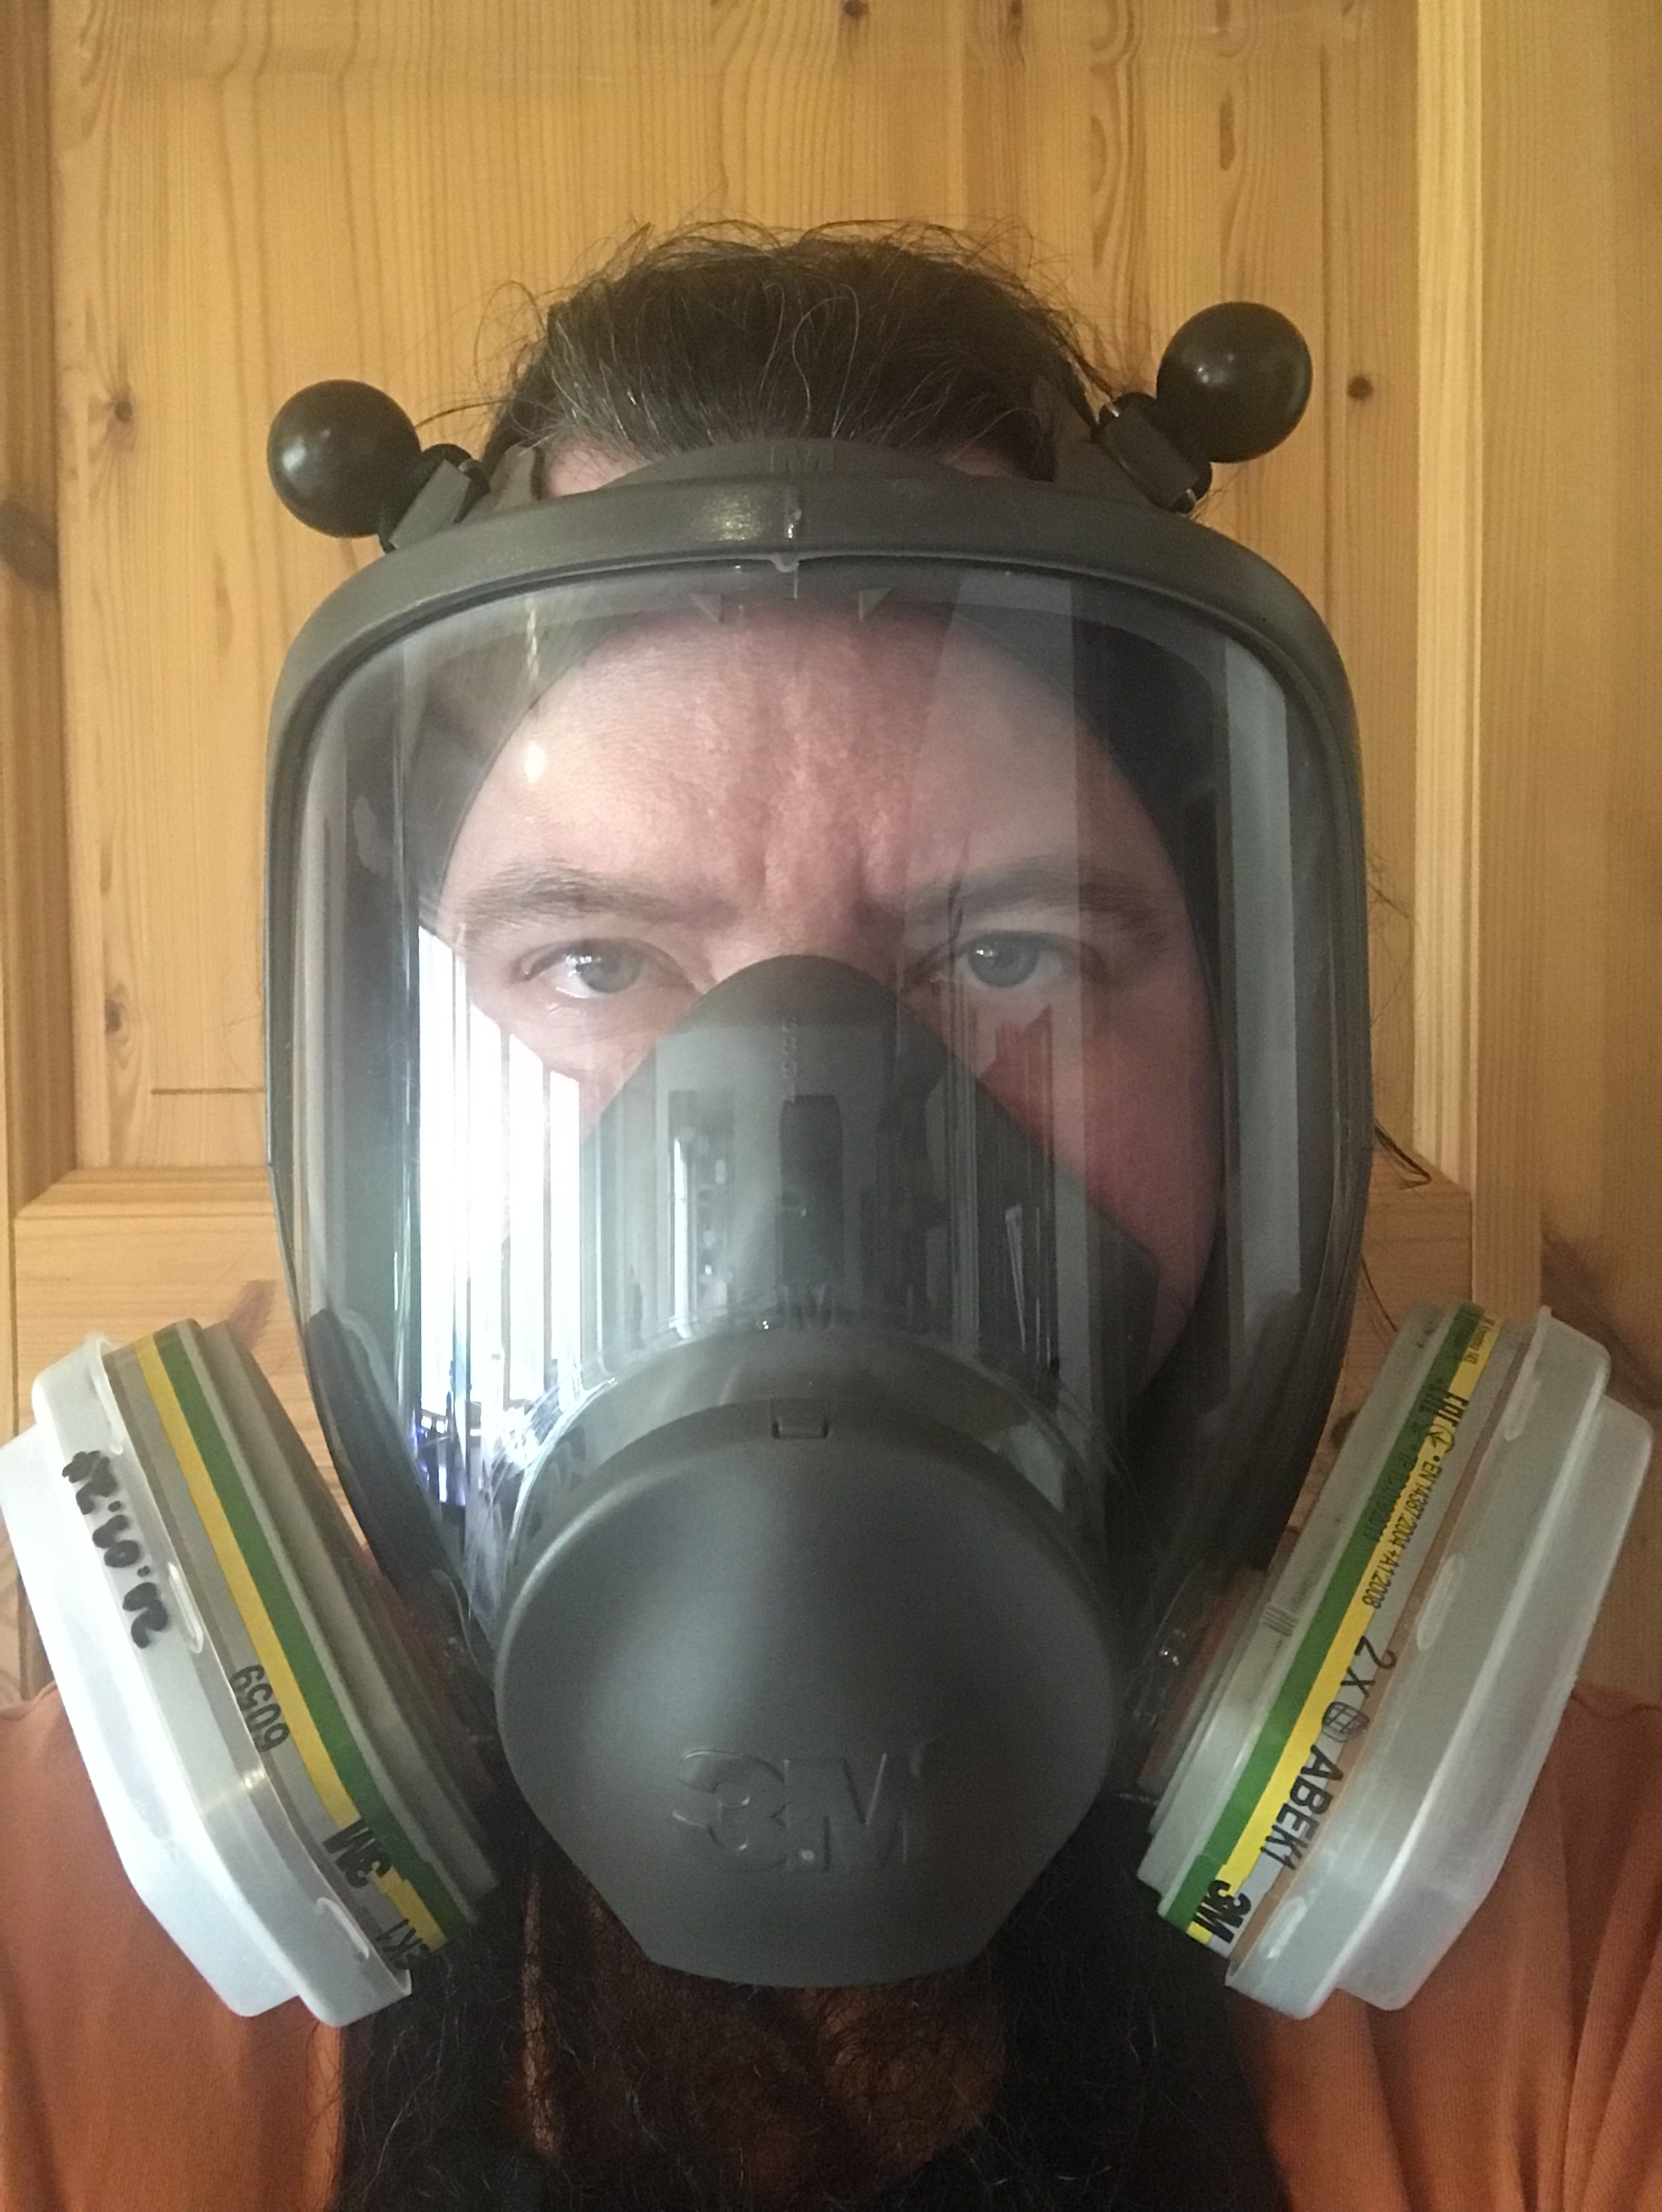
Yep. It’s been that kind of day. I’ve already repaired this strap system once and I don’t have the time or materials to do it again. I have a replacement part coming to me via Temu. Don’t throw shade on me for that. I am BROKE and I literally can’t afford anything better. No, there is nothing available locally in bumf*** Finland. The next cheapest thing I could find was from Amazon at 40€ plus shipping and it would arrive while I’m visiting my relatives in Canada. So, for now, we’ll have grouchy post-apocalyptic Shrek.
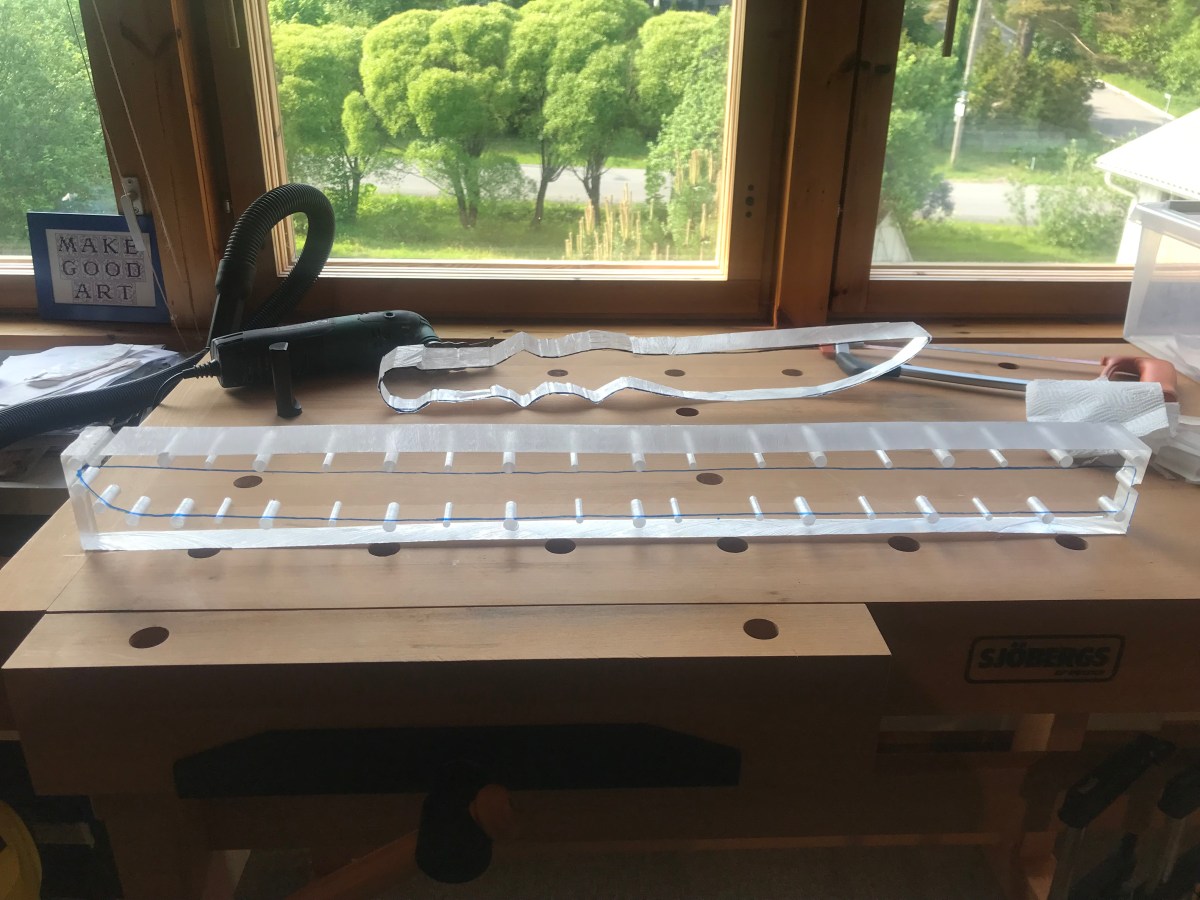
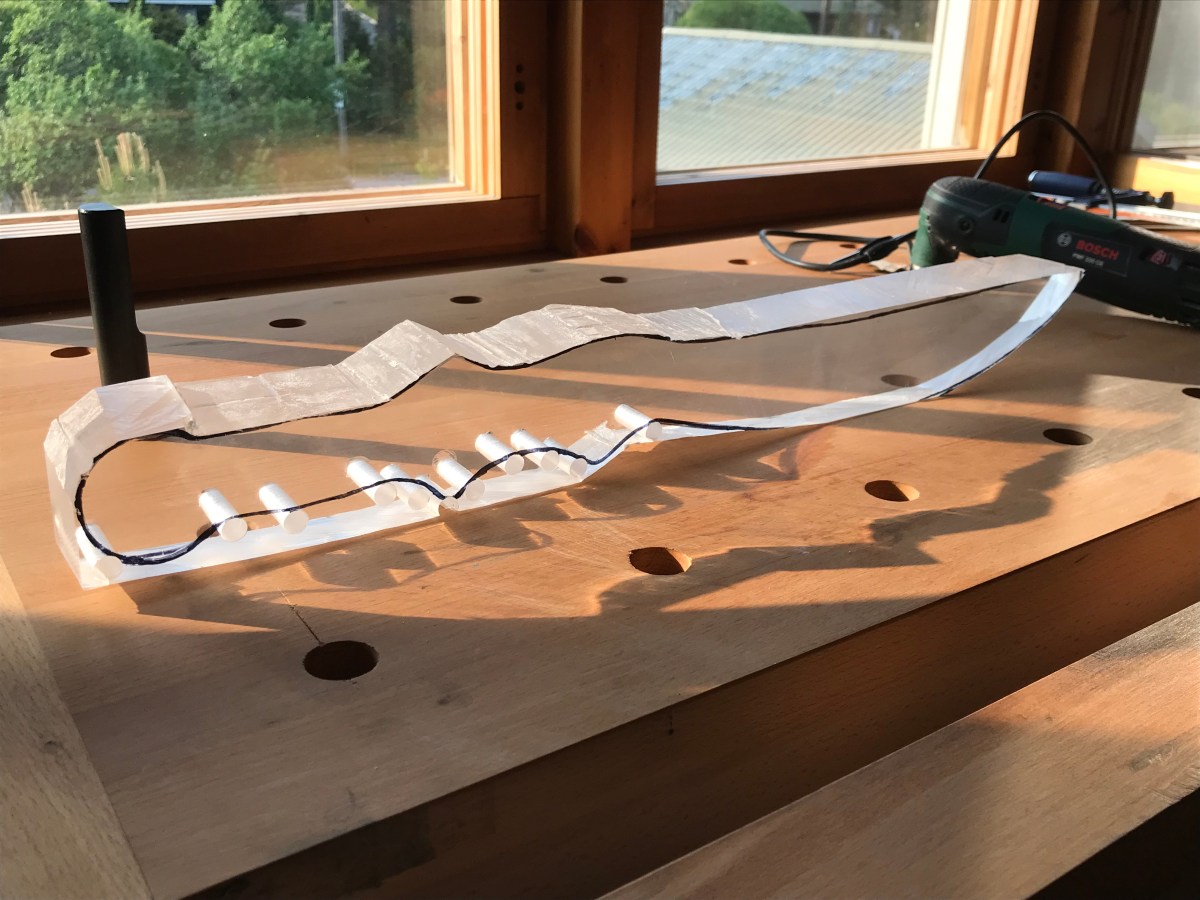
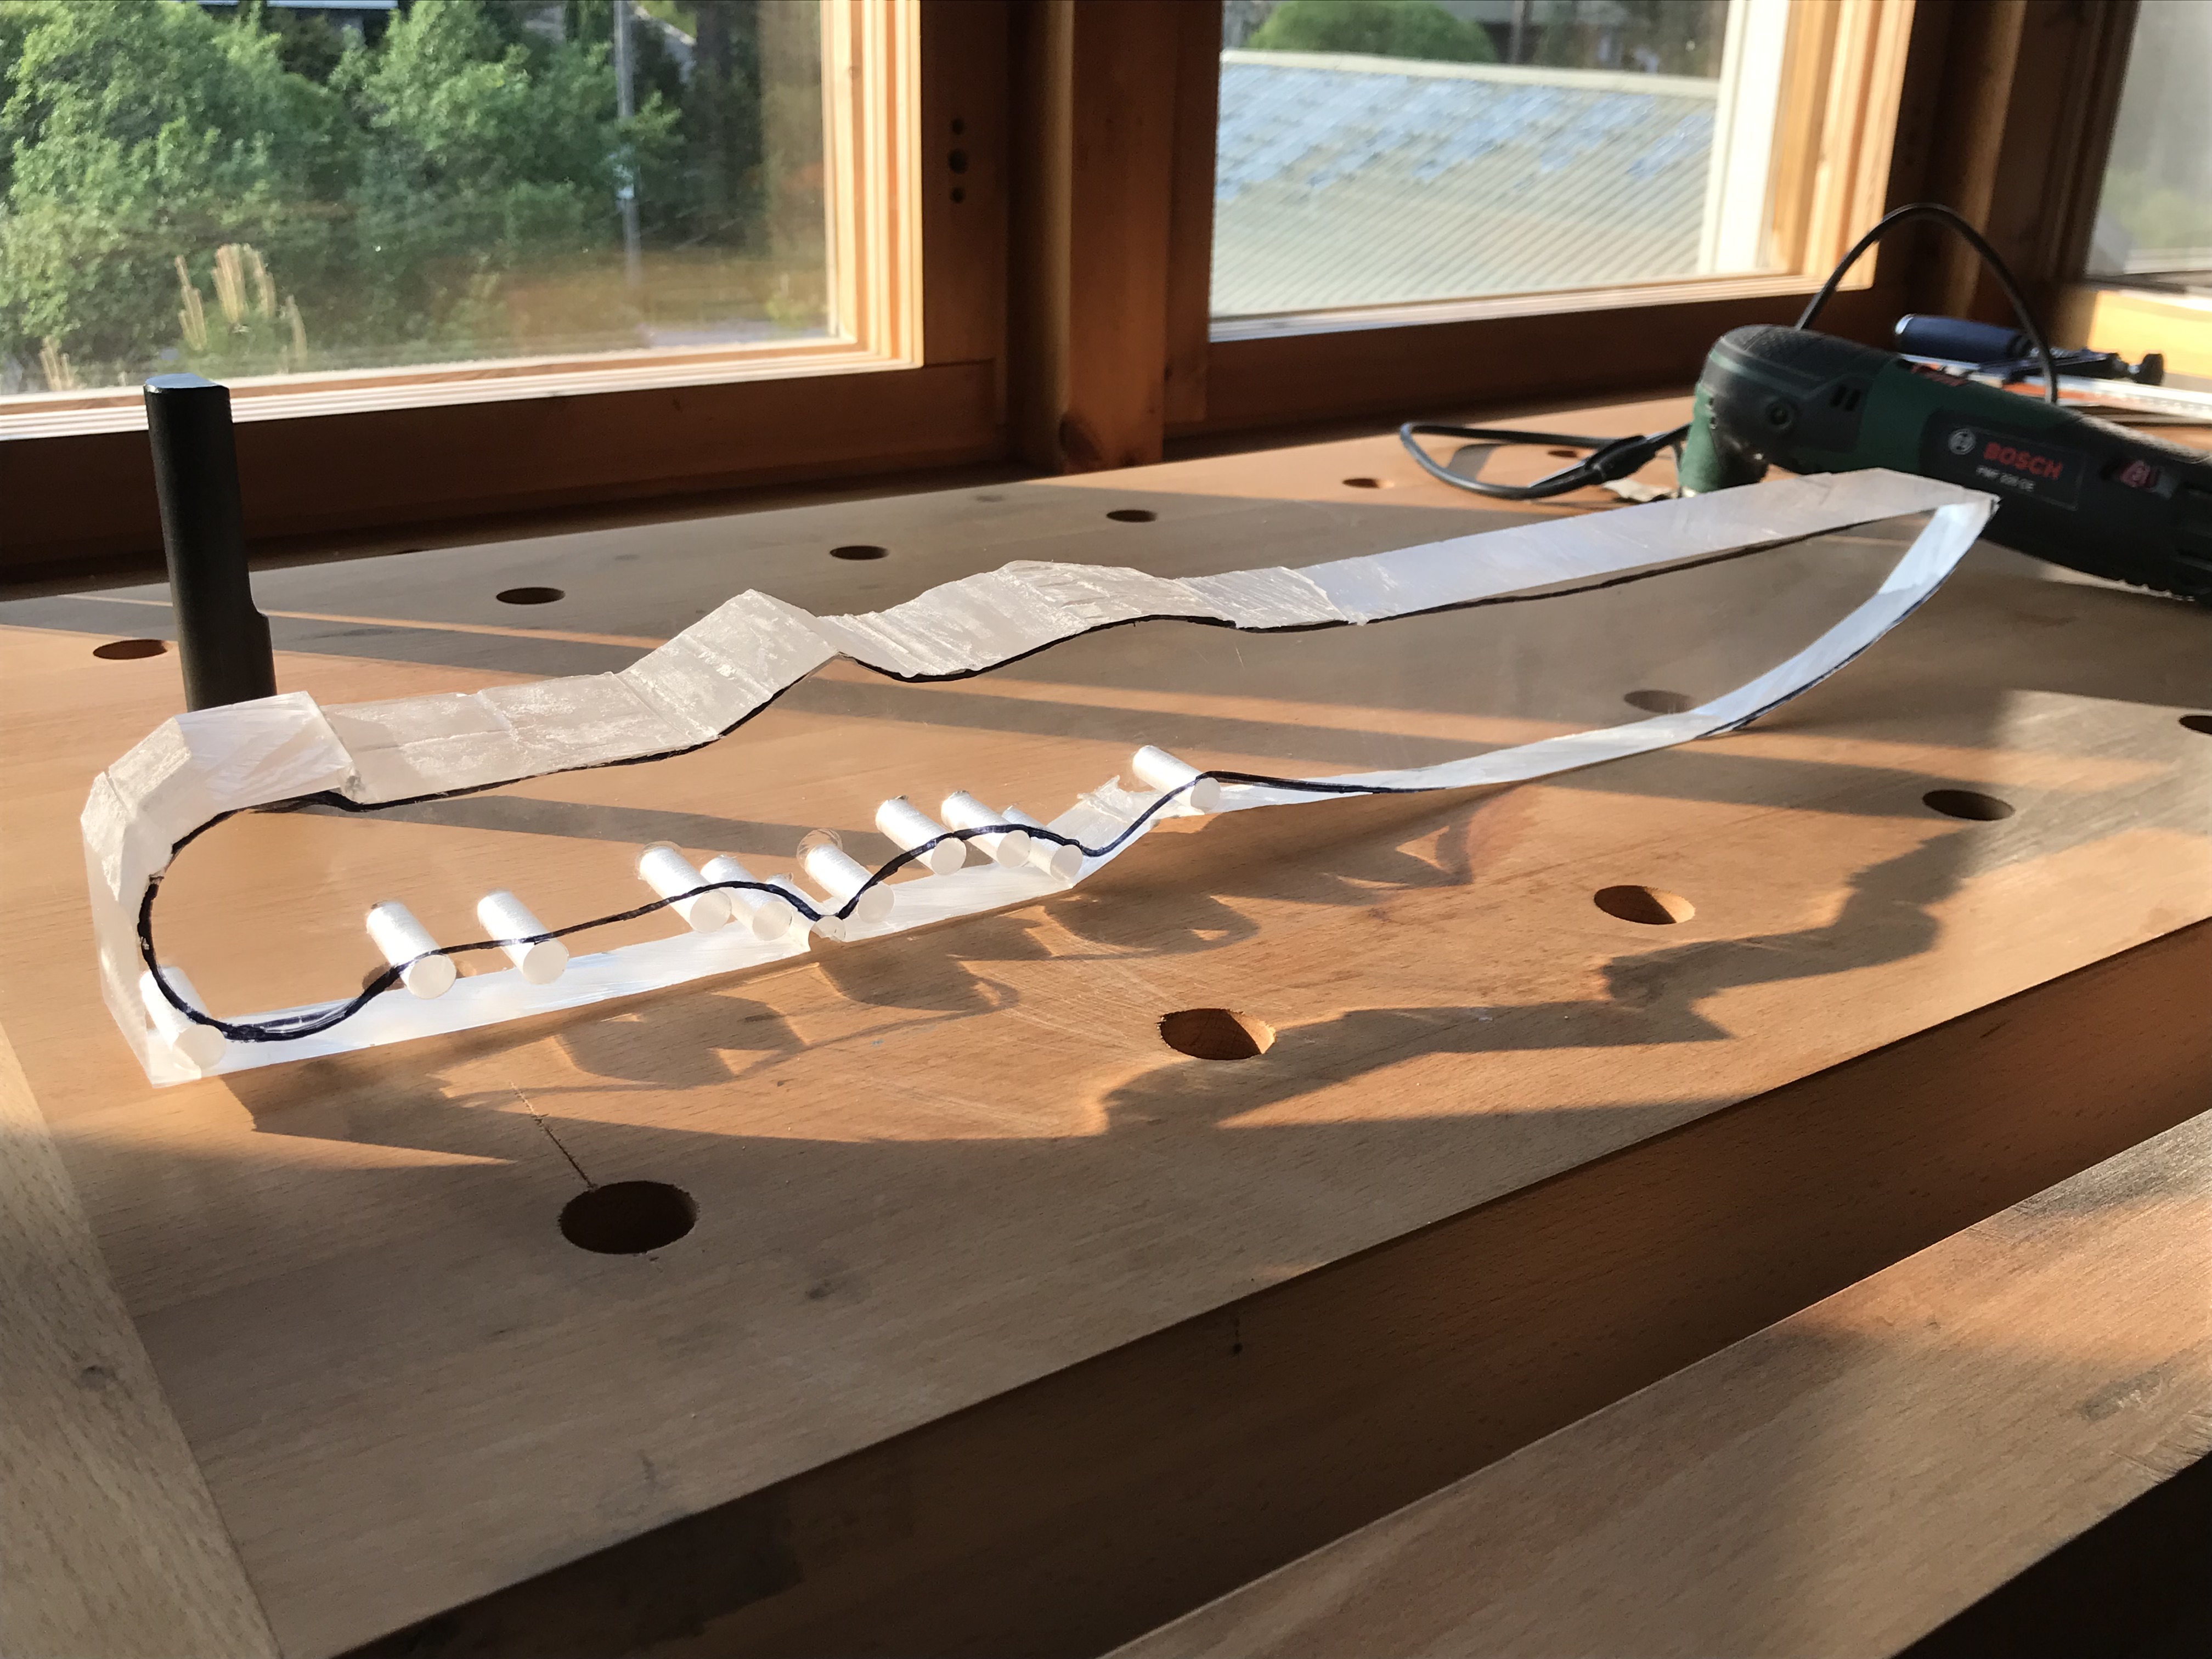
Angel blade all cut out, now it’s time to work on the wakizashi!
Got the modified Clariel seraph blade cut out as much as is practical with the plunge cutter. Now it’s time to tackle the wakizashi.
Slow and steady wins the race. There are several factors that dictate the pace of carving PMMA (Plexiglas).
For me, the first consideration is how much work my body can do each day. Because I’m not well, I have strict limitations on my endurance. I still have to do other things each day like prepare food, shower, clean, take care of my cats, and go grocery shopping. If I use up too much of my energy or raise my pain level too high, I won’t be able to do some or any of those other things.
The second consideration is the nature of the material itself. Unlike wood, PMMA will begin to melt if it gets too hot. This will deform the piece you’re trying to make and, if you ignore the warning signs of overheating, it can actually discolour the plastic.
To cut PMMA, you need to use friction. Whether you’re using a saw, a grinder, or a sander, the problem remains. You will have to go slowly and give the material adequate time to cool down during the cutting process. You must work in stages and keep moving the tool to different parts of the piece.
The third consideration is the tools themselves. I consider my Bosch multitool to be a decent machine but even it overheats after a few hours of work. It needs time to cool down as well. It’s also possible for the teeth of the tool to get gummed up with melted plastic and it will need to be cleaned.
Vibration from the cutting tools can cause numbness, tingling, and even nerve damage if used for a prolonged period of time. This can be partly mitigated by keeping the cutting bits clean and sharp. The one I’m using needs to be replaced but I’m having difficulty sourcing Bosch starlock cutting bits in Finland. Ah, the joys of living in a remote corner of the world.
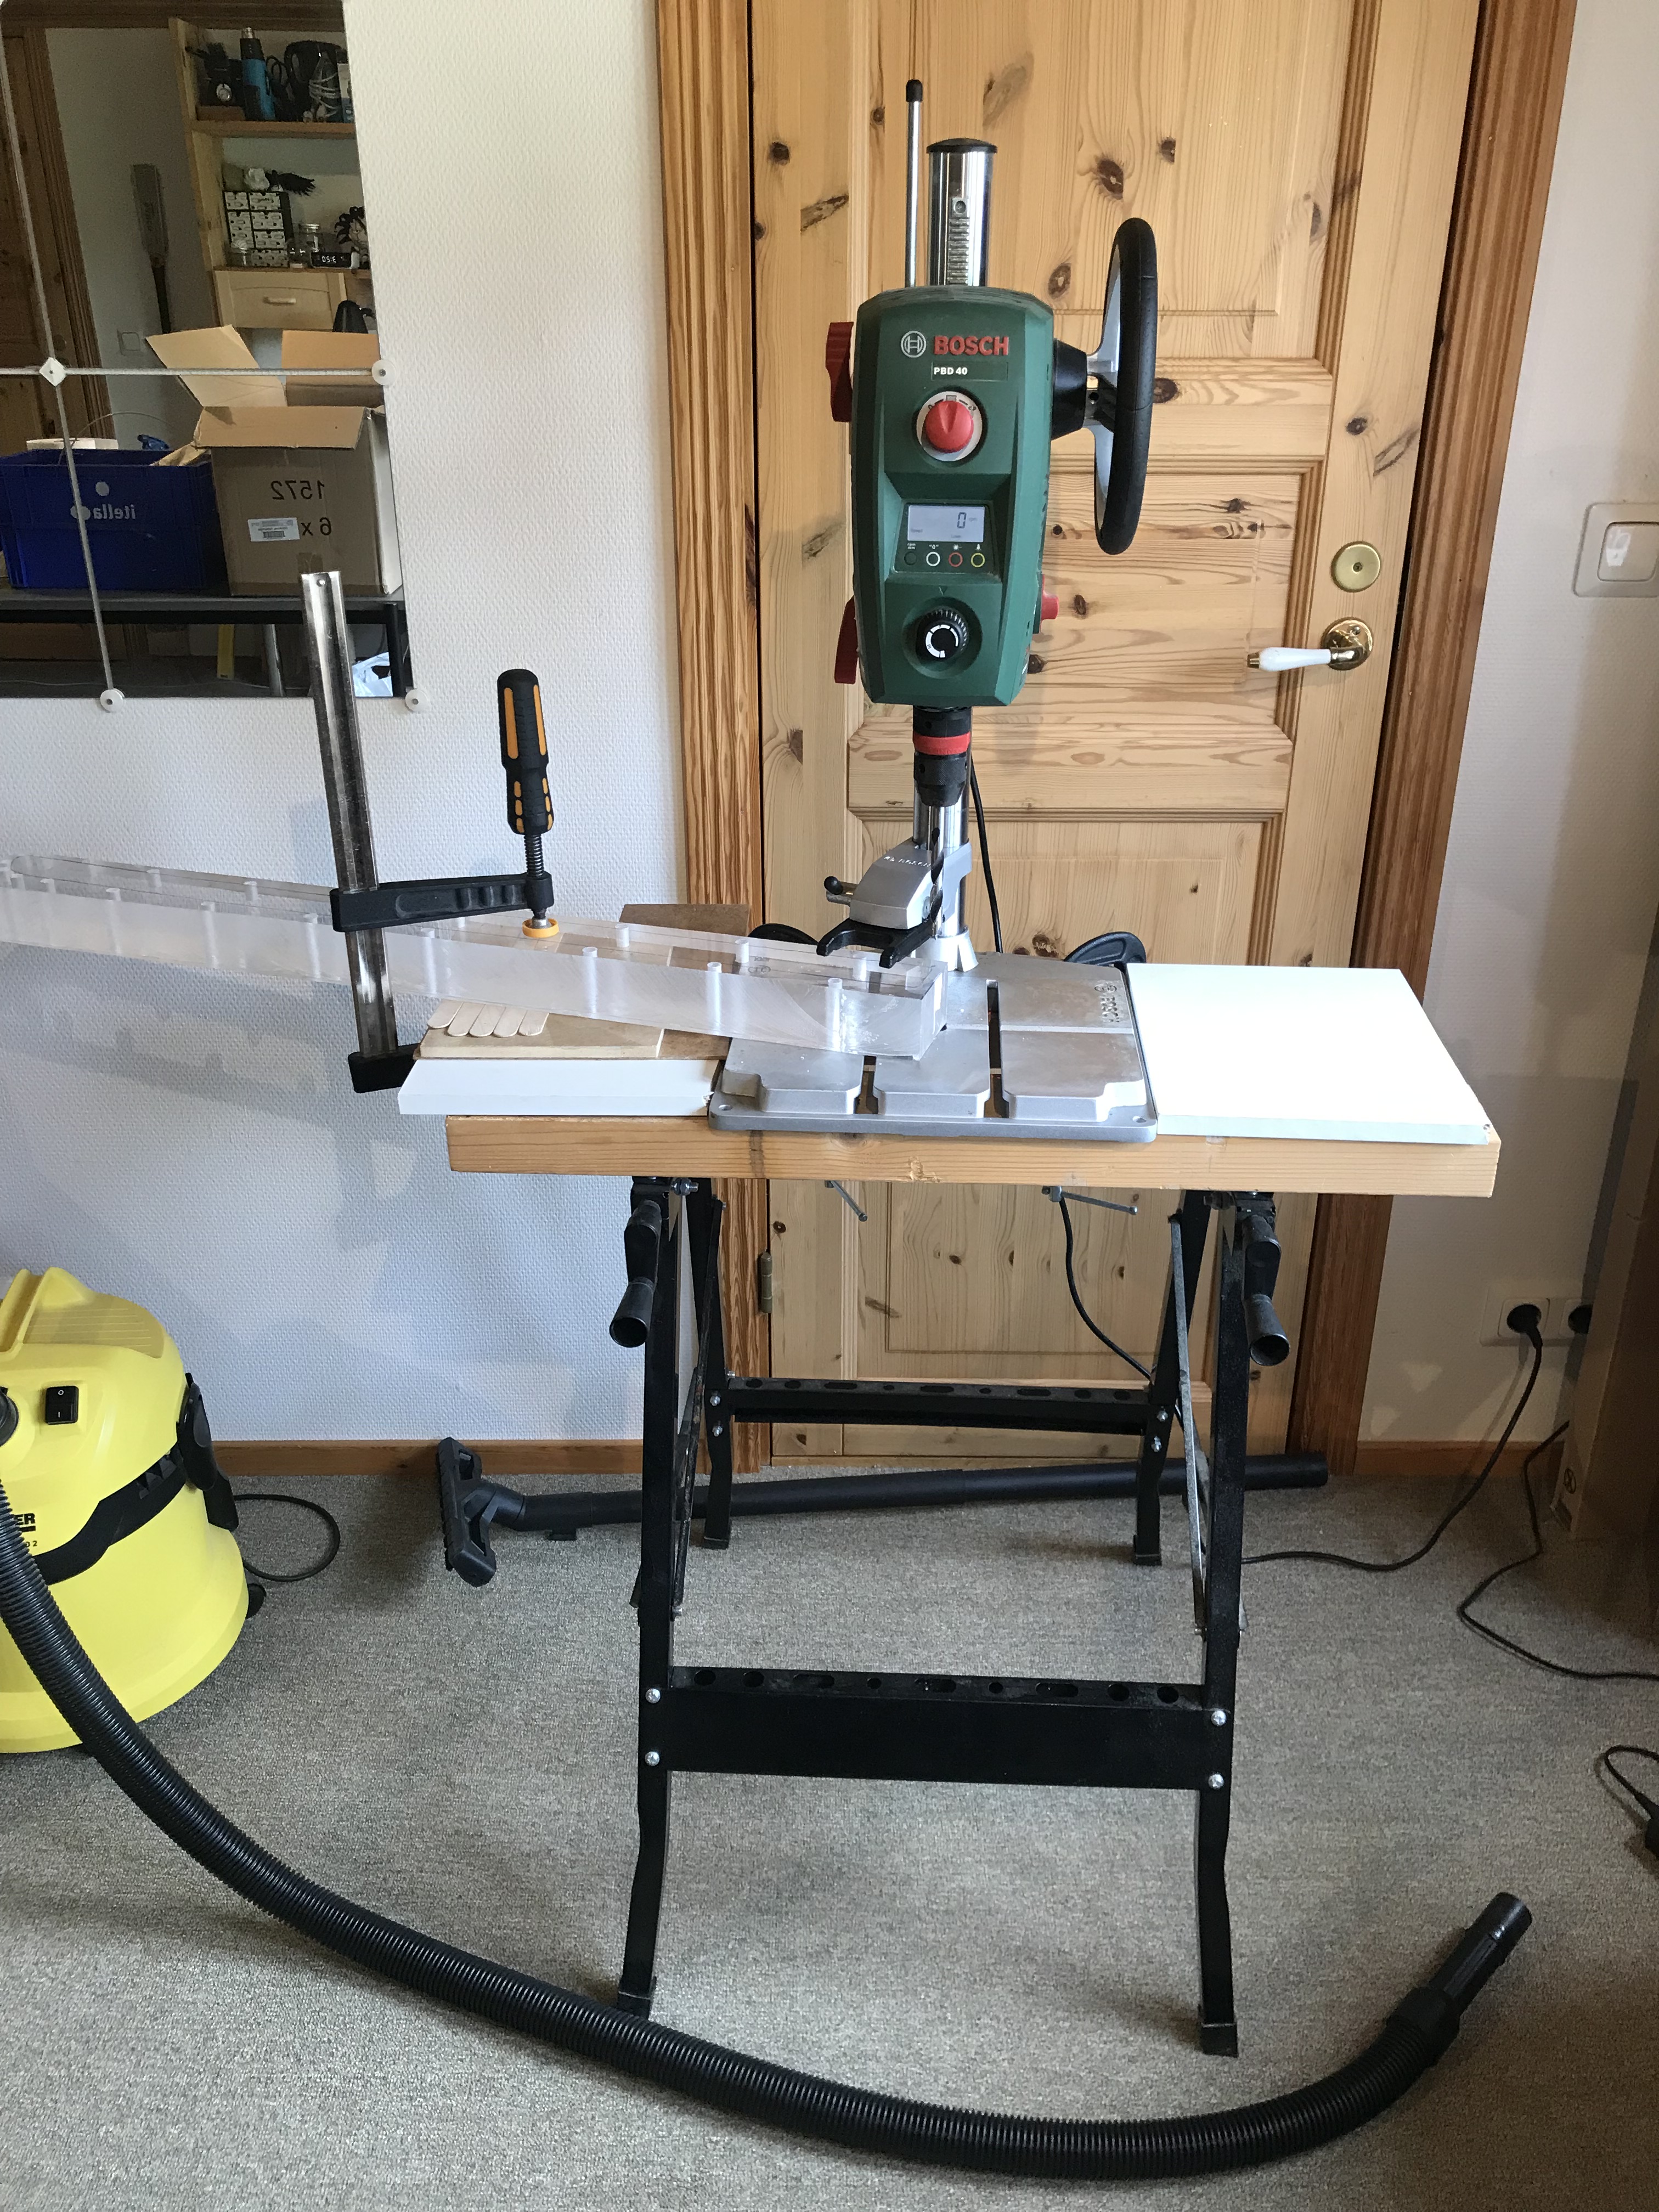
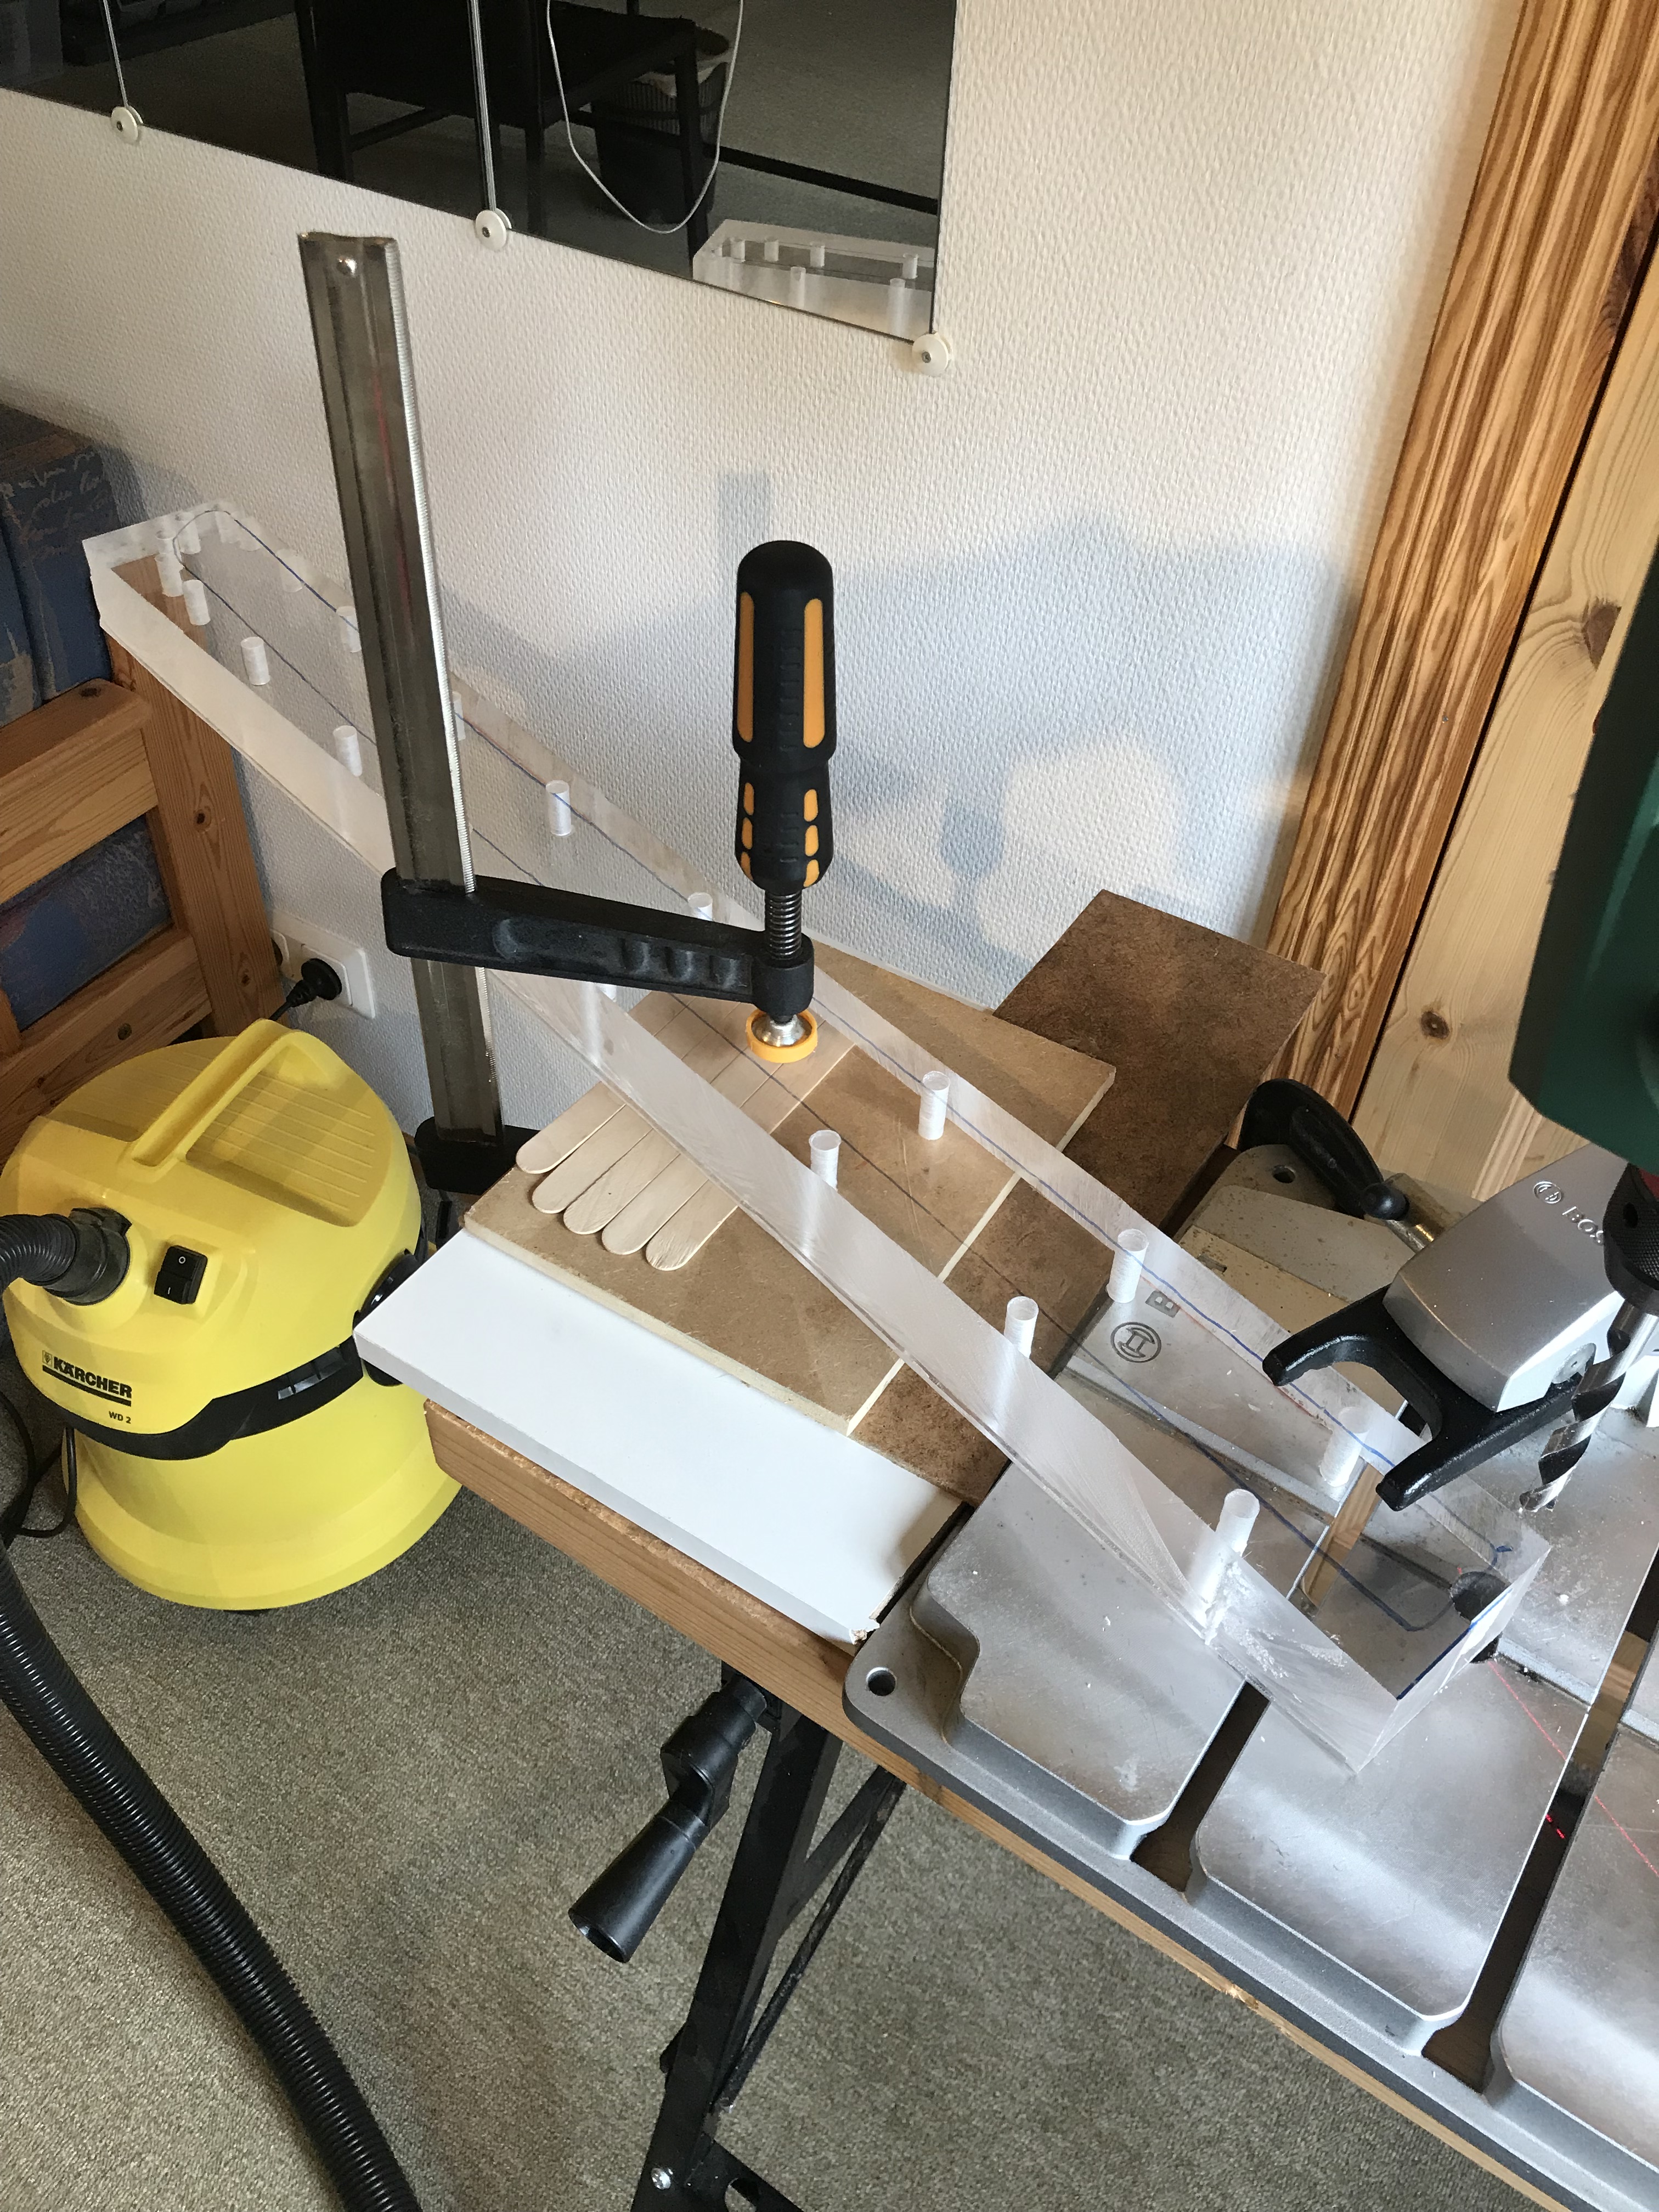
Are you ready!? Me neither. Anyway, I have a reasonably functional work space and some materials. On the workbench right now is a wakizashi and a modified Clariel order that was cancelled when the pandemic started.
My workshop is now located on the upper floor of my house. It was going to be in the garage but it turns out that the heating in there doesn’t work and the water pipe freezes every winter. Oh well. The entire outer wall of this room is windows so I have adequate ventilation.
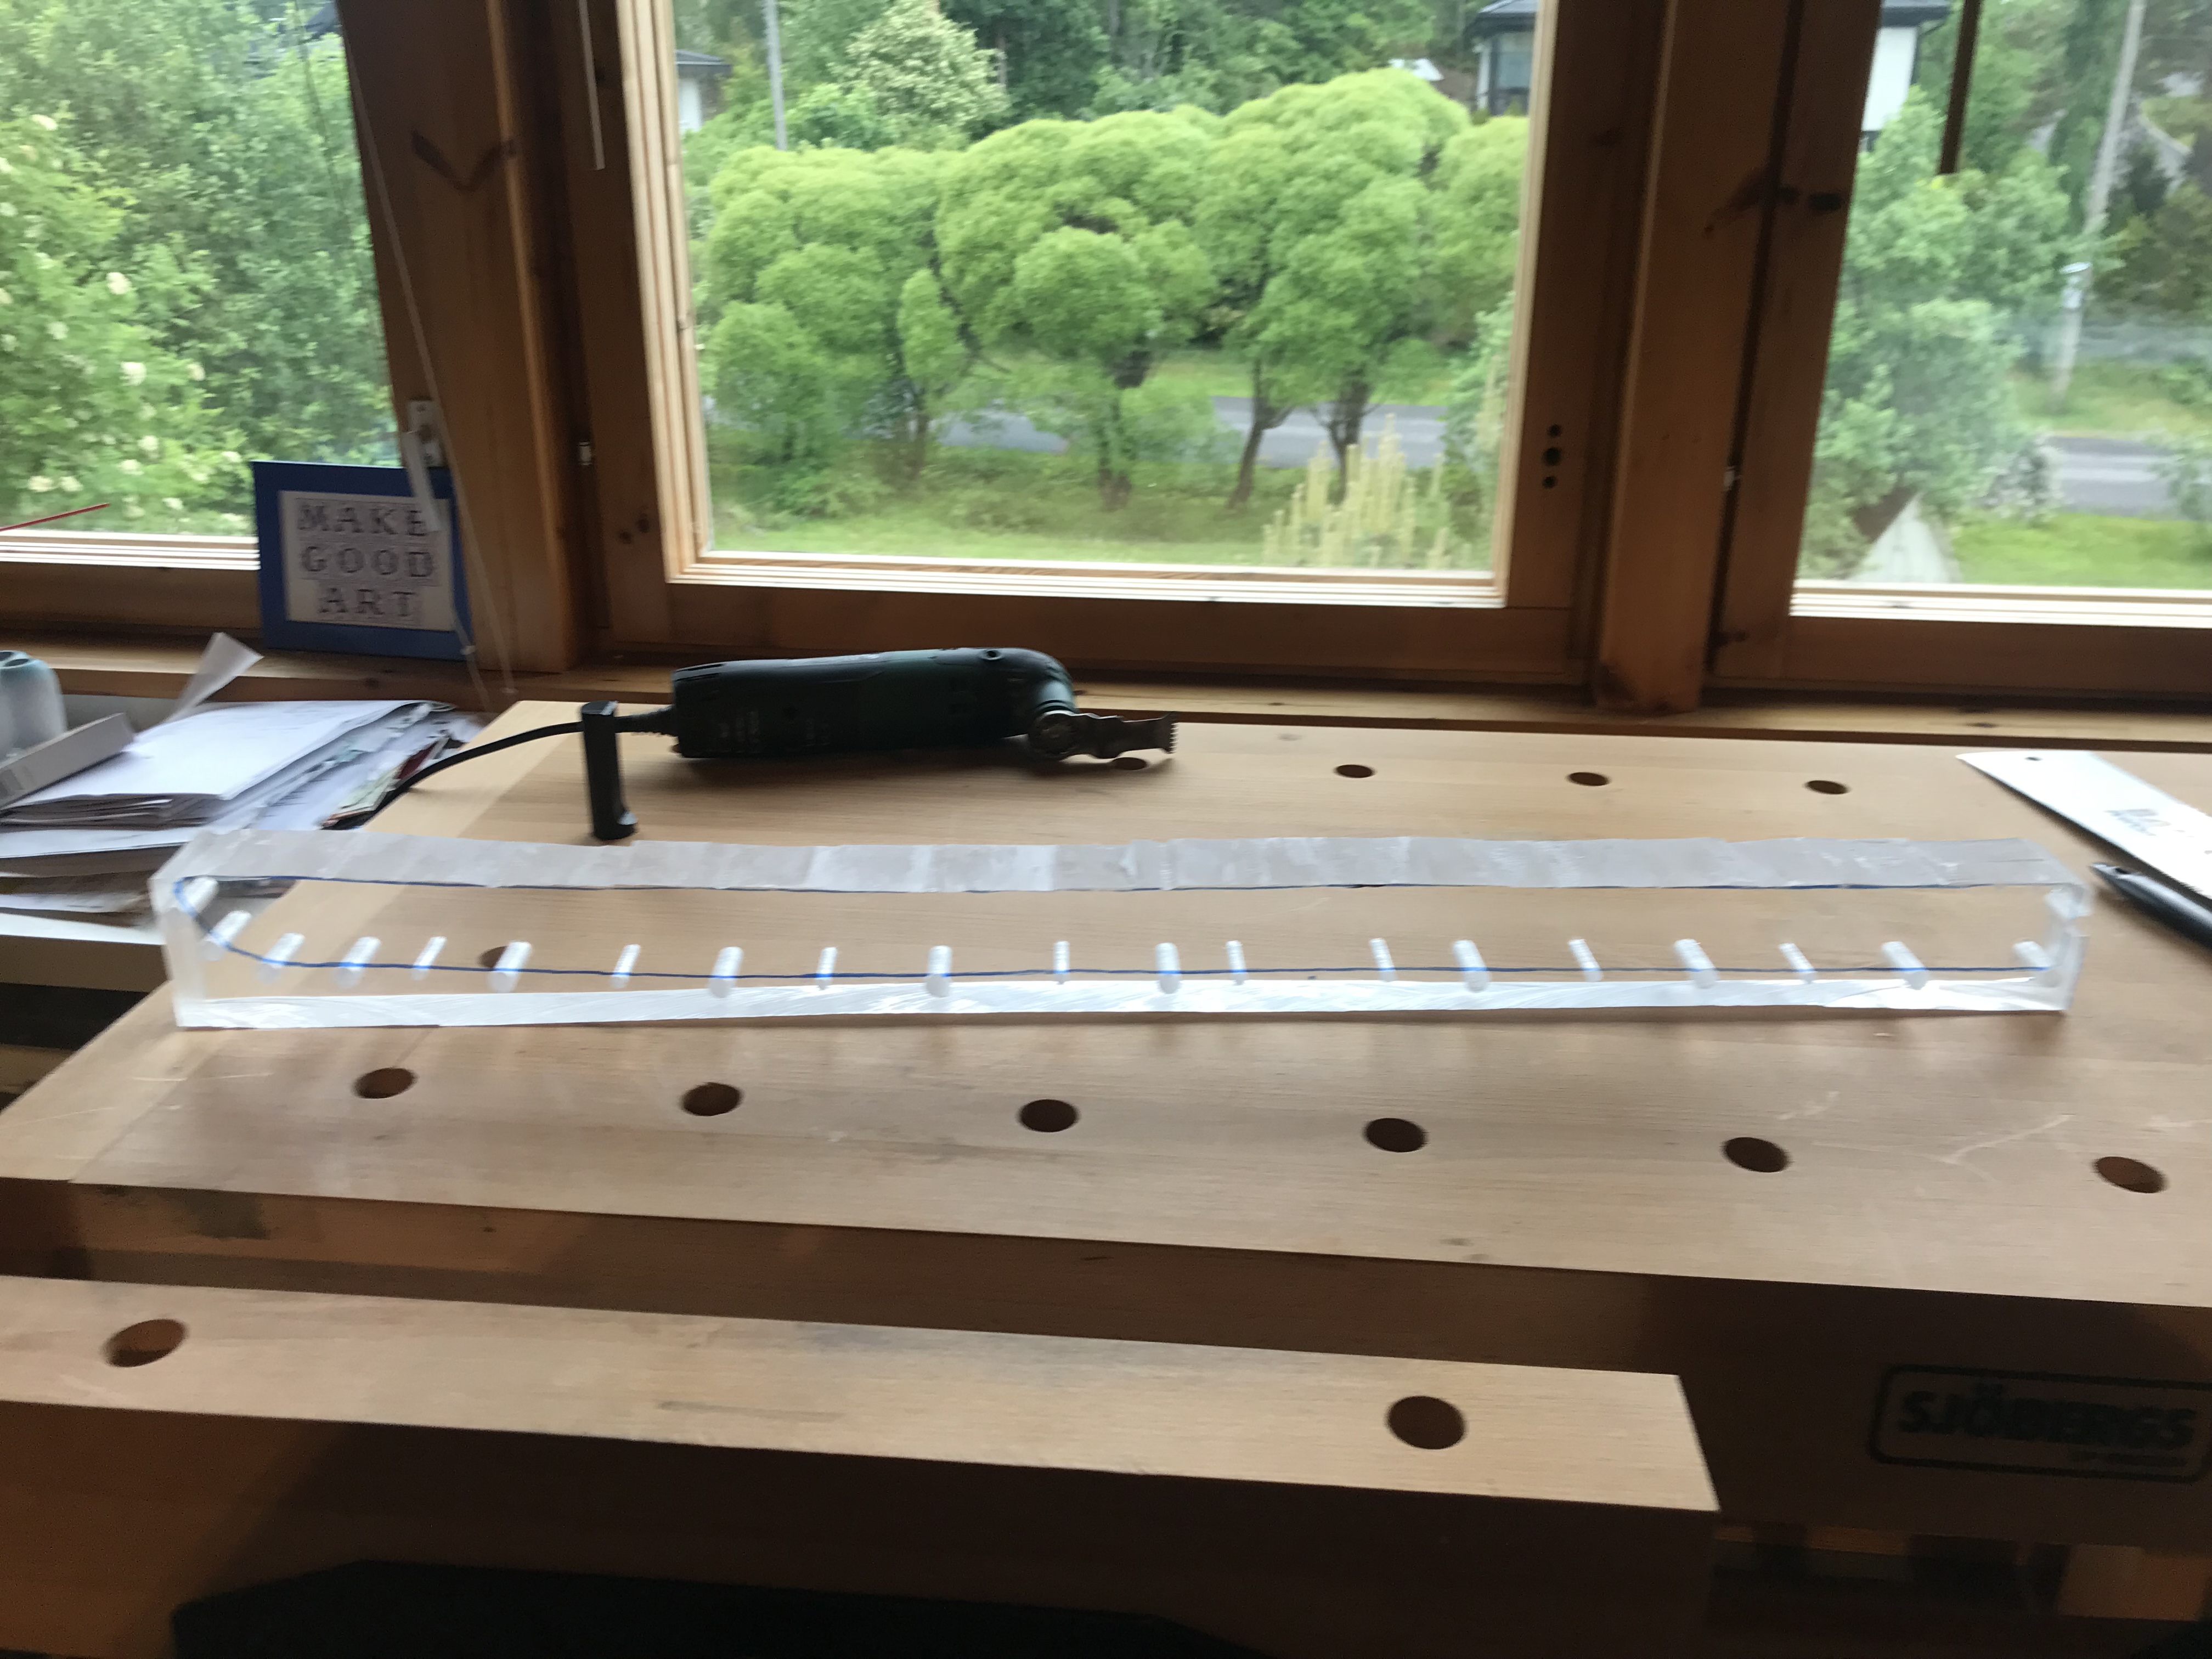
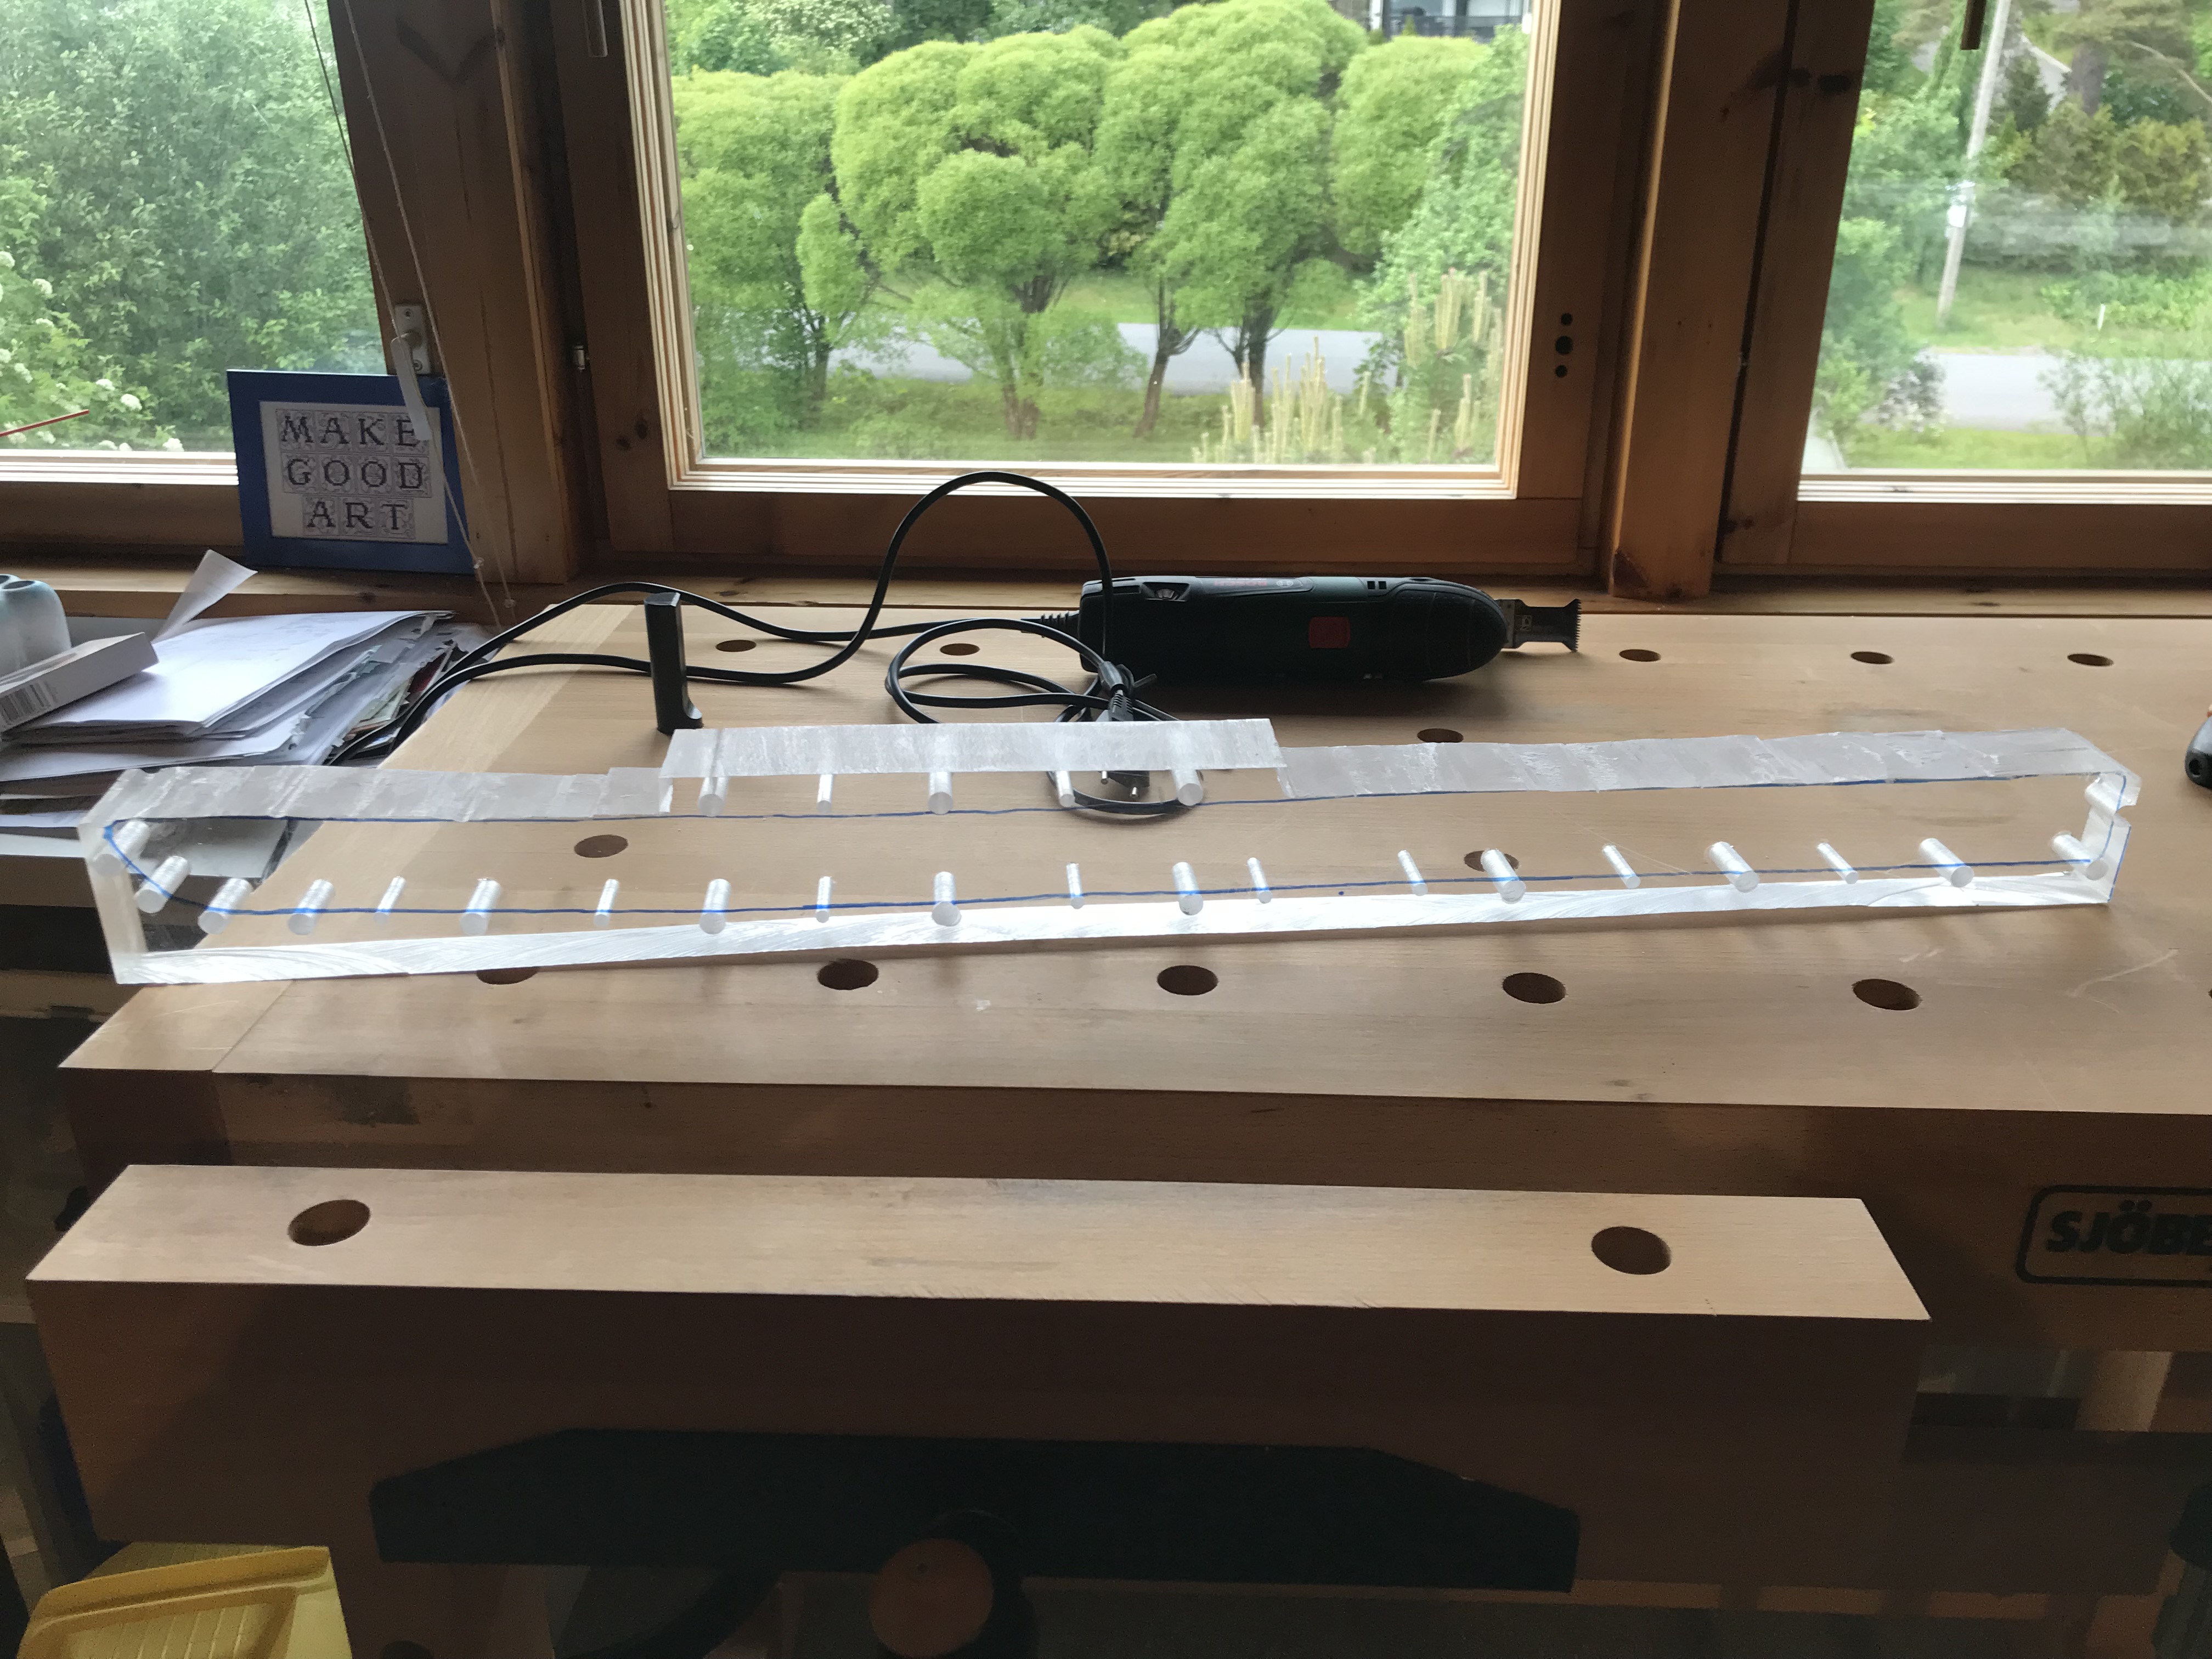
I haven’t been idle during my long hiatus. I’ve studied some new techniques and gotten a couple new tools which I hope will make my job easier and speedier. Here’s a picture of the wakizashi in progress. I’ve drilled guide holes through the material with my drill press who I call Emily, after Emily Post. If you know who that is, you’re officially cool.
Anyway, drilling nice 90 degree holes around the perimeter of the pattern I intend to cut out helps me keep my plunge cutter straight and avoid straying off on an angle that I’ll have to fix later.
You can see that the Clariel, a Seraph Blade inspired by Cassandra Clare’s “Shadowhunters” novel series, was already into the first stage of material removal when the project was cancelled. While it’s sad that the customer had to cancel, the upshot is that I can now do whatever I want with this piece. I’ve never had this kind of freedom before. It’s exciting and terrifying.
After struggling for a long time to make this business work, I realized that I needed a business partner. It’s just too much work for one person to do alone.
I and a friend of mine were set to team up and combine our talents to breathe new life into my studio. Unfortunately, when he arrived in Finland and we spent a few days together, it became clear that we were not compatible as business partners.
I had already closed my business, Inkblade Studios, in preparation to start a new business so now I am without a company.
I could start again with all the same problems as before, or I could just … not. I’ve decided not to. I’m very tired now. I hope you’ll understand. Thanks for all your support and encouragement.
The long weekend was nice and restful. I needed that. The photo shoot had to be postponed because of the paint-eating disaster. … No I didn’t eat the paint. The sealant ate the paint. I’m not that crazy. Yet.
So the transparent silicone from SeMost worked beautifully for the witchlight mould. I’m in the process of negotiating future orders. Hopefully we can get it all worked out for an agreeable price!
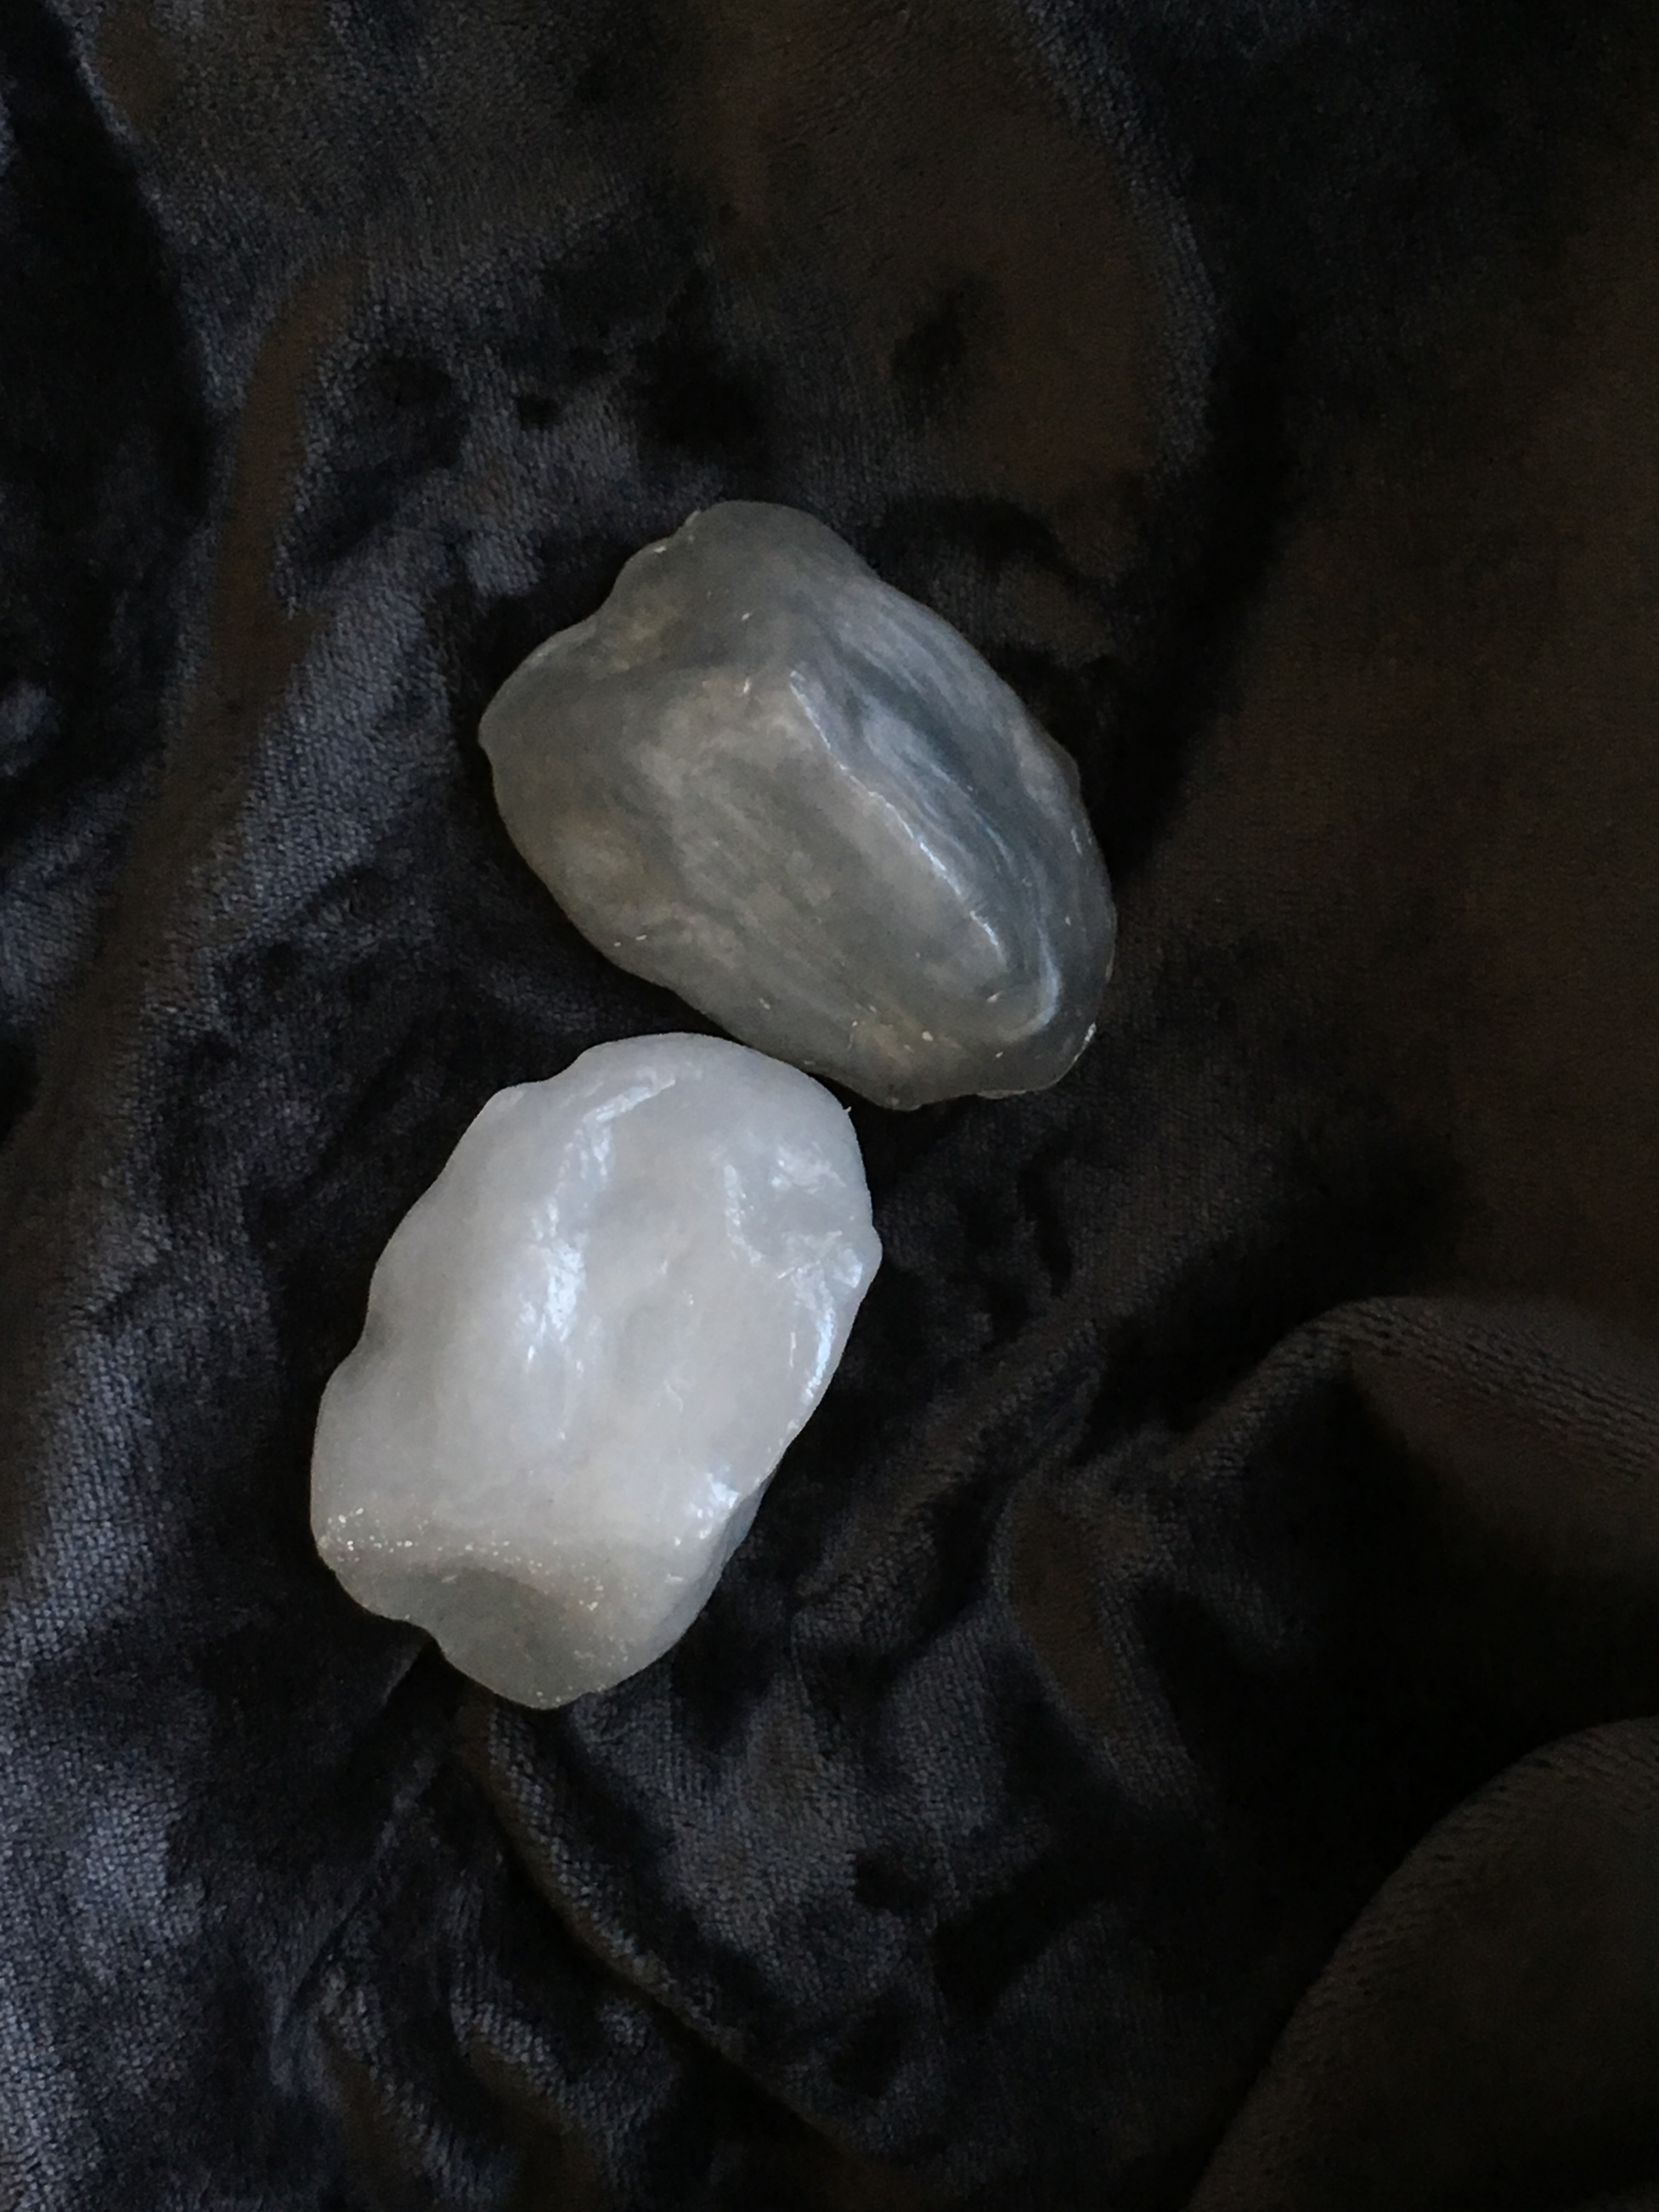
I did a kind of whitish one and then a kind of silvery one. I think the whitish one looks better.
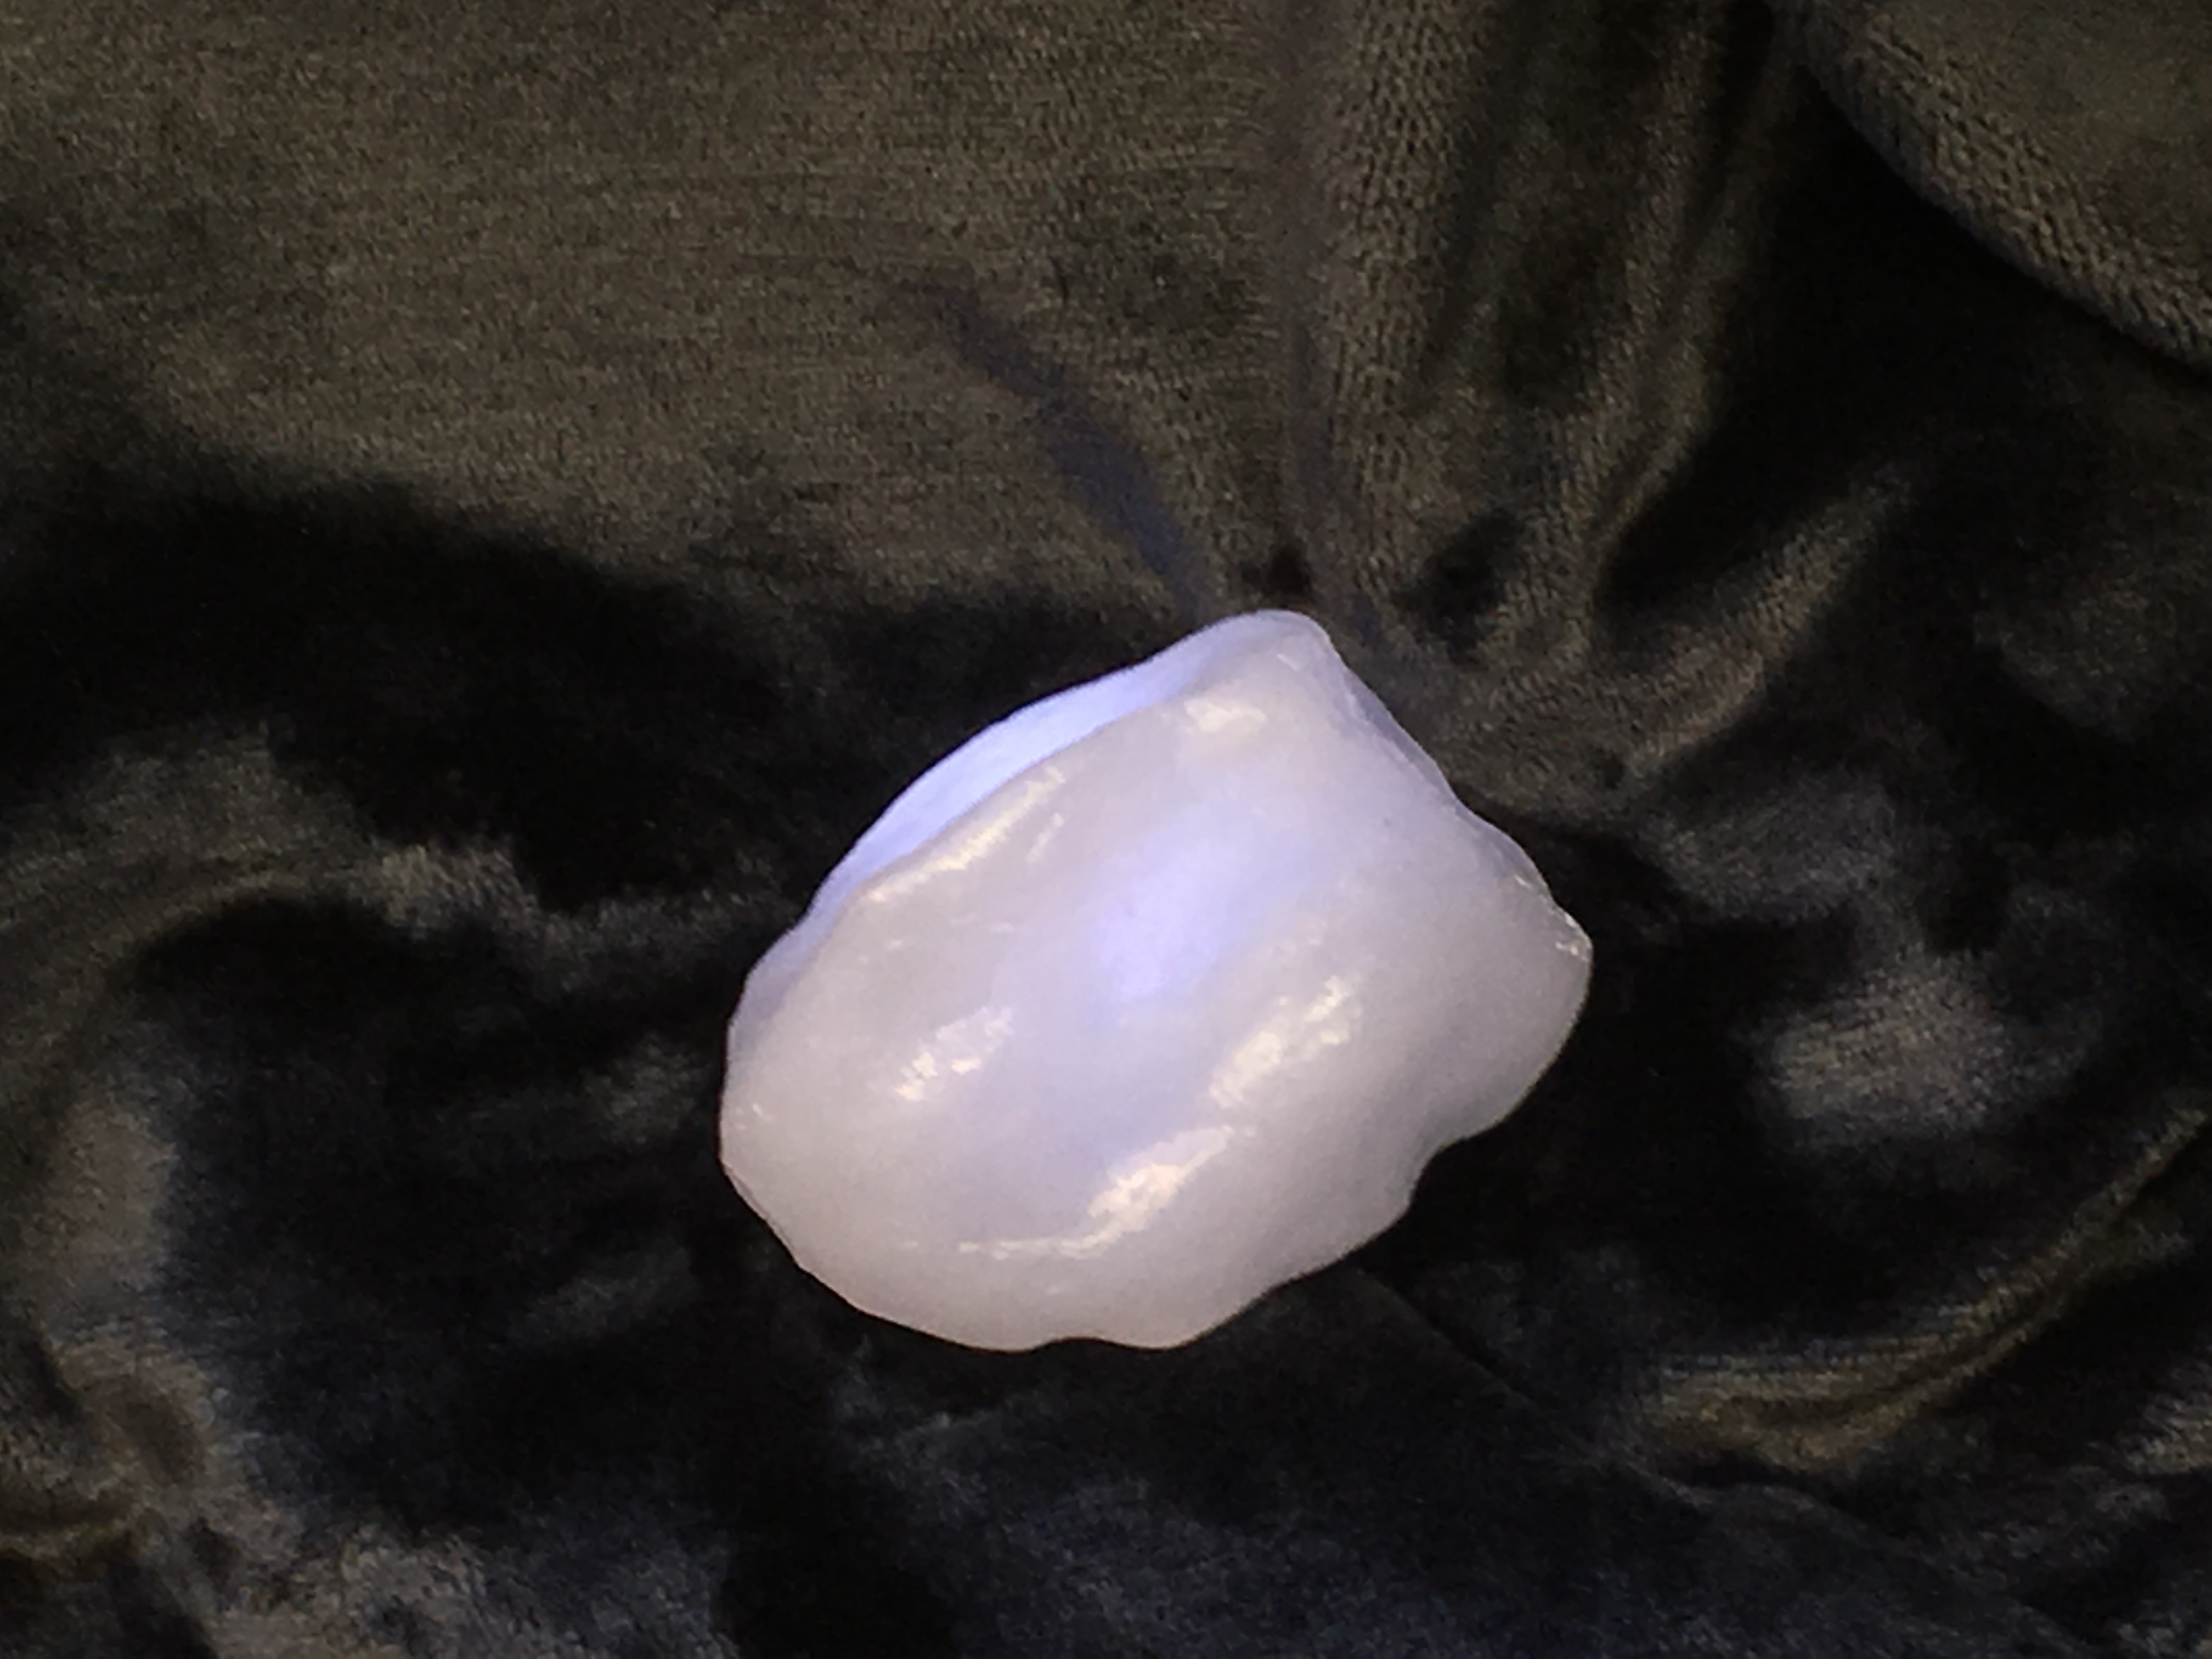
Stuck a light under one to get a feel for how it will look once I can get the lighting rigged up properly.
And a red one just for fun. 🙂
Yes, that’s Cool Kevin in the background being too cool to appreciate my hard work.
I got some more green paint on the sword and got the initial sculpting done on the light cover in the pommel.
Don’t worry, it’s not going to stay white and marshmallow-looking. I just needed some initial structure to work with and support the design I want to do.
Now I’ve got to hustle off to the workshop and get the next stages going. Hopefully everything goes as planned and nothing breaks. Wish me luck!
I have got some great news for you all. Check out my new baby!
What? You thought I had one of those stinking screaming mini-humans? Hah!
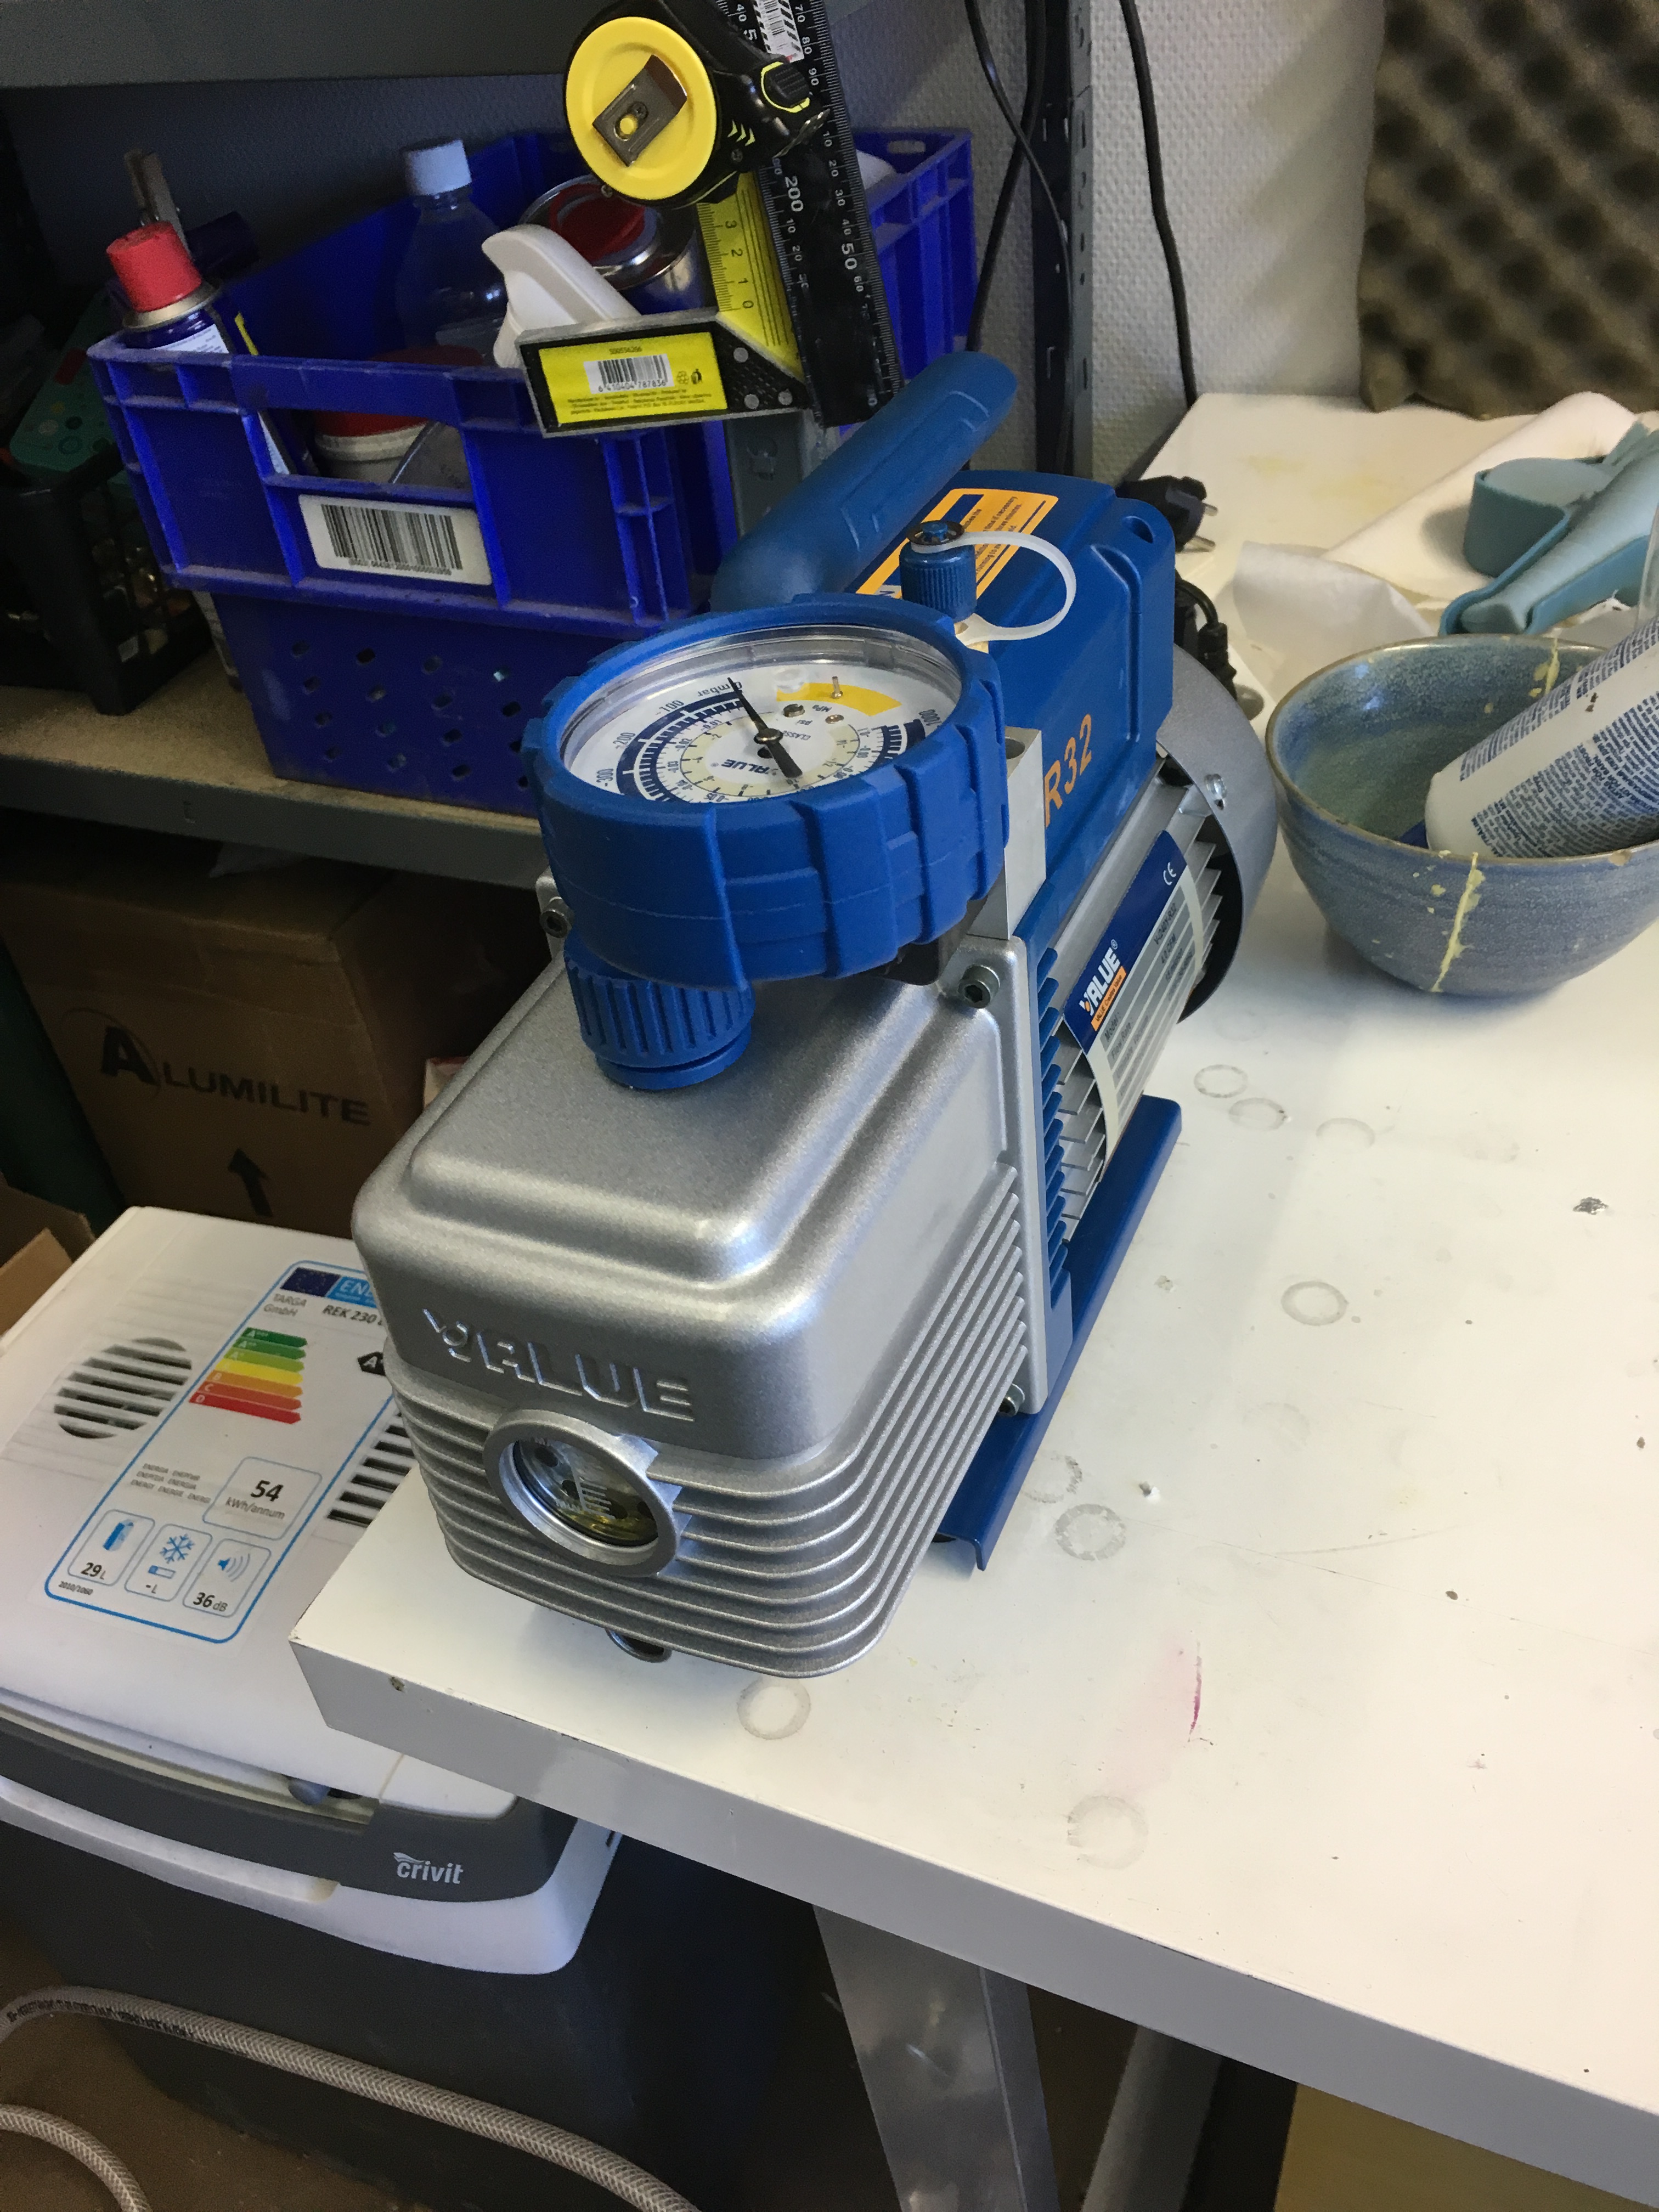
After I accidentally loaded my old vacuum pump with hydraulic oil instead of vacuum pump oil (oops!), it has never worked right again. Overheating. Loud banging noises. Foaming oil in the sight glass … It was bad. I needed a new one.
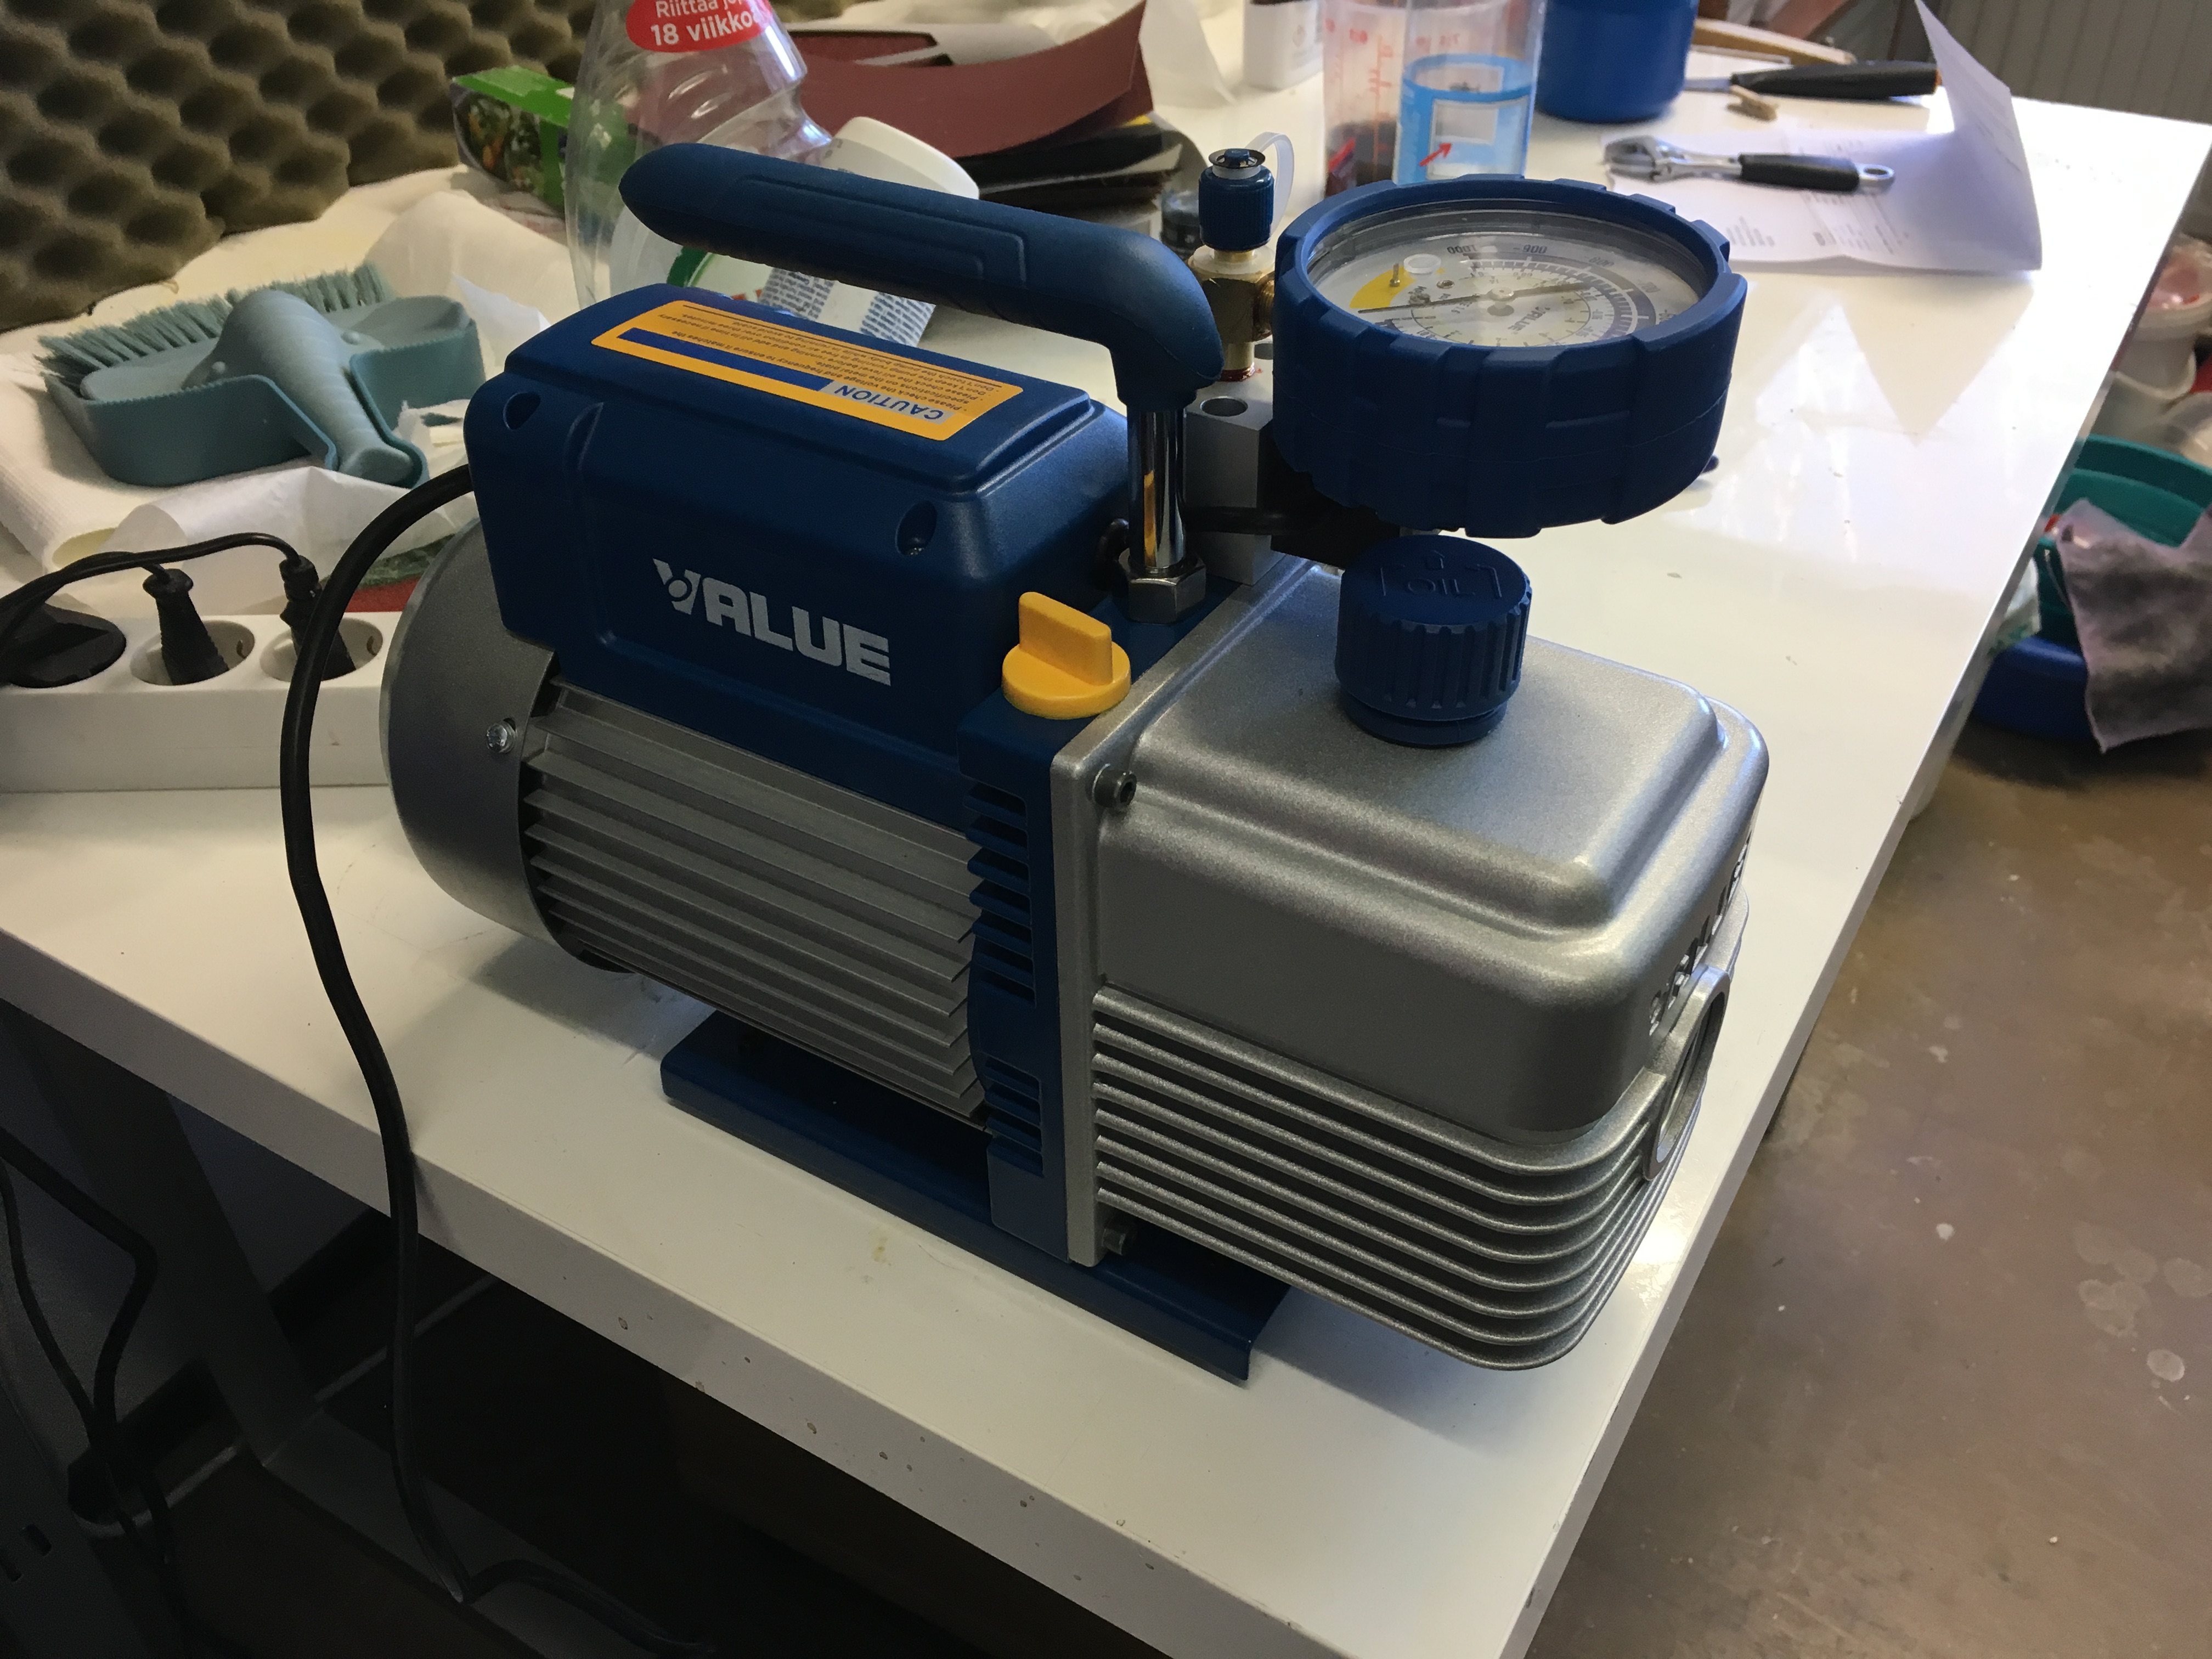
Thankfully, my buddies at Unicorn Tools had my back and got me a great price on a bigger, beefier vacuum pump. This one is getting pampered, I can tell you that much. They even sent along a spare container of the correct oil. Thank you guys so much! It takes about 3 seconds for this beast to pull all the air out of the vacuum chamber and it hums along like a champ under load. Love it!
Bask in its beauty.
And now that I have a working vacuum pump once again, I can cast things! Woo! Back to making swords!
Speaking of making swords …
Oh yes I did. Those of you familiar with my models will recognise Zaapiel, the exotic ring-sword inspired blade. The funky “spikes” sticking off of it are simply the little tabs that are created by the bubble traps in the mould. They get trimmed off before sanding and polishing happens.
Now this sword has some bubbles in it due to a resin issue I had, but the person it’s for said it looked cool as-is so we’re going with it. If you look closely, it looks like they’re some kind of magic spell firing down the length of the blade from the hand of some powerful magus.
ZAP!
That’s going to look really cool when it’s lit up. 🙂
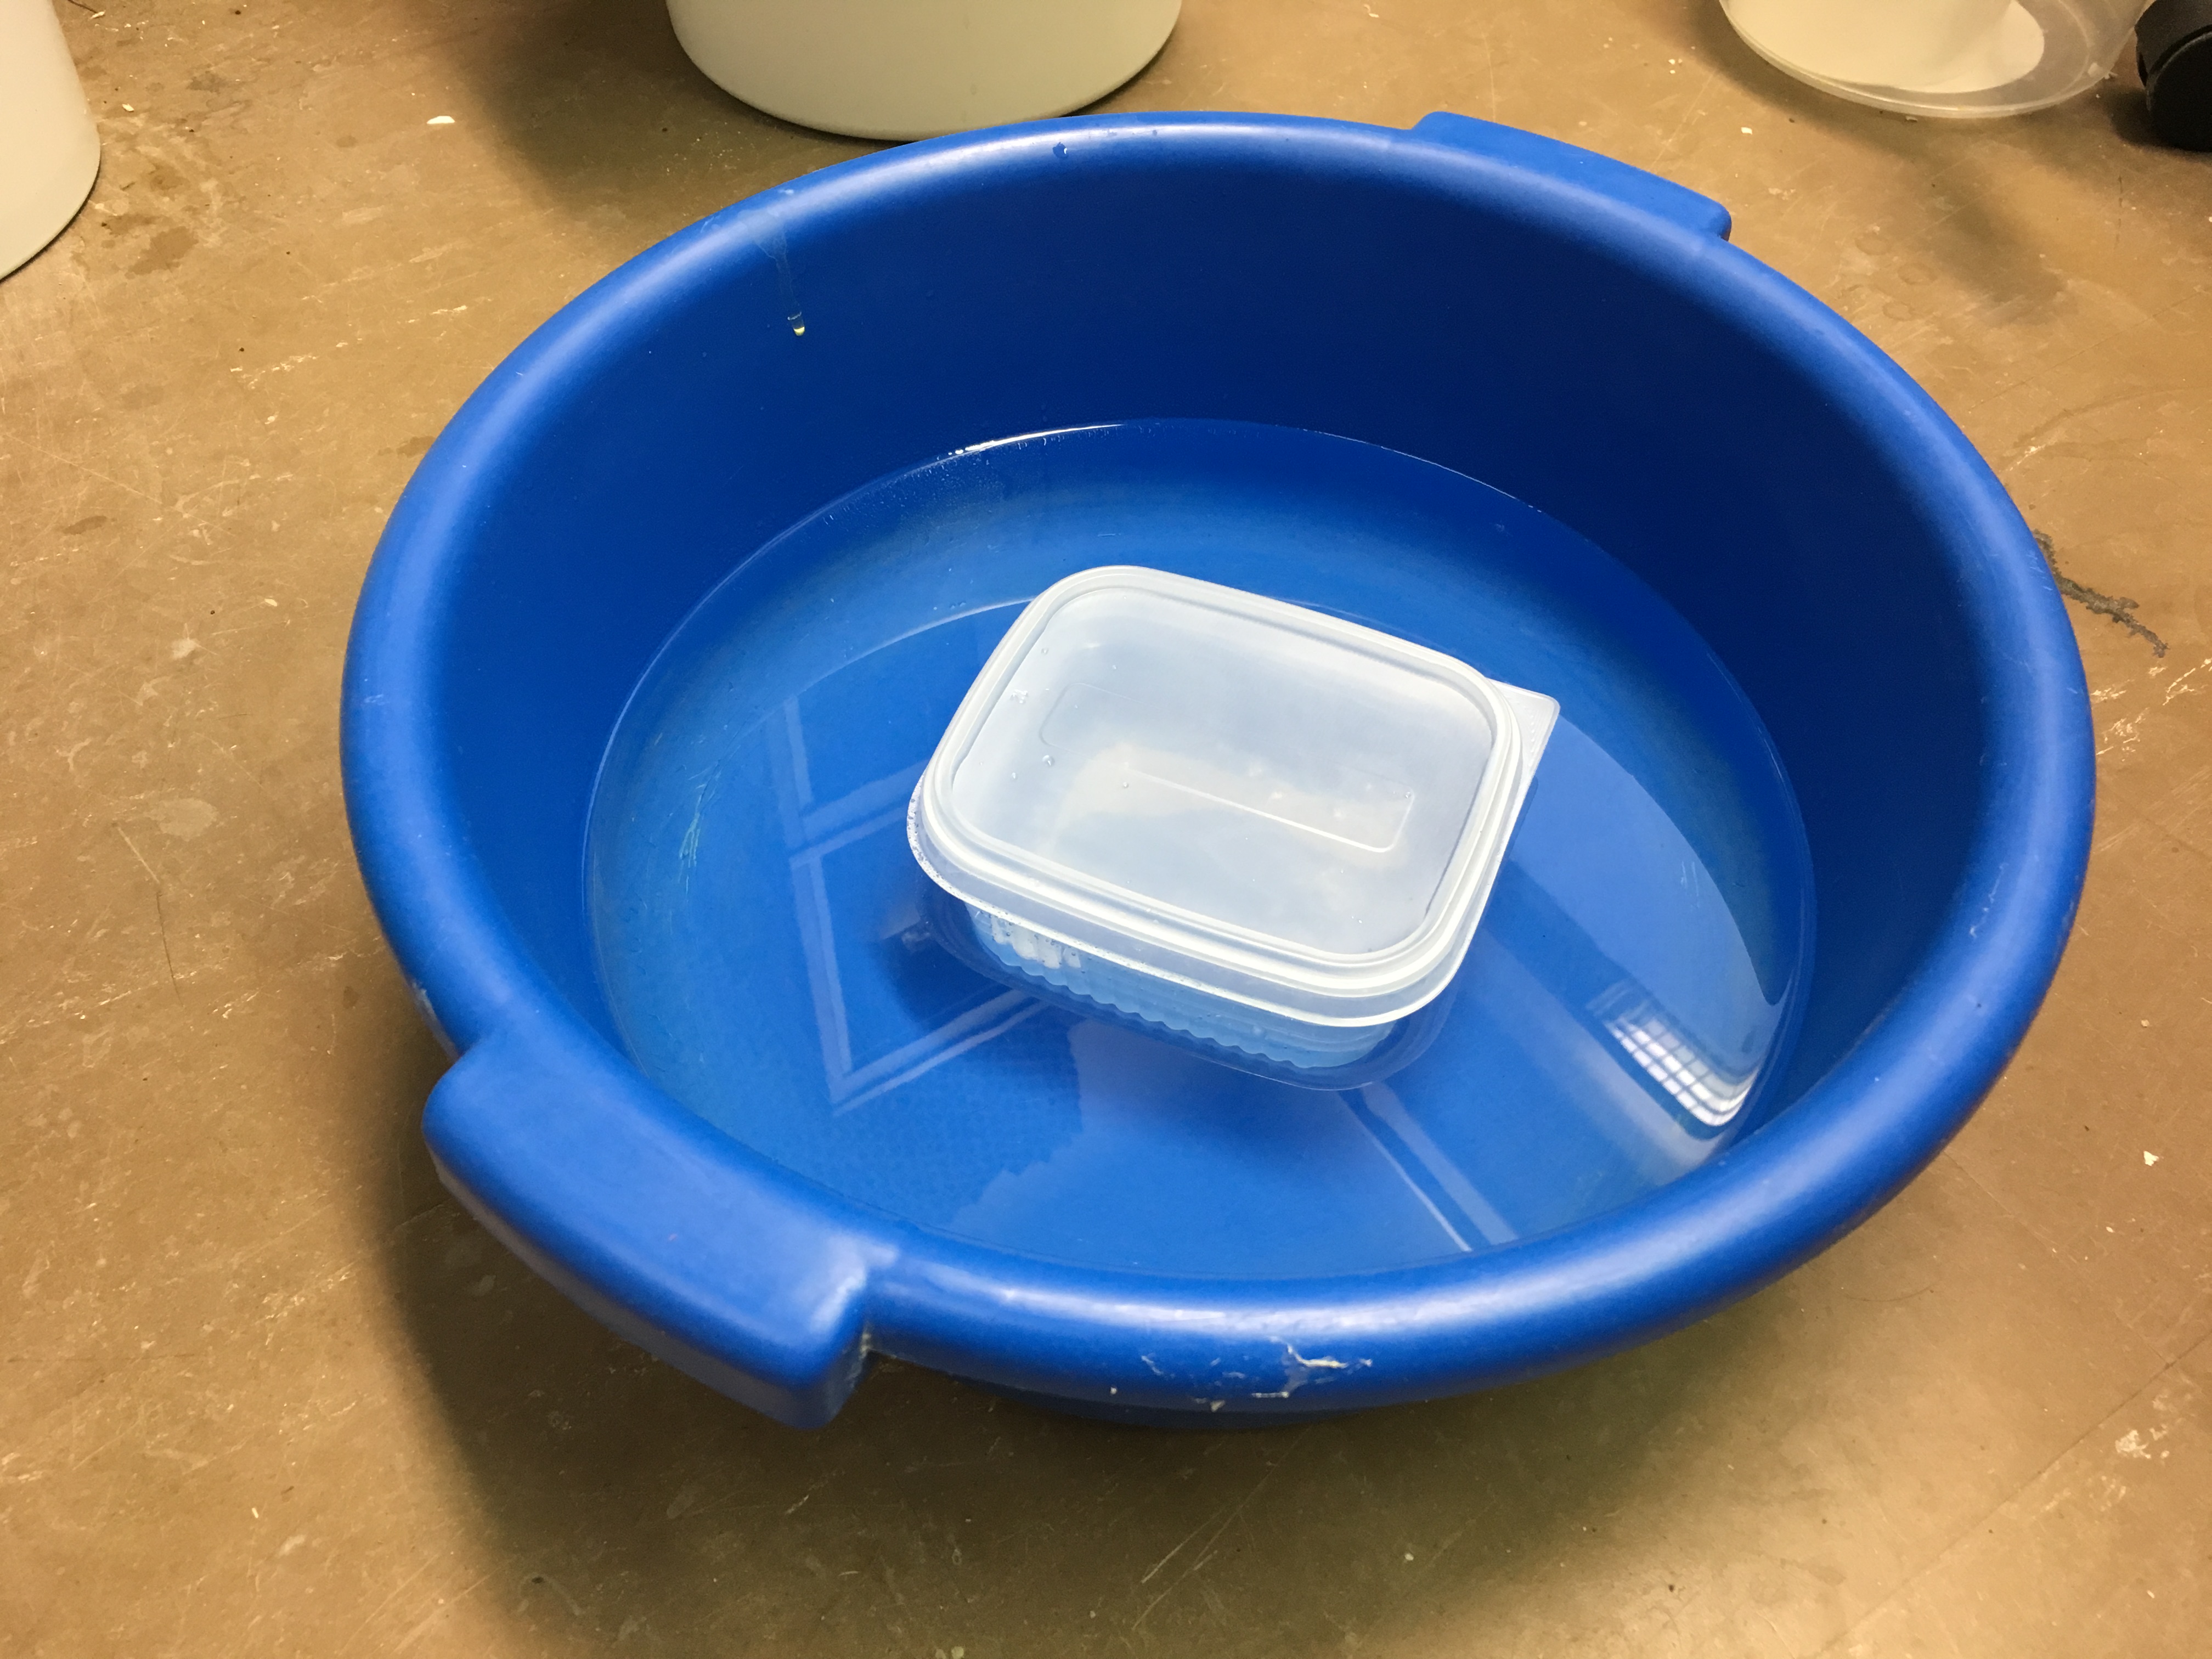
The issue I was having with the resin was that I was using Alumilite Clear Slow and this resin tends to “gel” up after a few months of not being used. If this happens to you, do not panic and do not throw it away. All you need to do is put it in a water-tight container and give it a hot water bath for a few hours and it will be liquid again.
I portioned out about 500mL of resin, stuck it in a Ziploc container, sealed it, and popped it in a hot water bath. Every now and then I took it out, dried it off really thoroughly, opened it up, and stirred it until it was the liquid consistency I wanted. Now, you’ll notice I emphasised “dried it off really thoroughly” and that’s because resin is really, really finicky about moisture. Even a little dampness. So you can imagine what a drop or two of water in the mix would do to it. Be careful when you’re handling it.
So I re-liquefied it, vacuumed it, and still got bubbles in the finished product? Yep. That was my fault. You see, resin cures faster when it’s warm. Annnnd I forgot to cool the resin down after its hot water bath. I just went straight to the degassing and mixing and pouring. Whoops. I got a little too gung-ho and eager to try out this new sword mould. So I should have gotten twelve minutes of working time with the resin but I had slightly less than that because it was quite warm and the bubbles couldn’t escape as well before it hardened.
But we still ended up with a really cool result so I guess I’m learning stuff about mould-making and handling my materials effectively. Yay for learning!
Today, of course, I move on to the next stage of the build and that means wet-sanding the whooooole surface and getting a consistent overall clarity and shine. And that means I’m working from home today where I have running water. Yup. Picture me standing in the bathroom with my hands in the sink for … let’s not think about how many hours. That’s my work day today. LOL
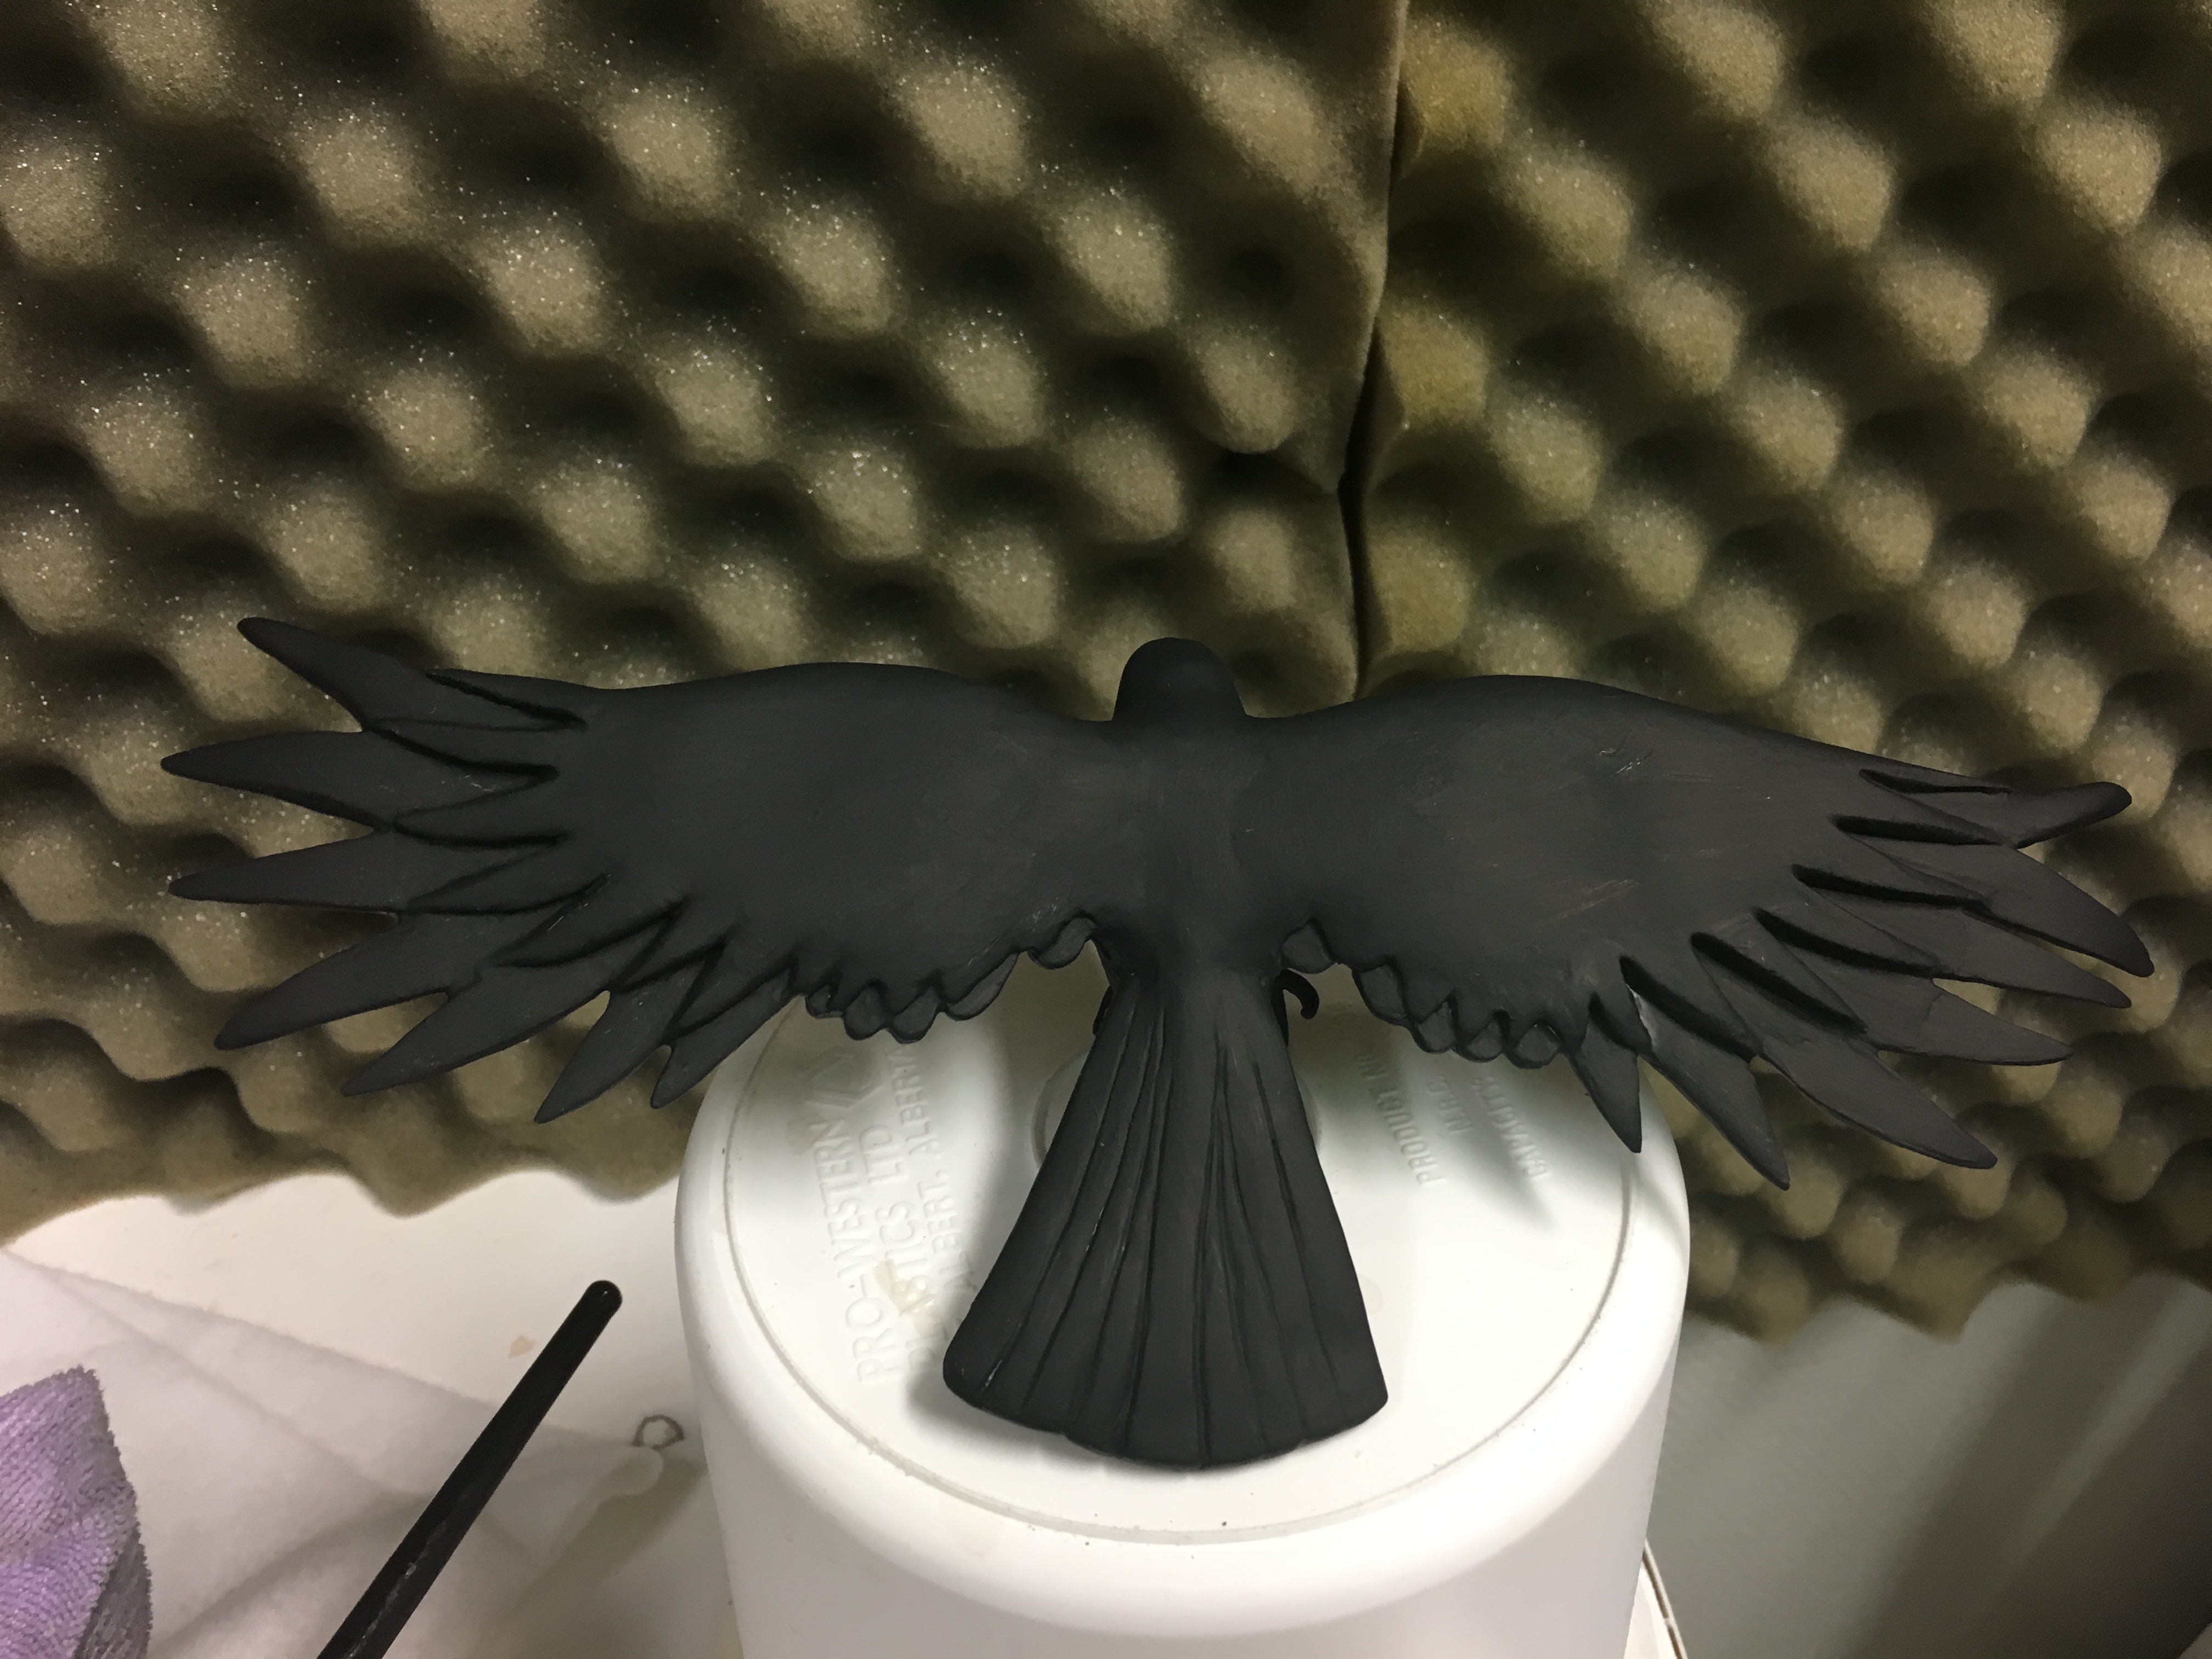
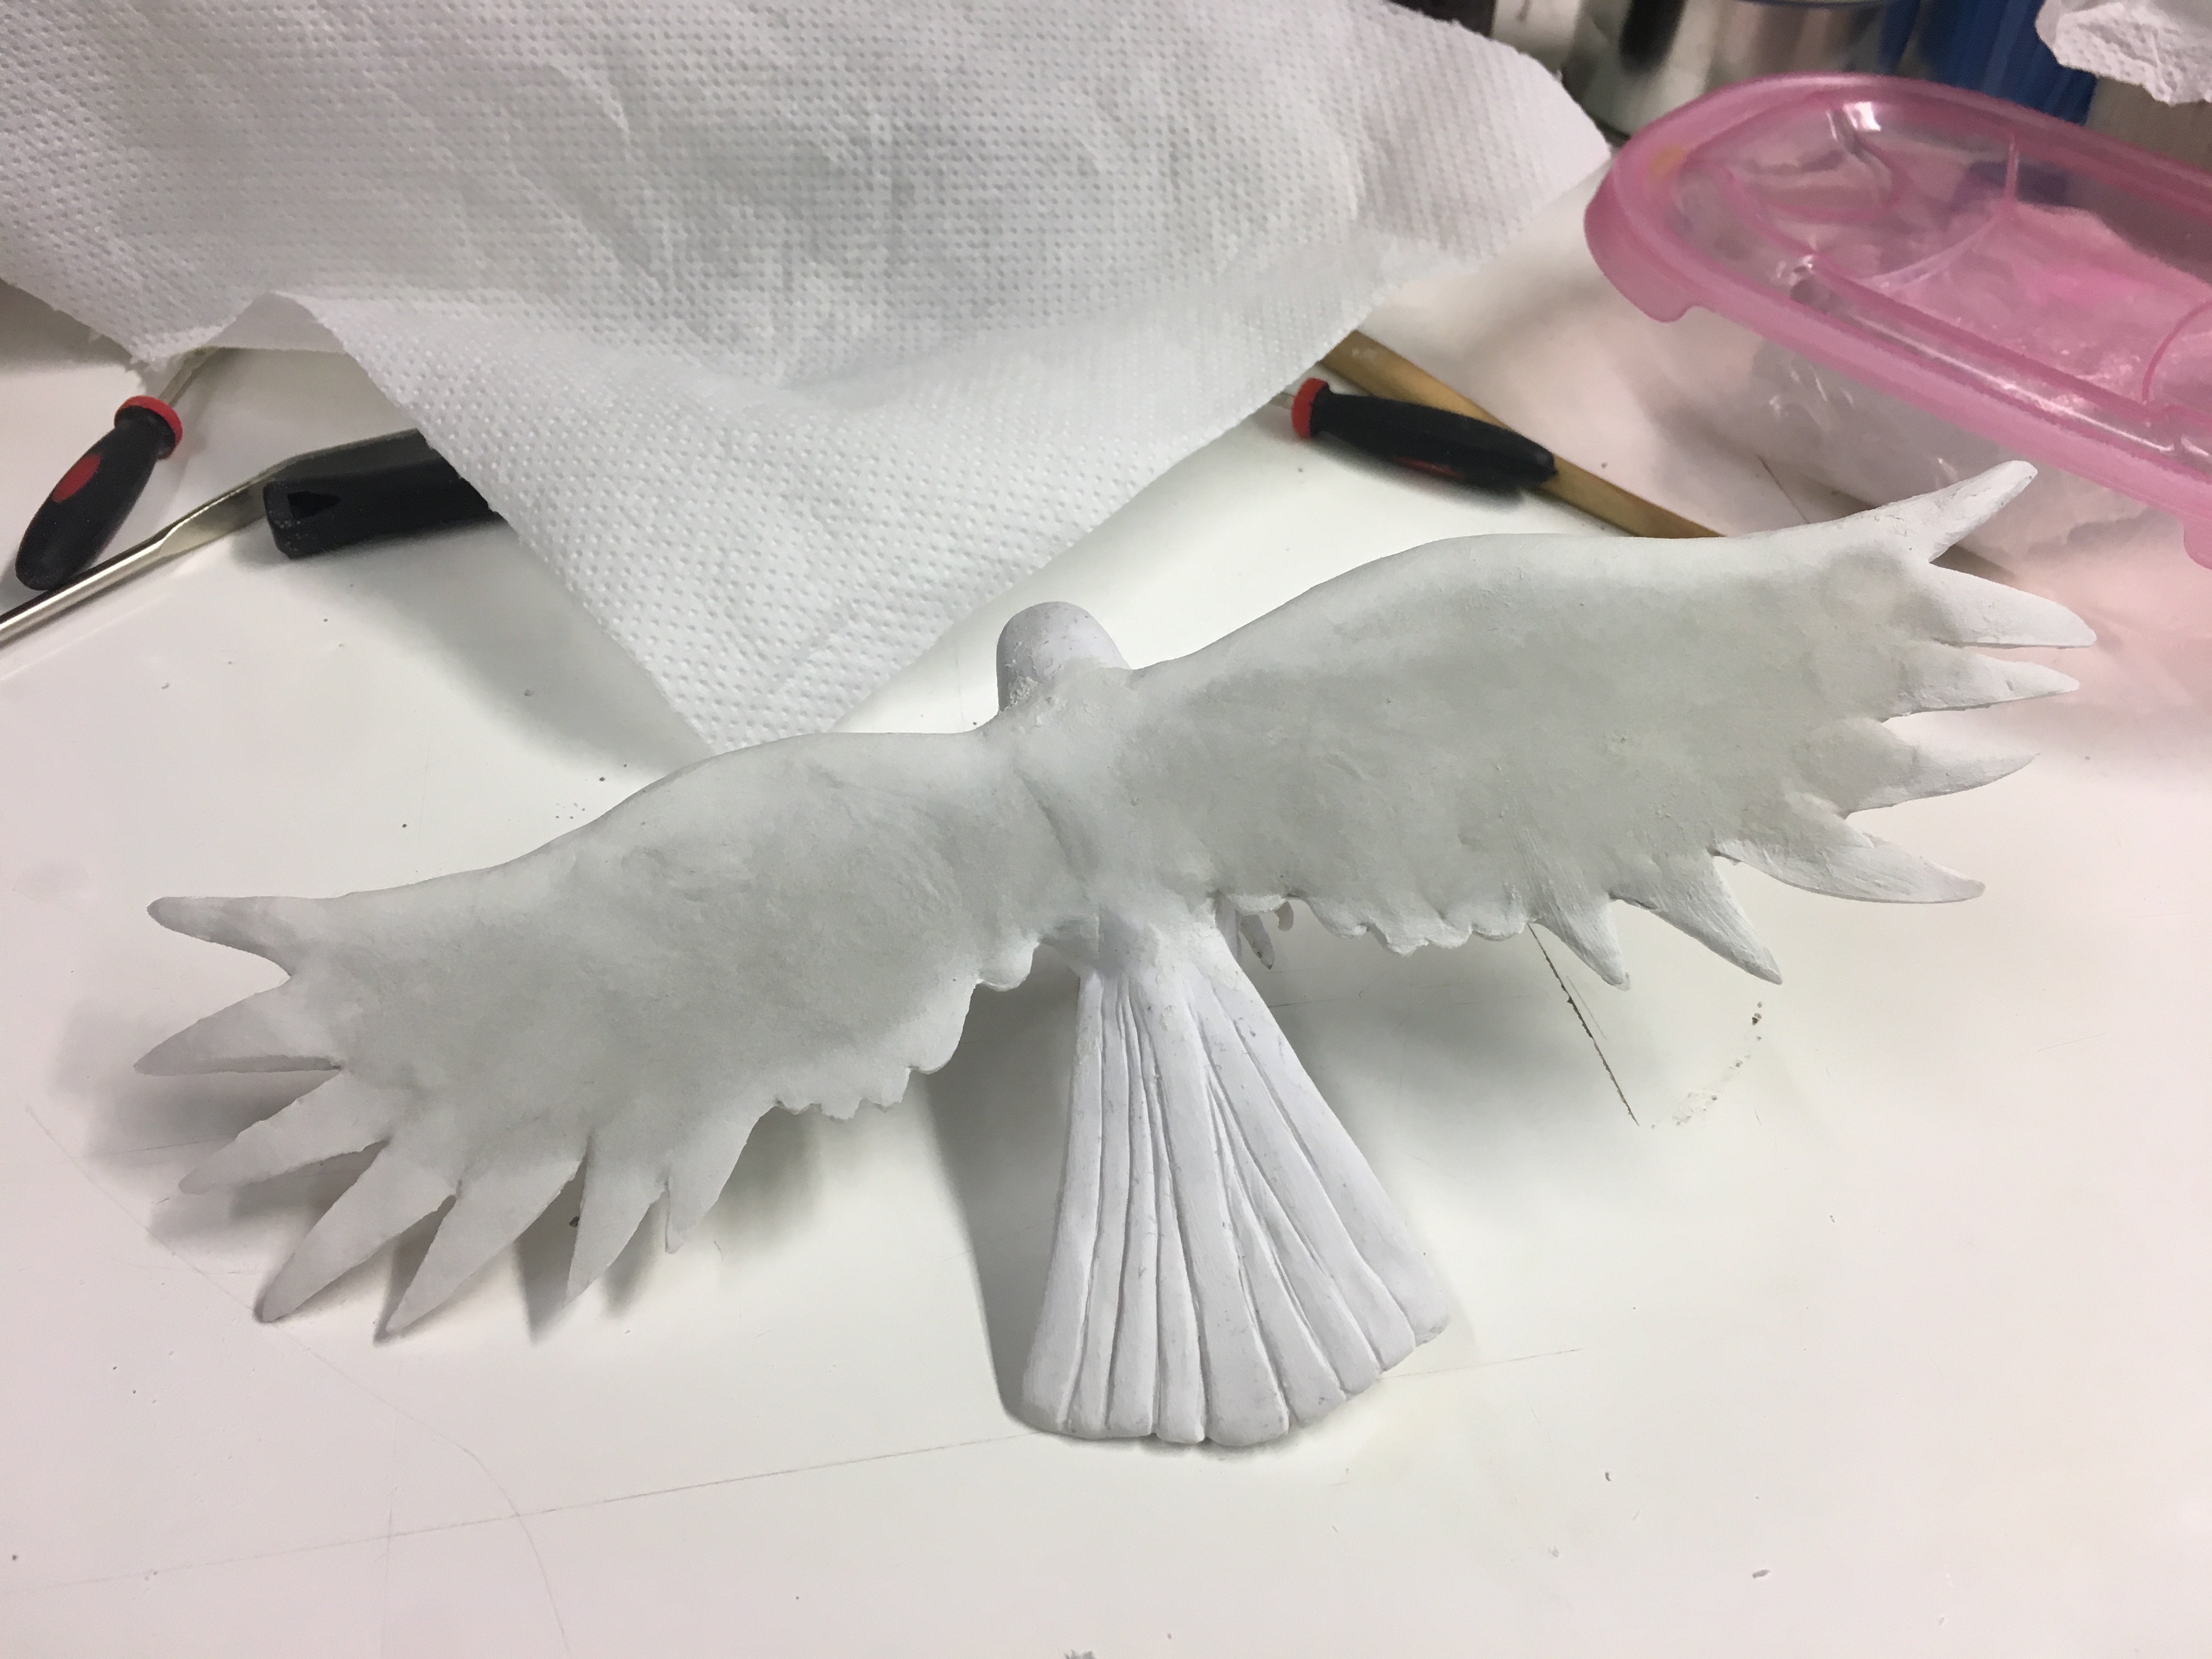
As a little bonus on the end here, check out where we are on the raven statuette!
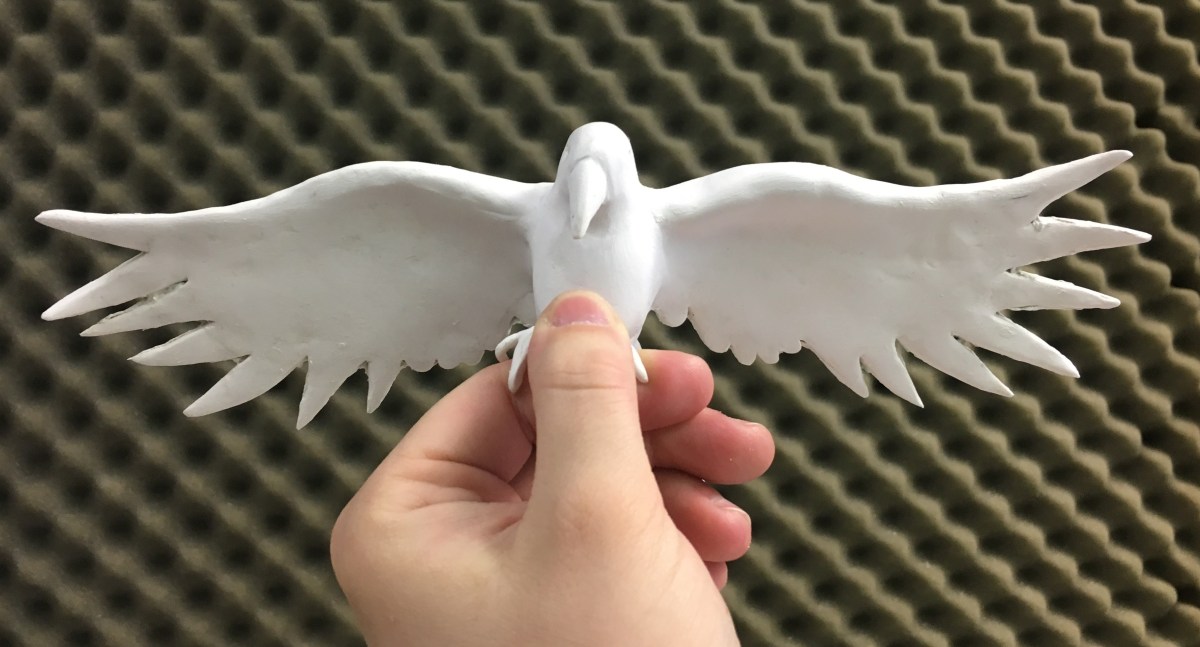
Sorry it’s a little hard to see its features on camera. In person, though, the black paint makes it easier for me to see imperfections and correct them. I noticed that the angle of its beak was a little off on its right side so I had to do some sanding and filing and a little carving to get it the way I wanted it. This piece will be getting some more smoothing, re-painting (to check again for errors), and sealing before I move on to the next part of the project.
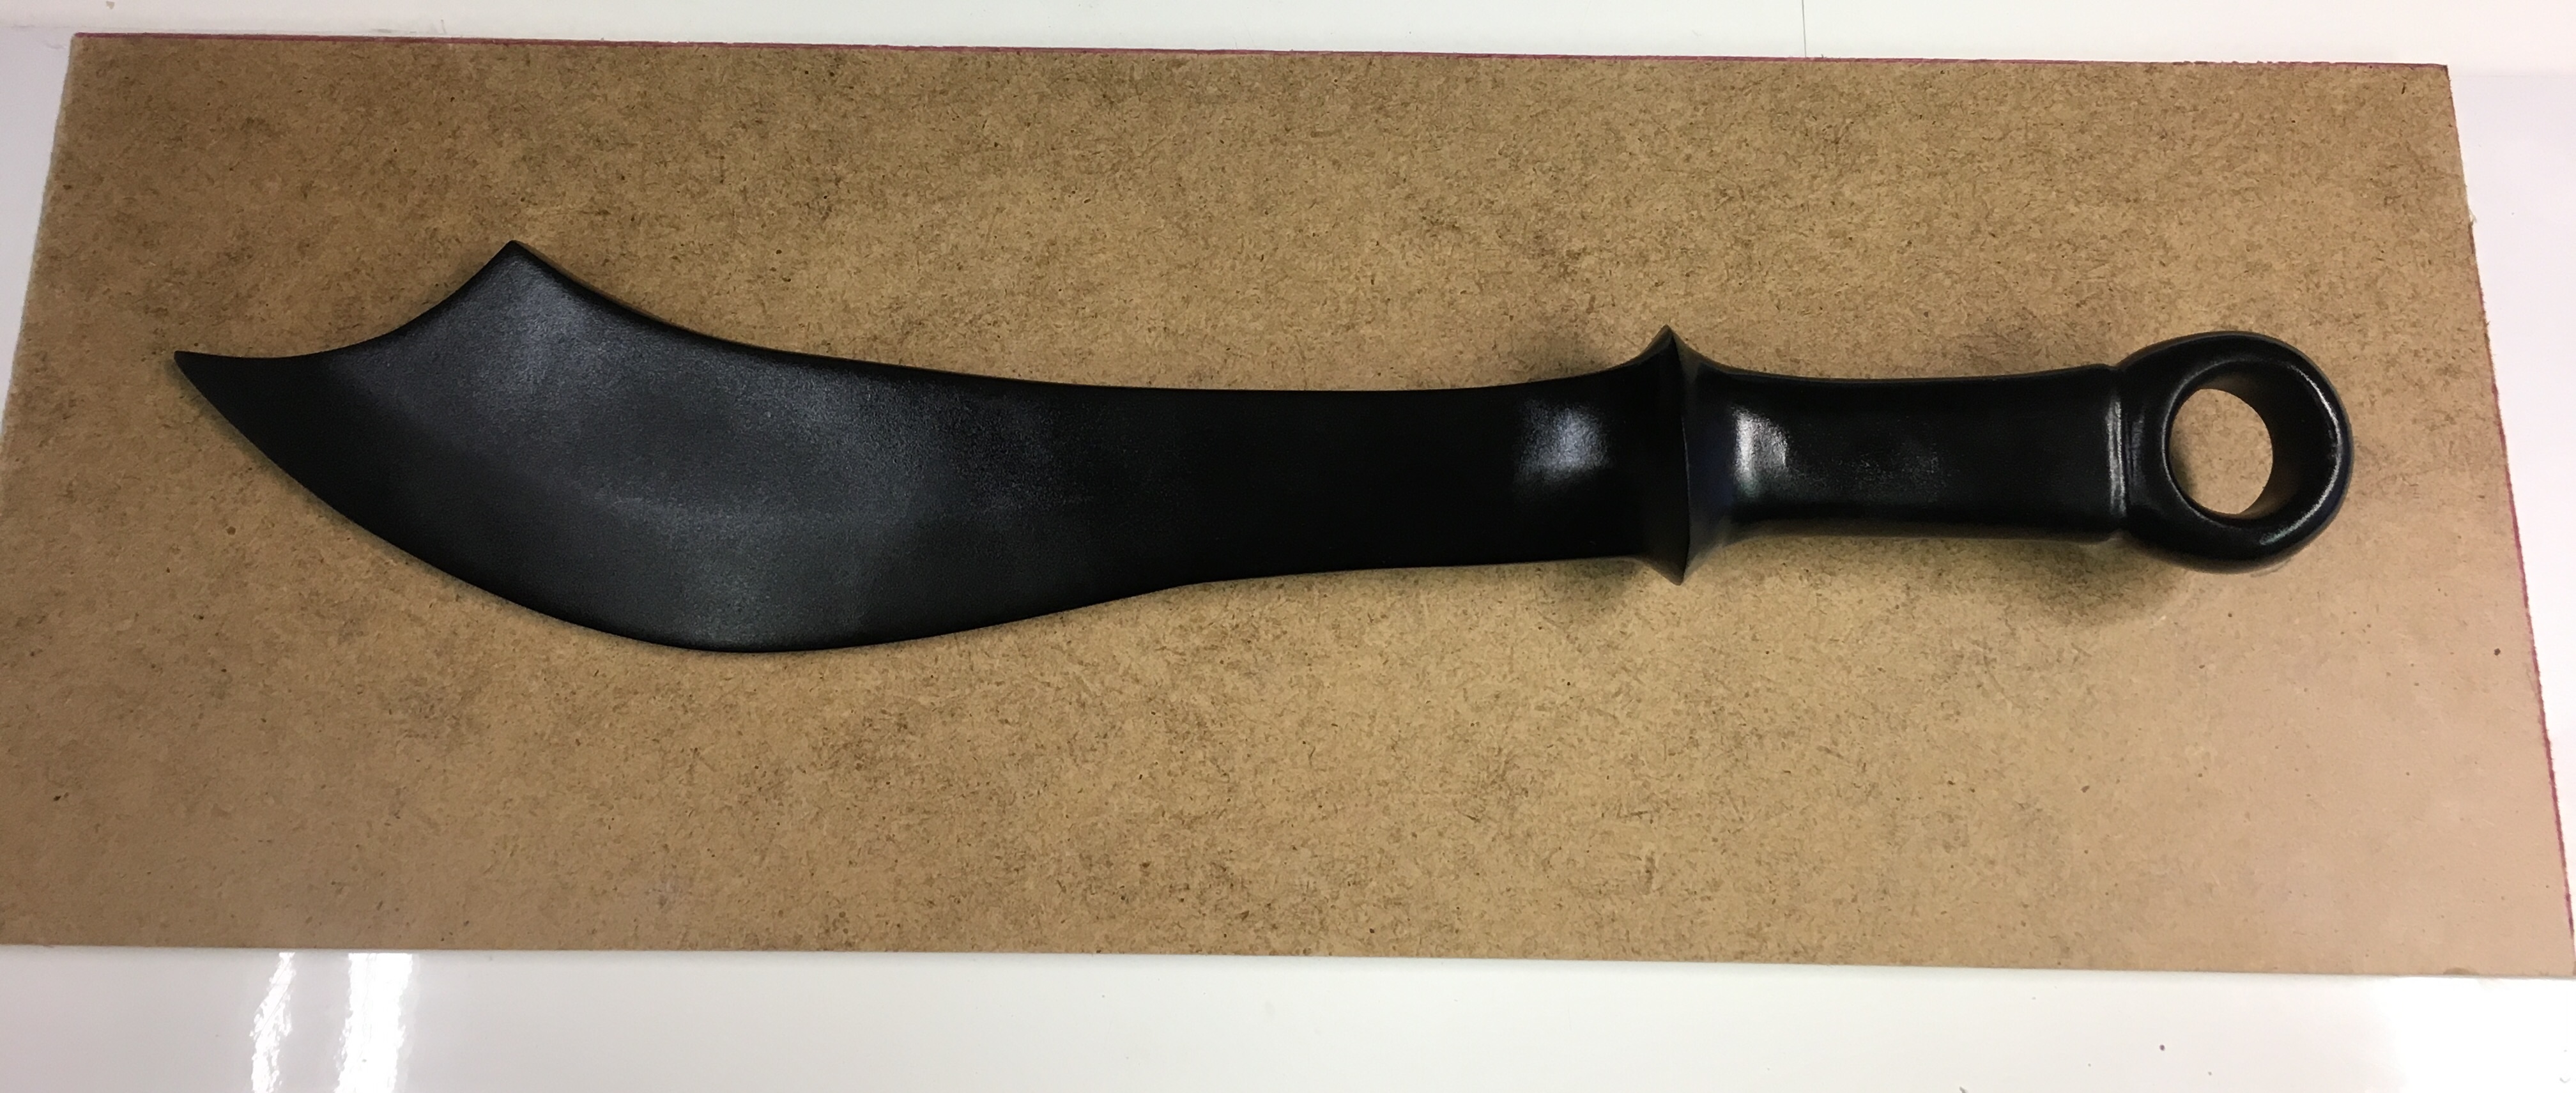
As a bonus-bonus, here is the current state of “Thorn” (working name). It’s so comfortable to hold.
When can we expect to see it appear in my Etsy store? Well … that depends on when the person who asked for it gets back to me. LOL
Okay, time for me to stop yammering and go pick up some more sandpaper. It’s sleeting outside so uh … wish me luck. XD
It’s so cuuuuute! This was a really good test of the new DIY paperclay stuff. Light, strong. mouldable, and sandable. I’m quite pleased!
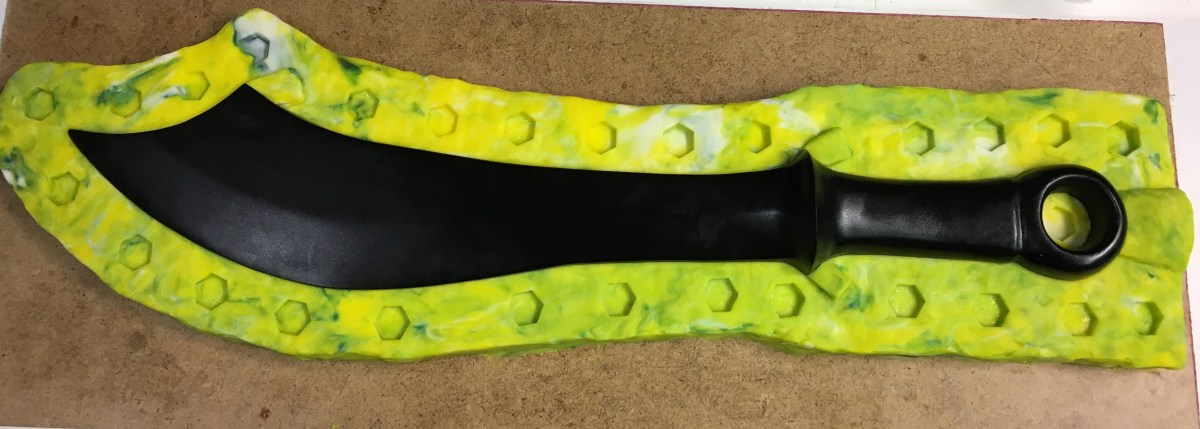
This here knife is currently going by the name of Thorn, just so I have something to call it. It is double-edged for maximum utility (slashing or stabbing) and provides a little bit of protection to the hand while blocking another blade.
Yes, yes, panicking parents, it’s not actually sharp. I don’t make real weapons. I make art pieces. I do envision how a blade would actually work if it were real, though, so my designs at least make some logical sense. So many fantasy weapons just look … preposterous.
Like A: it’s half the size of your body; you’re never going to lift it, and B: if you managed to, you’re never going to successfully stick it in the other guy, and C: if you somehow managed to accomplish that (like if he was asleep or something) you would never be able to get it out again. Or quite possibly D: your dagger has six blades on it they’re all curved at an angle even a snake would find obscene and half of them are pointed back at you what are you doing with your life?
Much more practical.
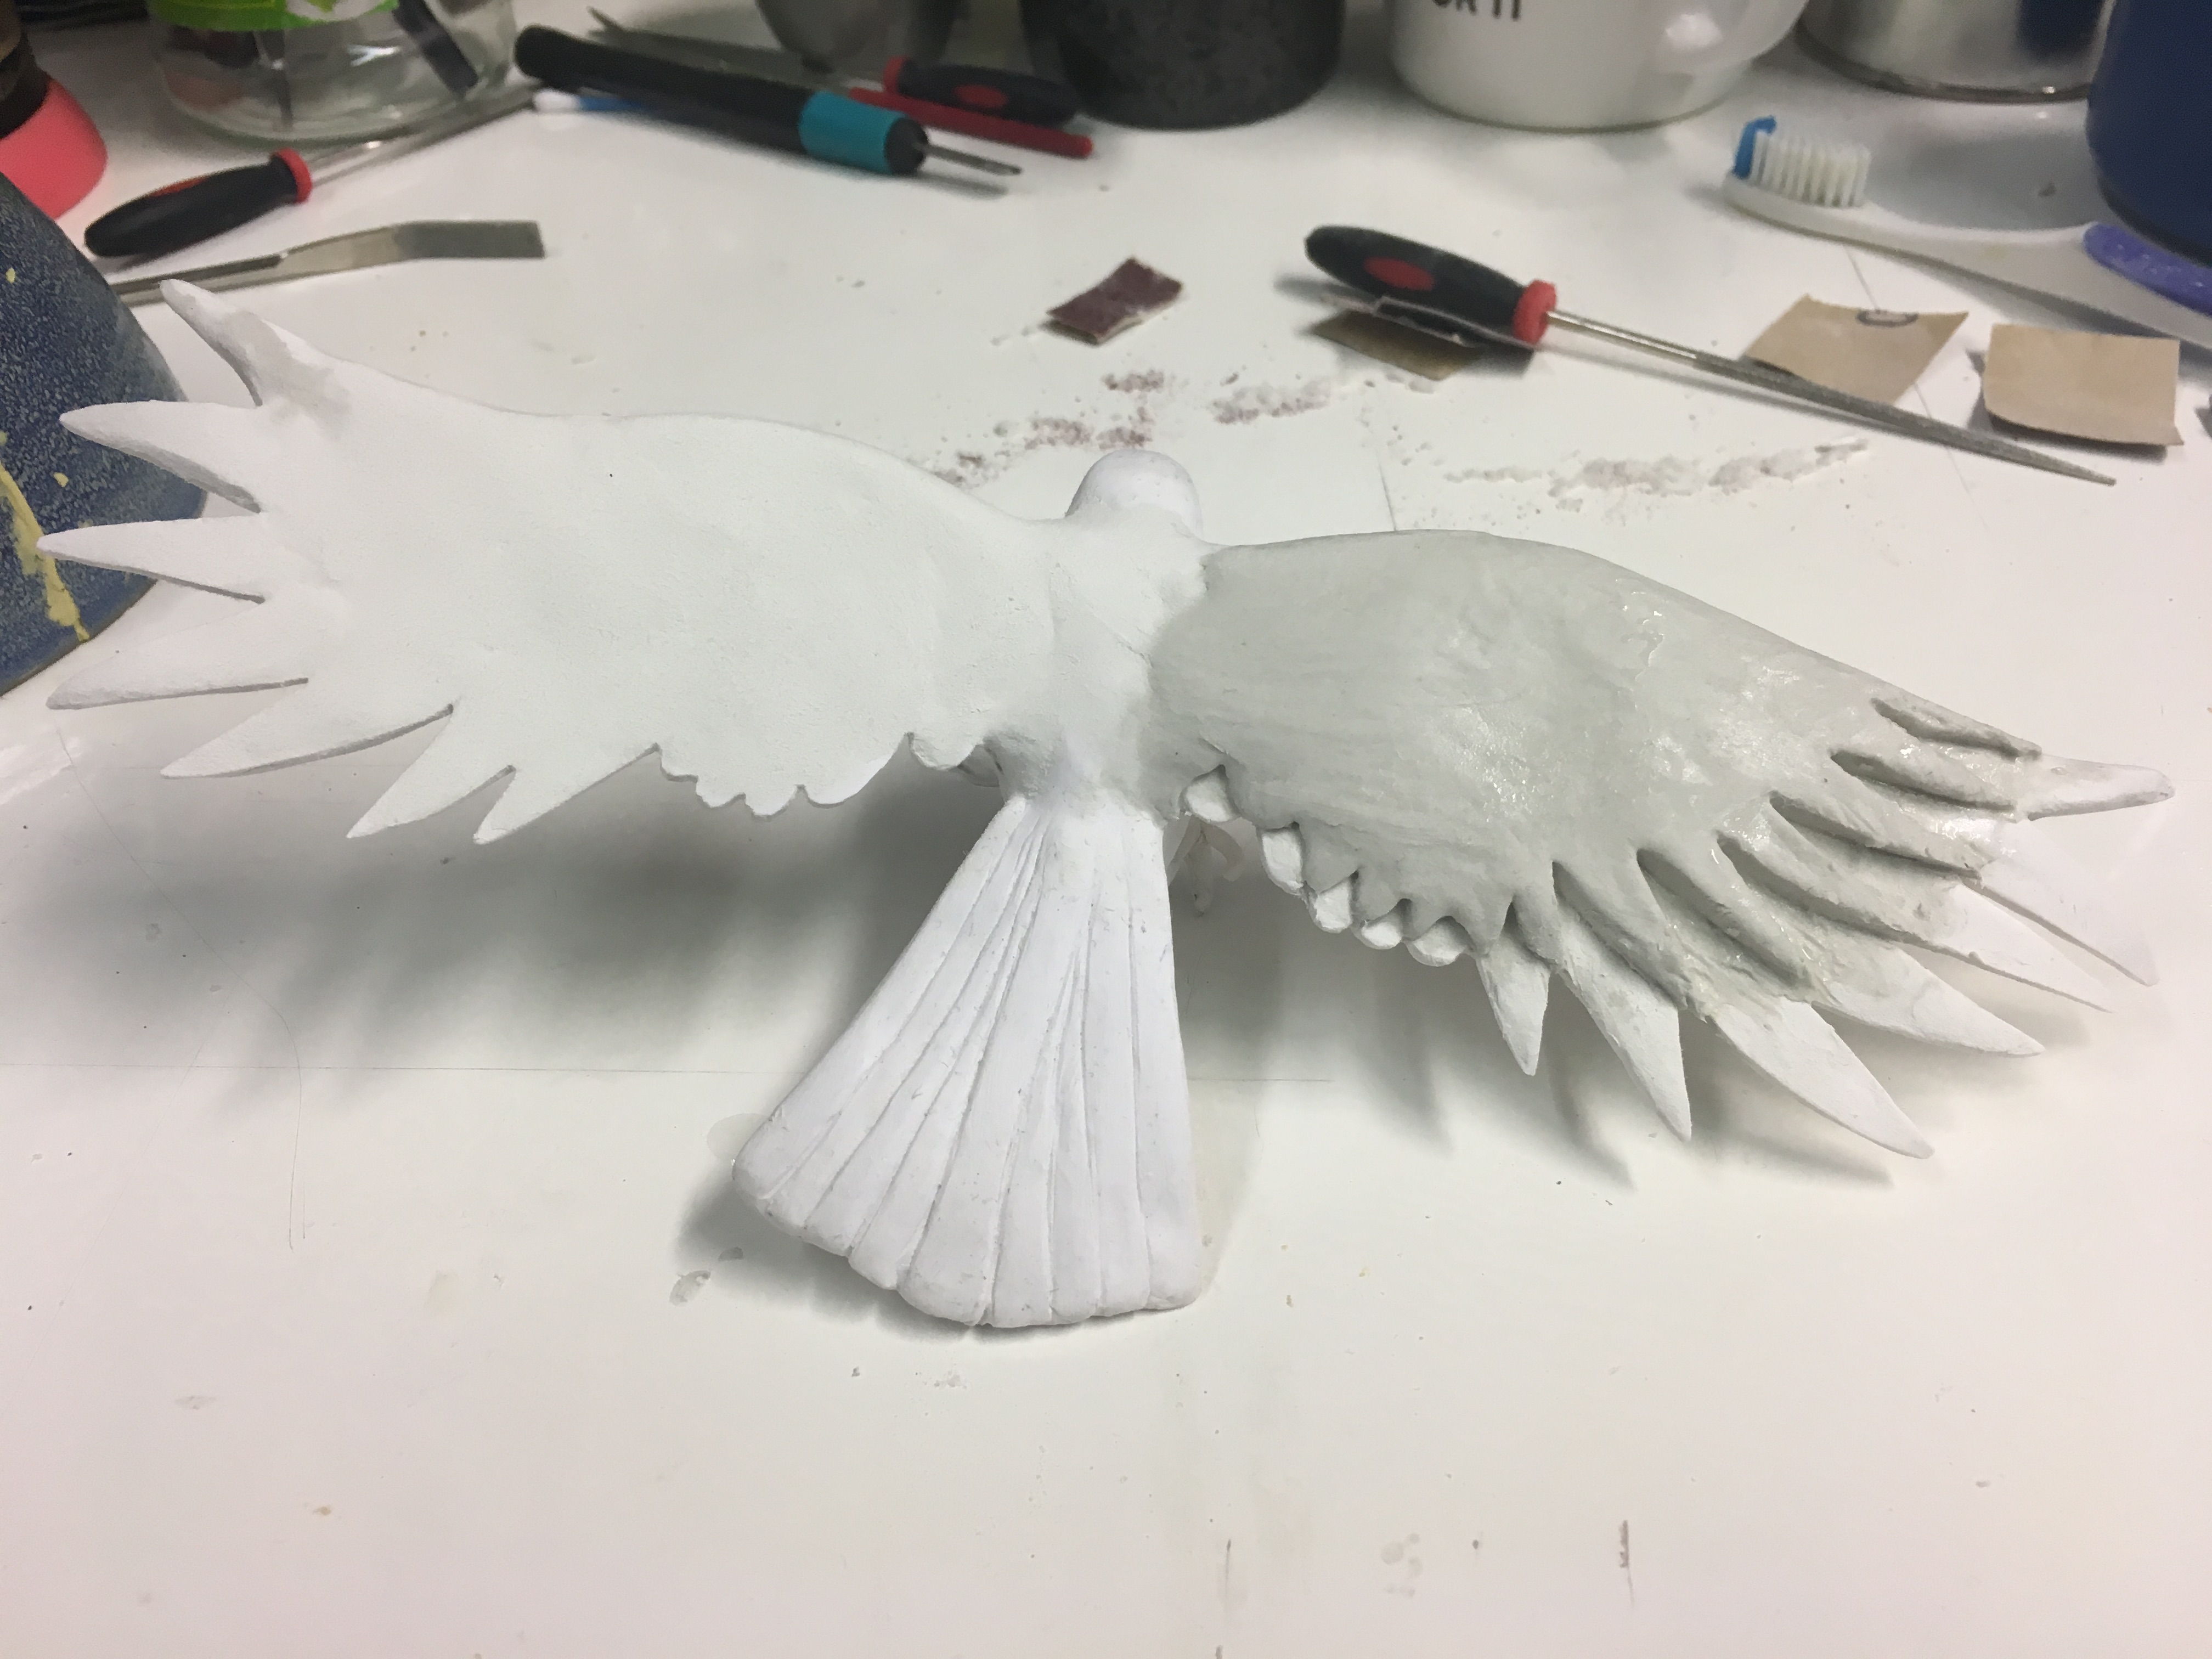
What else have I got for you today? Well, I put some more reinforcement on the wings of the raven.
Cause a cross-guard needs to actually … guard. Yeah. This one is more decorative than anything else though if I’m perfectly honest. I’m okay with that. ^_^
So! My vacuum pump has finally bit the dust. Poor thing. 😦 I am going to try to get the filter cleaned and looked at and maybe something replaced but I wasn’t willing to take the thing apart until I knew I had a nice new pump on the way that I could be sure would work. Cause let’s face it, it’s better to have a pump that sort of works for a short period of time than a pump that doesn’t work at all.
I have ordered that new pump and I am awaiting its arrival. Hopefully it will come soon! What am I doing in the meantime? Some design work. Some experiments with clay. Annnd slowly progressing on that neato raven sculpture I’ve been working on.
I’ve been reinforcing the raven statuette with DAS paperclay. You might remember me mentioning that most of the sculpture was made with Sculpy. I got to the point with it that it was too wiggly to safely work on the details without smushing the back of the wings or vice versa so I just decided to bake it and finish the detailing in an air dry clay.
I’m quite pleased with how it’s going.
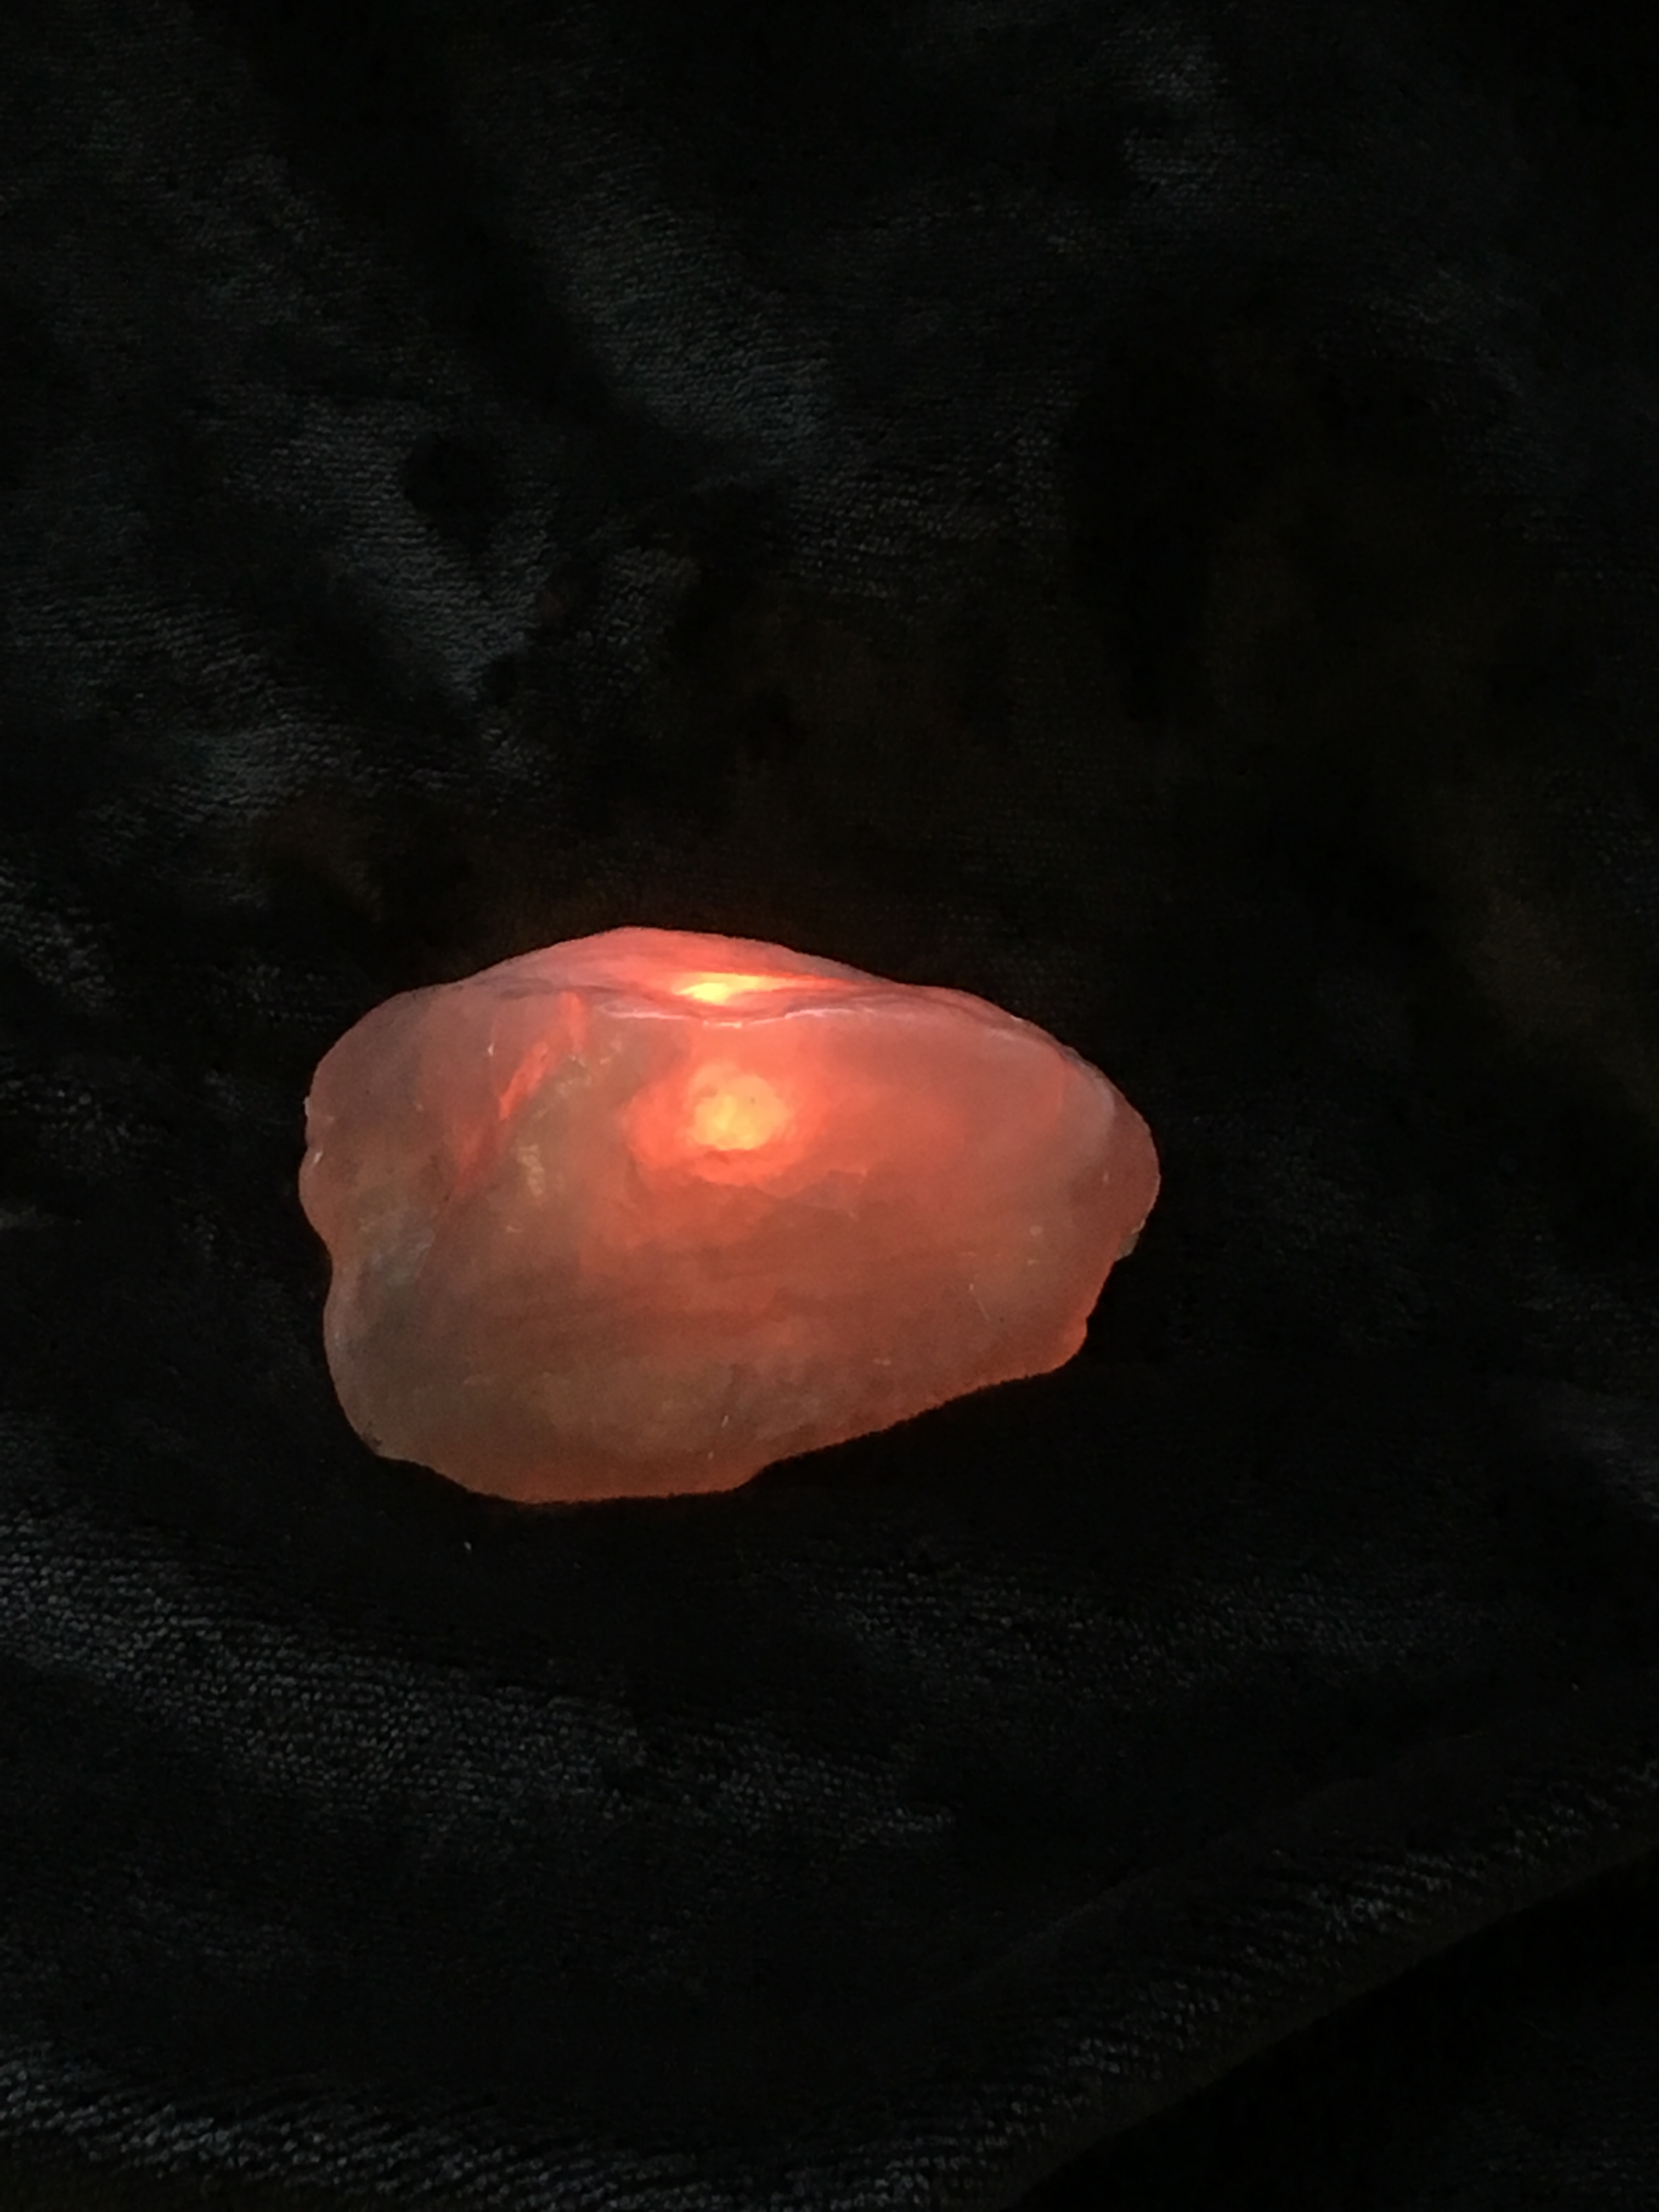
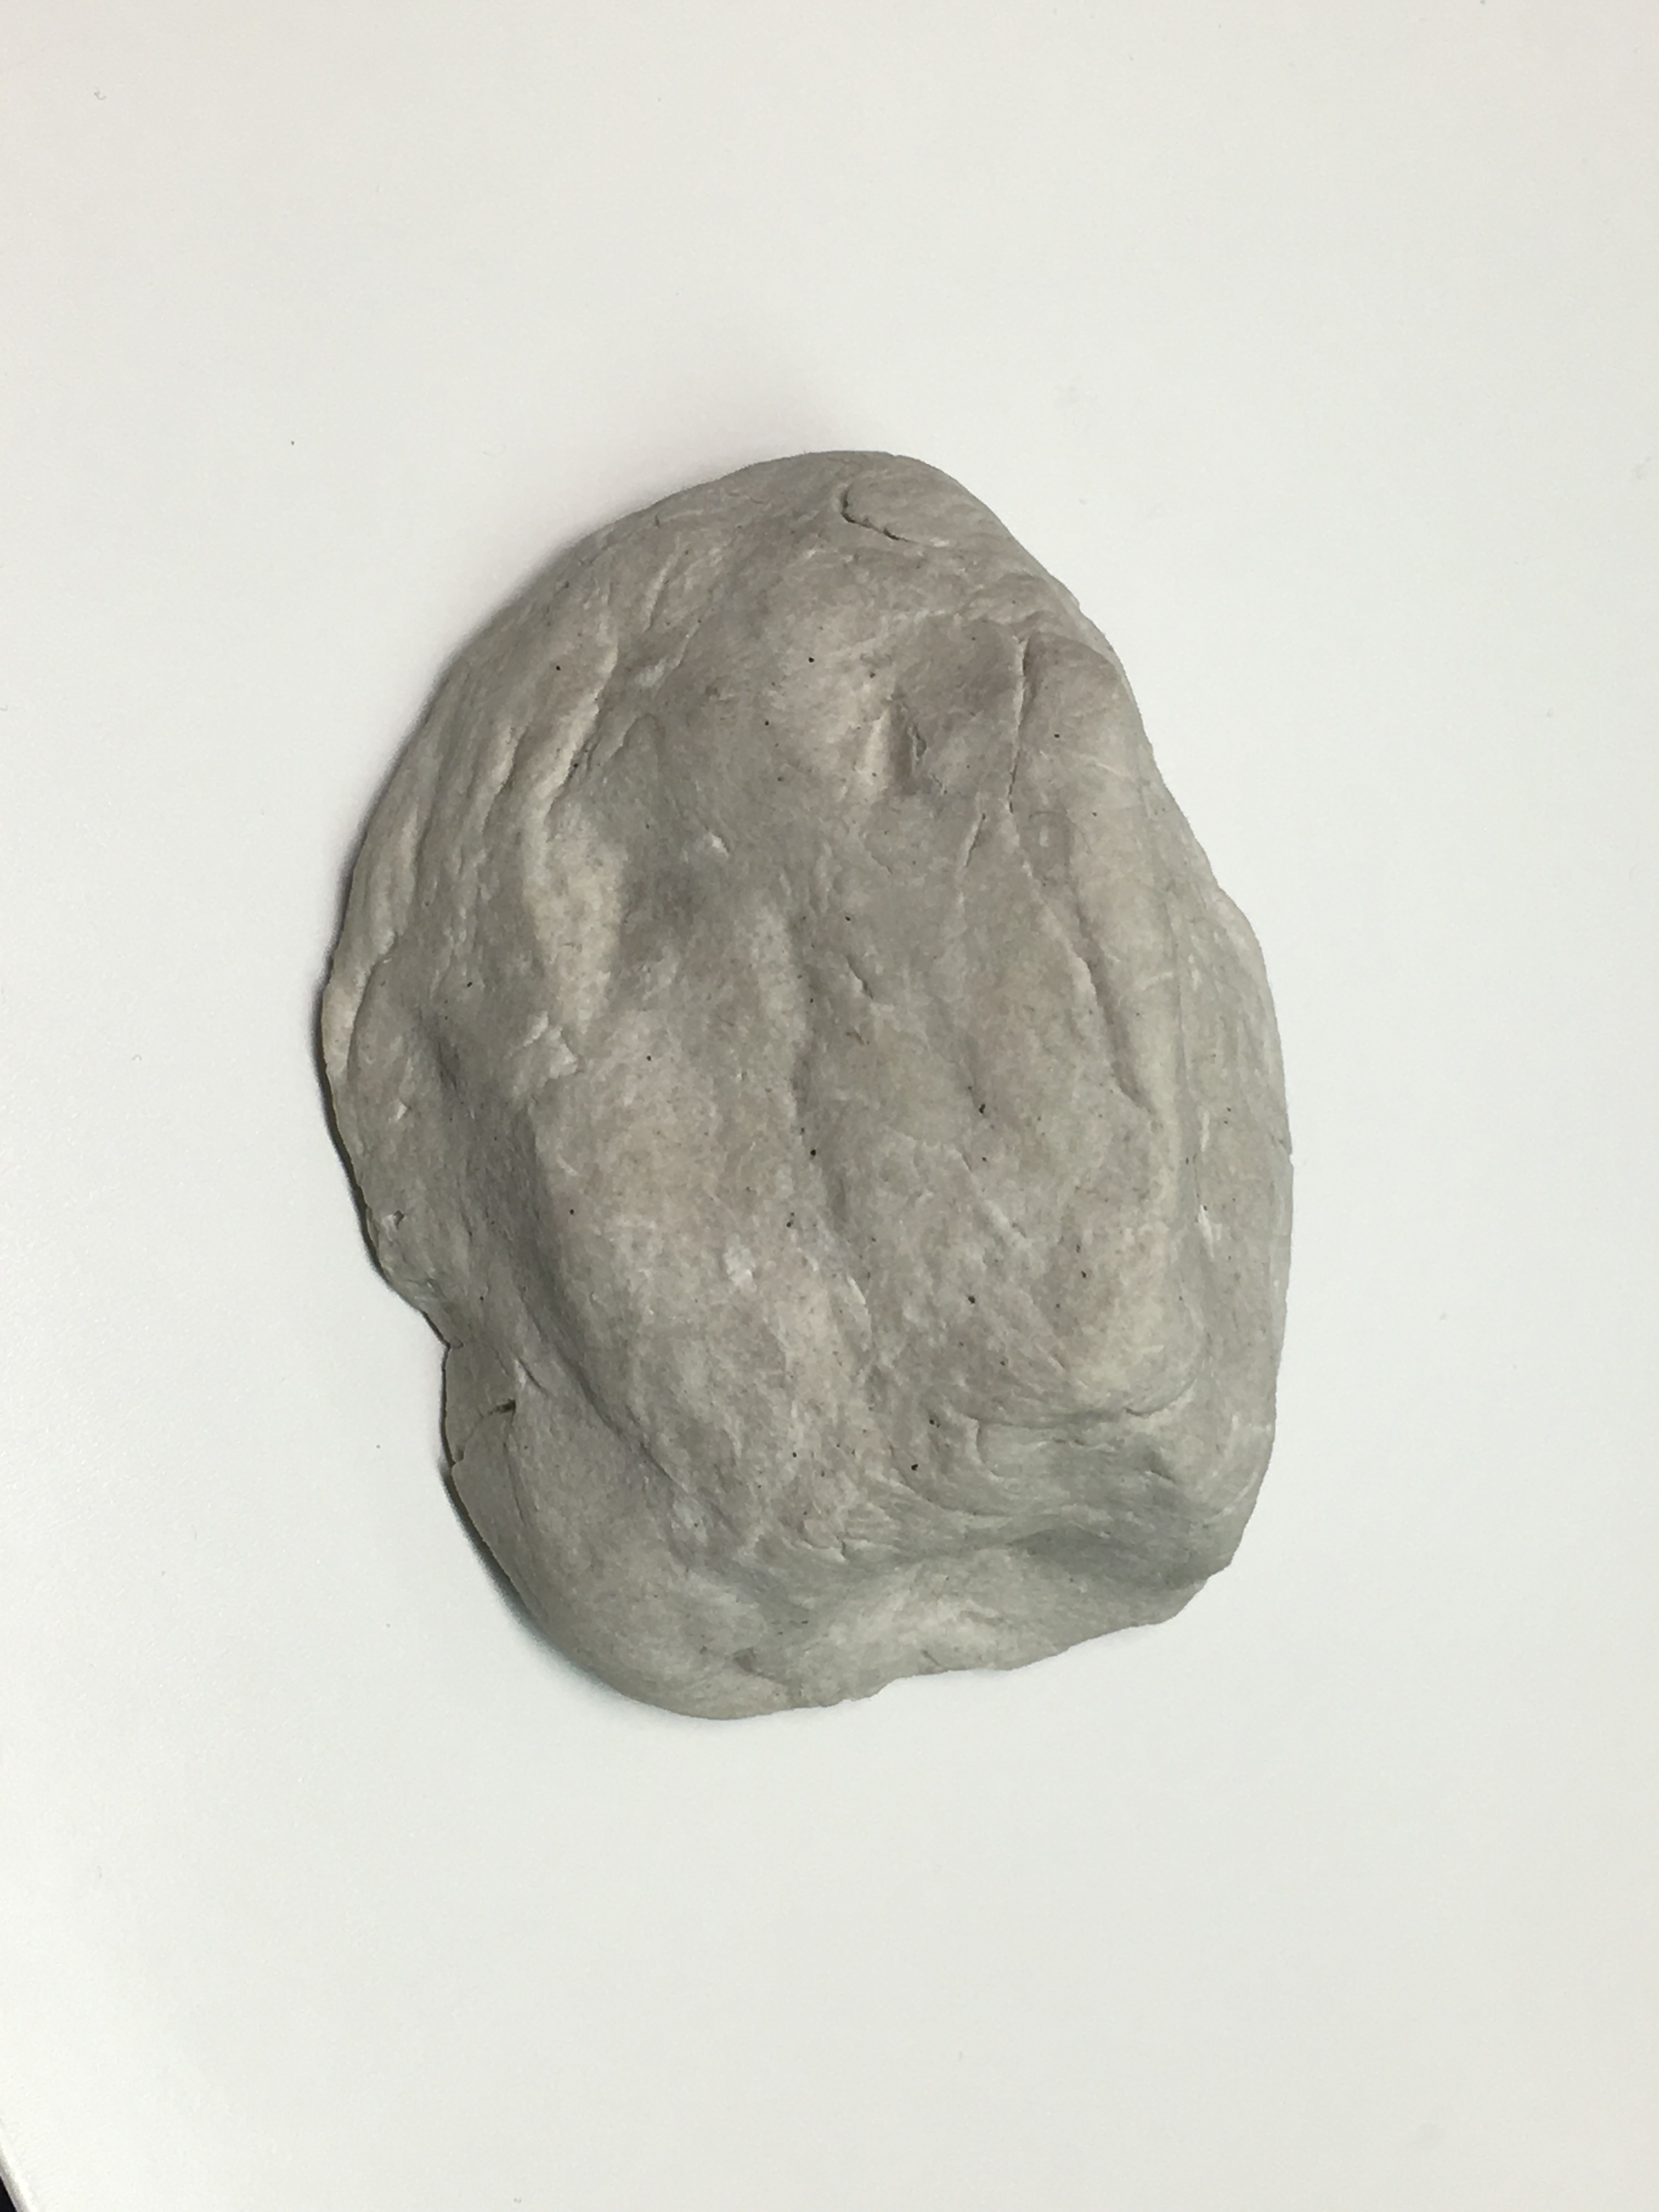
Behold! A rock!
It’s a lovely rock. I know what you’re thinking. Ethan’s finally snapped. Now he’s showing us his rock collection on his work blog. But before you stage an intervention, let me reveal to you that this rock has a secret!
It’s hollow! Remember that DIY paperclay recipe I said I was going to try out? Well, I did and it is fantastic for creating stone-like textures. It’s quite hard but I found I was able to hollow it out quite easily with a small carving tool. This is to be the beginning of my new witchlight model.
Betcha thought I forgot eh? Nope! I’ve just been struggling with the execution of the project. It’s a rather demanding thing to accomplish and I really want to get it right and make it look cool.
Here’s the video of the paperclay recipe I used. I followed it precisely. It turned out great! After five-ish days or so it got stiff and lumpy so I had to add some more water to it and beat it up a little to get it going again. It was still chunkier than it was when it was fresh so I’d very much recommend only making as much as you need and using it within a day or two. I’ll let you know how the rehydrated clay works, versus the fresh stuff.
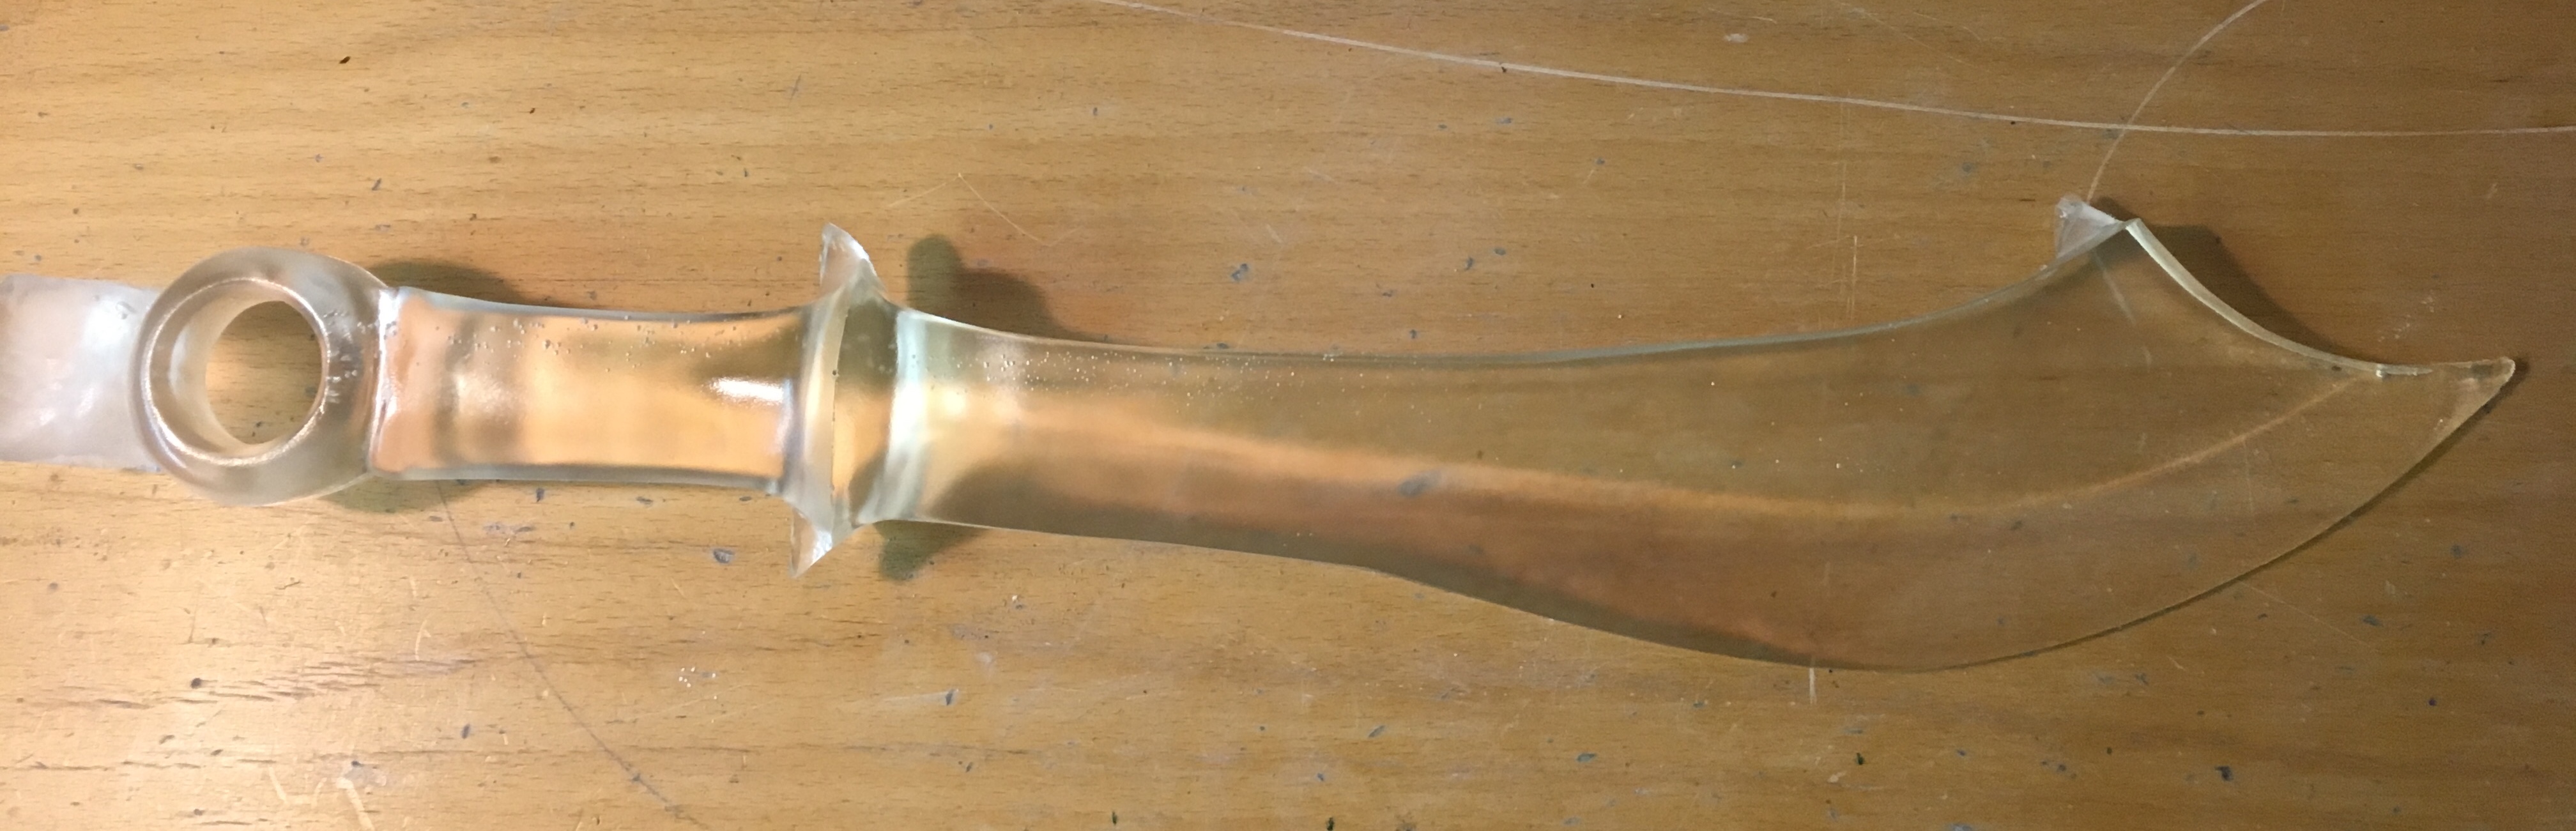
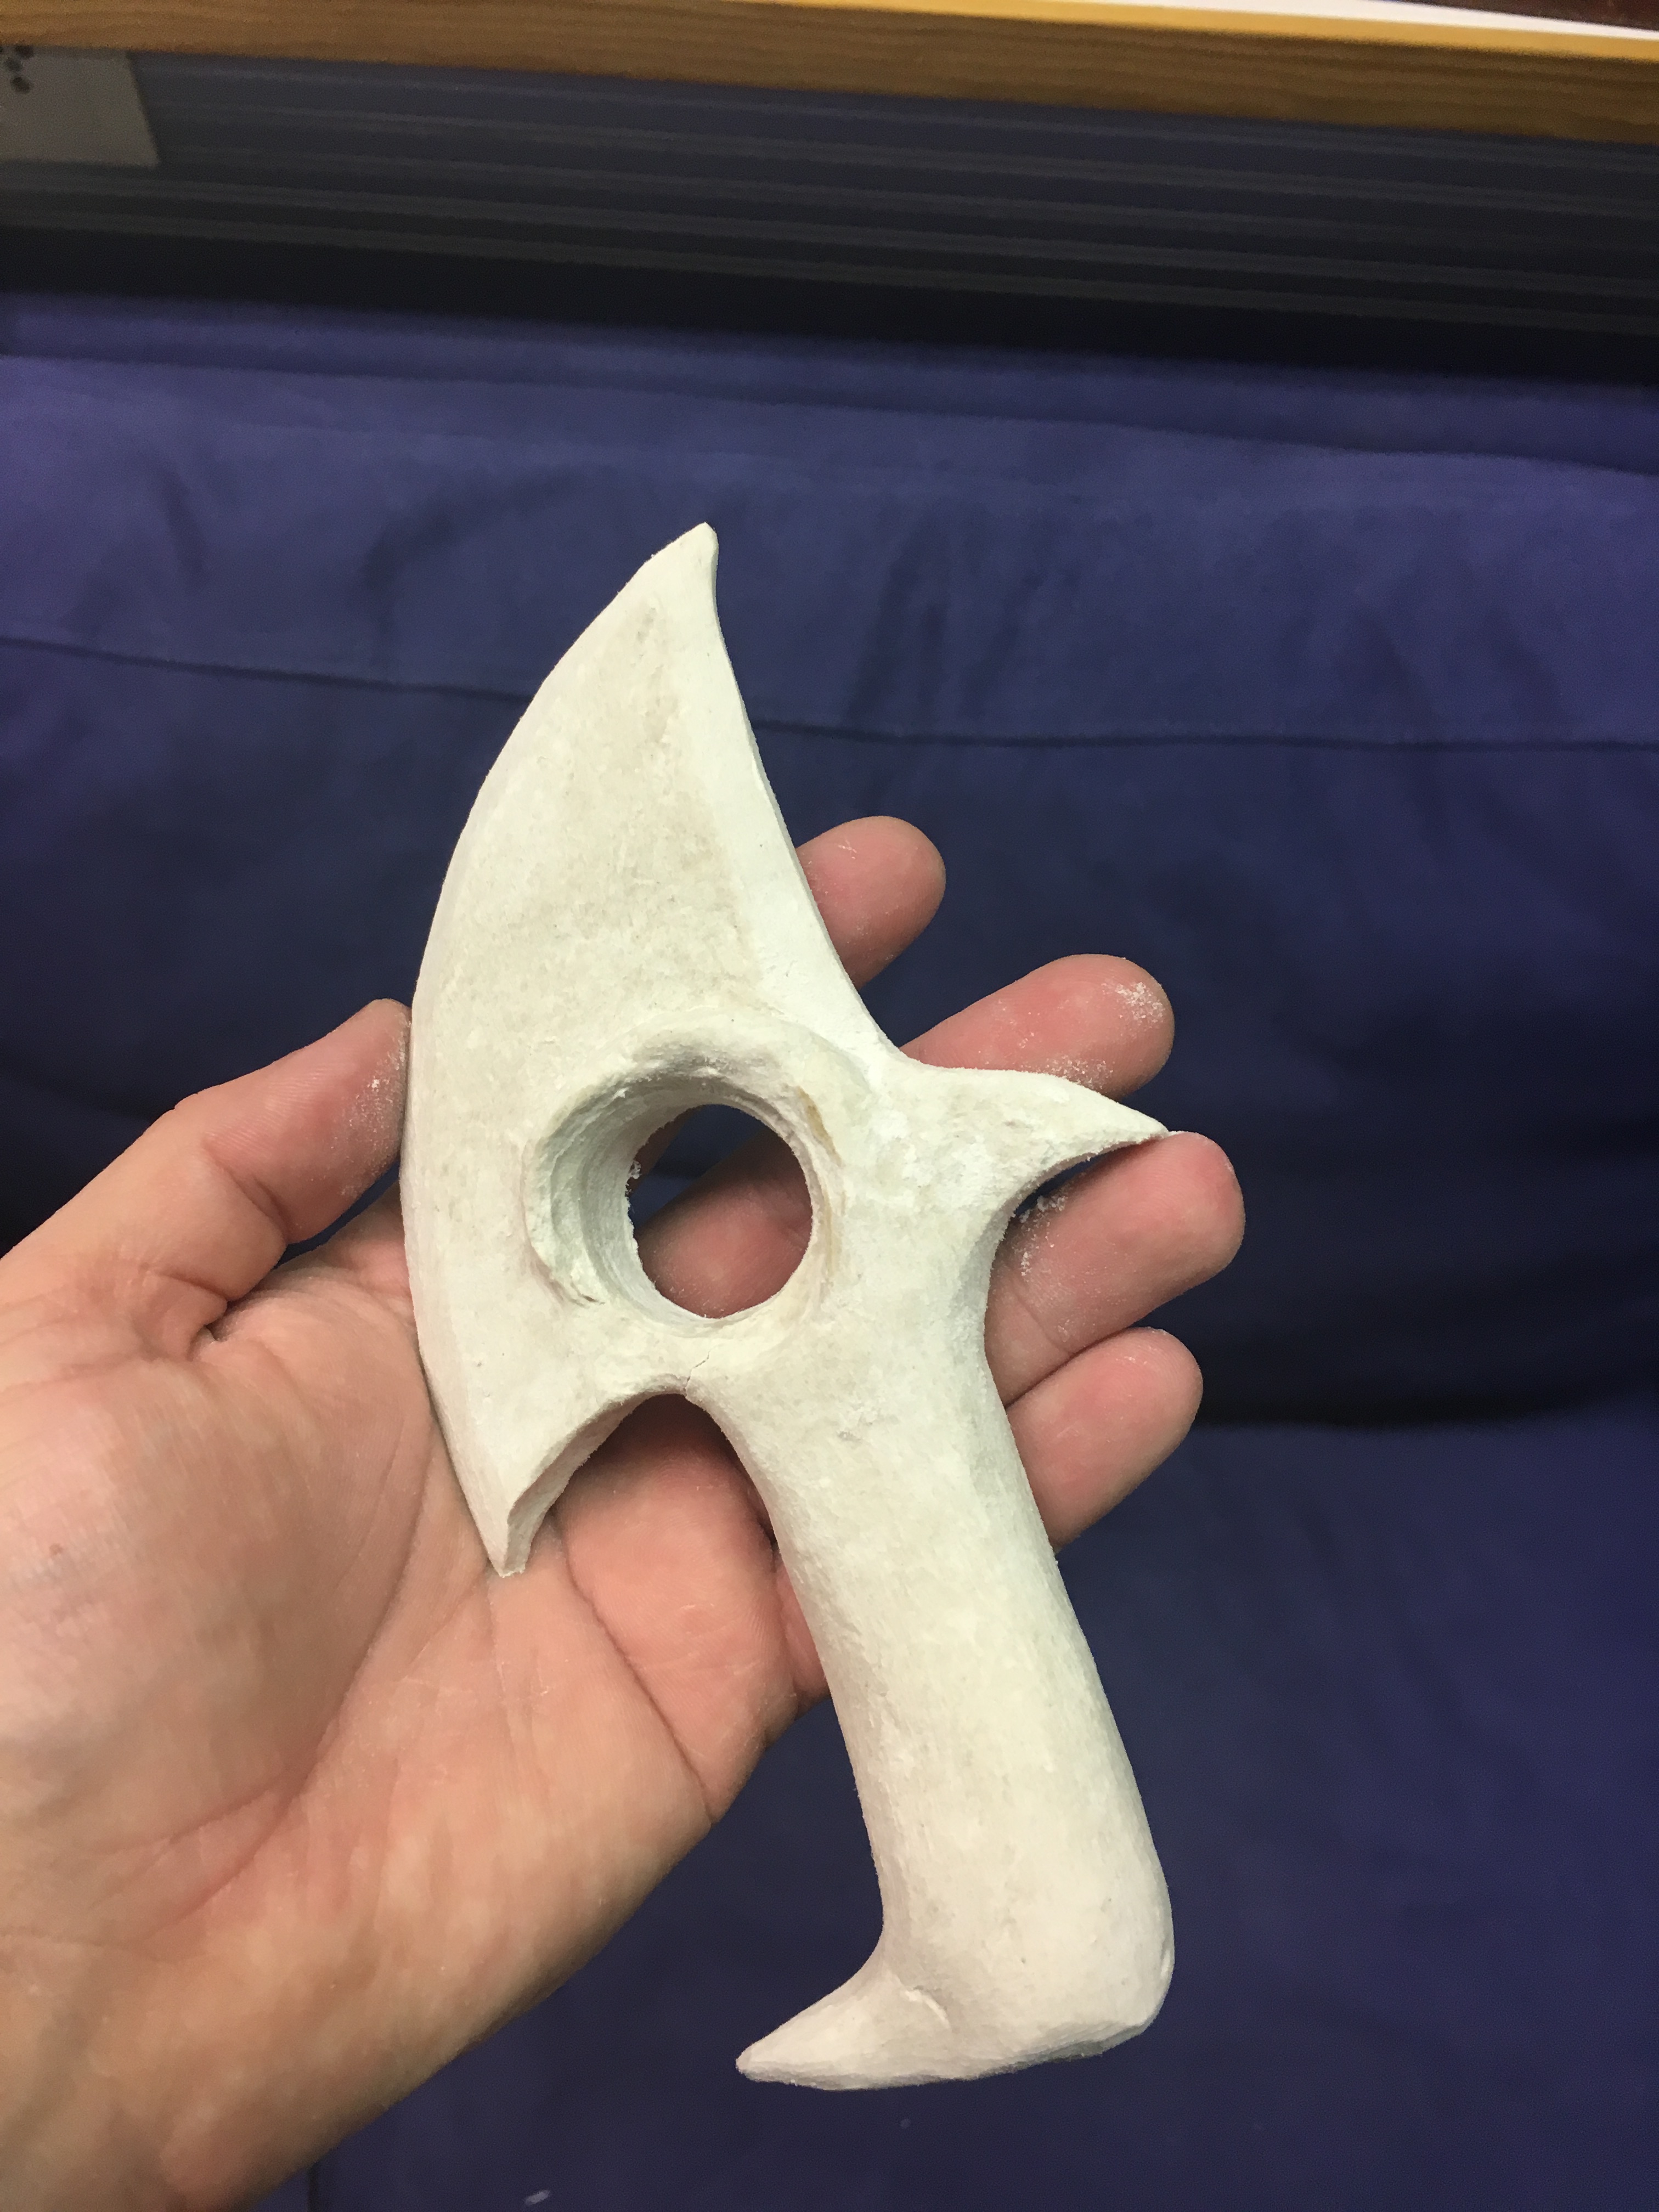
So I mentioned design work! I’ve had a request for the tiniest little Seraph Blade I’ve ever made. 15.22cm (6″) total. I was stumped as to how I was supposed to make something that wouldn’t look ridiculous and end up with the handle being longer than the blade. But then my wife mentioned skinning knives to me. Those are short but wide and have a really nice curve to them.
I took some inspiration from various models I looked at and came up with this design. The middle, ring, and pinkie finger rest on the handle proper while the index finger goes through the hole in the blade. I added a thumb guard to keep the hand safe from sliding onto the edge of the blade when it’s all slippery with demon ichor. 😉
Demons thinking they’ve caught a lucky break and found a Shadowhunter unarmed will be in for a nasty little surprise. It might be intimidating to get that close and personal with the infernal, but a hunter’s gotta do what a hunter’s gotta do. I know some of you will have the moxie to pull it off.
I’ll have some more progress pictures for you soon. Everybody cross your fingers for a quick shipping of my new vacuum pump so I can get that pretty Arabian sword cast in resin! Can’t wait to show you the completion of that project!
No that wasn’t a typo. Goo! Sticky slorpy blue goo! It is time to pour silicone all over this beauty!
When you see something halfway buried in clay, you know the wacky wizardry is about to begin.
So right now I have Zaapiel sitting in its mould box (which I didn’t take a picture of because I was dead tired at the end of the day on Friday) awaiting my arrival this morning.
What else is afoot at the workshop? Well, I found a few DIY recipes for air-dry paper clay that I’m dying to try out. If it goes well, I’ll have a supply of much cheaper self-hardening clay I can use to sculpt my prototypes instead of using foam insulation. Foam insulation is not very good for the environment and is also annoyingly porous so it has to be sealed over and over again with layers of glue and paint before I can actually take a prototype mould of it. It’d be great if I didn’t have to do that! Let’s see if I can find those recipes for you and maybe we can try it together.