

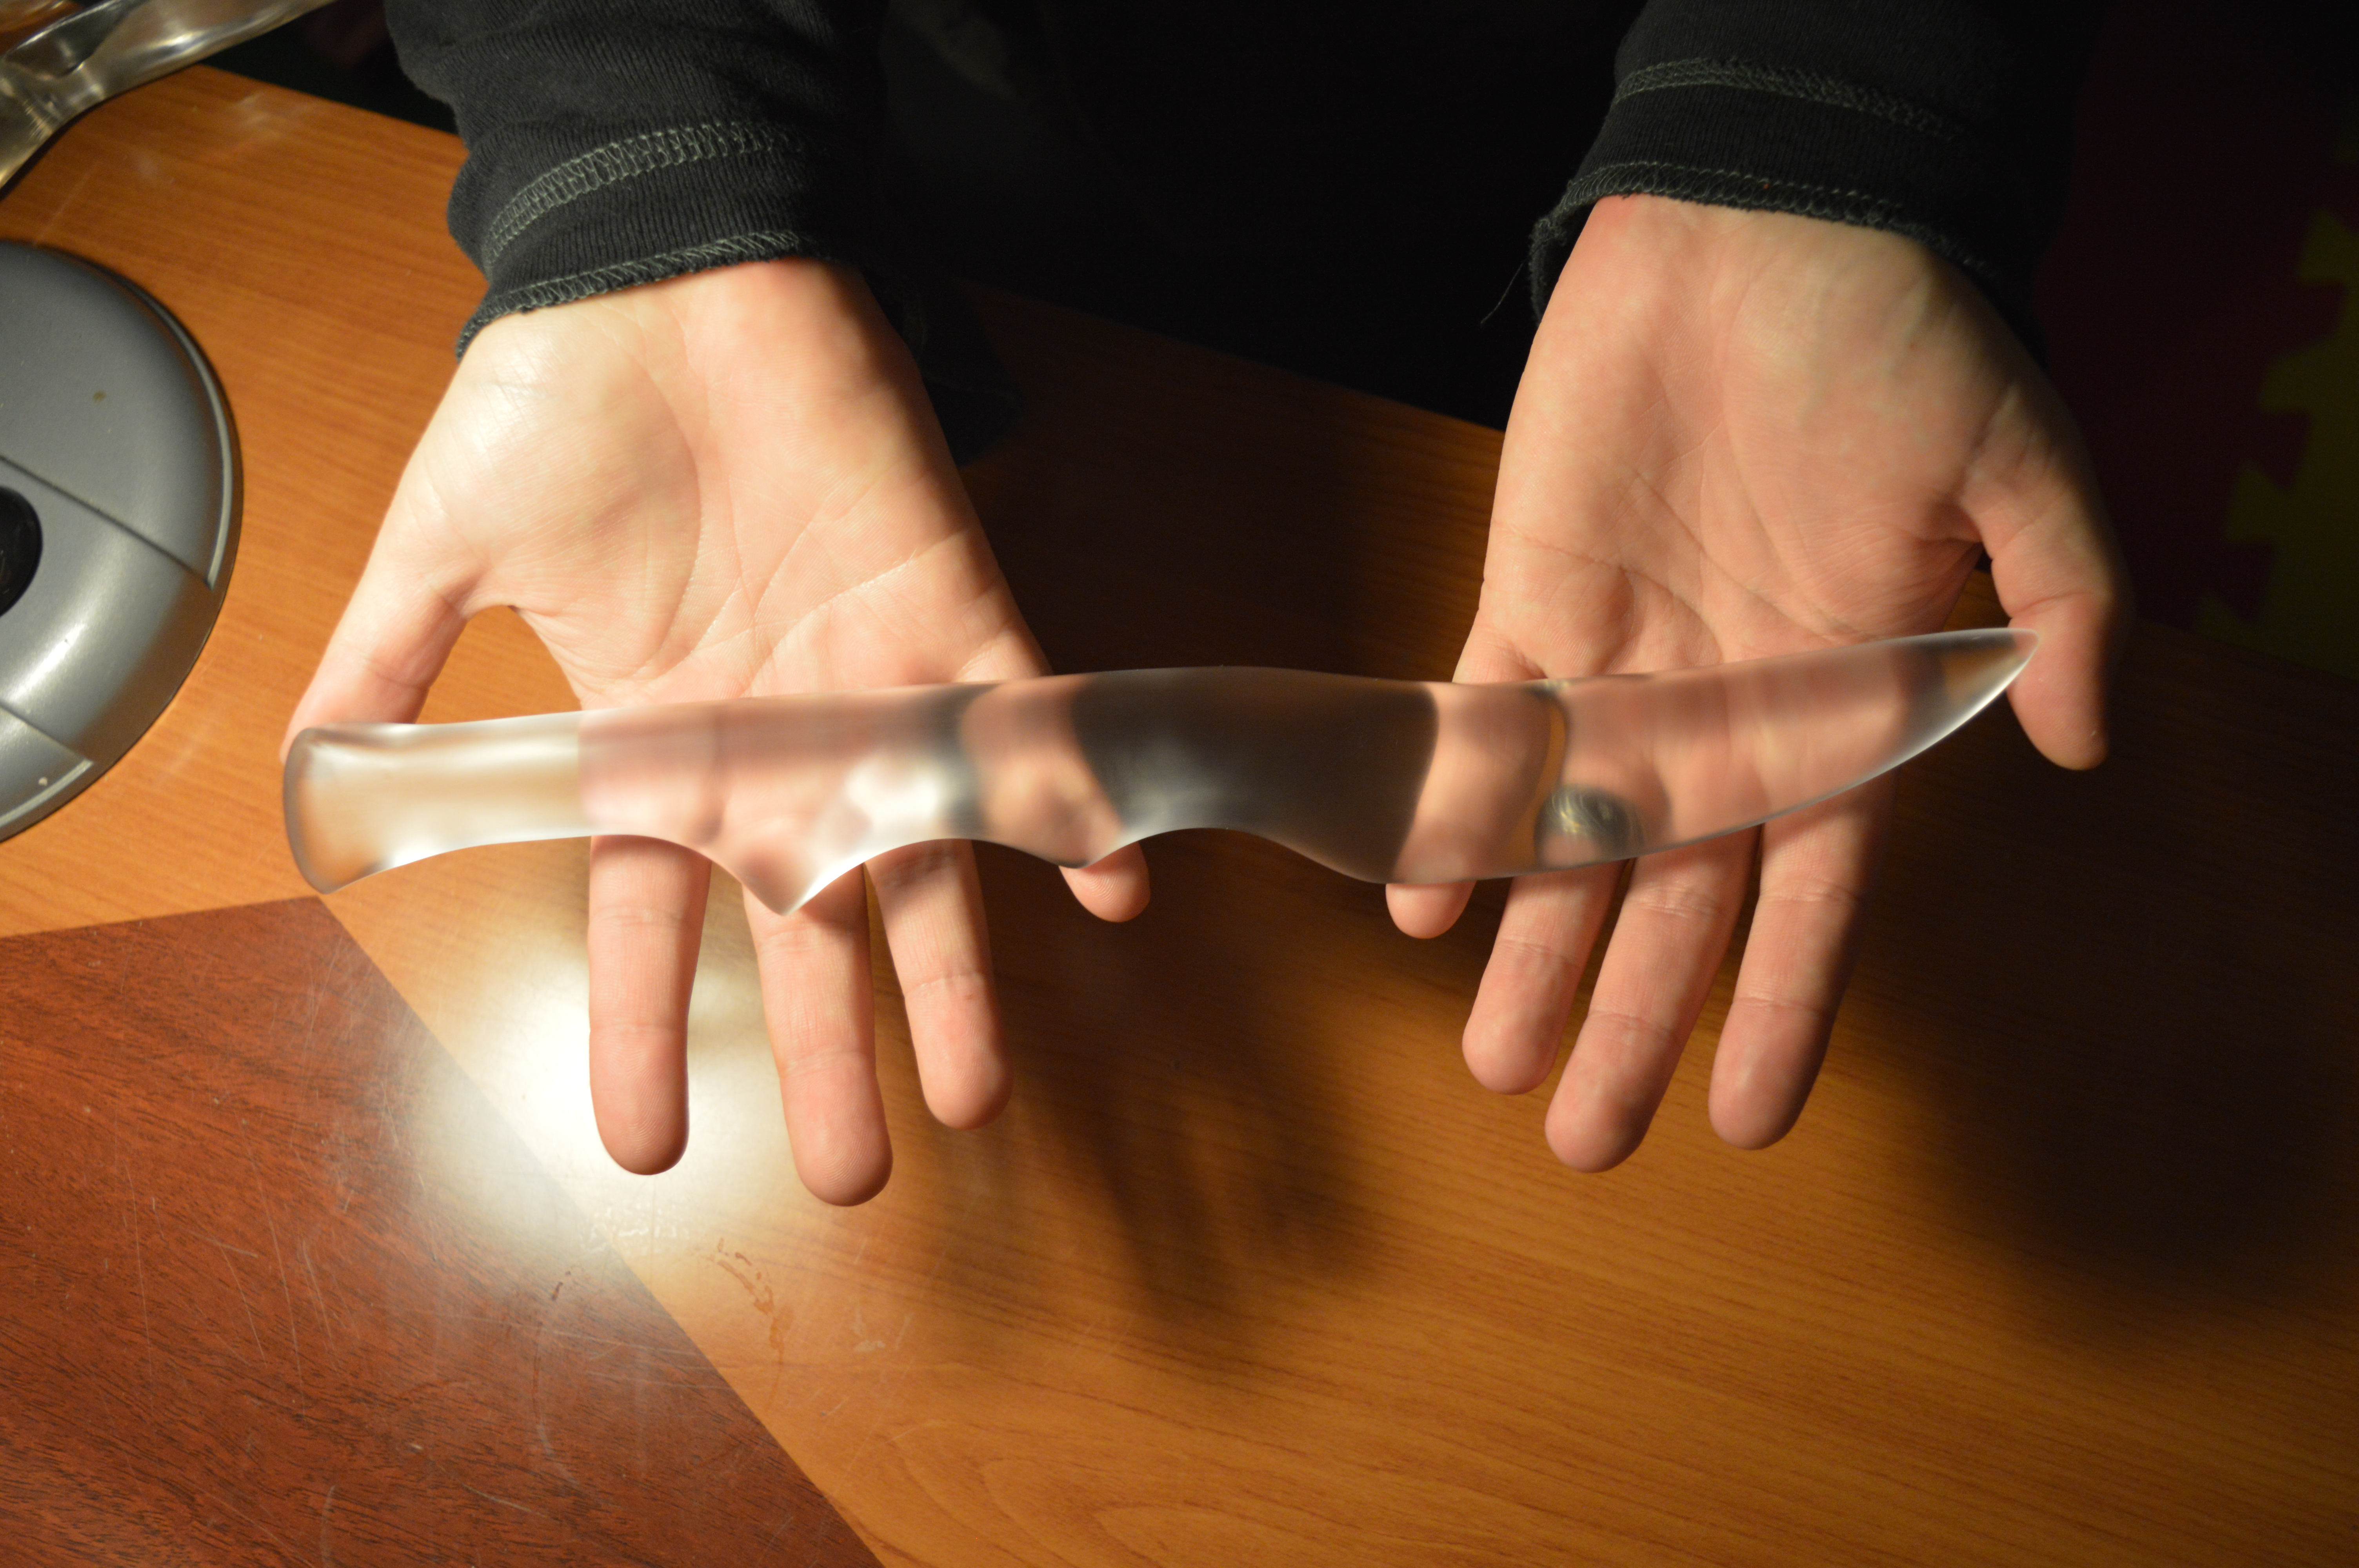
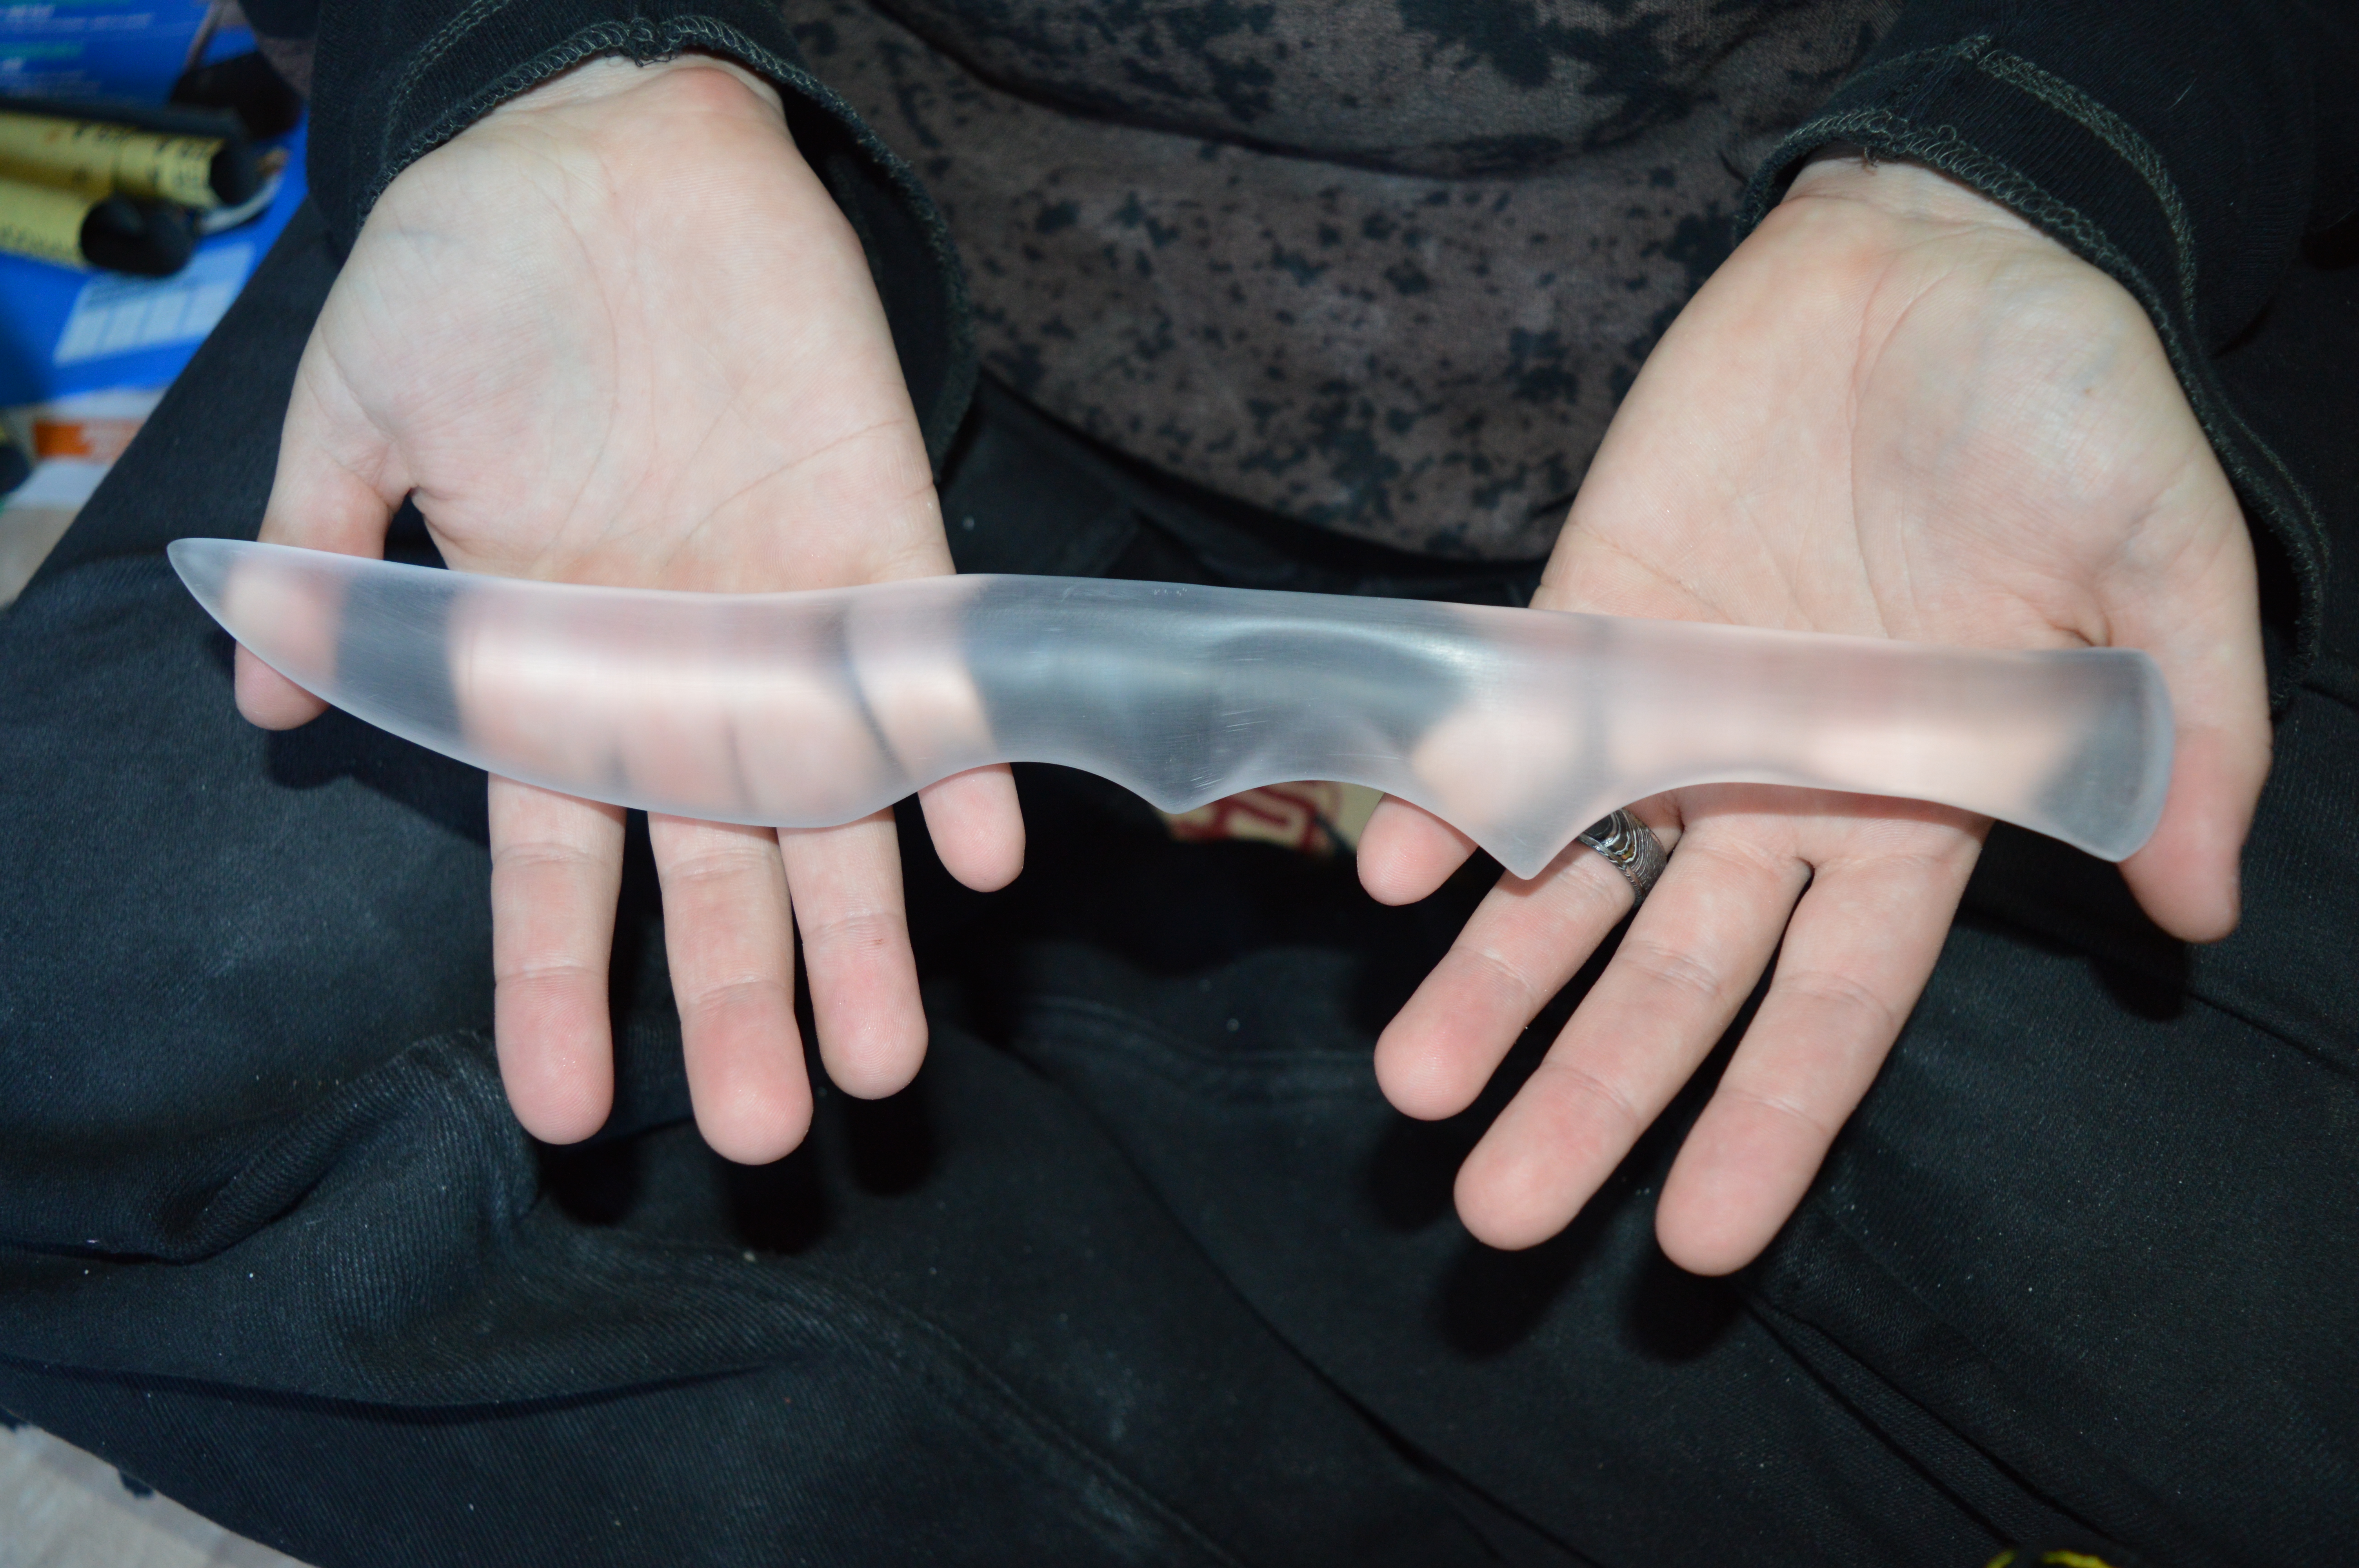
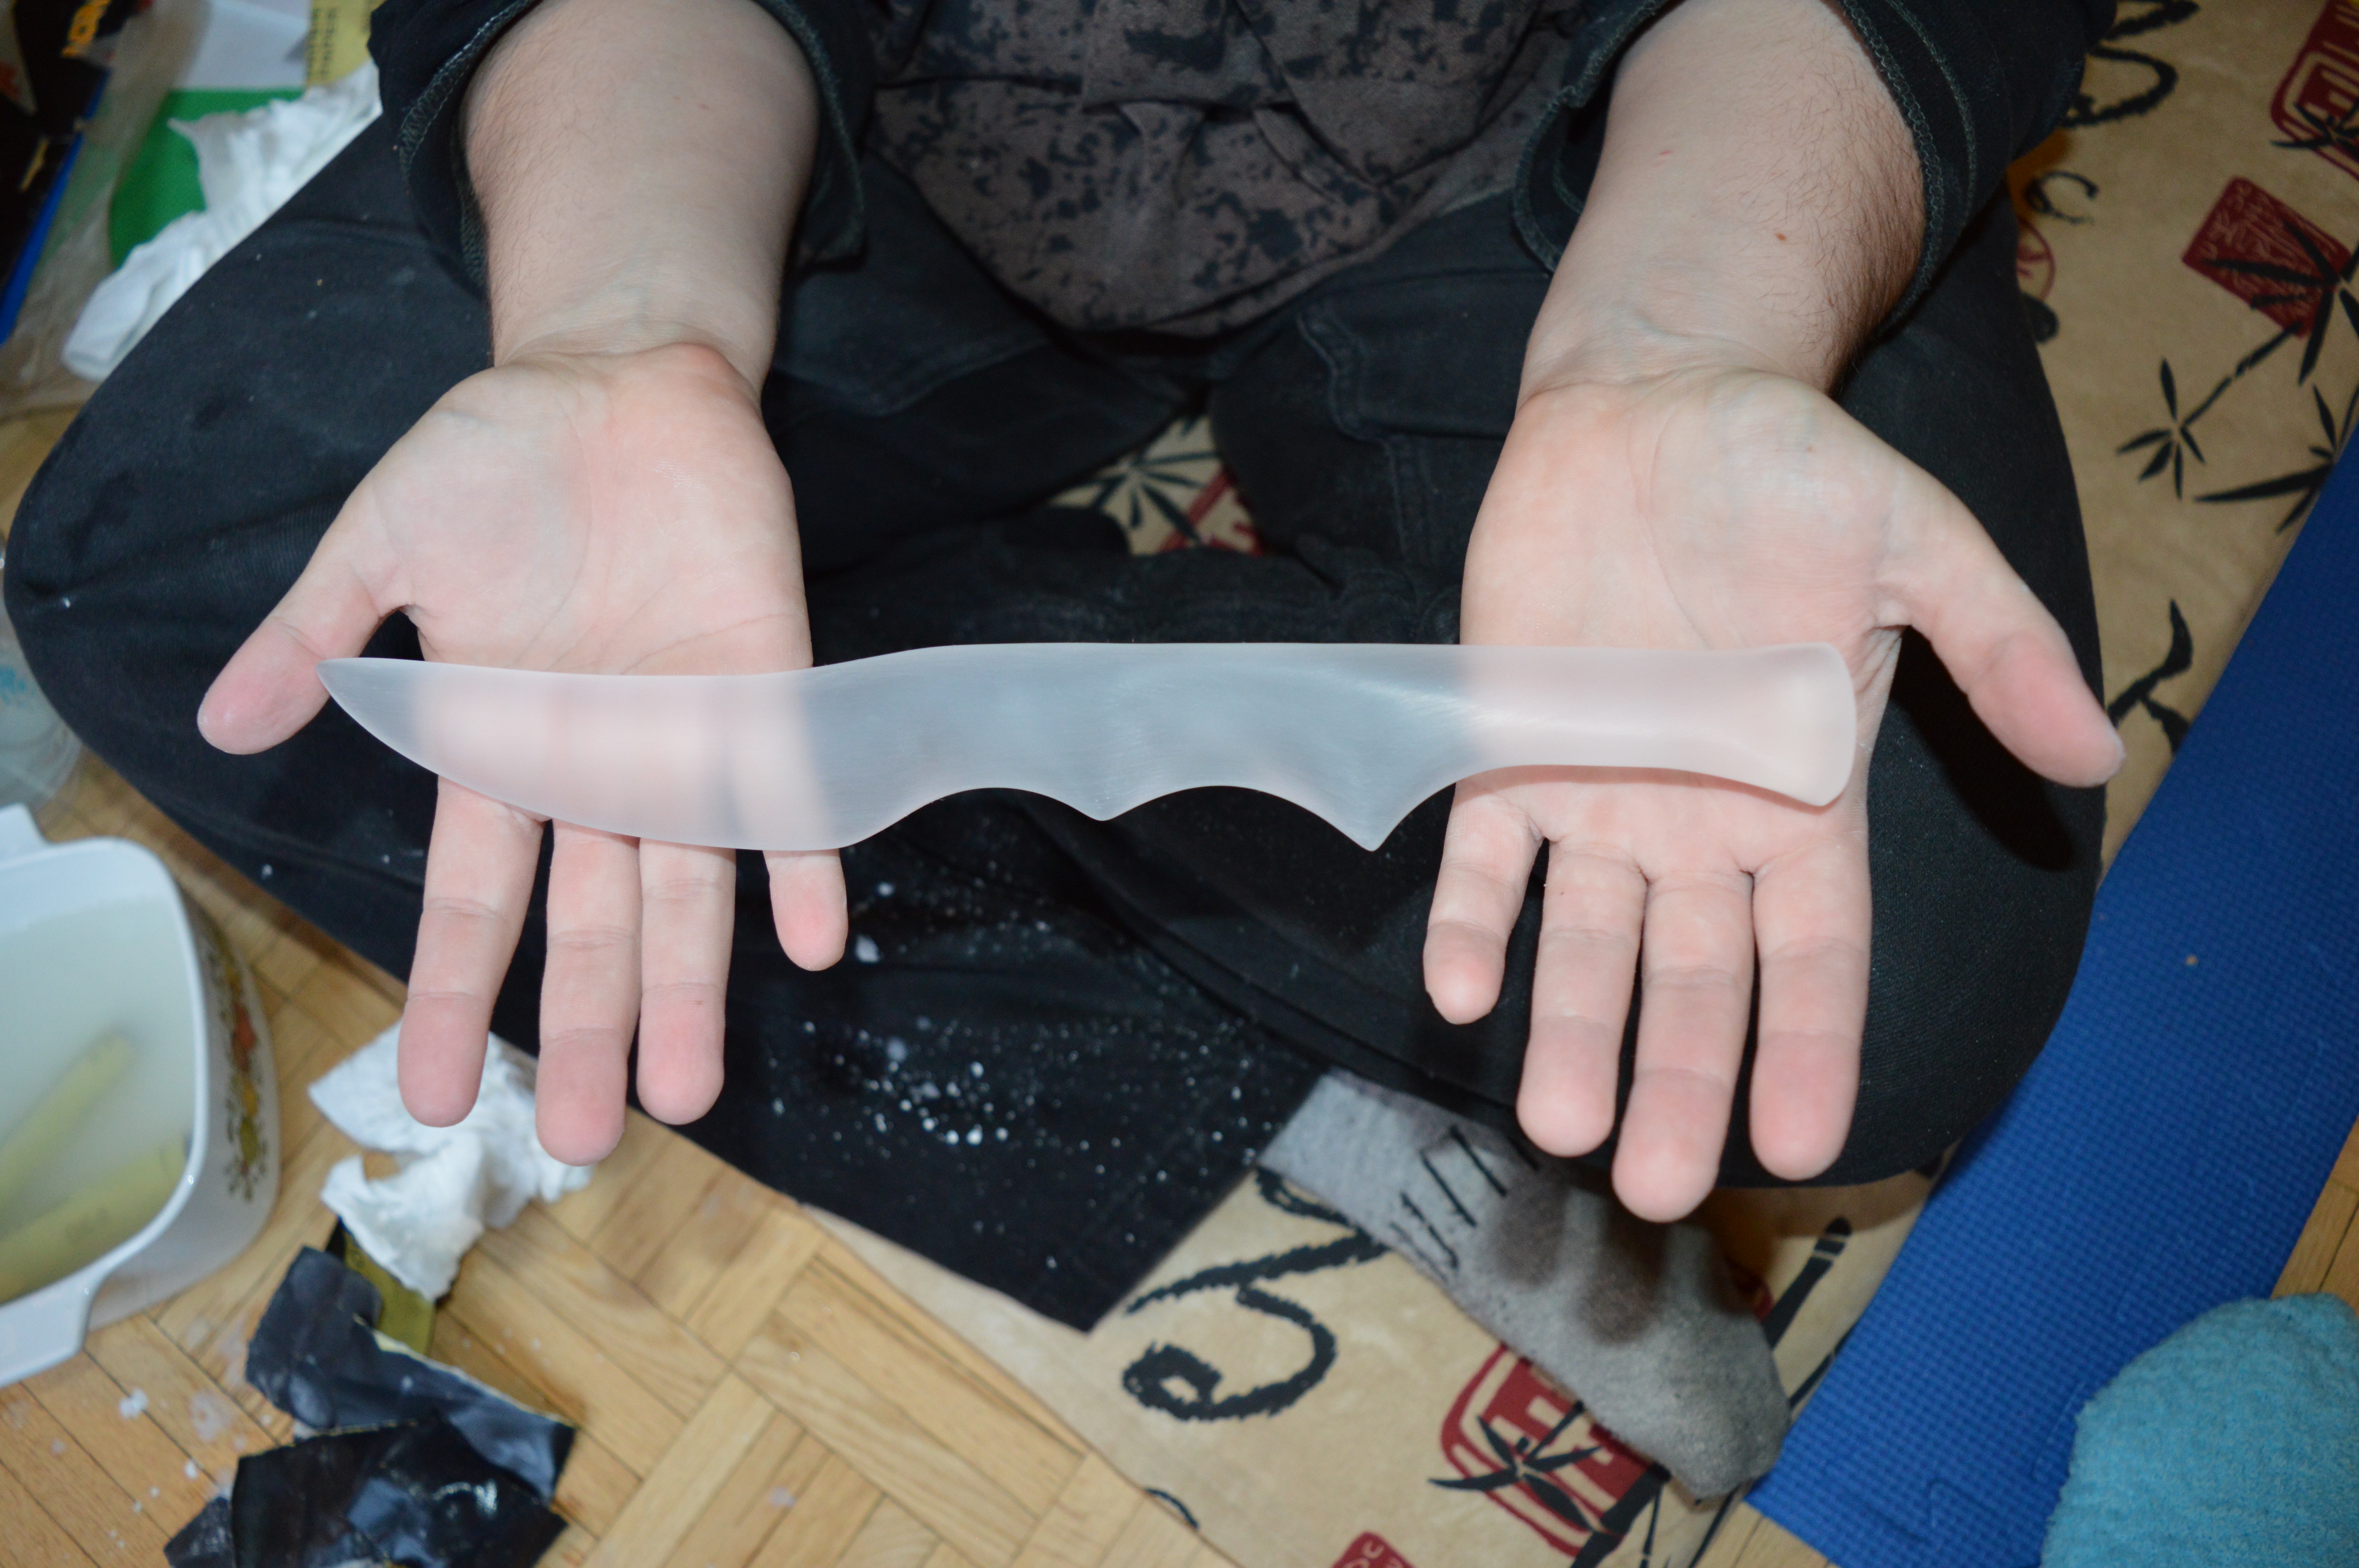
This is the seraph blade that I made for Randi’s wee Shadowhunter daughter. The grip, as you can see, is made for the small hand of a child and while it is a dagger to most of us, it will make a nicely sized short-sword for her.
How did I make it? Well read on and see!
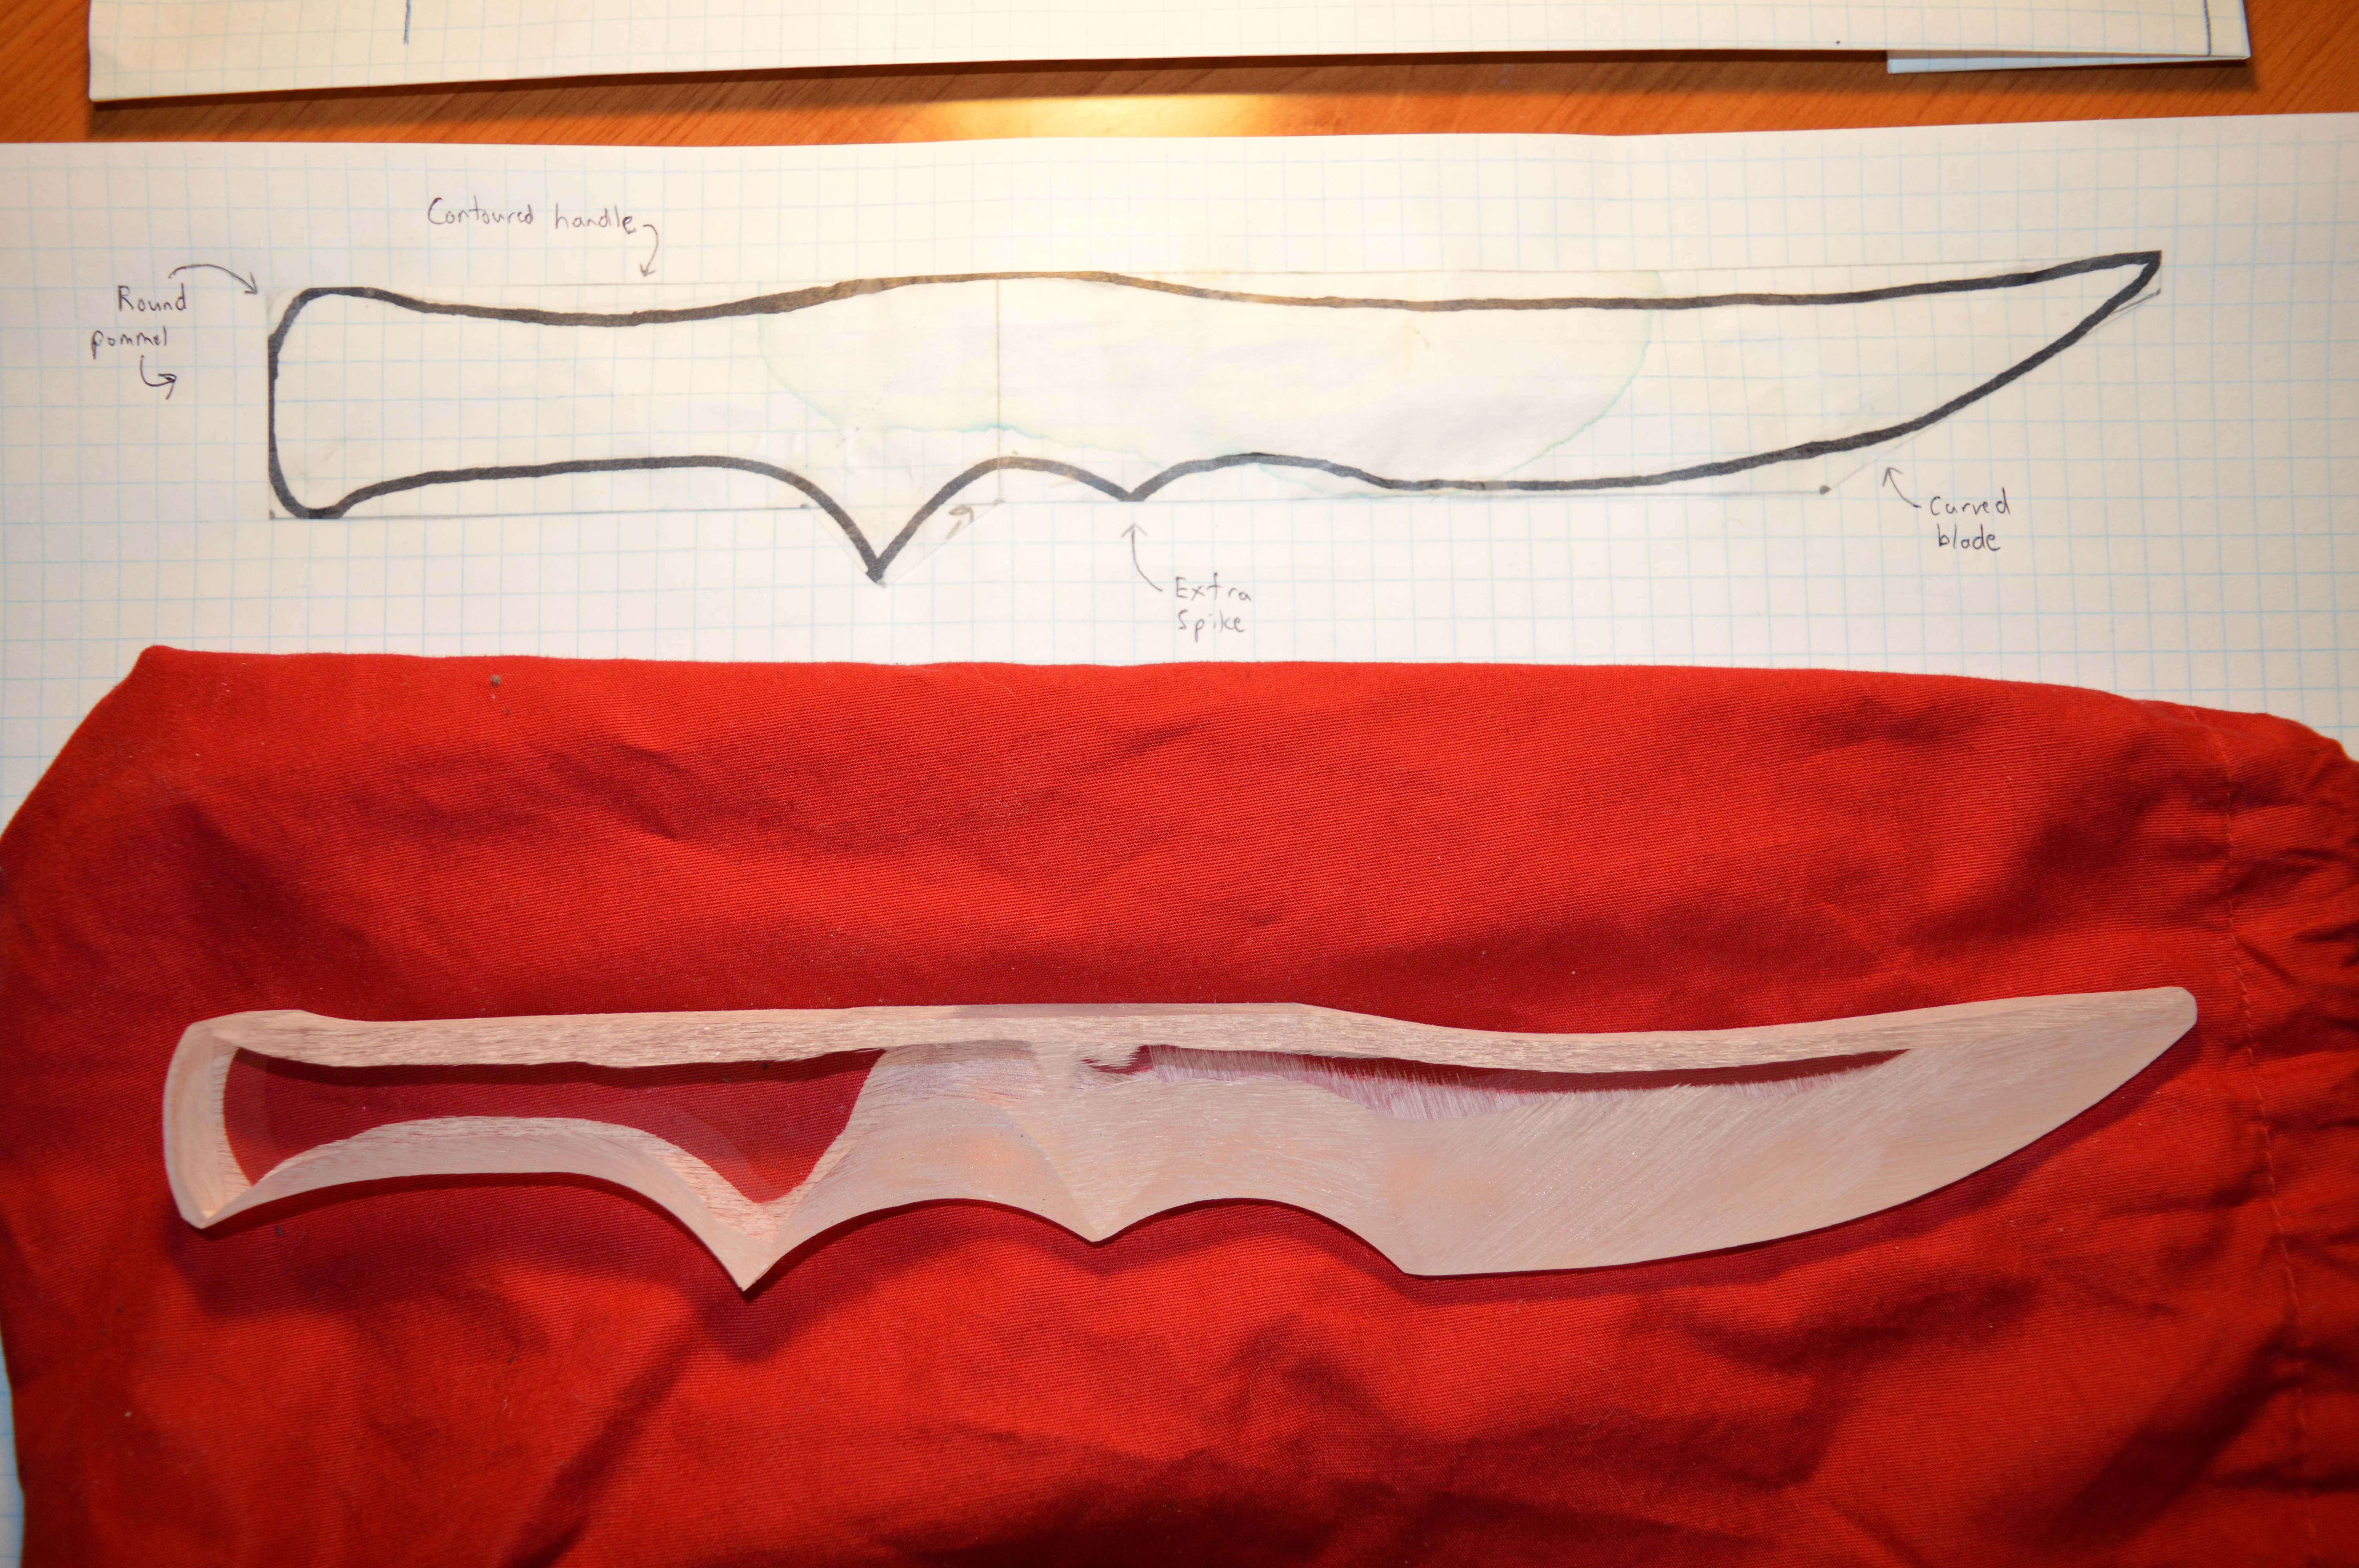
First, Randi contacts me with her request for a small seraph blade for her daughter. I send her a link to my Blade Design Dropbox and she selects my short “tanto” (Japanese short dagger) model as the base for a new design.
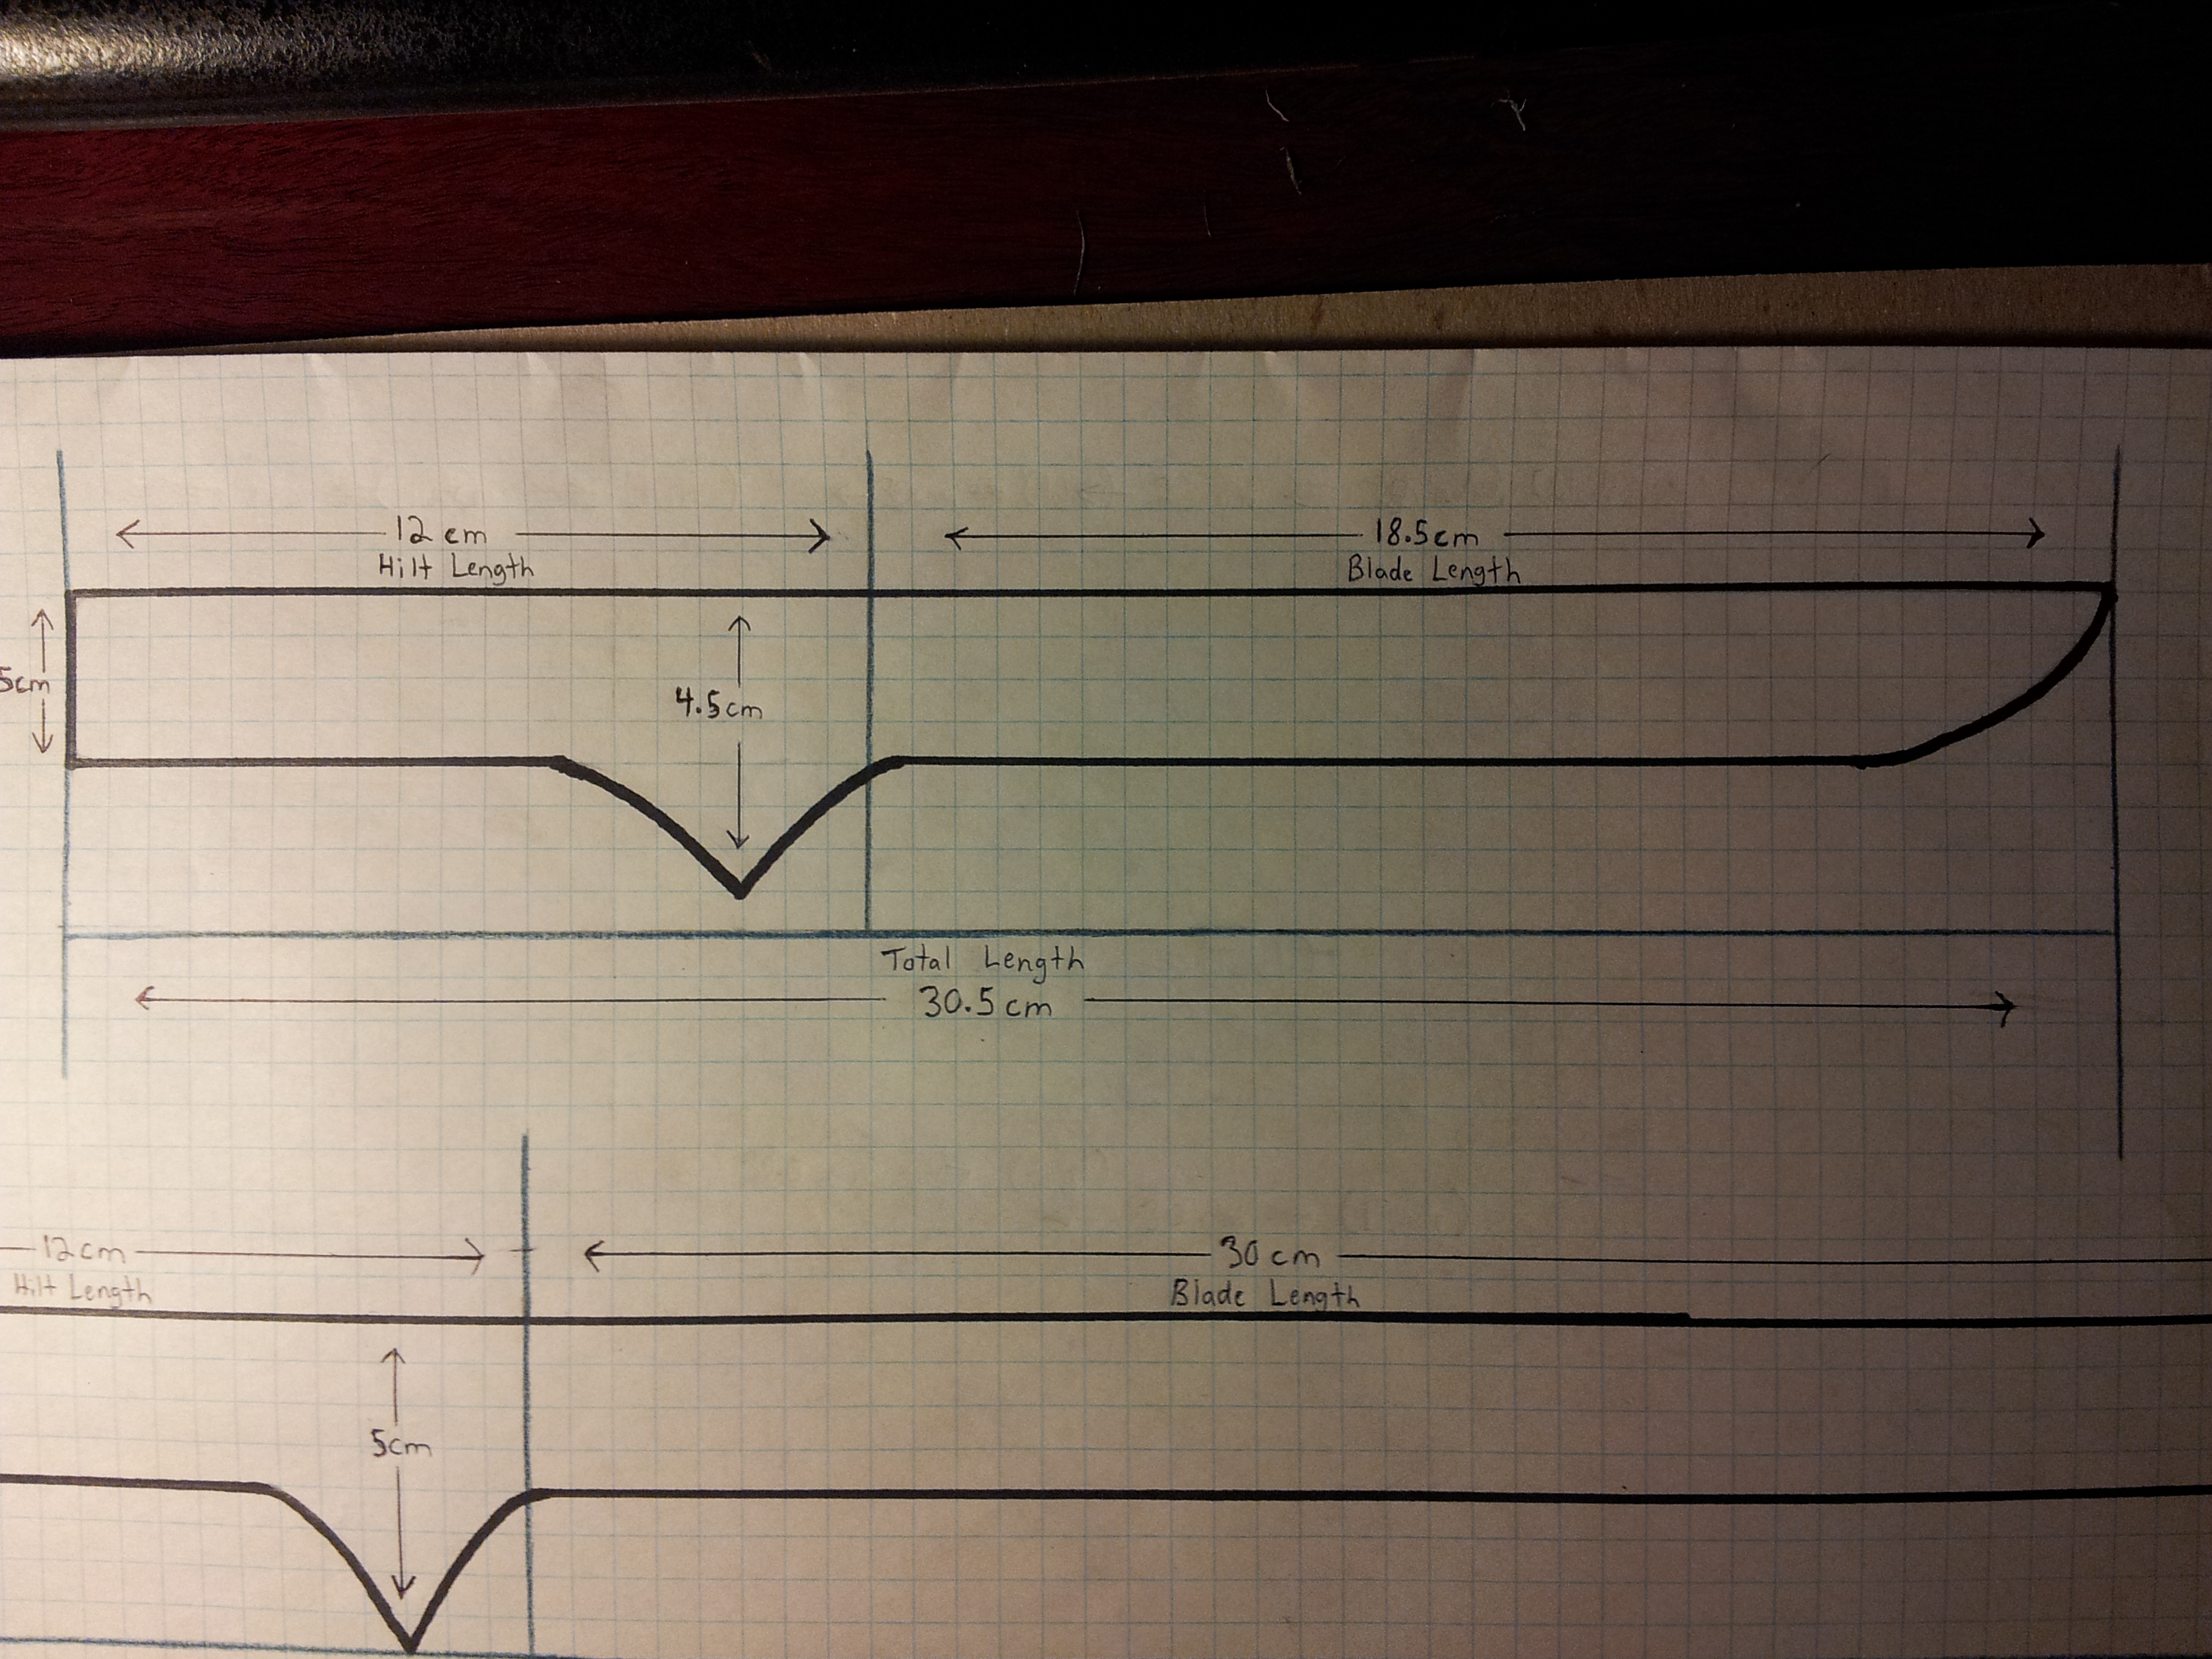
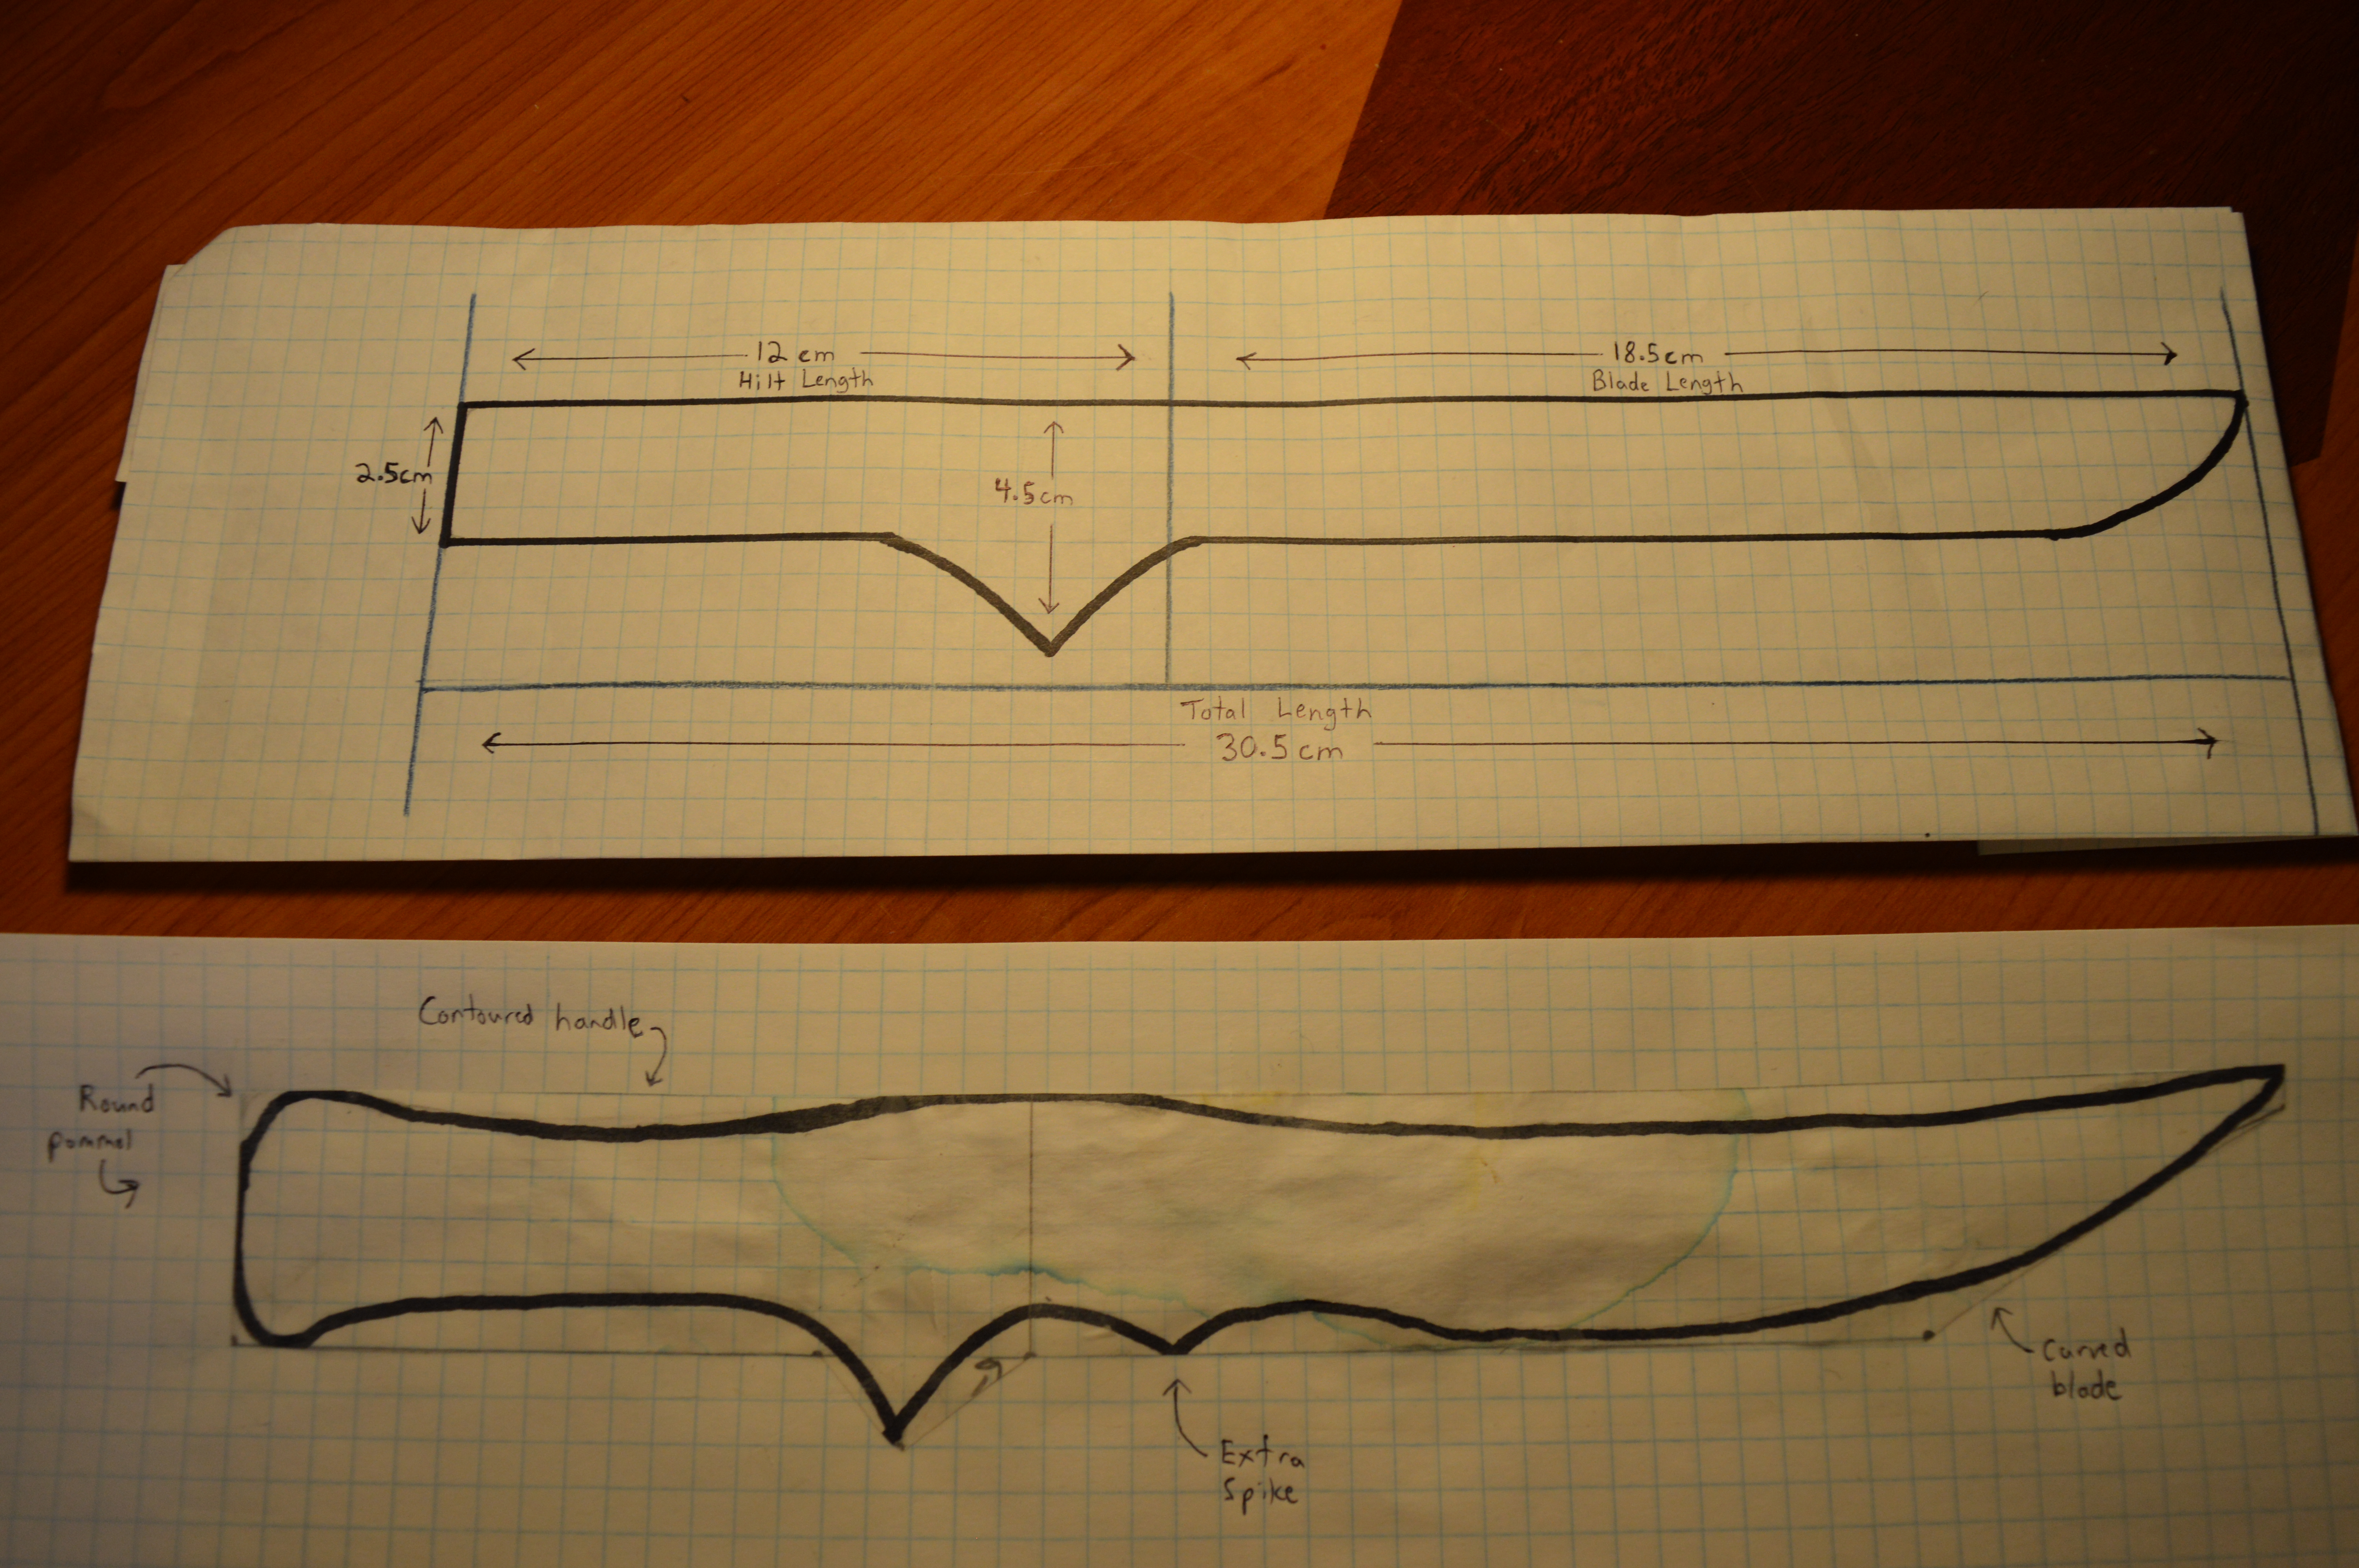
Now the excitement begins as Randi discusses with me what modifications she wants to make to make the simple “tanto” into a unique blade. She wants a more pronounced pommel (the rear end of the dagger’s hilt), a second spike on the blade, and a more curved appearance to the blade itself. I sketch the changes for her and ensure that it meets with her approval.
Once the design receives Randi’s go-ahead, I travel to the “Adamant Studio” as we like to call it, to make use of my friend Sister Verbena’s industrial cutting tools.
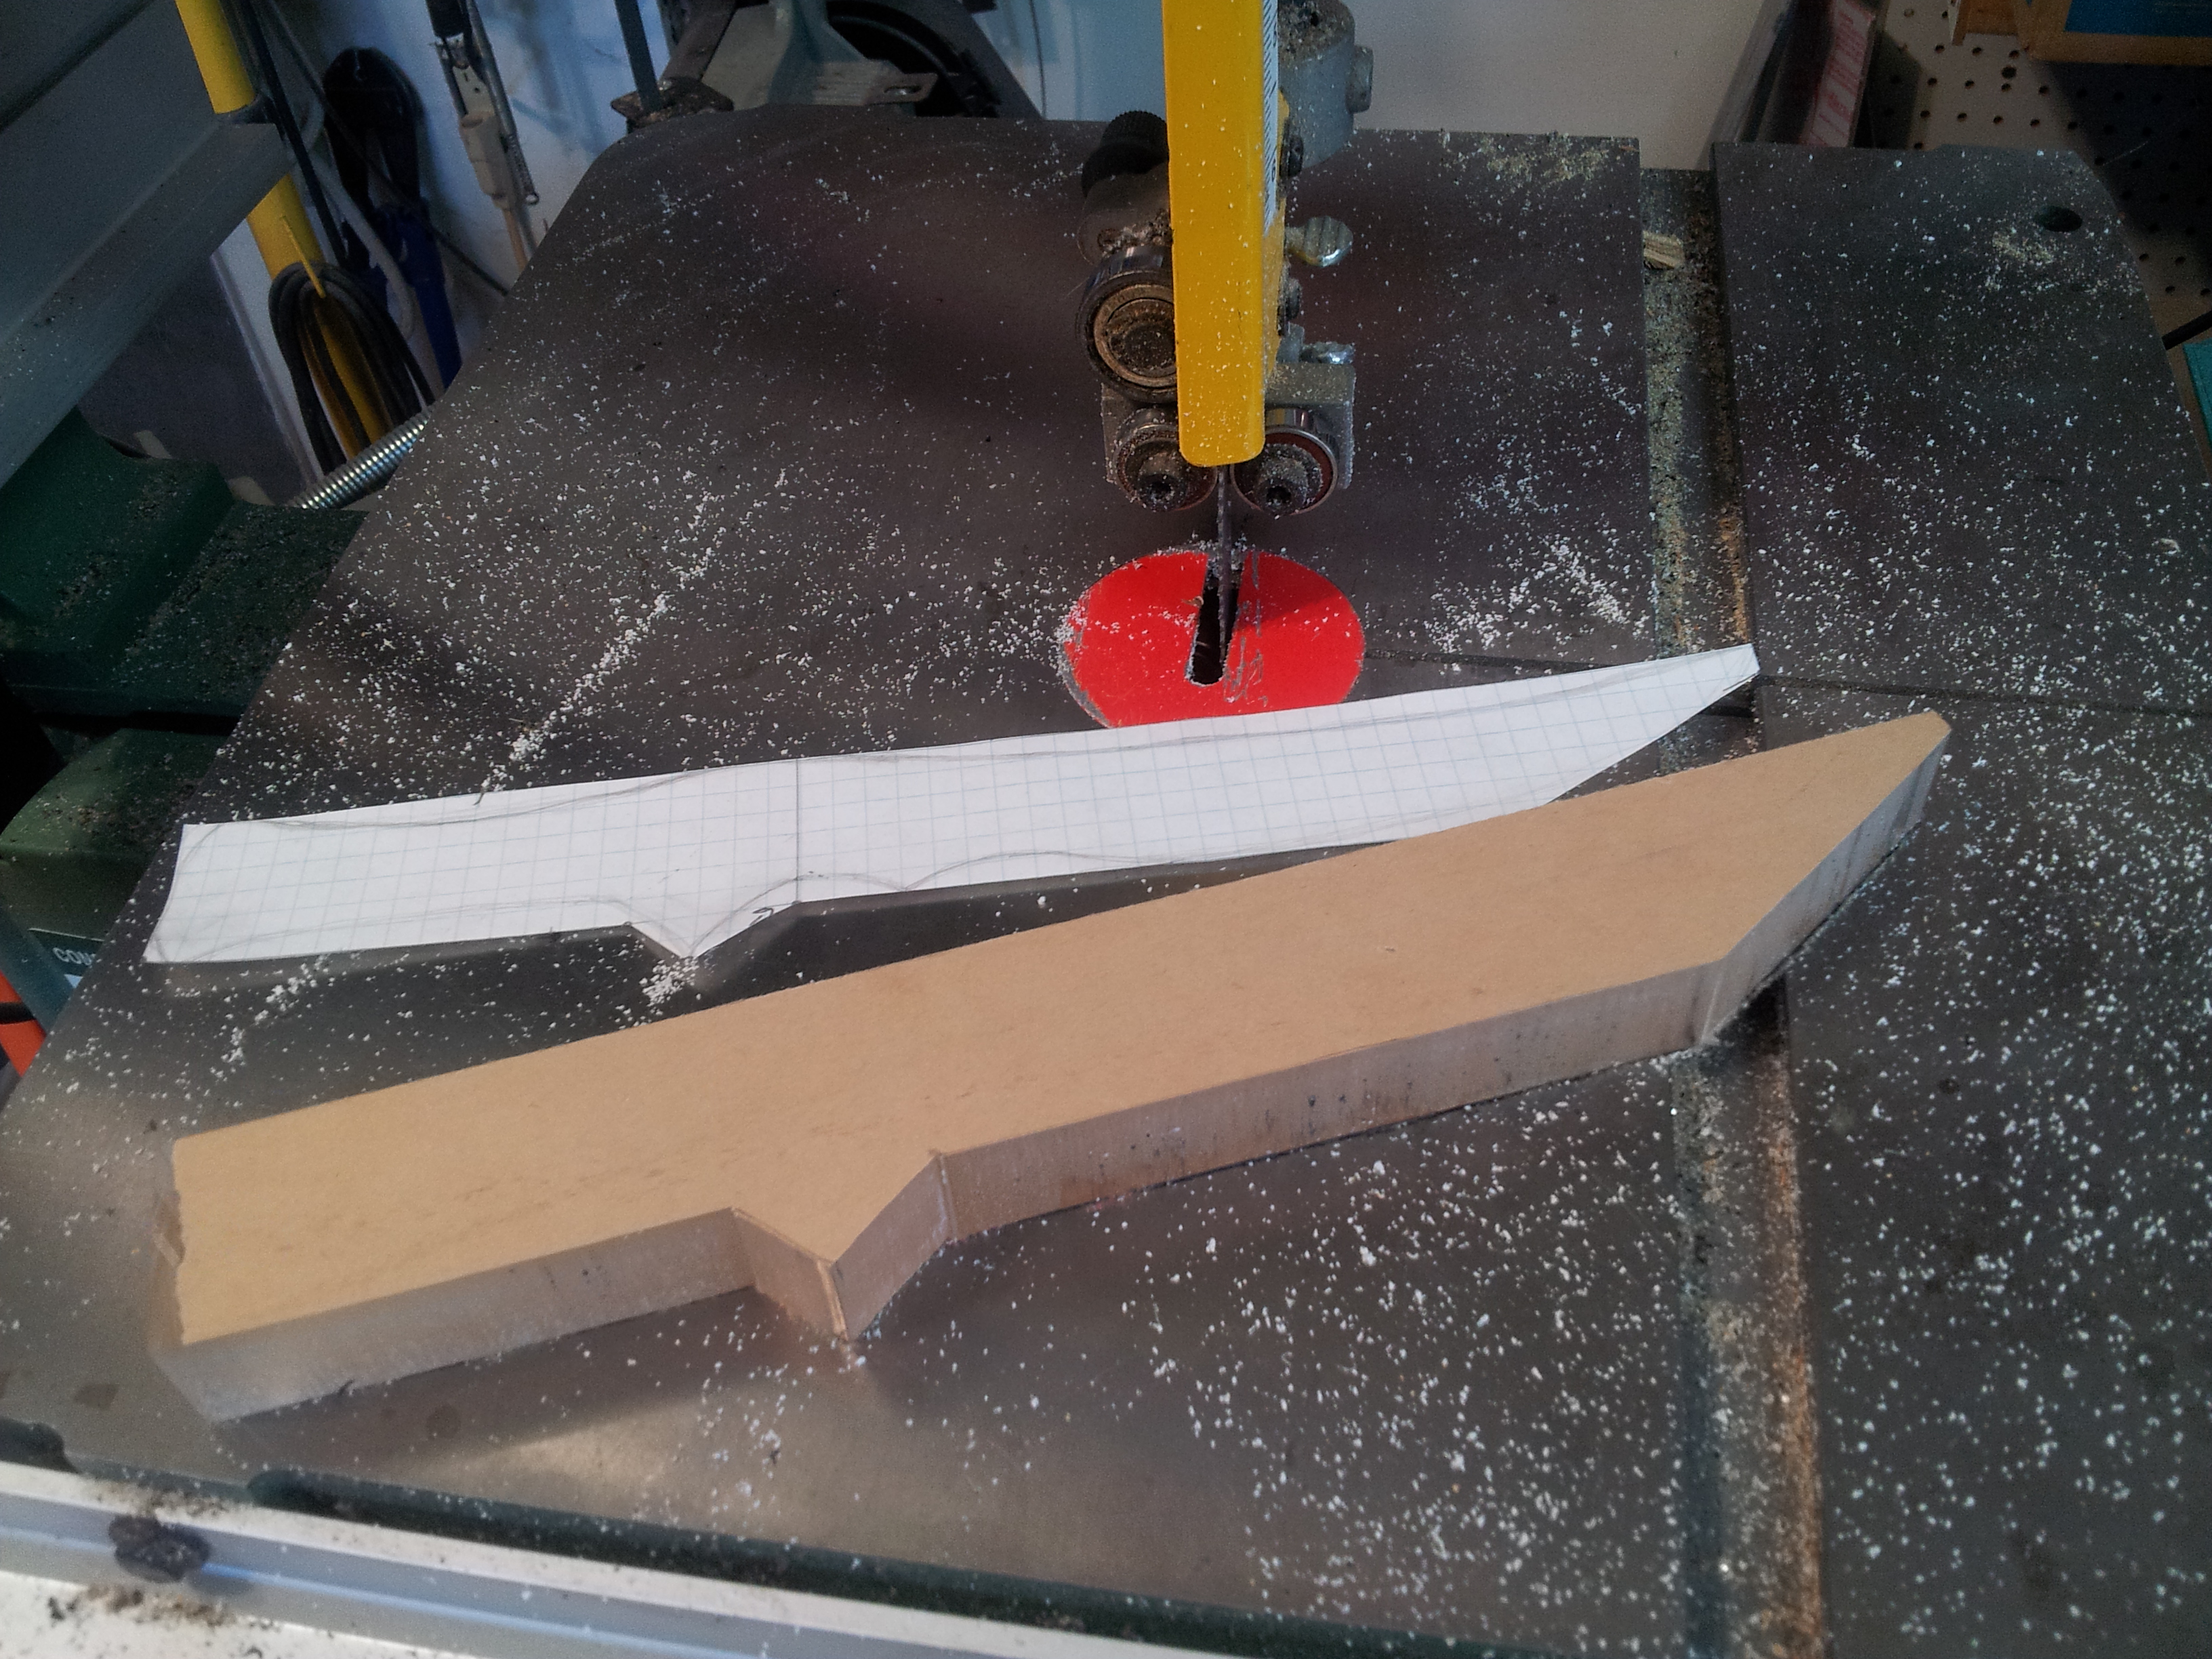
The band saw assists me in getting the rectangle of inch-thick acrylic into roughly the correct size and shape.
Now, the dagger undergoes shaping on the belt sander with a sanding belt of 50 grit first, then 80 grit, and finally 120 grit. This is as much shaping and smoothing as I can do by machine. The rest of the work is too delicate and I must do it by hand.
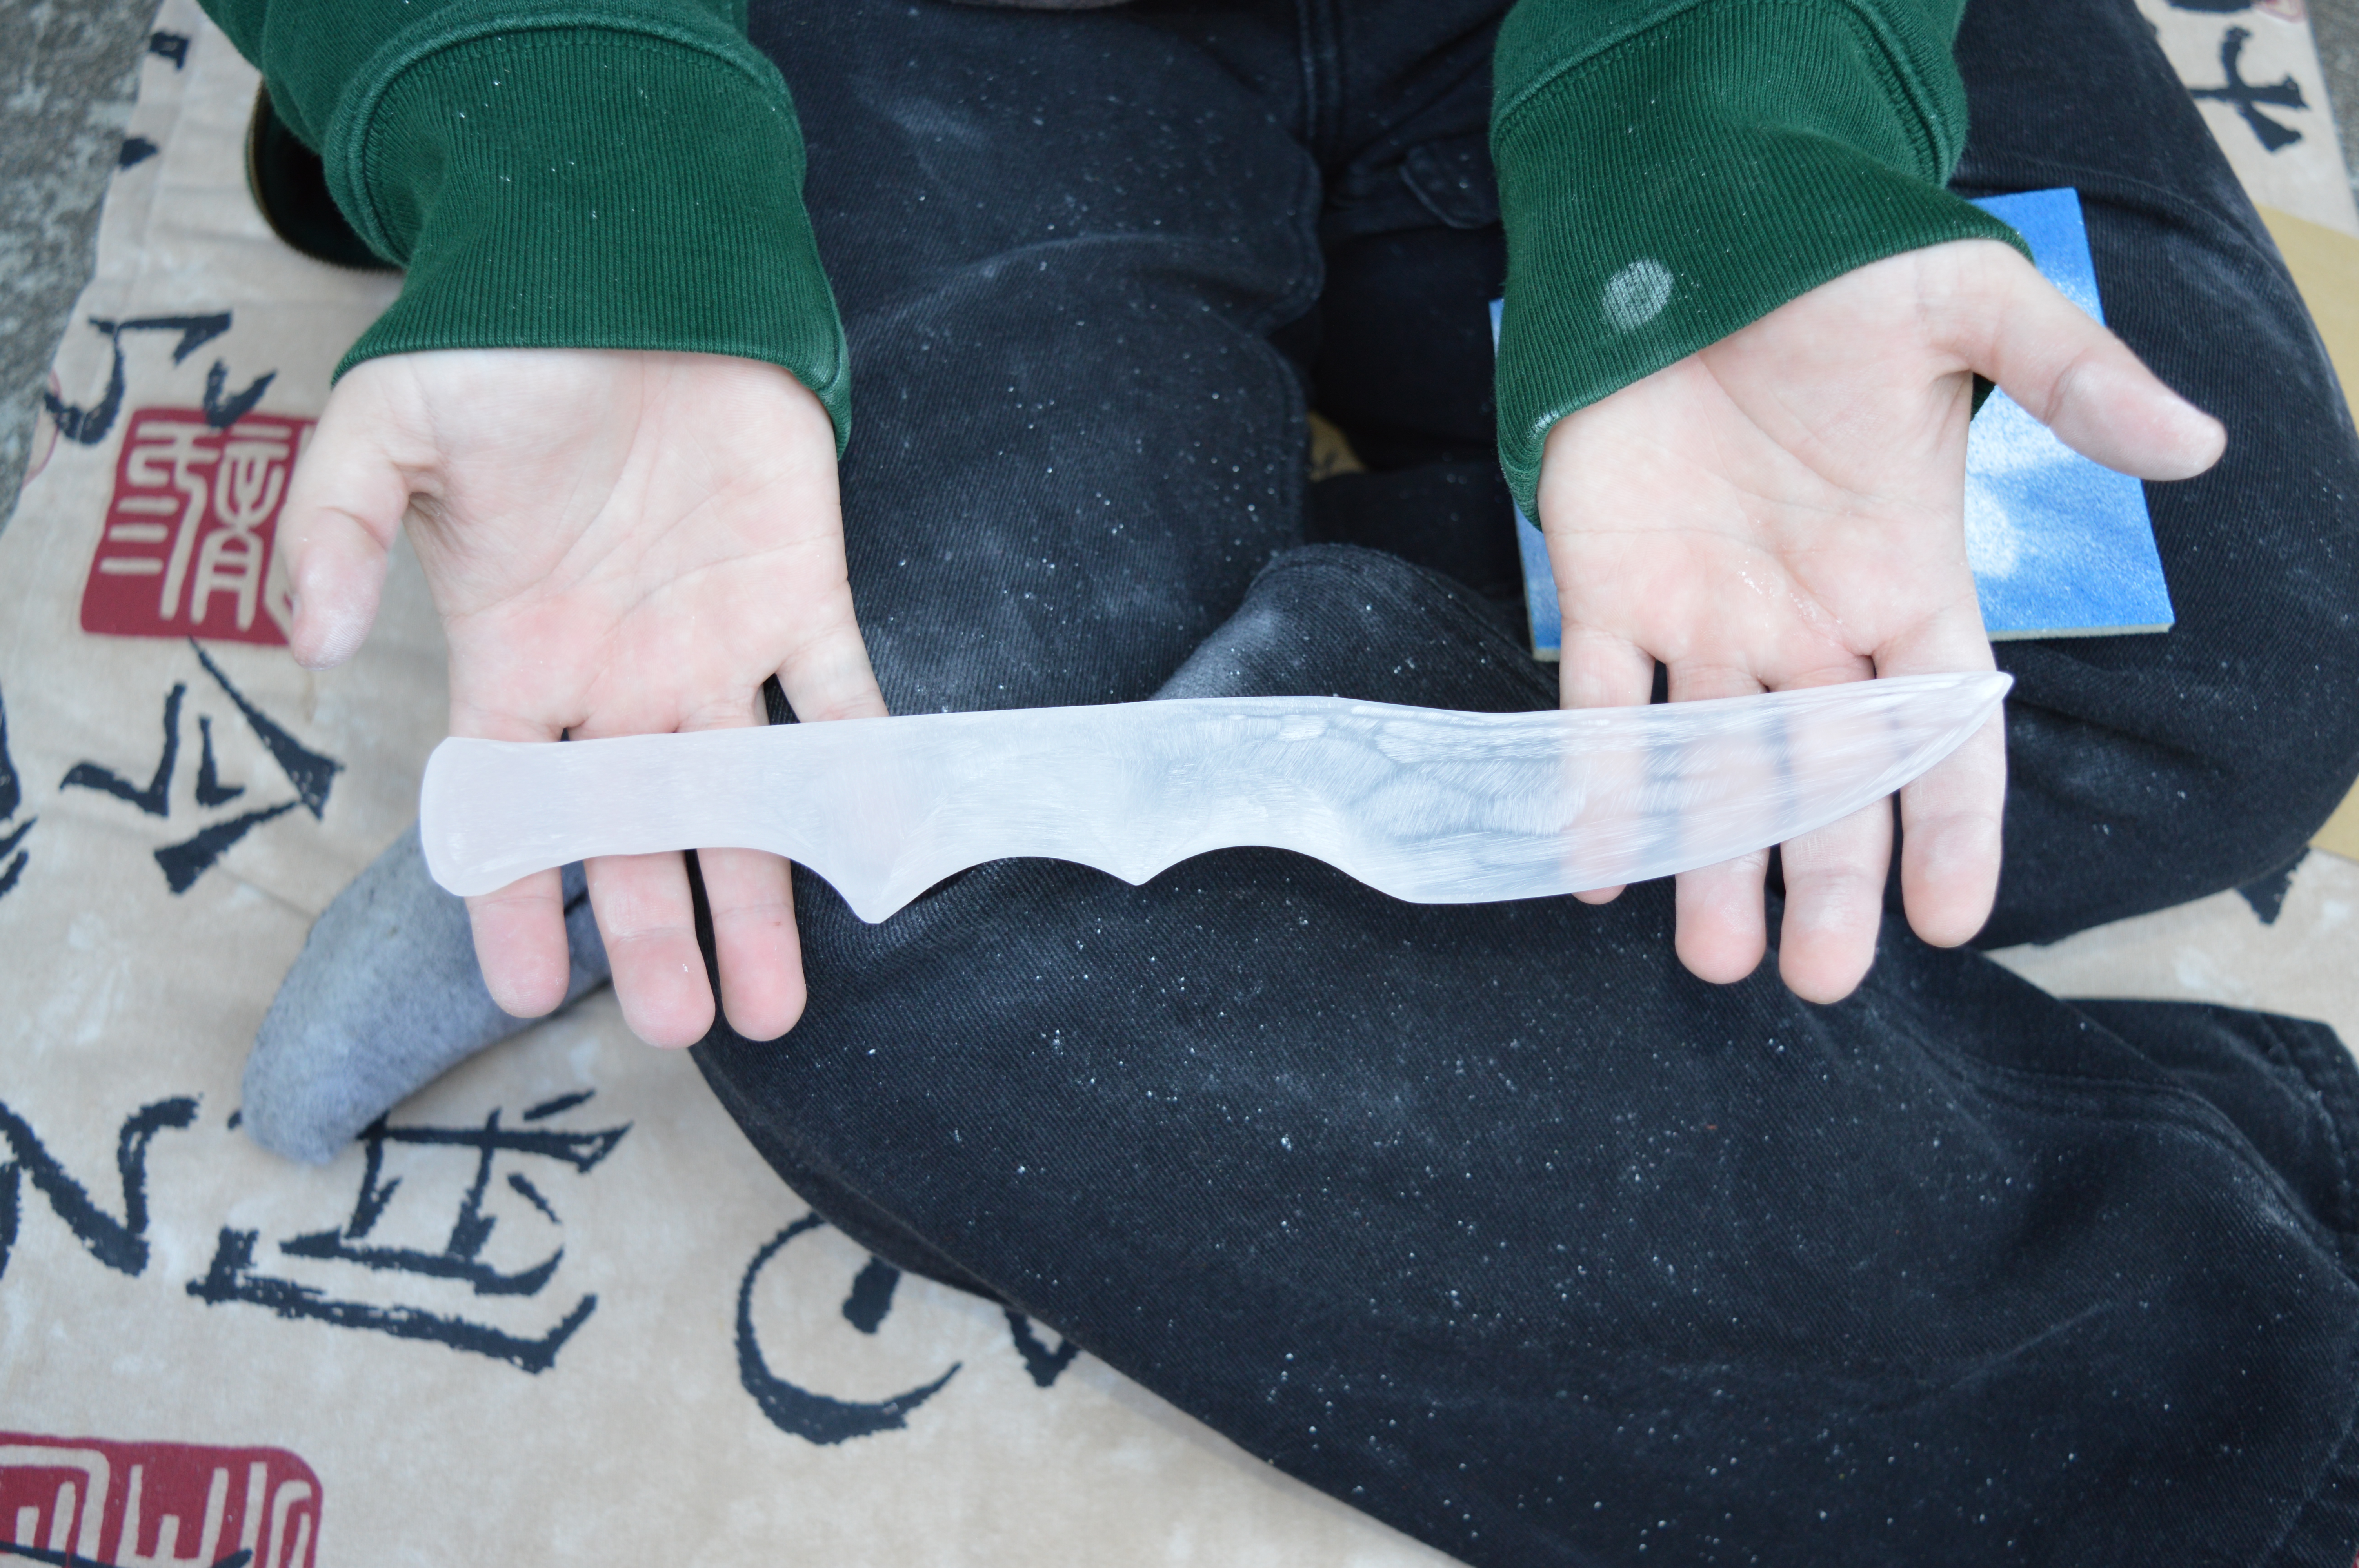
At the beginning of the hand-sanding, the dagger is treated to the 80 grit paper once again to do the more finicky shaping. From this point onward, nothing lower than 80 grit may touch the blade lest it ruin the smoothing progress. Acrylic is hard but diamond is harder and care must be taken not to make any undue scratches
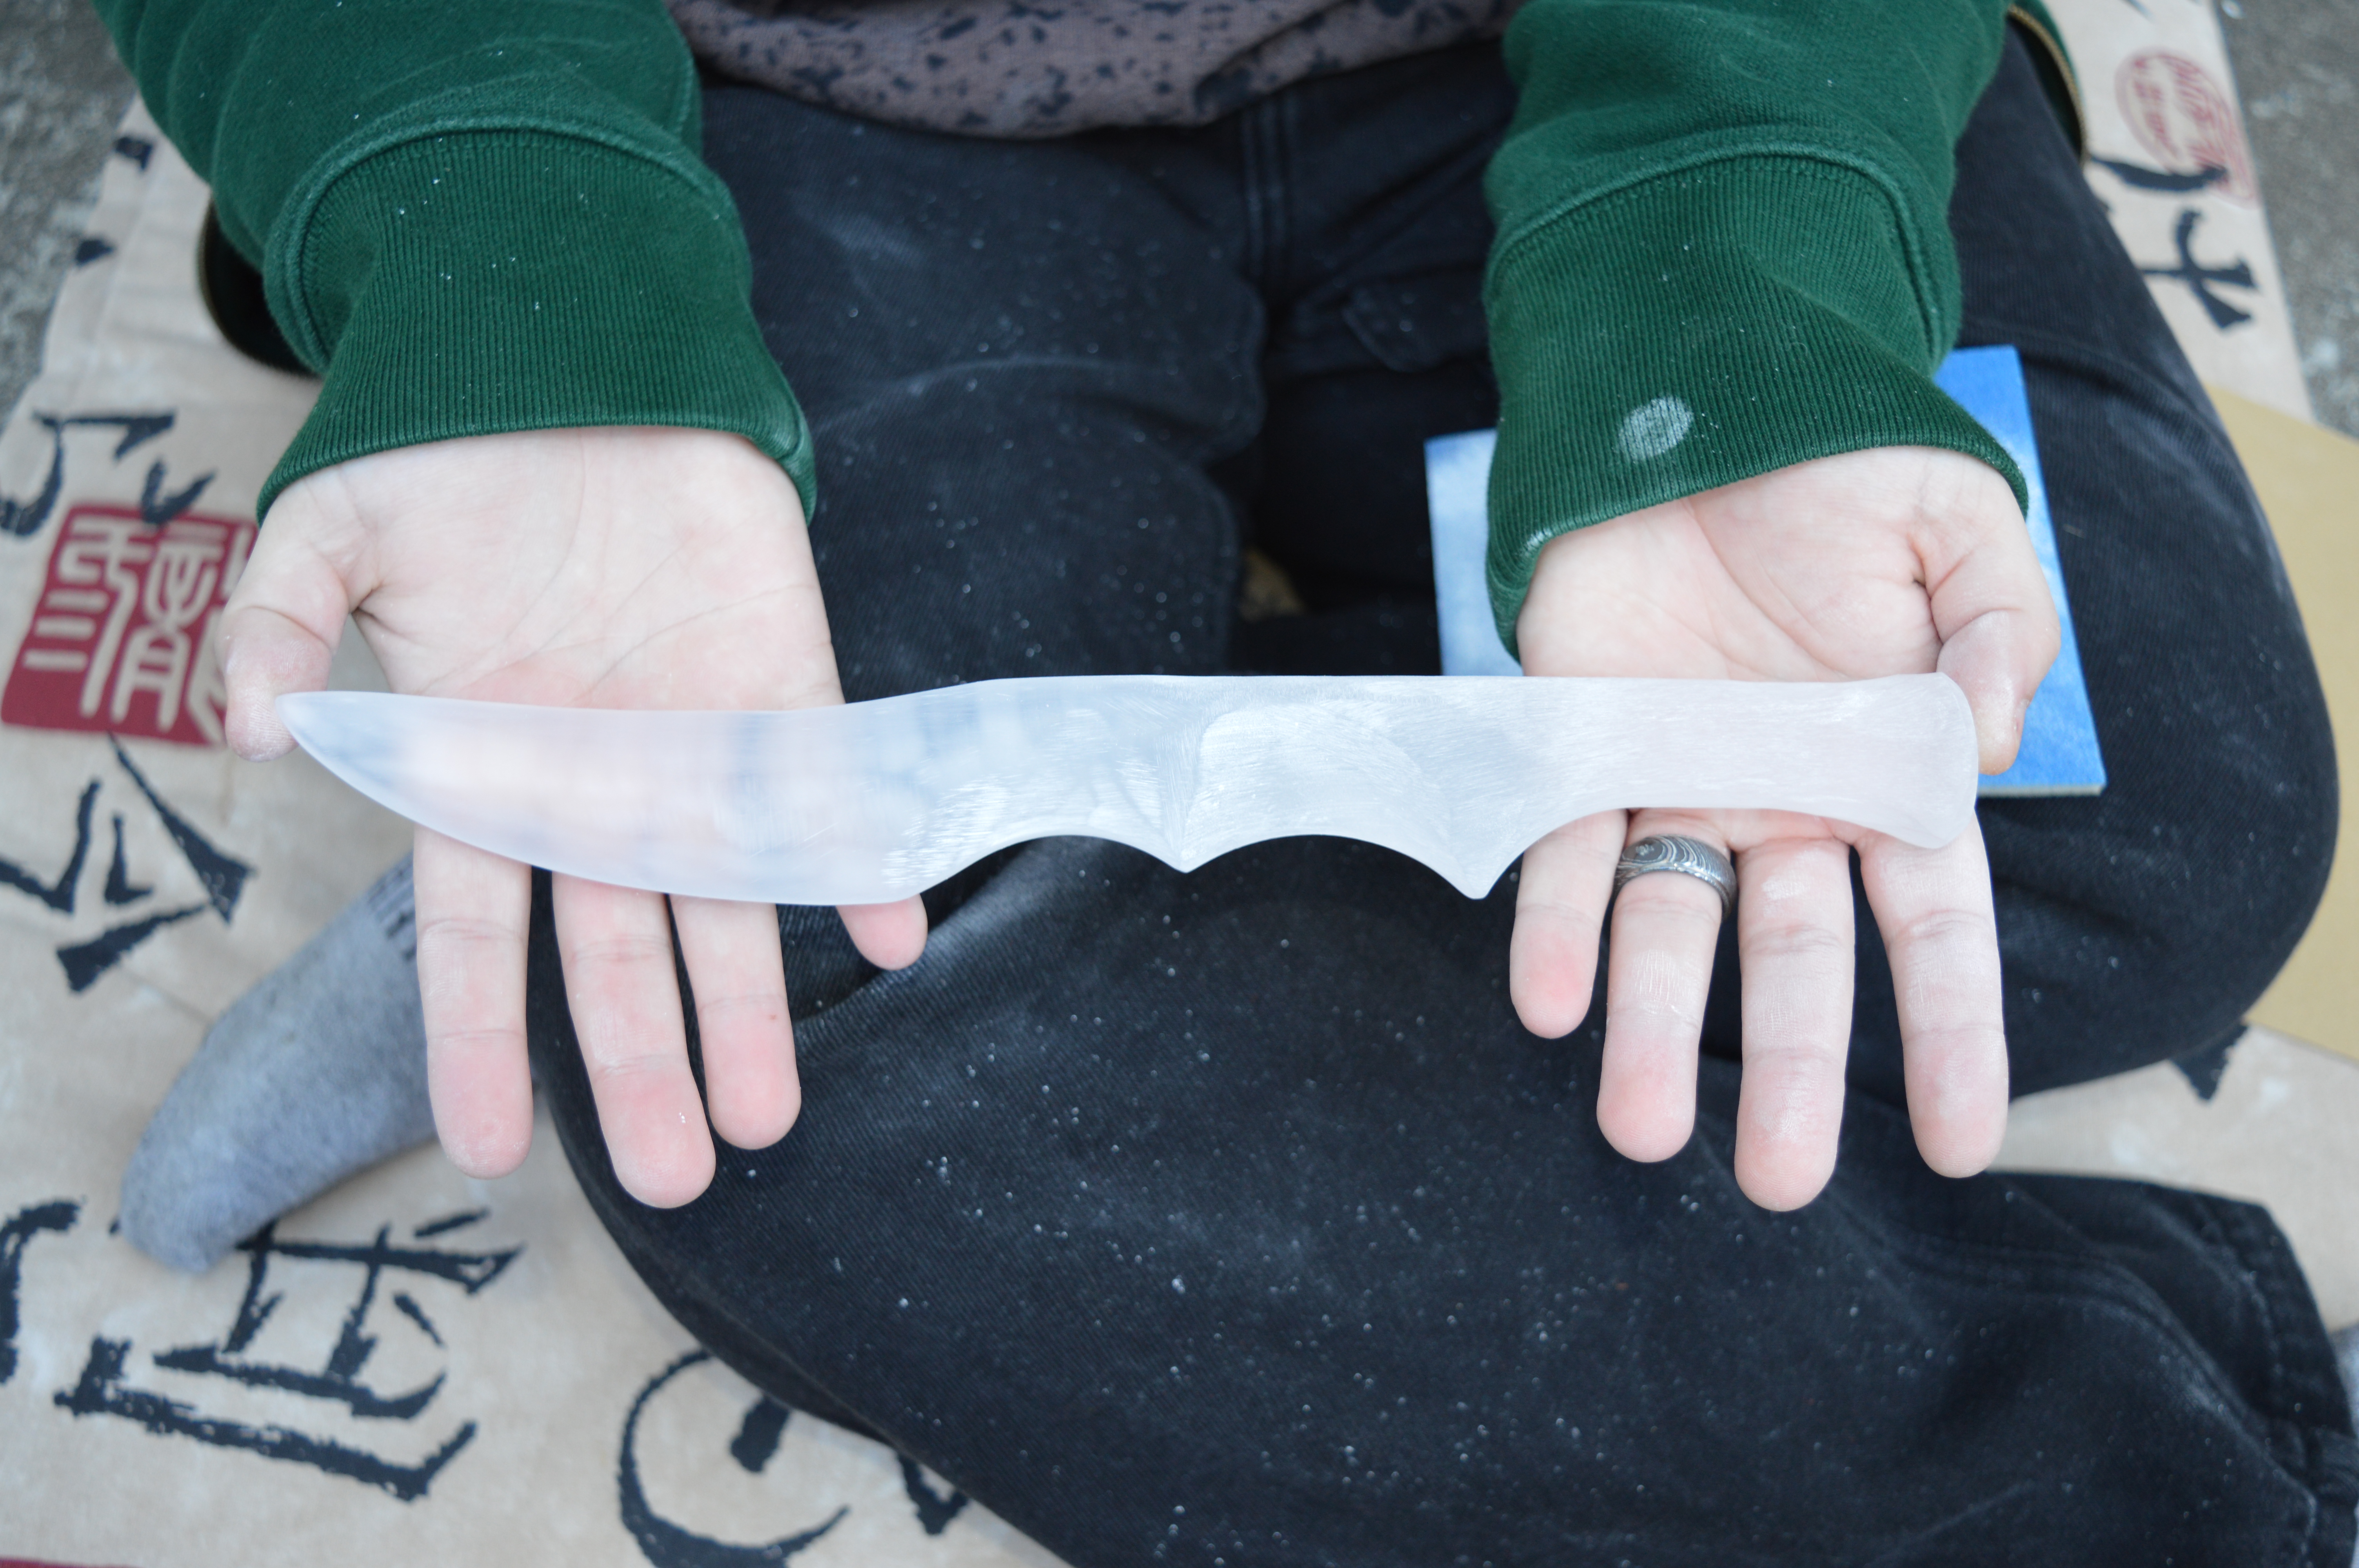
The seraph blade becomes clearer and clearer as I polish it with higher and higher grades of sandpaper. The difference between 100 grit and 180 grit is remarkable.
After the surface has been fully buffed by the 180 grit sand paper, it begins to reflect the light. We begin to have a clearer idea of what it will look like when it is completed.
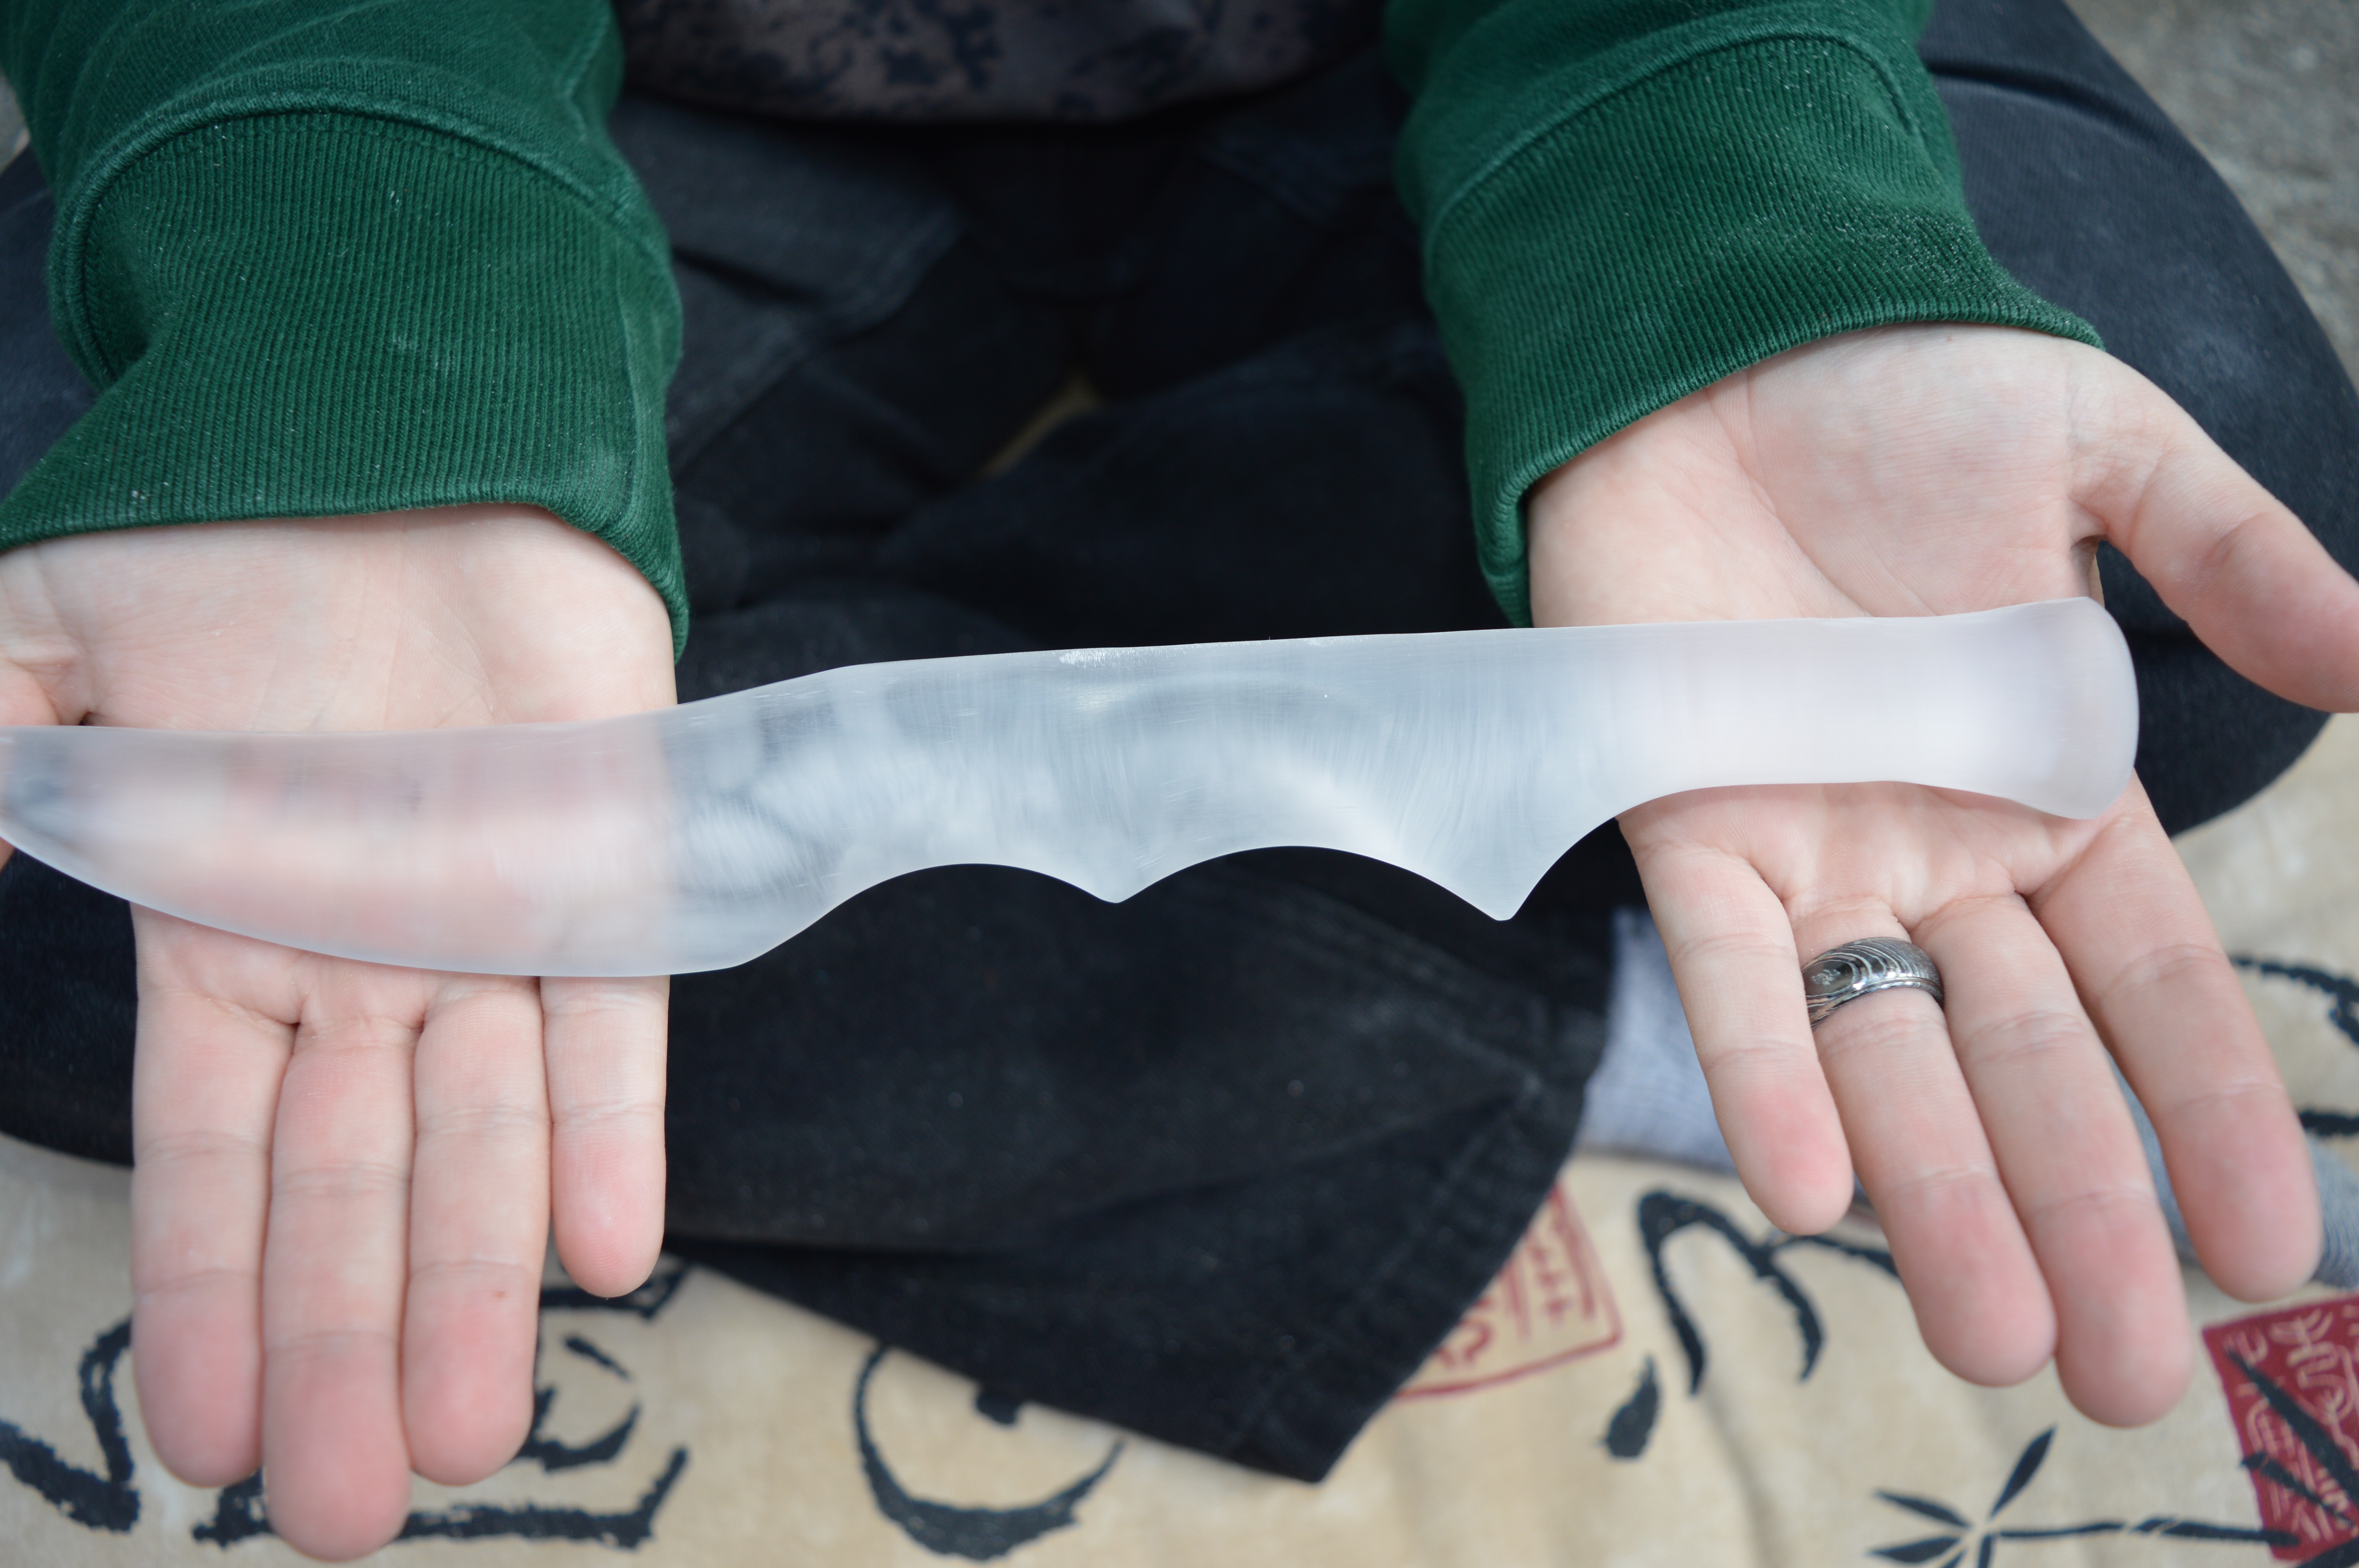
After the dagger has been polished up to 400 grit, it is clear enough to see the lines of my hands through it. It still possesses “whisker” scratches along its length from the shaping process, though. These imperfections still need to be buffed out. After this point, I remove my ring so that it does not scrape against the finish.
After a 600 grit wet-sanding, the imperfections on the surface are gone. But I still have more work to do at this point.
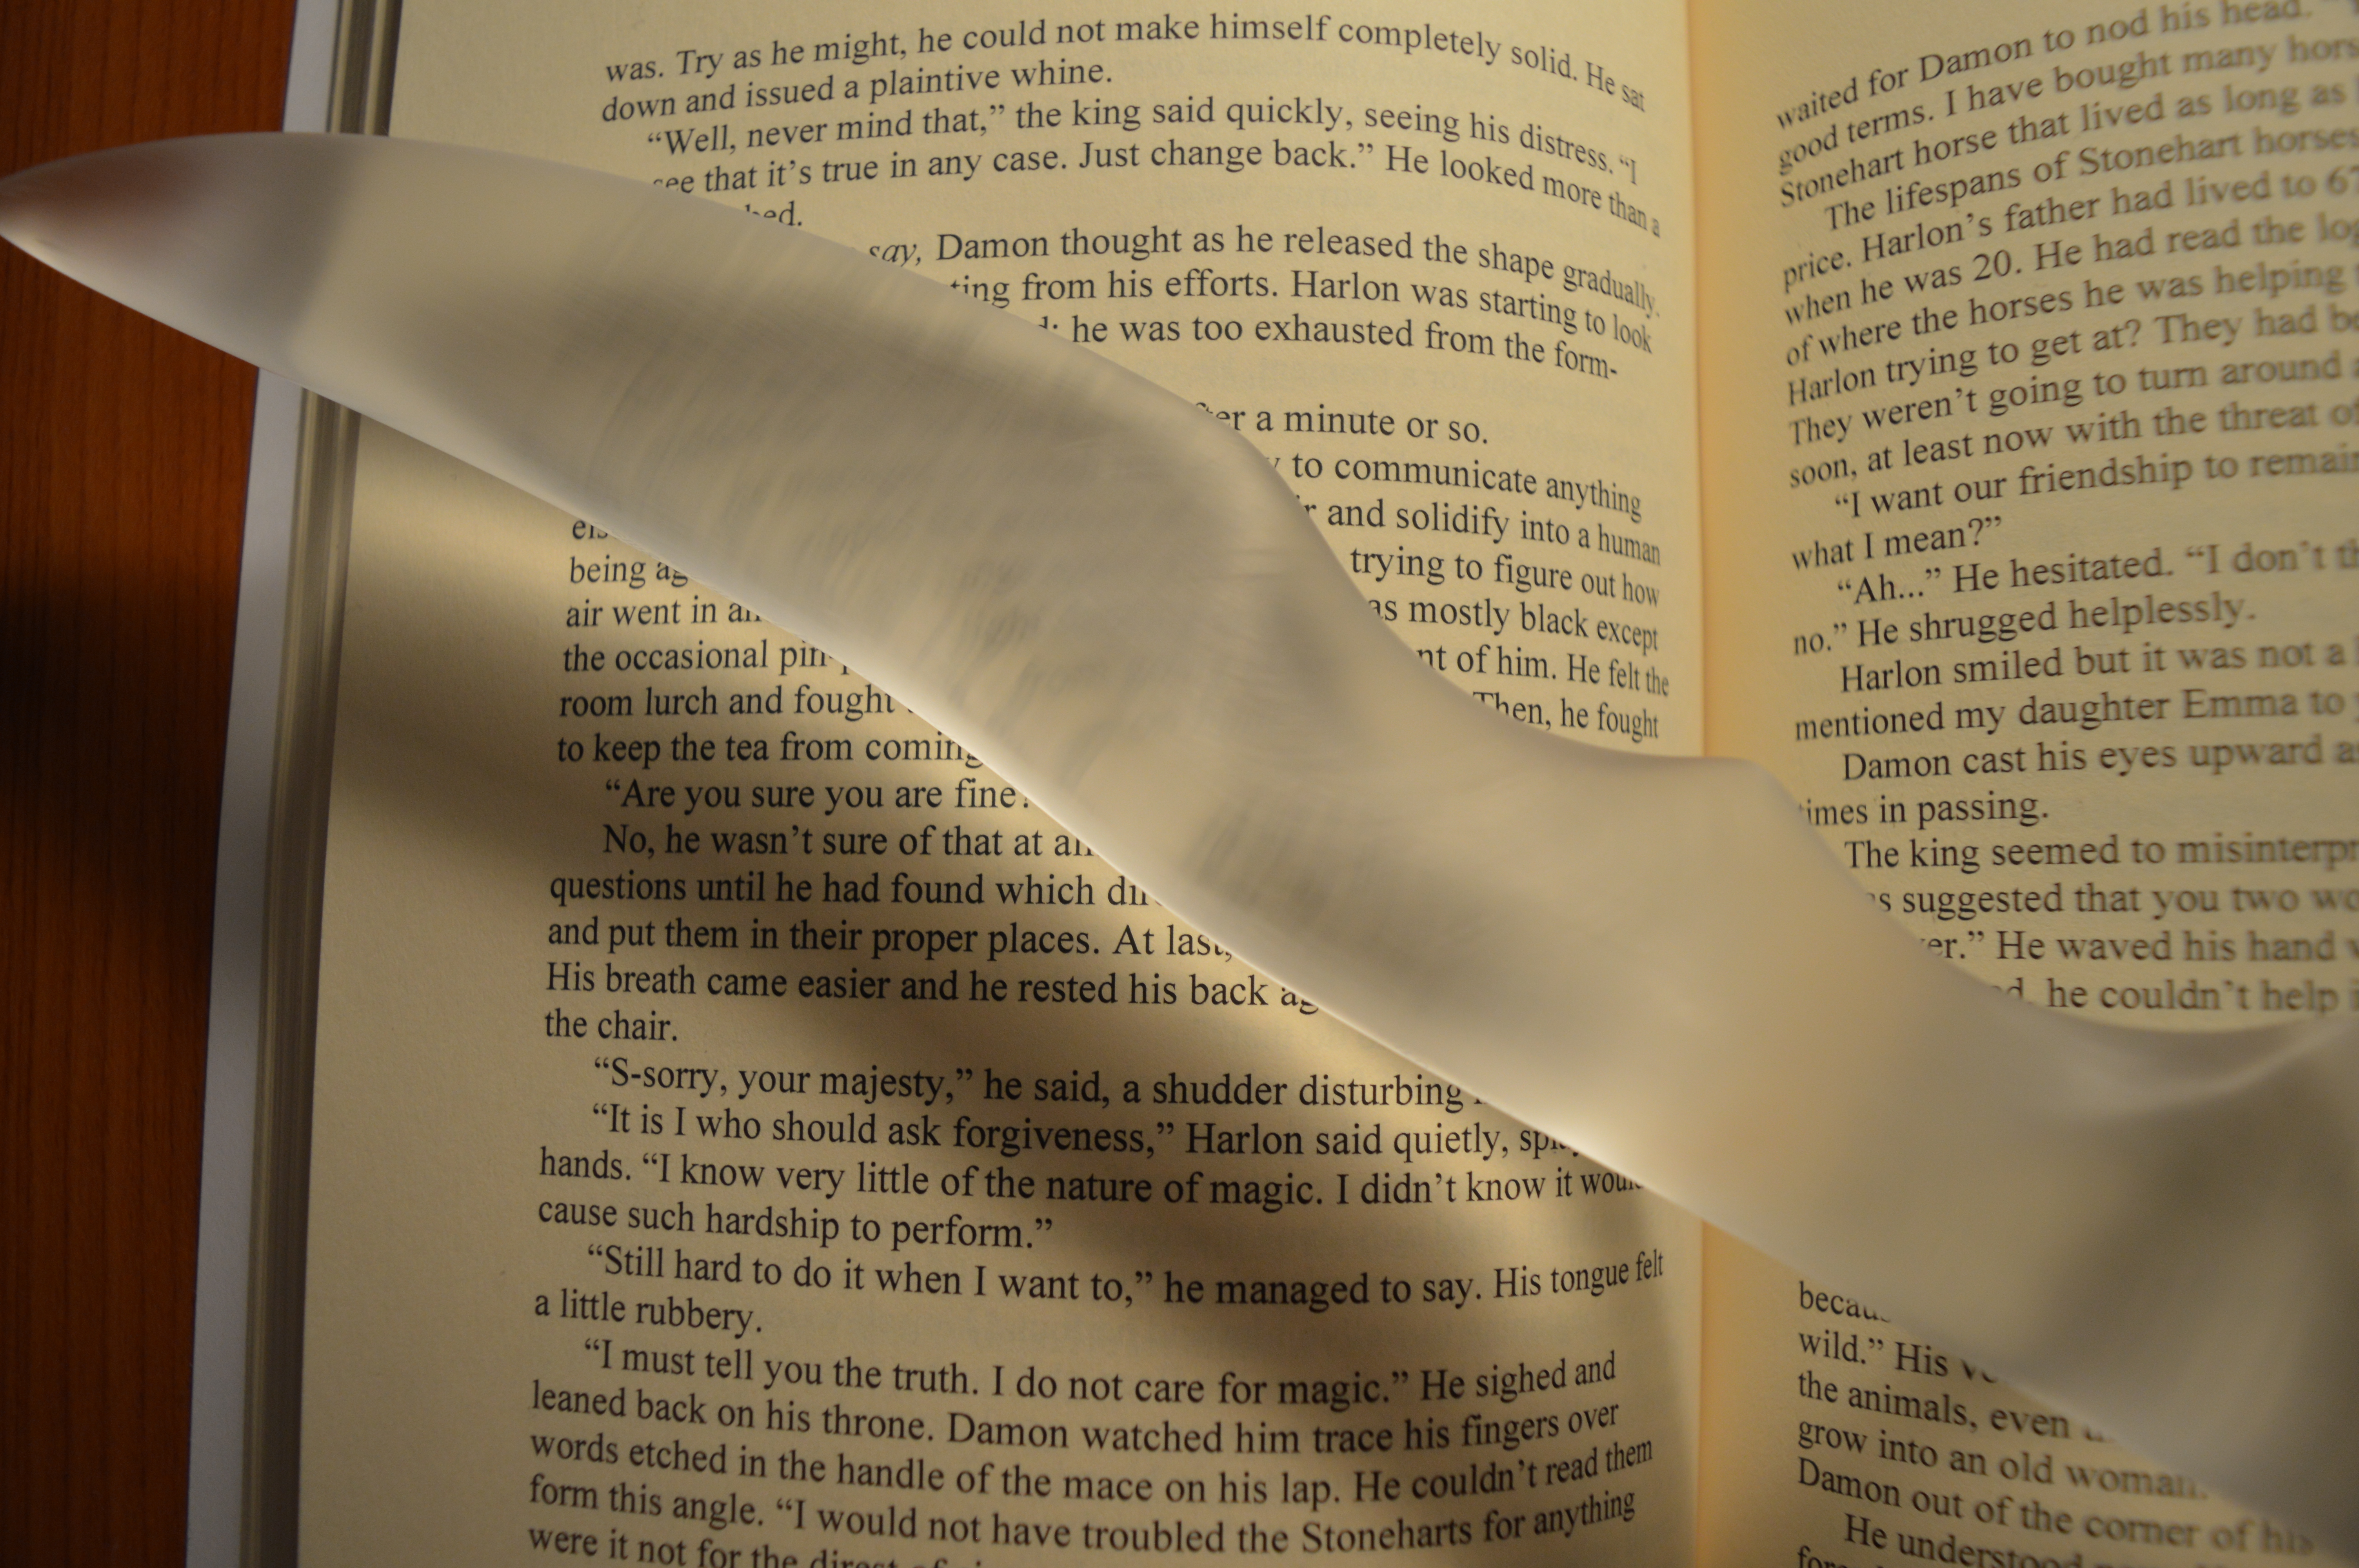
A seraph blade is only finished when I can read through it. As you can see, even at 600 grit, I cannot. It is time to break out the automotive sandpapers. The dagger is wet-sanded with 800 grit, 1000 grit, 1500 grit, and finally 2000 grit. It takes many hours and great patience.
I have polished it with my highest grade sandpaper. Now comes the moment of truth. Can I read through it?
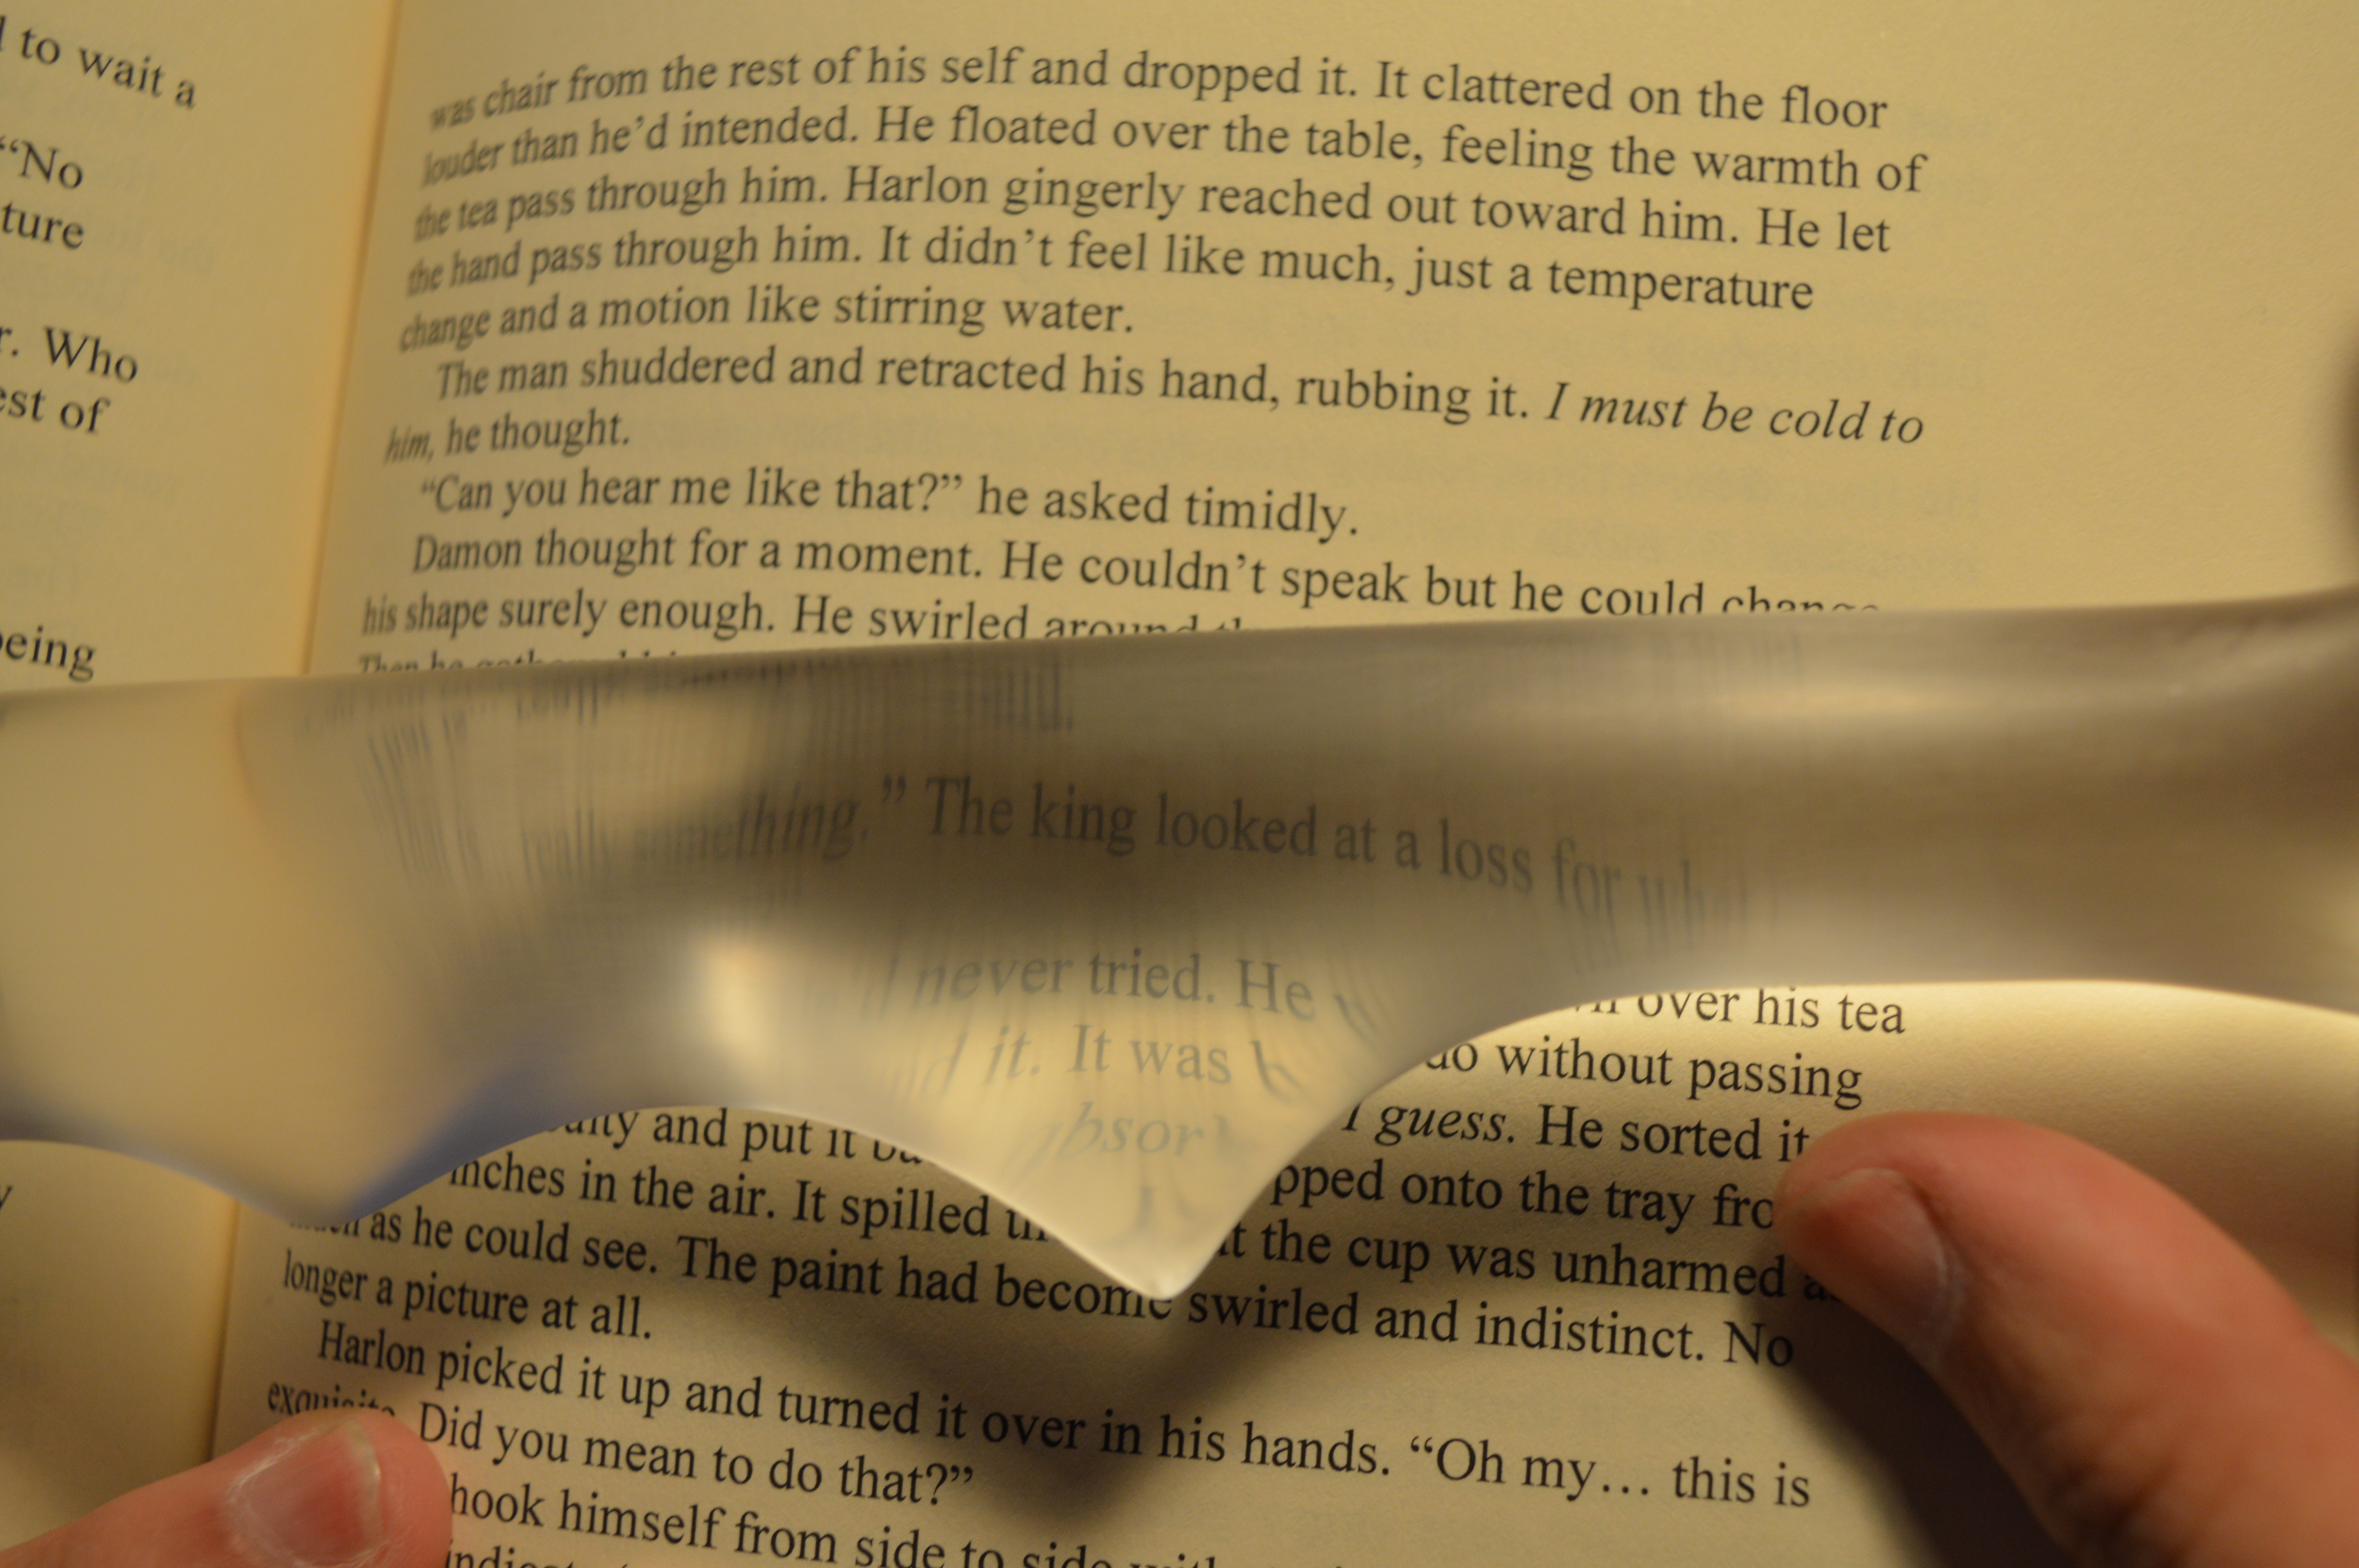
Yes. Yes I can.
Randi opts for the photo finish as opposed to the flame polish so that the blade will show up better in photographs and on video camera. The lighting effects one can make with a photo finish blade are also rather splendid.

As Randi assisted with the design process, it is only fair that she should be able to name the design. She chooses Hamaliel, the angel who governs August, in honour of her daughter’s birth month.

Now I bid farewell to the seraph blade I very much enjoyed working on from start to finish. There will be others, but each one is special and teaches me new things every time I craft a new blade. From the fires of the Adamant Citadel (well … the band saw of the Adamant Studio) to the final polishing, Hamaliel was a joy to make. I’m sure it will be well loved by the tiny Shadowhunter who will wield it.
If you’d like a nephilim weapon of your own, you may certainly contact me to make you one. Or, you can try your hand at the Iron Sister gig yourself and craft one! If you do, I’d love to see it. Feel free to post pictures in the comments.
That’s all from me for now. Happy hunting!

