
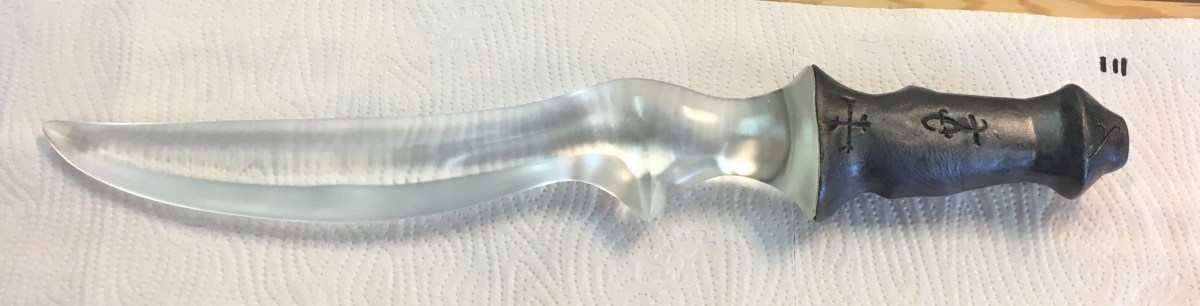
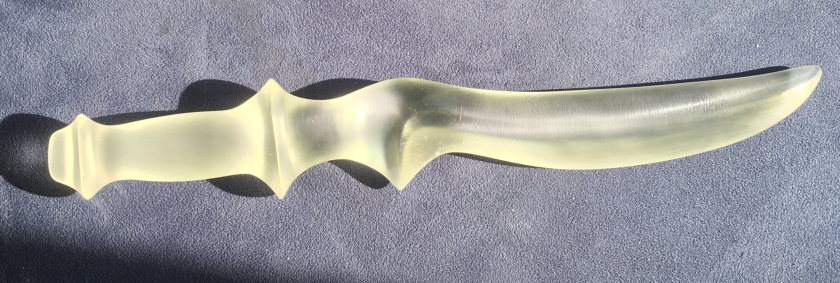
I’m so excited guys! I’m almost finished the second cast resin Clariel sword and it is gorgeous.
![IMG_2546[1]](https://heythisismyjob.com/wp-content/uploads/2018/05/img_25461-e1525677645478.jpg?w=840)
The handle is all painted to simulate the look of weathered steel and the whole thing has been given three layers of high-gloss sealer. This sealer protects the sword from scratches and the yellowing effect that UV rays can have on resin over time.
![IMG_2550[1]](https://heythisismyjob.com/wp-content/uploads/2018/05/img_25501.jpg?w=573&h=764)
I’m committed to making items that stand the test of time so it’s very important to me that each sword has adequate protection against wear.
All that’s left to put on this sword is the handle strap and it will be ready to go to its new home! This Clariel is promised to a lucky Shadowhunter already but the 3rd resin cast Clariel is still unclaimed! Will it be yours?


In theory would you be able to make a replica of a certain blade (excalibur from the Fate/Stay series) if you had the mold
LikeLike
This? http://img.amiami.jp/images/product/main/152/GOODS-00037300.jpg Yep. Opaque blades are way easier to do than transparent ones!
LikeLike
So, i’m assuming it would cost extra to make it transparent (due to its size)?
LikeLike
Ahh, you’d like the Excalibur to be transparent! Oh that would look really cool … It might have to cost a tad more if it’s transparent. I’ll explain as briefly as I can:
When you’re casting a piece, unless you’re casting it under pressure, you’re about … 97% likely to have at least a few pin-sized bubbles/imperfections in it where the gas has gotten trapped while the resin was hardening. (If you cast it under pressure, the gas gets squeezed out. But I don’t have a pressure chamber large enough to do that.) 99% of the pin-sized bubbles are on the inside of the piece, or at least it seems to go that way with the type of resin I use. If the piece is transparent, you can see all those bubbles and if there are too many of them, I have to chuck the piece and try again. But if the piece is opaque, you can’t see any of the bubbles and nobody cares. XD
So, long story made short: transparent pieces are more finicky and demand greater skill and effort.
LikeLike