
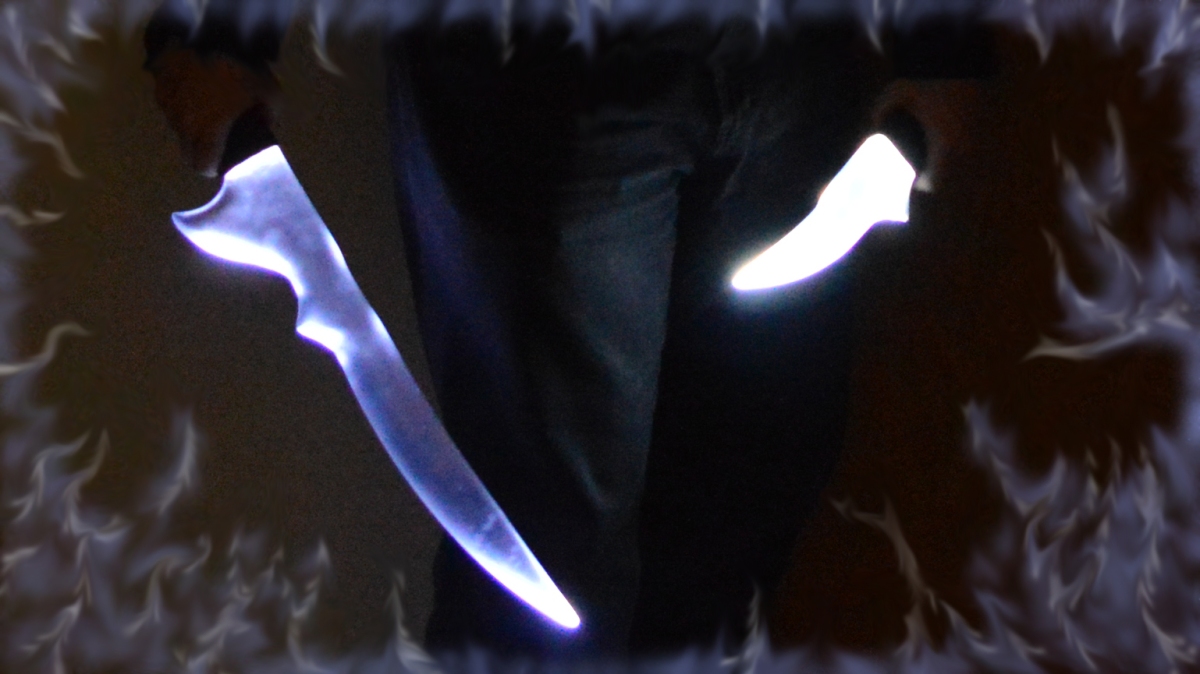

So you wanna look like this? Well, bad news: there’s only one Jamie Bower in the world and chances are, you’re not him. But I can help you out with that sweet, sweet Seraph Blade.
You can commission a blade from me. Here’s my Etsy shop! Or you can email me at inkbladestudios@gmail.com to ask about custom orders. Each blade is made to order and is individually made by hand so please allow for a few weeks of crafting time.
But what if you want to make your own? Well, here’s a tutorial on how to carve one from solid acrylic. I make them out of liquid resin these days, but that is a huge expense for a single seraph blade which is probably what you want if you’re reading this.
Things You Will Need
The Material:
- 1″ – 2″ thick clear acrylic
The Tools:
- A band saw
- A belt sander (with 50 and 80 grit belts)
Drafting and Design:
- Graph paper and drawing implements
- A permanent marker
- Scissors
- Cardboard or other stiff paper
- Tape
- A ruler
Polishing Implements:
- A tub or trough for water
- Wet or wet/dry sandpaper (a selection of grits from 120-2500)
- Soft towels
Lighting and Wrapping (Optional):
- A plunge cutter
- A Dremel tool with engraving bits
- Clamps
- Snug-fitting safety gloves
- A small, thin LED flashlight
- Leather, faux-leather, or cloth (to wrap the handle)
- Leather paint (If you wish to re-colour the leather/paint runes)
- Velcro or snaps
- Modge Podge
- Scalpel
- String
Safety Equipment (NOT OPTIONAL):
- Safety glasses
- Ear protection
- A dust mask
If you’re not installing lighting in your sword, you don’t need the plunge cutter or the Dremel tool. The other tools, however, are necessary. You can try to hack away at the acrylic with a jigsaw and a hand-sander but I really don’t recommend it.
Alright, let’s do this.
Step 1:

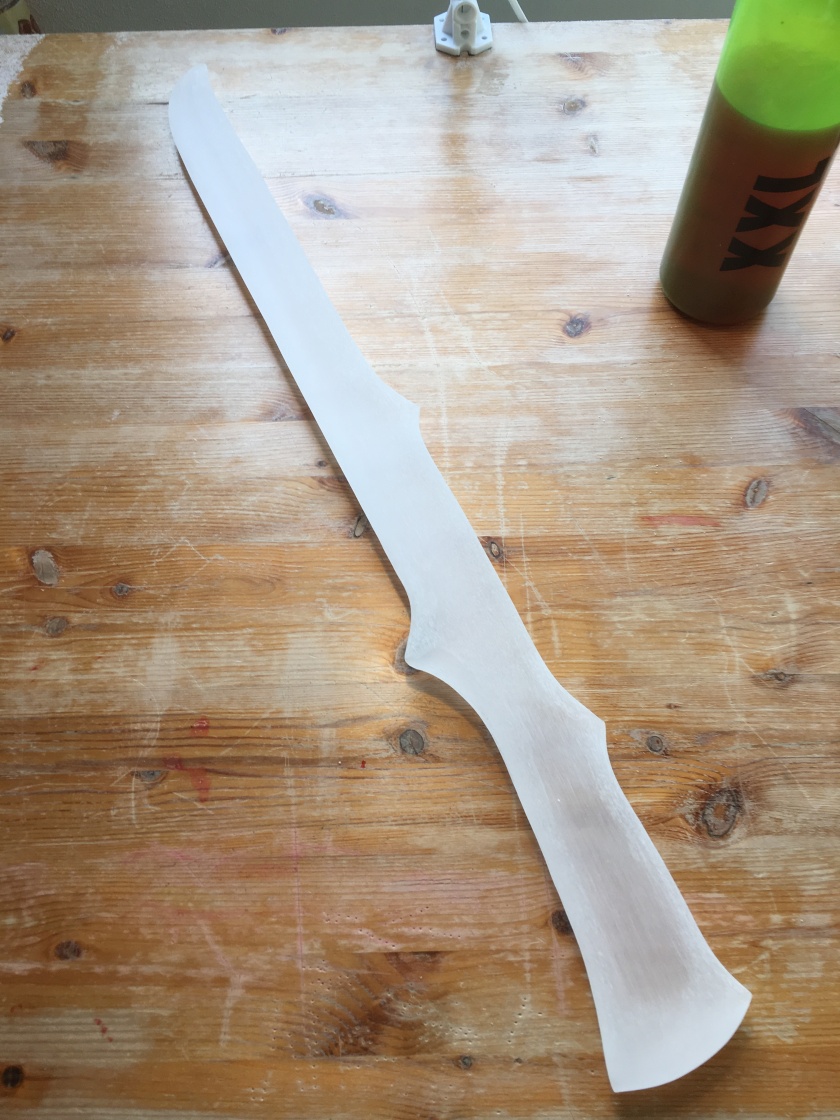
Draw your blade design on graph paper. Azrael will be our model for this tutorial.
Step 2:
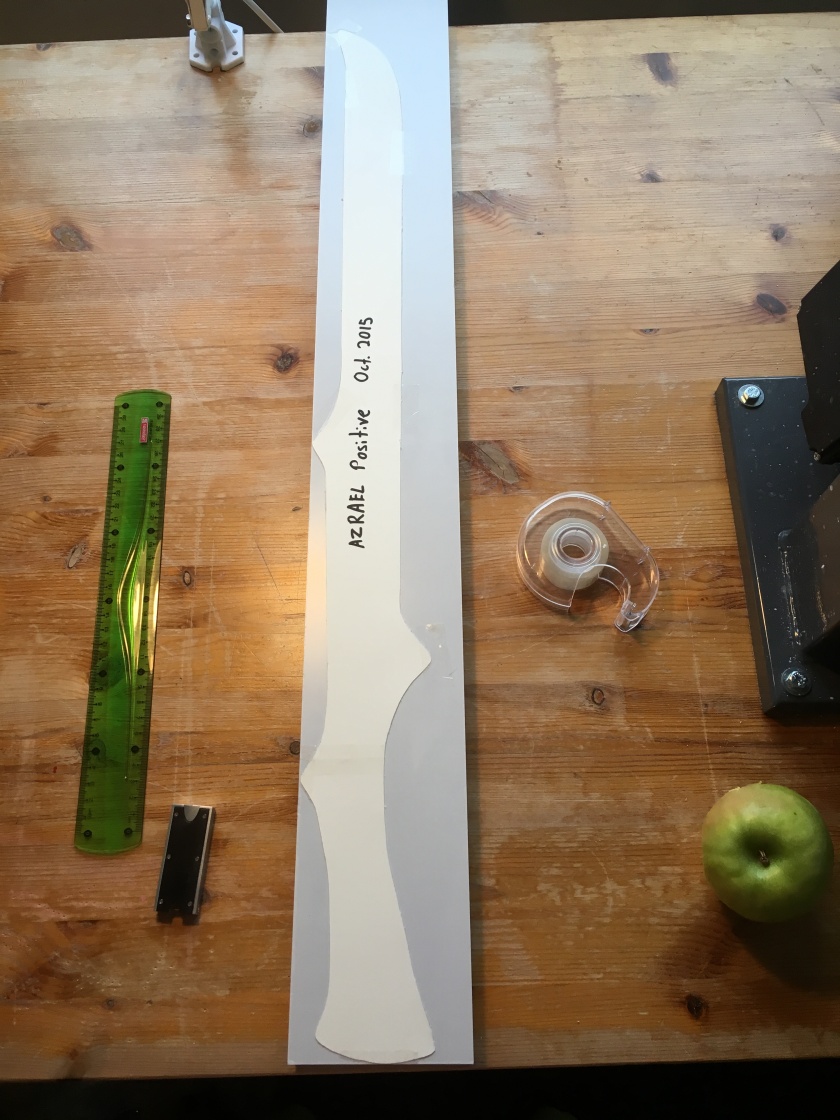
Cut out this design and transfer it onto cardboard or other stiff paper. Use a few pieces of tape to hold the cardboard template securely on the acrylic while you trace it onto the protective paper. Use a permanent marker. This will be easy to see and unlikely to smudge.
This will be your last opportunity to make changes to the design. Remember that you can’t add material after it’s been cut away. If you’re adding a light, make sure that the light mechanism will fit in the handle with at least a centimetre of space all around the edges.


Step 3:
It’s band saw time! Put on the ear protection, dust mask, and safety glasses. Safety gloves are not recommended for this task as the fabric can become caught in the blade. I don’t recommend Googling images of what happens after that.
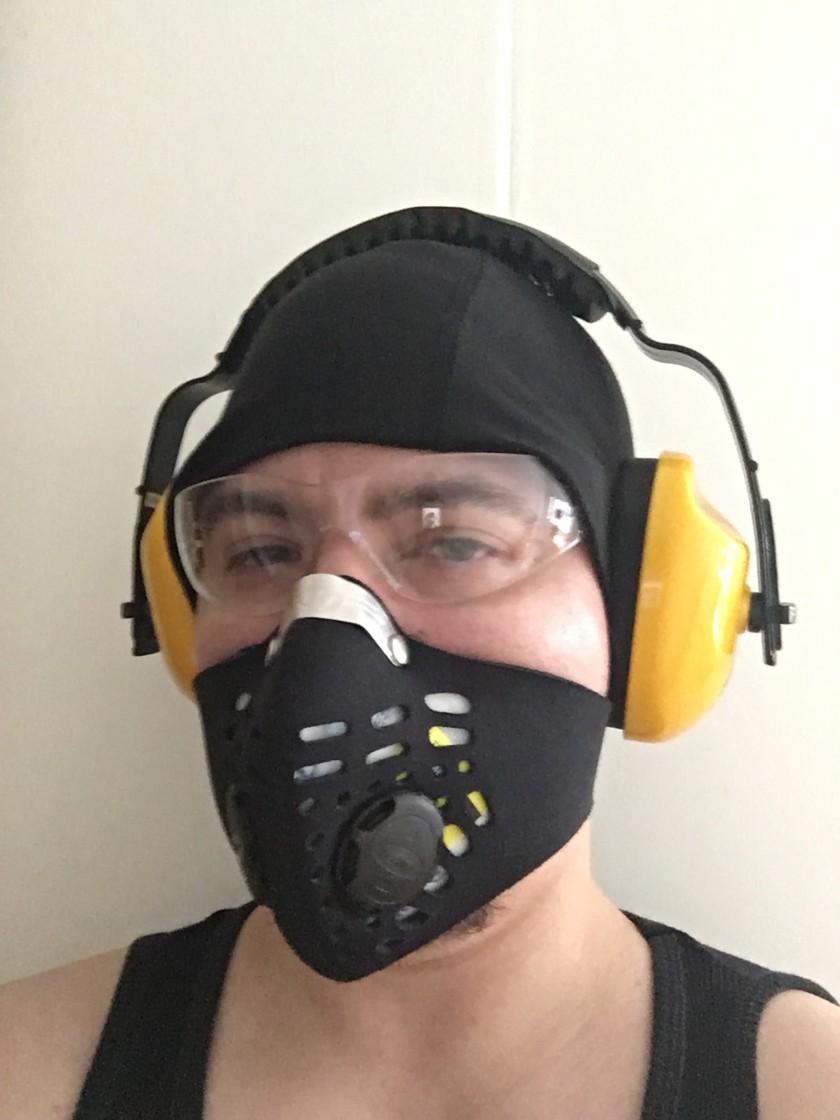
Say it with me guys! “Safety gear is not optional!”
You may also want a do-rag, a bandana, or some other snug fitting hat to keep the million bits of flying plastic snow from getting into your hair.
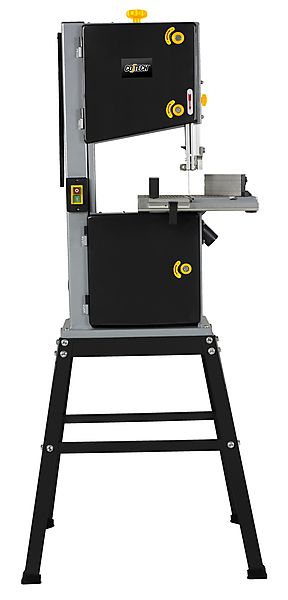
This is my band saw. Its name is Nibbles. Nibbles only likes to cut in straight lines or very gradual curves. If you try to cut too sharp of a curve, the saw blade may snap. You can still achieve the cuts you want, but you must think outside the box and remove the excess acrylic in pieces.
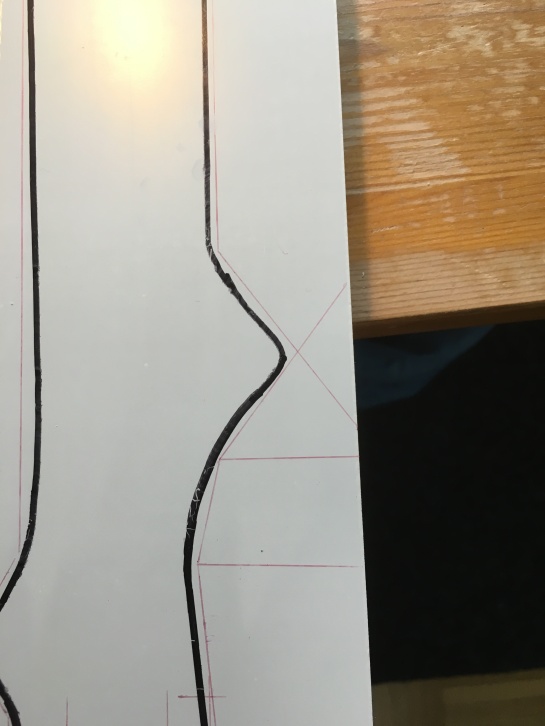
Plan your cuts. There is no need to cut precisely along the black line of the template. You can always sand those curves smooth later.


Patience is the key to success. Do not rush. Acrylic is a material that is harder than most human bones. The saw blade will nibble through it at a few millimetres per second.
I recommend taking frequent breaks to switch off the band saw and stretch your arms and back. Try walking around a little, drinking some water, or having a snack. This will help you avoid getting stiff and sore from remaining still for long periods and also allow you to stay focused. Zoning out while using power tools is dangerous!
Step 4:
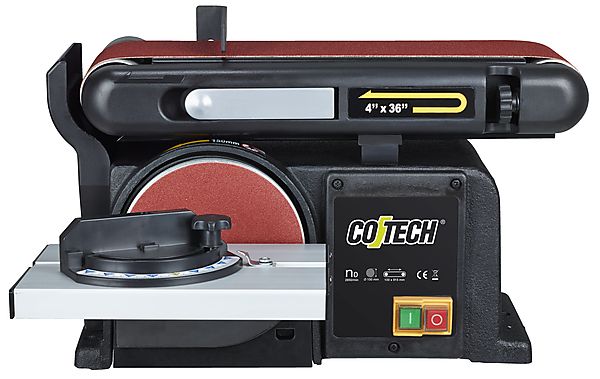
Now that you’ve had a break and a stretch, it’s time to shape the blade. For this, we will need the assistance of my beloved belt sander, Chewie.
I’d like to speak about safety and safety equipment again here. This is because I am aware that Cassandra Clare’s The Mortal Instruments series and the Shadowhunters fandom in general tends to have a young audience. You may not have used these kinds of tools before and I want you to know how to keep from hurting yourself. If you’re already familiar with these noisy little monsters, you’re free to skip down to the next picture.
I have all of the guards and guides taken off my belt sander. This is not recommended by the manufacturer. But since I have to turn the acrylic at all sorts of weird angles to get the shape I want, the guards make this impossible. I use the sander as a carving tool to remove excess materials from the piece quickly. It is not how the tool was designed, but it works for my purposes.
As with Nibbles, the handling of Chewie requires safety equipment. A dust mask, protective eye-wear, and ear protection. Please do not wear safety gloves while using a belt sander. (Unless you are working with metal.)
As with the band saw, one moment of distraction can result in the injury. I have two scars on my left index finger from this rapidly-spinning belt. Less than a second will take the skin off. If the tip of a glove becomes caught in the rotating mechanism of the belt sander … let’s just say that you won’t be attending that convention you were planning on going to. Yes, the plastic dust will be a little hot when it flies off the belt. You’ll get used to it fairly quickly. Trust me. No gloves. Not worth it.
Always unplug the machine if you have to move it, clean it, adjust it, change the belts … basically anything besides turning it on and off. I once picked up a belt sander to move it. It turned on while I had it held against my stomach.Thank goodness I dropped it immediately and it only snagged the edge of my shirt, otherwise that would have been an awful mess.
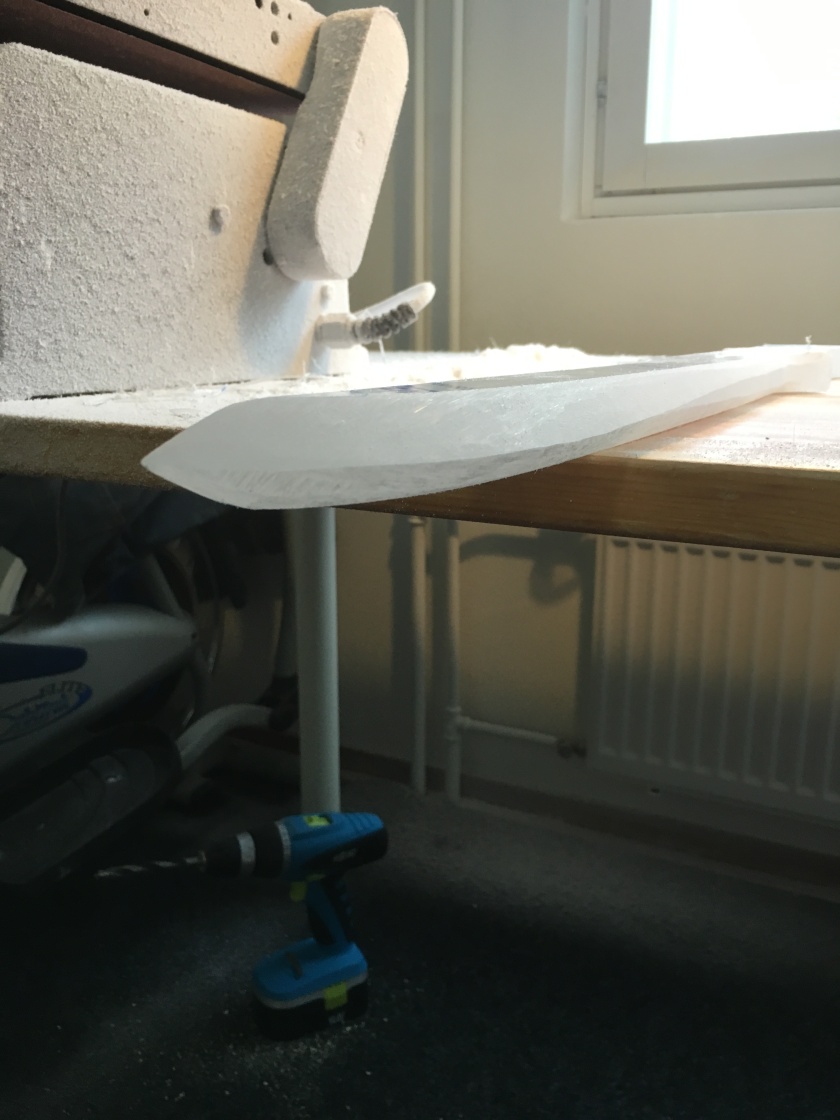
Start with the 50 grit belt and grind down the edges of the sword until you have the shape you want.
Once you have the shape more or less as you want it, it is time to switch to the 80 grit belt and do some smoothing.
The smoother you can get the surface of the sword, the less work you will have to do later with the hand-sanding. Run your hands over the piece, inspecting it for imperfections. See how it feels to hold and wield it. Now is an excellent time to make adjustments to the grip if it is uncomfortable.
Step 5:
If you are adding an LED to your sword, you will need to cut a slot for the flashlight to fit in. If not, you may skip ahead to step 6.
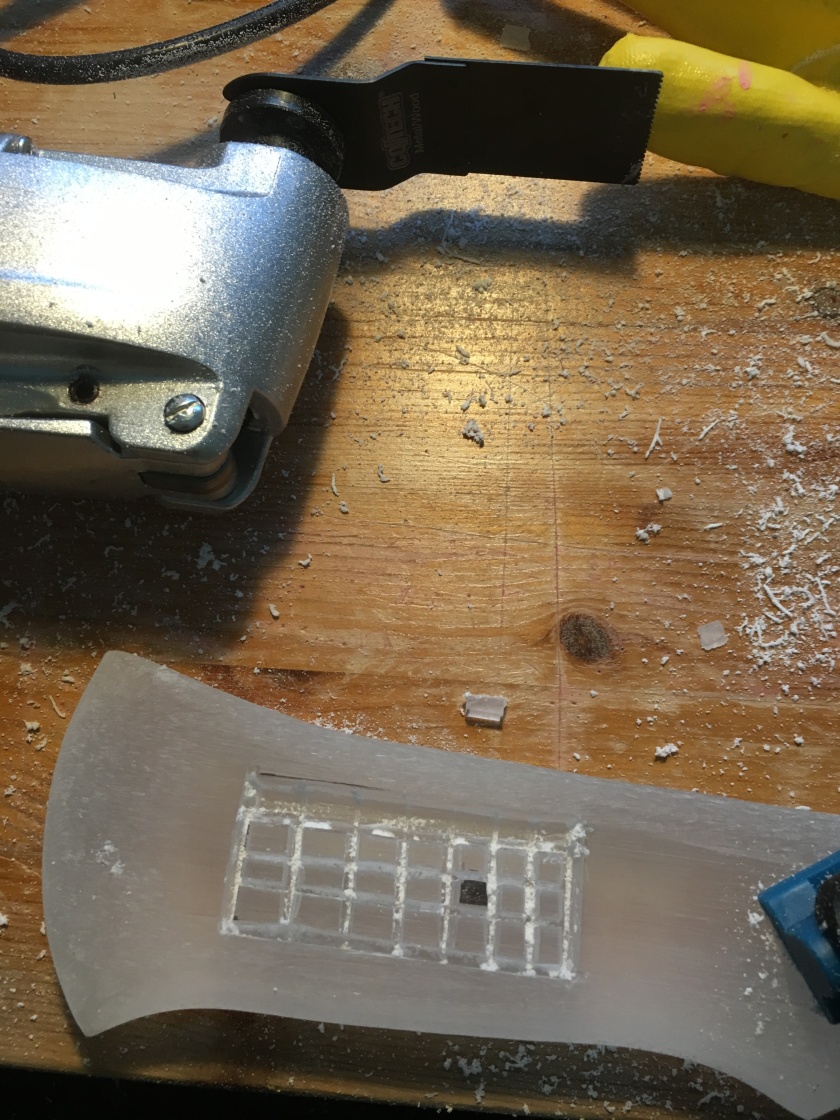
Now it is time to make use of the plunge cutter. This tool is known by a few different names. I call mine Jitter-Bug.
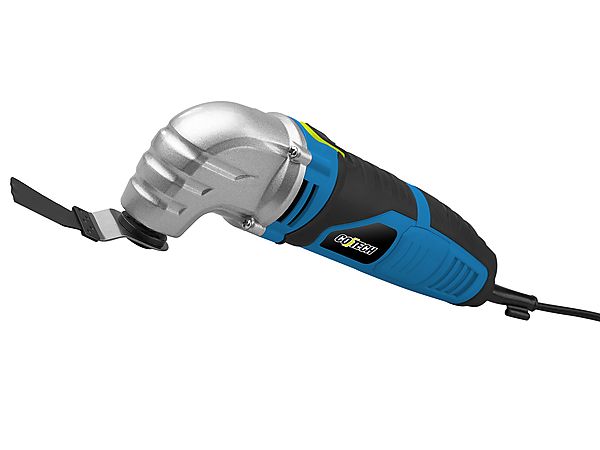
This is Jitter-Bug. Jitter-Bug is loud, obnoxious, and possesses an undying hatred for all mankind. Do not trust Jitter-Bug. Hold onto it firmly like your life depends on it because it absolutely will try to jitter right out of your hands when you put it to the acrylic.
You will need to wear all the usual safety gear I’ve mentioned before, plus protective gloves. The plastic dust flying off will be hot enough to hurt. Possibly not enough to burn, but it’s uncomfortable enough to be distracting. Remember what I said about distractions? Yeah. Let’s just avoid that.
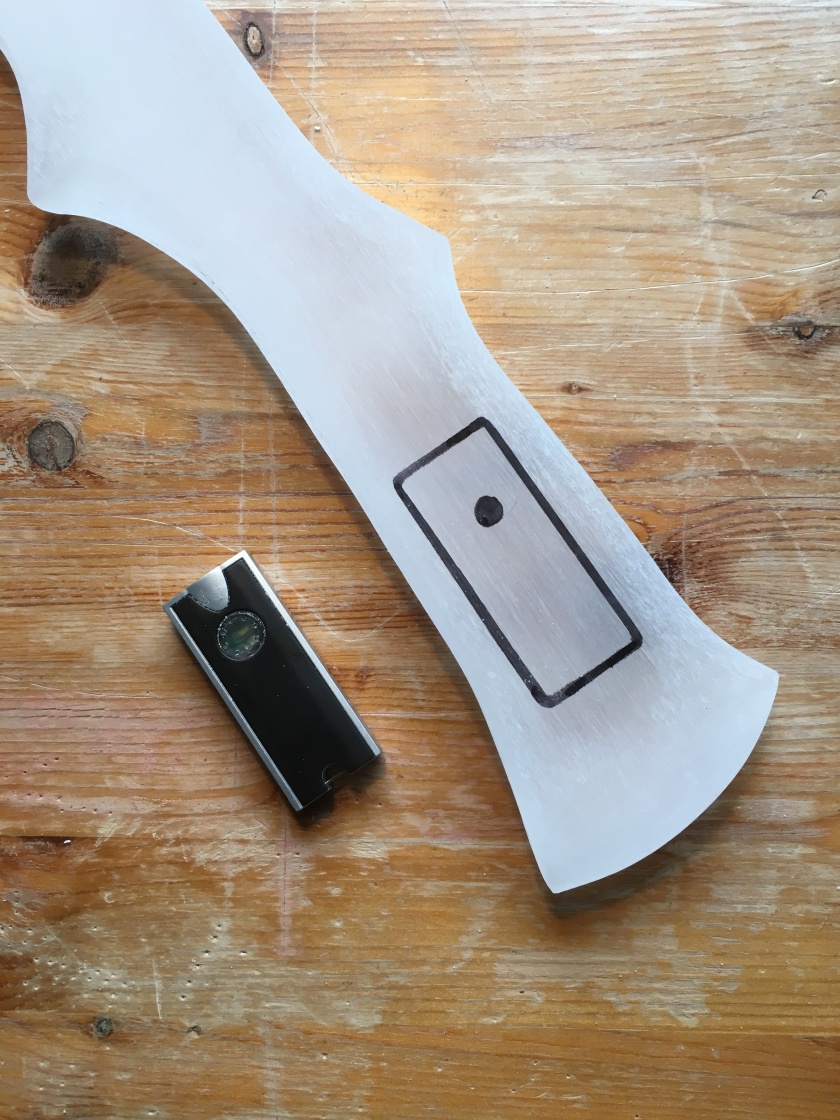
After all that sanding on Chewie, you will have to re-draw the light recess on the handle of the sword. Take a moment to hold the blade and press your fingertips on the grip. Where do they sit? You want the tip of one finger to rest over the button of the flashlight hidden in the sword hilt. Mark where that is and make sure that the light will be in the right place before you start cutting.
Clamp the sword to the edge of the table. Sit yourself down, and get in a nice stable position. The tool will vibrate a lot so you will have to keep as steady as you can.
Now, Jitter-Bug, like Nibbles, also only likes to cut in straight lines. You will have to be clever about removing the material from the light slot. Start by cutting all around the black line.
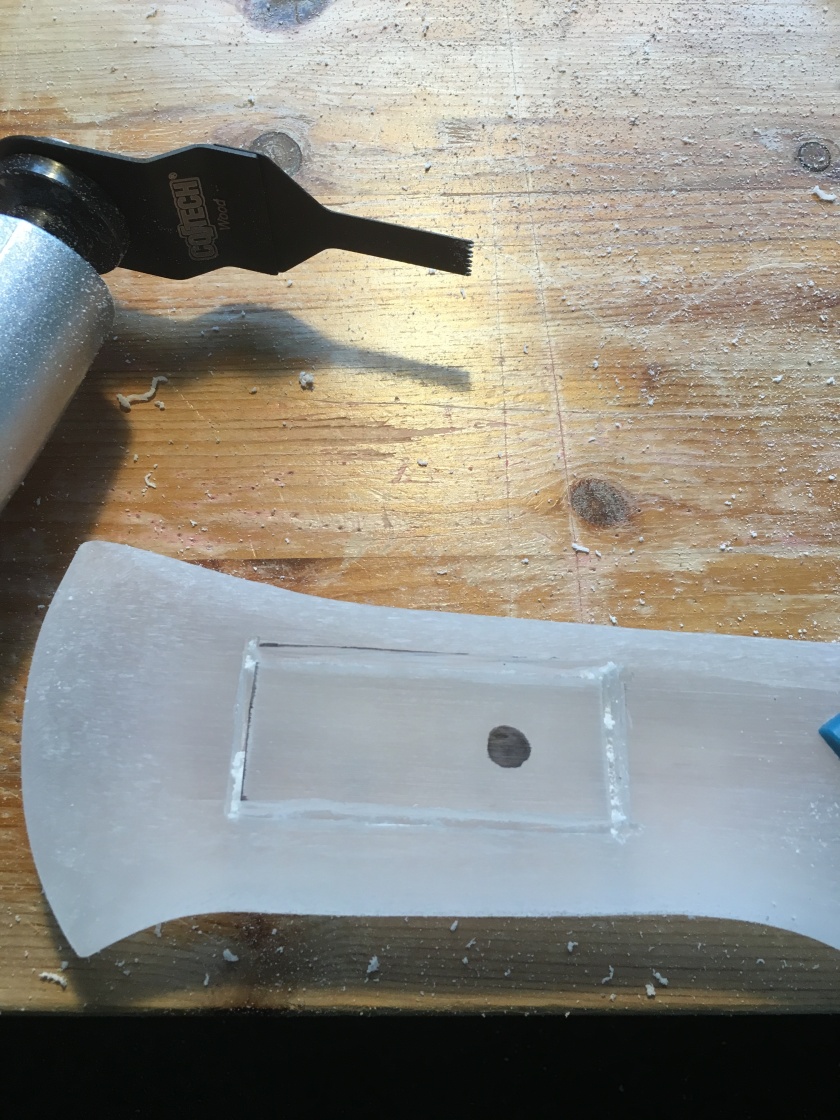
I use two different kinds of blades on Jitter-Bug for this. The one in the picture above is a narrow one for cutting the shorter sides of the rectangle. The wider one is for the longer sides. Please unplug the tool when changing the blades. Switching it on by accident really sucks.
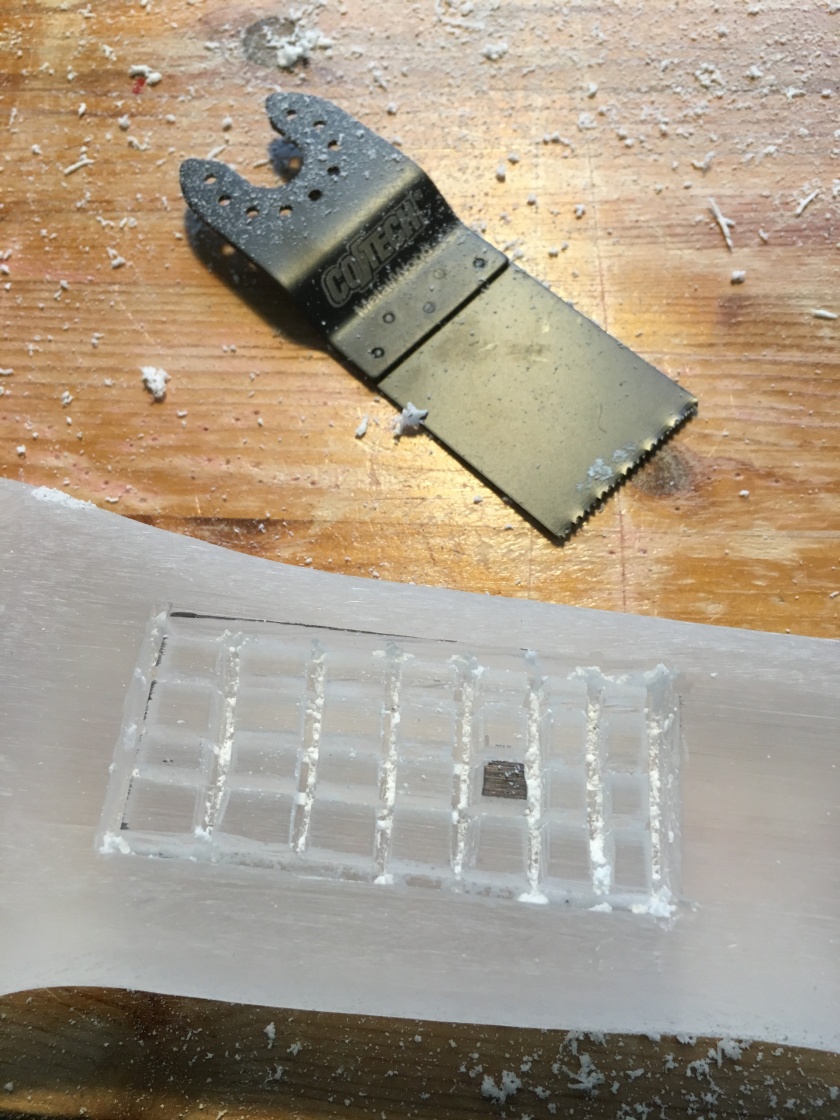
Cut a grid-pattern in the acrylic where you will be removing material. Make sure that each line is deep enough for the flash light to sit flush with the surface of the sword handle.
Now, place Jitter-Bug’s blade in the line closest to you at a 45 degree angle and begin making those little squares into wedge-shapes. When you are cutting away from yourself, it is okay to remain seated, but when you cut the other side of the wedge, you will have to stand up and move to the side. Never, ever cut toward yourself. It’s called a “plunge cutter” because “stabby machine” would probably get you put on a government watch list of some kind.
Once those 45 degree angle cuts meet, the wedges of acrylic will come popping out like a boxer’s teeth, leaving a nice recess for you to put the light in.
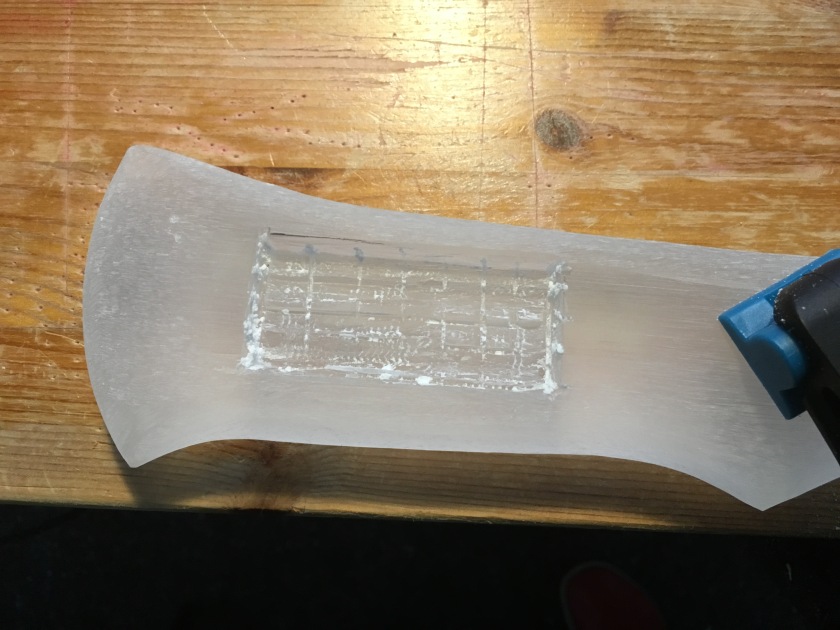
Take your Dremel tool and grind all those rough ridges smooth, especially the front side of the light recess. The clearer and smoother you can make that side of the rectangle, the better the light will transmit through the acrylic.
Step 6:
Alright. You’ll be happy to know that we’re done with the scary power tools. Now it’s time to gain a new-found hatred of water. That’s right. It’s wet-sanding time and your fingers are going to be wrinkly as a raisin by the time we’re done.
Put your water tub or trough on a table and fill it with warm water. The warmth doesn’t affect the sanding in any way but you will be able to work for much longer without your hands cramping if the water is hot.
Plop that sword in the water, cut a strip of 120 grit sandpaper, and begin sanding the sword. Once you have done all you can with the 120 grit, move up to 240 and do it again. Then again with some 360 grit. Then again with some 600 grit. Then again with some 800 grit …
You get the idea. Change the water every couple of rounds. This will allow you to have some nice warm water again. It will also make it less likely for stray bits of plastic to get caught between the sword and the sandpaper which will create more scratches. Between each round of sanding, rinse the sword off under running water, dry it with a towel, and inspect it under good light to see how many scratches and scrapes remain.
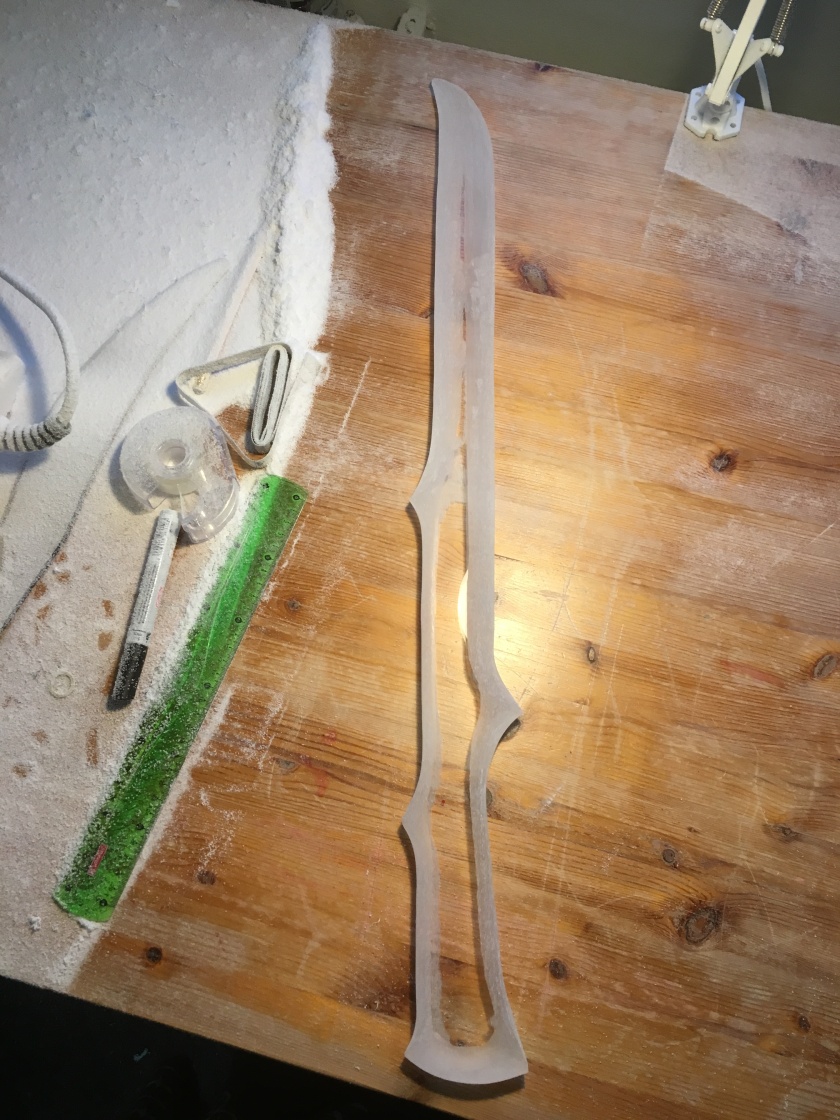
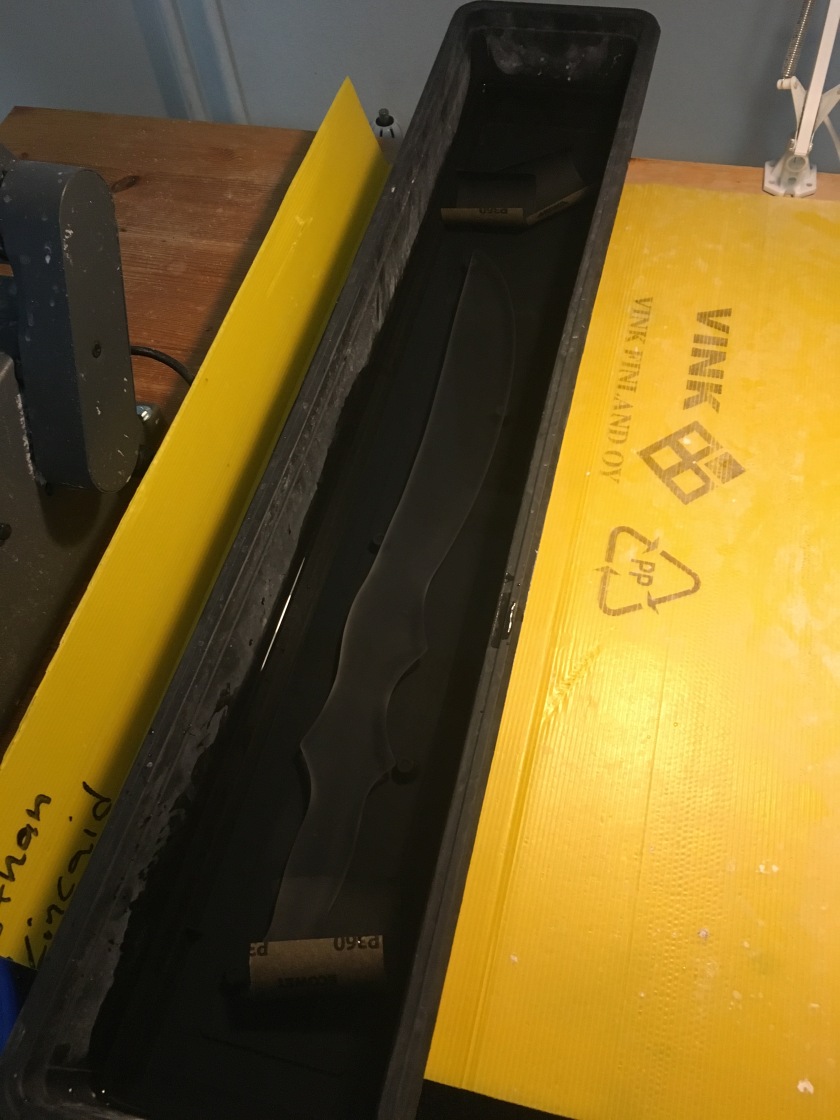
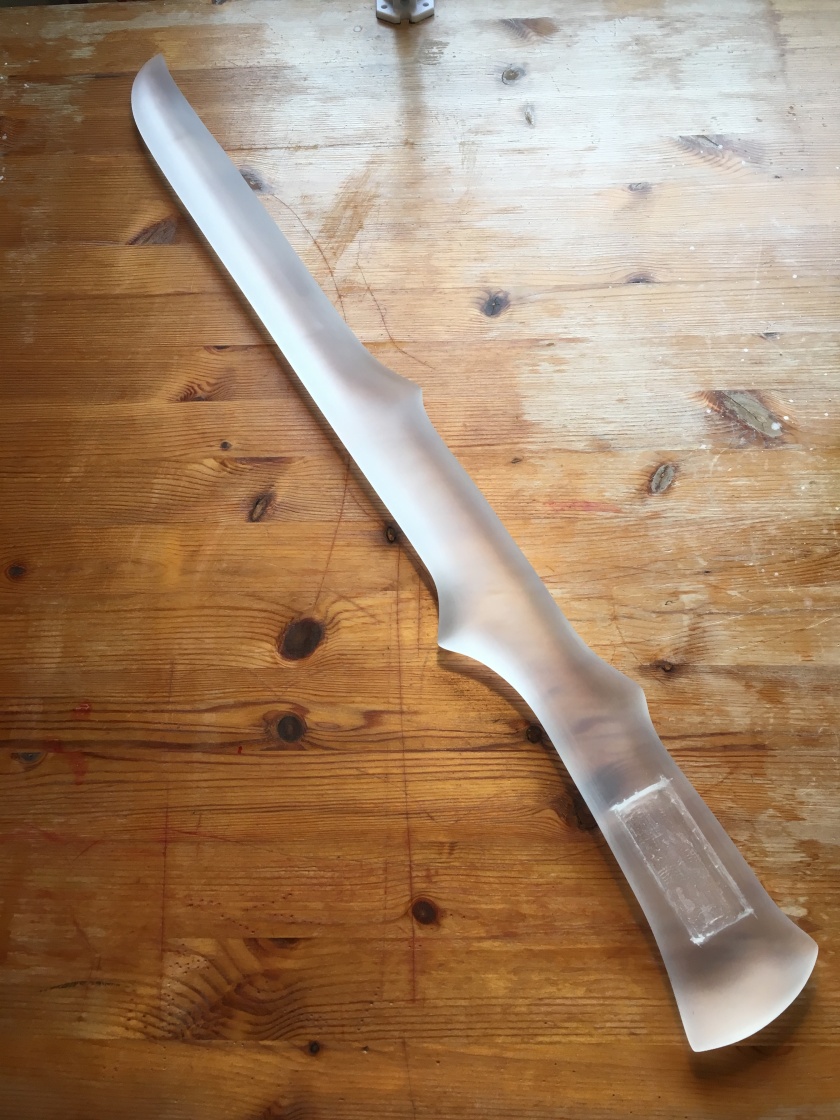
When you’re through, with all your polishing and no scratches remain, it should look something like this.
For those of you not putting a light in your sword: Congratulations! You are finished! Enjoy your beautiful Seraph Blade.
For those of you inserting an LED, your toil is not yet done. Come with me to the magical land of … hiding something in a crystal-clear object.
Step 7:
You’re going to need a hilt wrapping on your sword to conceal the flash light. There’s really not any way around that. A lot of people were surprised when the Shadowhunters TV series launched and the Seraph Blades had opaque handles. If you give it some thought, though, you can totally see why.

You can read through it for crying out loud. How are you going to hide anything in there?
Well, grab your graph paper, it’s time to take measurements of your sword handle. You can cut and wrap the paper around the hilt as much as you like until you’re content with the design of the wrapping.
Remember that if you’re painting the leather, it’s going to shrink a little as the leather paint dries! So leave a little extra space. Take note of how wide the Velcro is, or how wide the snaps are, and make sure that the wrapping overlaps at least that much. I’m using Velcro in this tutorial.
It’s up to you how you want to design the hilt wrapping. The one I’m going to show you is a double wrap simply because I like how it looks.
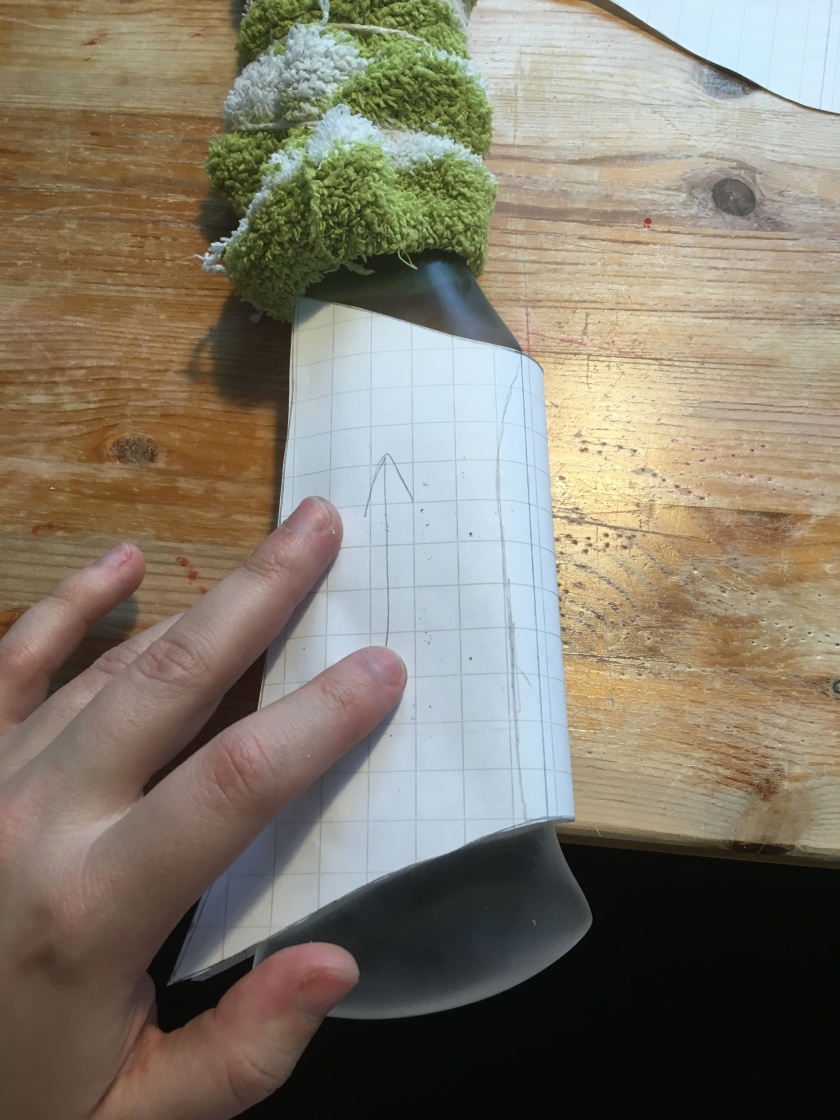
Azrael is wrapped in a pair of old socks here to protect it from getting dinged on tools and tables and whatnot while I move it at all sorts of weird angles for the fitting.
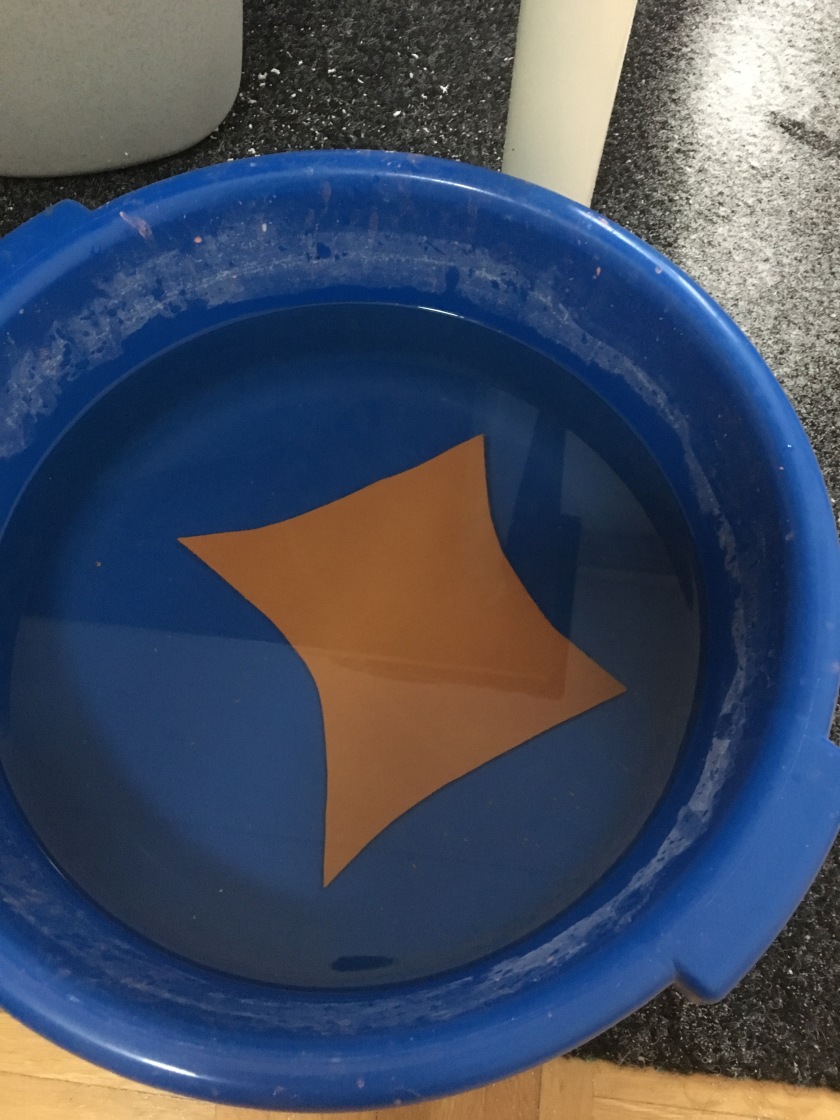
Once you are sure of your design, cut the leather. I use vegetable tanned leather because it is relatively easy to mould to the correct shape by immersing it in hot water for a few minutes, and then wrapping it around the hilt to dry.
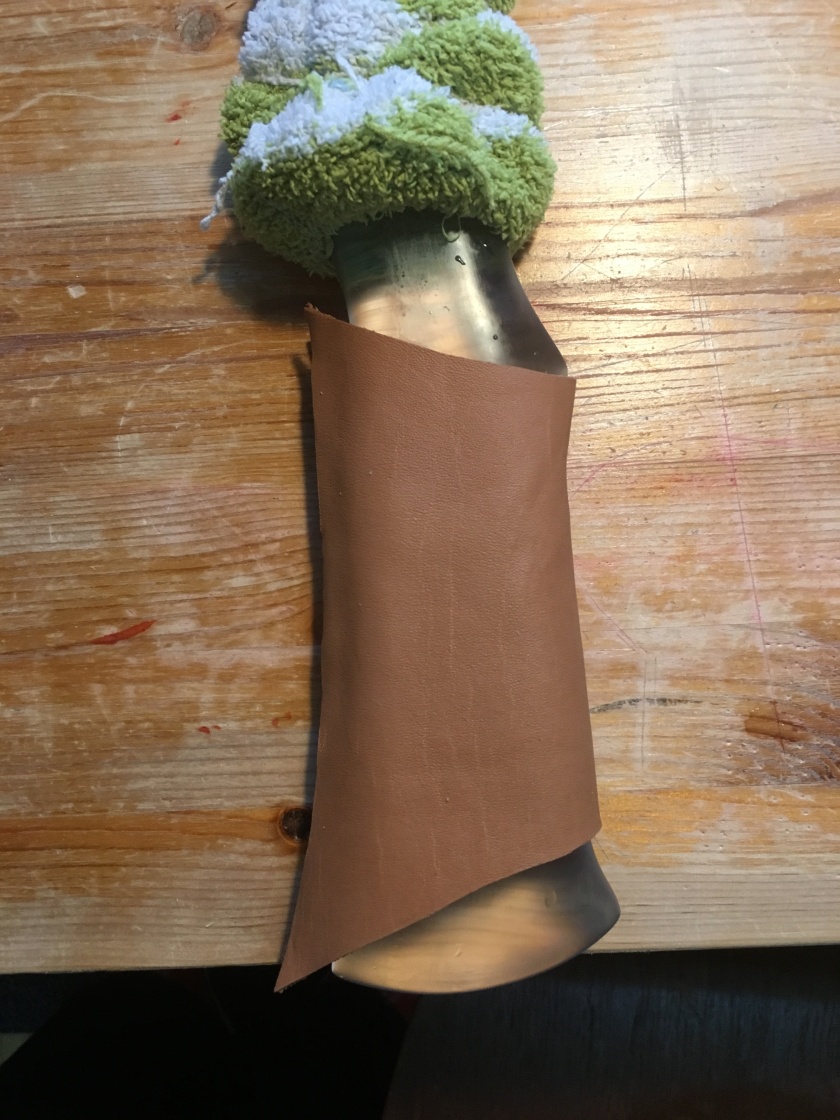
If you’re painting it, make sure it is completely dry before doing so. It may take a day or so to get it in the right shape and dried properly. Again, patience is the key to success with this.
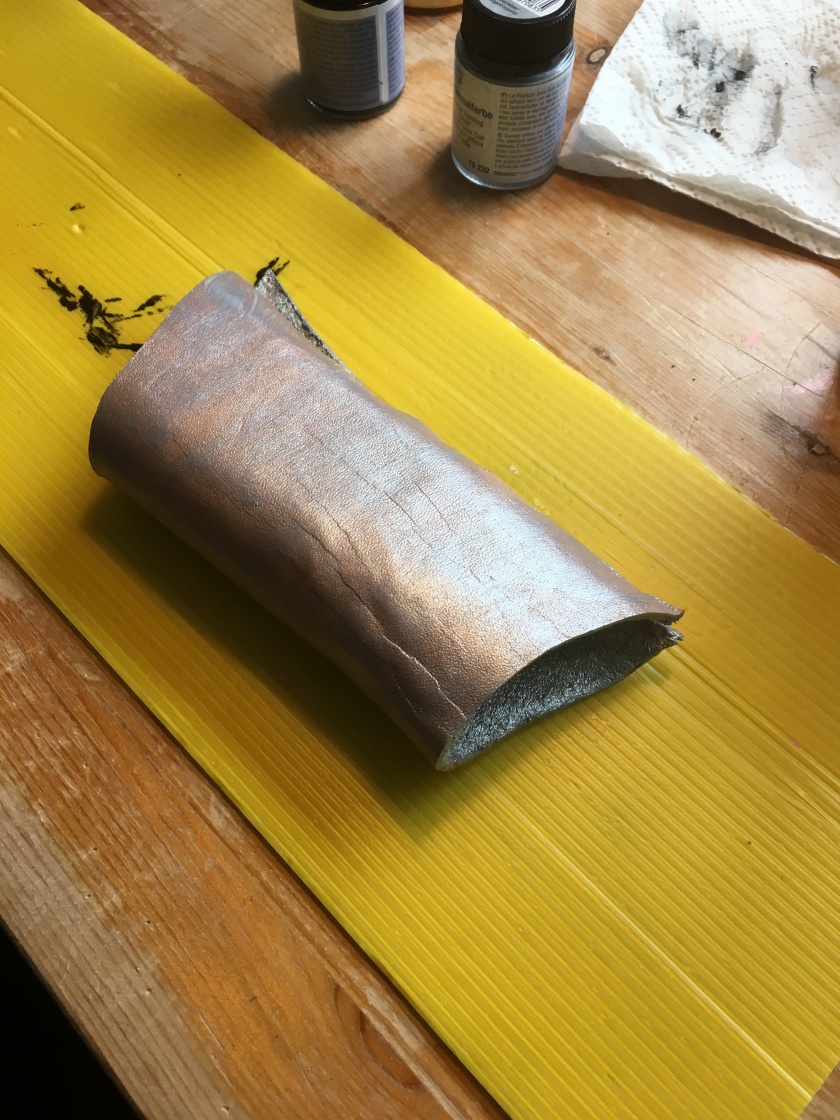
I paint the interior of the hilt wrap as well as the exterior because I do not want the cow-hide colour to show through the sword. It will take several coats to achieve a good look. Give each coat four to six hours to dry before applying the next one.
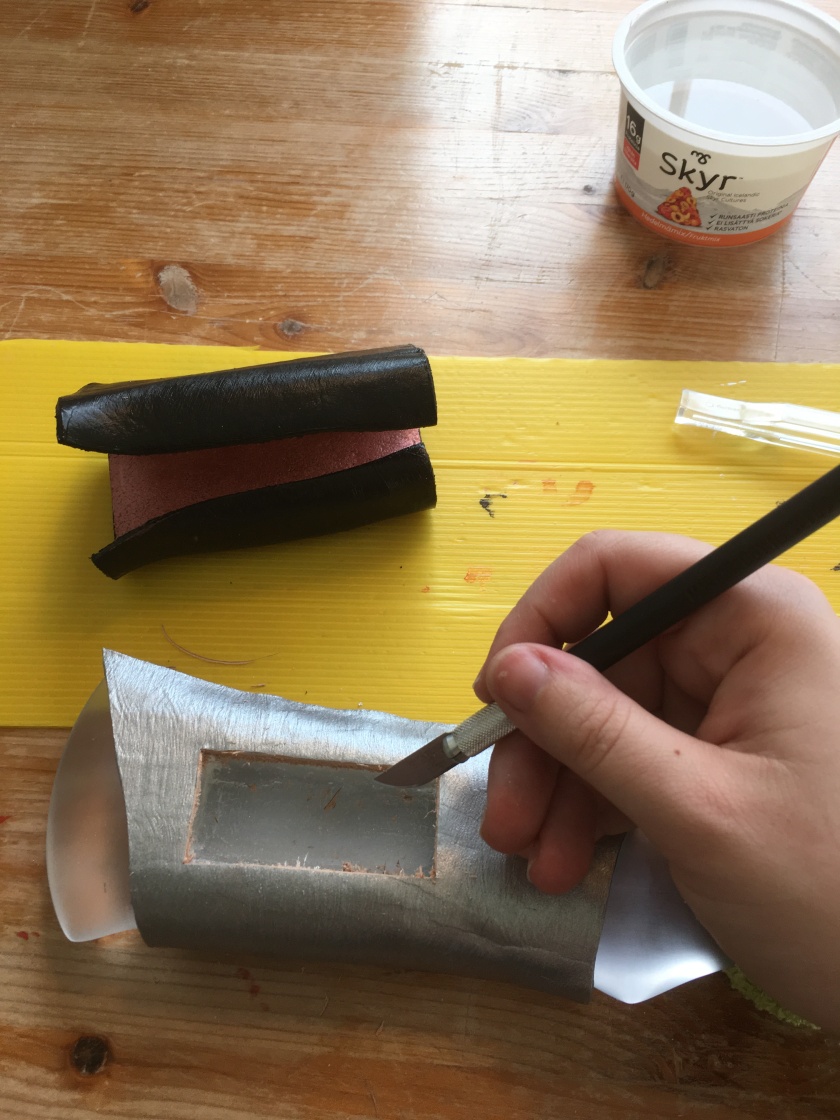
Wrap the painted leather around the hilt and carefully cut a hole where the light recess is. I use a scalpel for this.
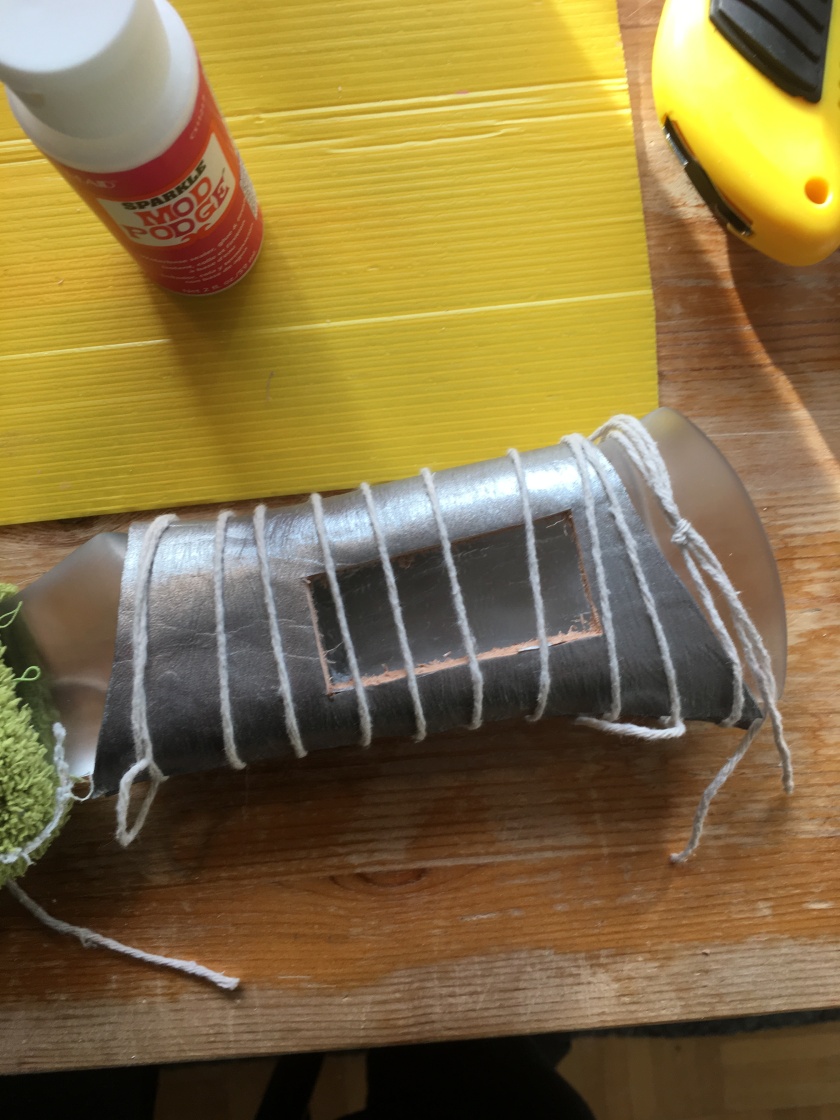
Glue the leather wrap in place and wind string securely around it so that it stays put while drying. This usually takes another day.
For this style of wrapping, I have used a length of suede to go around the hilt a second time and form the flap that covers the flashlight. Yes. This takes another day to dry.
Now it is time to cut the Velcro and glue it in place. I have used a combination of paper clips and string to hold them while they dry. This takes … how did you know? Yes. Another day. See, you’re getting the hang of this already!
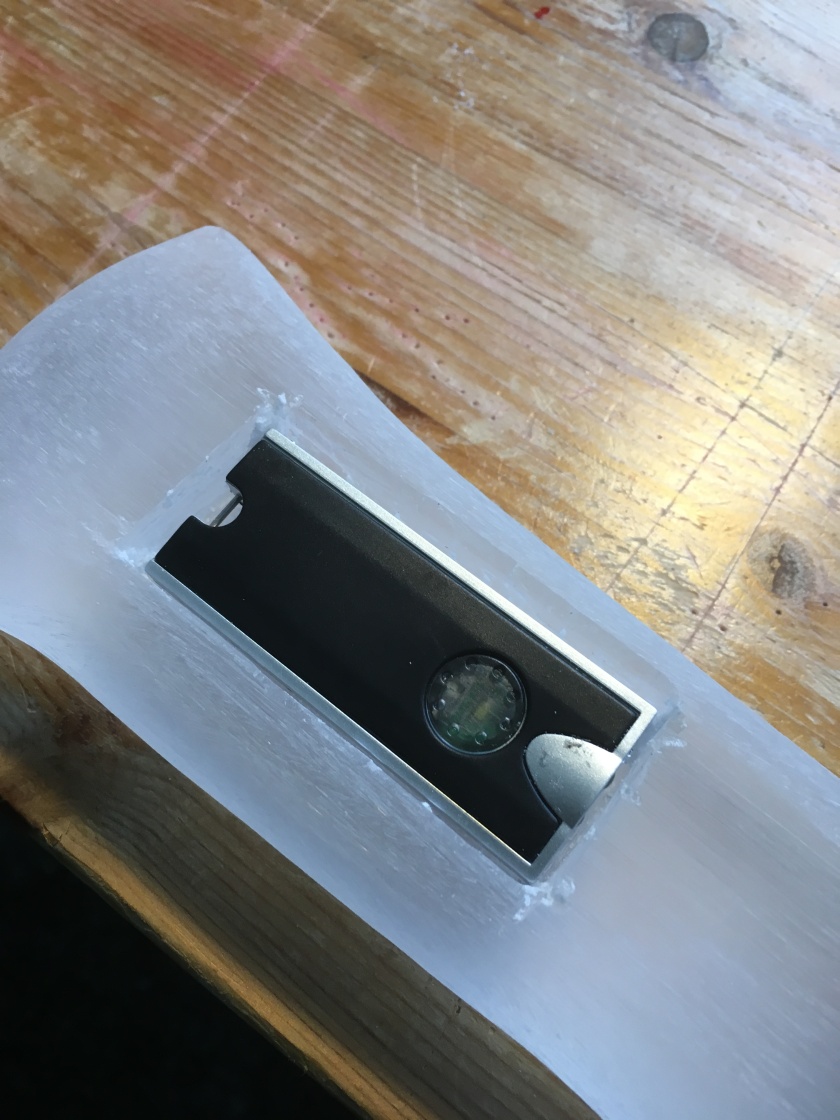
At long last, we can put the light in its new home. I’ve secured a length of elastic to the back of it so it can be easily retrieved. You don’t have to do this but it is convenient.

Flashlight? What flashlight? I’ll have you know that my Seraph Blade ignites with the power of the angels! Hmph! Mundies.
Now we may remove the protective socks and feast our eyes on a brand new LED-equipped sword.
Weeks of labour. But suddenly, it all seems worth it.
Sometimes, my customers can find it hard to be patient, but I think you can now see why you have to wait so long for your new baby to arrive! I don’t know about you, but I have a new appreciation for the stubborn, hard-as-nails attitudes of the Iron Sisters.
I know, I know. You’re all waiting for me to stop talking and show you the light.
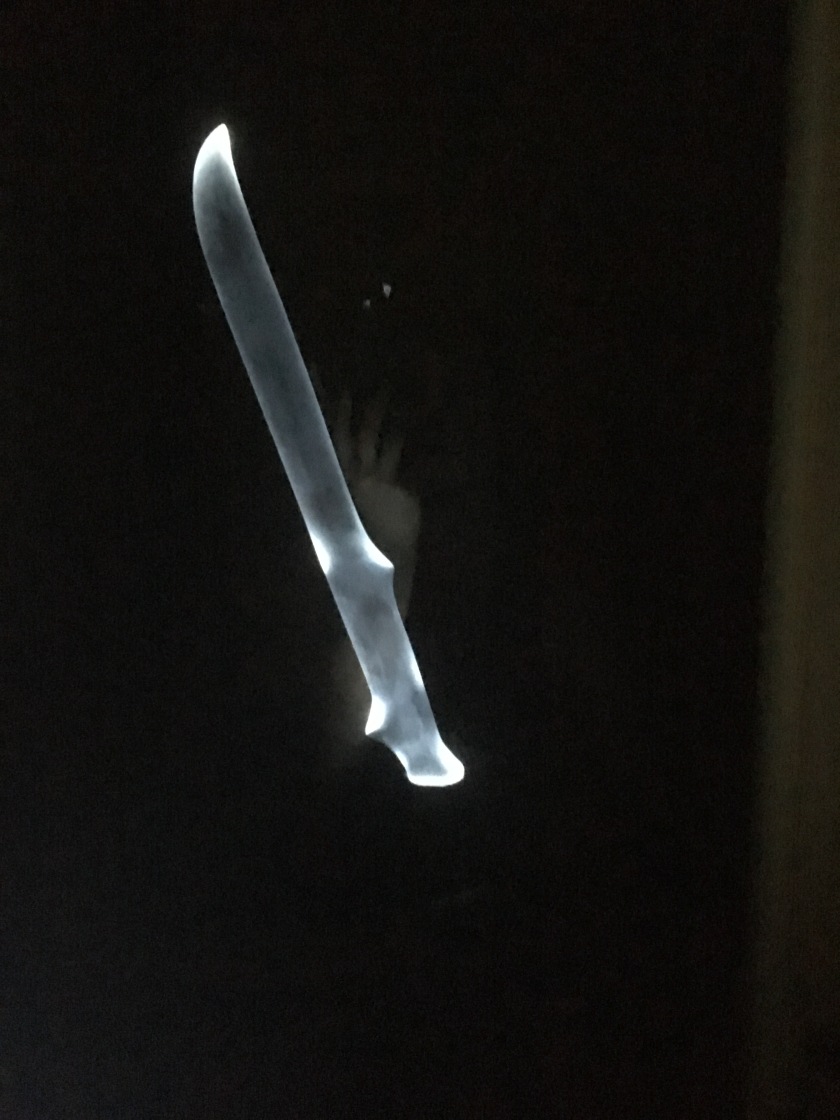
Possibly the bathroom selfie of the year.
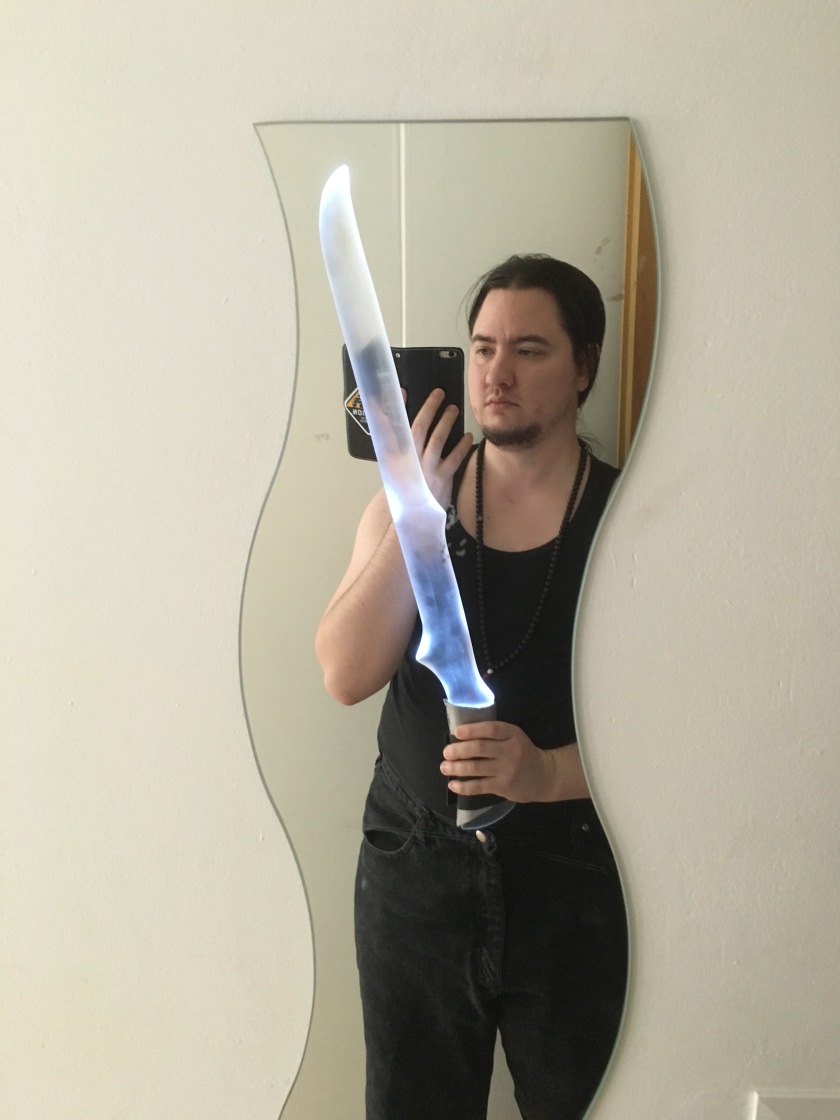
Unmistakably glowing, even in bright sunlight.
So that’s my tutorial. If you have any questions or comments, feel free to scribble something in the comments section below. I love chatting with my fellow Shadowhunter fans.


Excellent tutorial! A few notes on the use of machinery:
A band saw does not have any give, it only cuts in a straight line. If you need a curved contour, you’ll need to make a bunch of perpendicular cuts first, allowing the plastic to break away when you pull back out for a new angle. Cut all the way to your outline at a 90 degree angle. I suggest making these breakaway cuts every inch or so. Doing those reduced my work time by half, compared to doing a bunch of angling cuts like I did for the first one.
A handheld sander is NOT what you want. Using one makes the work ten times more difficult. A stationary floor one is far superior and makes the work a breeze. Essentially you’re using it as a sharpening wheel. Be sure to place yourself so the belt is rotating away from you, so that if you lose your grip it doesn’t go flying in your face. Also make sure nothing breakable is across from you, in case it does go flying. Happy crafting! 🙂
LikeLike
Yeah, but if you don’t have a belt sander, you can clamp the thing in place on a work table and go to it. It will be harder, but some people can’t afford a bigass sander like the one we used.
LikeLike
Holy crap, I so wish I had some of these things lying around so I could make one or two for me and my best friend.
These are fantastic, you did an awesome job. 😁❤️✨
LikeLike
Thank you so very much for your kind words. 🙂 It’s true that there are many speciality tools involved in the process. It’s the one big downside of working with acrylic. Such a hard material is tough to break but also tough to cut! You could possibly nibble through the cutting process with a hand saw if you are quite strong and have the stubbornness of an Iron Sister but the shaping … ehhh, you really need an electric sander or grinder. I’ve gone at this stuff with a hand file until my hands literally bled but it wouldn’t yield. XD Thank goodness for lofnbard’s Colonel Sander! (It’s her fault I now name all my tools. LOL)
LikeLike
Hi im going to supernova in november and really want one of your seraph blades, how much are you willing to sell them for? (If still selling)
LikeLike
Hi! Have you had a chance to look at my selection of blade designs? I make them to order. Feel free to browse and send me an email at inkbladestudios@gmail.com to let me know what style you fancy and when you’ll need it delivered. 🙂
LikeLike
Is there a place you can buy them or do u make and sell them because I dont have any of that equipment lying around XD
LikeLike
Ah, I’ve never seen them for sale. I did a lot of searching before I had to cave in and make my own. I guess I could part with a couple if the price is right.
LikeLike
How much would you be willing to sell some for?
LikeLike
Hm! Well, how many would you like and what’s your budget? Send me an email and we’ll see if we can work something out. 🙂 ekincaidwrites (at) gmail (dot) com
LikeLike
Hi! I was just wondering if anyone knew of a good place to get an acrylic block big enough for this project?
LikeLike
Absolutely. I got my acrylic from Johnston Plastics here in Montreal. I’d recommend checking to see if there is anywhere closer to you to save on shipping costs. I was able to get the plastic for 10.00CAD per block because they were left-over end pieces. Perhaps you can score a similar deal!
LikeLike
Another question: If I used an acrylic rod instead of a block, would that be easier or more difficult for this? I have access to all the tools you used and many more of similar nature.
LikeLike
It would yield a more slender sword, to be sure unless the diameter of the rod was quite thick. You would also be limited in how much of a curve you could put on the blade so it would be a rather straight weapon. You might potentially have less work in the way of rounding the edges but that rather depends on your design. I’d advise caution, if you decide to go with a rod. A more slender weapon shouldn’t be too long or you will get a “wobble” in the plastic when you move it around. If you’re using a rod, I think daggers or possibly short scimitars would be the maximum I’d feel confident with.
Another issue with a rod is that it may be slightly more tricky to trace the design of the weapon onto it before shaping. It can certainly be done. It’s just potentially fiddly.
LikeLike
Thanks! With that in mind I think I’ll lean back toward the blocks!
LikeLike
Not a problem. And good luck to you! I hope you will show your creation to us when you’re done. I’d love to see it!
LikeLike
im only 13 but i really want one for decor purposes, do you sell them and how much would they be ?
LikeLike
Thirteen is quite alright. They’re not actually sharp so I don’t have to worry about selling real weapons. ^_^ Current asking price is 200.00CAD per sword.
LikeLike
Still selling any
LikeLike
Indeed I am. 🙂
LikeLike
do you ship to the USA?
LikeLike
Yes. I shop worldwide. 🙂
LikeLike
I really like this tutorial! but i have a few questions! Where can i buy Acrylic? I only find sheets and that’s to thin! And are you selling them and for how much?
LikeLike
This depends on where you live. I bought mine from Johnston Plastics in Montreal. You may want to try getting a company closer to you because shipping can be expensive. I am selling the swords, yes. Current asking price is 200.00 CAD per blade given that each of them took about a week’s labour.
LikeLike
Hey, I’m from the Netherlands and I was wondering if I could buy 2 blades. I understand that they will be more expensive. But I was just interested in if you want to ship those to the Netherlands. I hope to get something back from you and otherwise I’m going to ask my dad if he is able to make 2. I think that they look really good!
LikeLike
Of course I will ship to the Netherlands. ^_^ Not a problem. Just email me at ekincaidwrites (at) gmail (dot) com and we can work out the details.
LikeLike
Hello. I love how you did this. I think all your Shadowhunter tutorials are amazing and have already made my own witchlight and stele woth the help of your tutorials. But I do not have the time nor materials to make myself a seraph blade. I was hoping to buy one from you. I understand if I can’t it just would make things alot easier. Thank you
LikeLike
Sure! Current asking price for the ones I have is 200.00CAD per sword. I’ll be making some new ones soon so if you’d like to negotiate a custom design, feel free to email me at ekincaidwrites (at) gmail (dot )com and I’m sure we can work something out.
LikeLike
Thanks and I did. As my email also says is there other way we could communicate. It’s just email takes a while and also I would love to pick your mind on a couple of things
LikeLike
Hi I love this tutorial and I’ve already started my sword I’ve cut out my shape but have no idea how to sand it to be a blade or what type of sandpaper to use. Any suggestions? Thanks
LikeLike
I use a belt sander. Start with a 50 grit belt to strip away the extra material and shape the sword. Then put on an 80 grit belt to refine the rough patches and do a little more shaping. Then, you can put on a 120 grit belt and do a little more smoothing. Once you have done all you can with the belt (there comes a point where the rest of the work is too delicate for a big machine), you will need to sand it by hand. Always use diamond sandpaper (the silicon kind) as garnet isn’t quite hard enough and will scratch the crap out of your blade.
Here’s the grits you will need: 80 grit, 100 grit, 120 grit, 150 grit, 180 grit, 220 grit, 500 grit, 800 grit, 1000 grit, 1500 grit, 2000 grit Don’t worry if you can’t find something in between a couple of the grits. For example, if you can’t get your hands on 180 for some reason, just get a bit more 220 and spend a bit more time on that pass over your sword. For the really high grits, look in the automotive section. These are the kinds of sandpapers you use when working on the finish of a car so you probably won’t find it in the carpentry section of a store. 800 upward is most likely to be a wet polish. This is great! Just soak the sandpaper in a bucket of water and keep it beside you while you work. This will keep the dust down and make for much smoother sanding. All in all, if you have a choice between wet and dry sandpaper, go for the wet stuff. It makes the work much easier and more pleasant.
Of course, remember safety gear. 😉 Dust mask, safety glasses, and some protective gloves that fit your hands snugly. (Too loose and they become a risk for getting caught in the sanding belt.) Trust me, you don’t want the joy of sneezing out a nosefull of plastic snow. Hahaha!
LikeLike
Thank you for your help I was also wondering if I could use a detail sander as there is a sale!! And I don’t have a belt sander
LikeLike
Yes you can though it will likely be more difficult. I would advise you to clamp the blade very securely to a sturdy table or bench and purchase more sandpaper than you think you’ll need. Acrylic is a tough and resilient material and will try to resist your efforts to shape it.
LikeLike
This was so extremely helpful! thank you for putting together such a wonderful tutorial!
LikeLike
My pleasure. If you make some of your own, feel free to post pictures. I love seeing people’s creations. 🙂
LikeLike
How could i buy one my daughter is being isabelle light for a drama assignment in school and she needs a seraph blade
LikeLike
Cool! Good luck to her on her assignment 🙂 My buyer’s guide is available for your perusal right here.
LikeLike
Hi! I’m interested in making a seraph blade however I don’t have a band saw. I have a table saw though, could that work?
LikeLike
I’m not sure. I don’t have a table saw if you can believe that! XD All this fancy shmancy equipment and no plain ol’ table saw.
I suggest getting your hands on a 2″ thick plank of wood and try getting the shape you want with that. Make a wooden prototype of the sword design you want. Wood is far cheaper and easier to get your hands on than acrylic and if it works with wood, you’ll know you can get the cuts you need on the acrylic. Just a reminder, though, acrylic is harder than wood so when you work with the acrylic, you’ll need to do everything more slowly and be patient with your tools. 🙂
LikeLike
Thank you!
LikeLike
I was just wondering if you had a recommendation on where to buy the plastic to make it? I’m wanting to build my own for a convention but I’m not finding the right thickness.
LikeLike
That is difficult. I buy mine from VINK here in Finland. If you are in Canada, I can tell you my supplier that I had when I was located there. Otherwise, I have no idea.
LikeLike
Can we have the template for Azrael please ? Else very good tutorial.
LikeLike
I can give you the template for Gabriel as it’s based on the movie. Azrael, though, is one of my original designs so I hope you will understand and forgive me if I don’t give away that one. 😉
LikeLike
My amazing father just started on my sword 😉 thanks for the great tutorial. I hope we manage to make it look a little like the beautiful ones you make. 🙂 We got some odd looks when we went to ask for the acrylic at Vink and we tried to explain what it was for tough :p
Greetings from Belgium
LikeLike
Haha! Yes it is a rare art form! I hope you will post pictures when it’s finished? I love to see other artists’ creations! 🙂
LikeLike
i finished it 🙂 where can i post my picture?
LikeLike
I think the html code button thingies will let you post images in your comments?
LikeLike
I need one of these sooooo badly!
LikeLike
Do you happen to know where I could get the acrylic in the US?
LikeLike
Sorry, I have no idea. I’m located in Finland.
LikeLike
K, thanx anyway!
LikeLike
Could you use a 3/4 thick piece of acrylic?
LikeLike
I think so. It would be more slender than the ones I make but I think it would work.
LikeLike
(inch)
LikeLike
Hi. I love this blade! I want to make a shadowhunter’s costume and I am not able to make the blade. Do you sell them?
LikeLike
Hi there! Thank you so much for your kind words. 🙂 I do sell seraph blades though I’m afraid I don’t have any more available for this year. If you’re still interested next year, I’ll post an announcement when my workshop opens up again.
LikeLike
Yes! I don’t mind waiting 🙂 could you tell me how much would they cost more less?
LikeLike
How much would they cost more less? To have an idea 🙂
LikeLike
How much would they cost? To have an idea 🙂
LikeLike
That depends on what style you want. They’re usually around 200-300 euros.
LikeLike
I dont suppose you know where I could buy one of these? I’ve had no luck myself in my search!
LikeLike
I make them and sell them. 🙂 I’m in the process of setting up my new workshop now, but I should be able to take orders again in February 2017. I’ll make an announcement on my blog.
LikeLike
what type of material do you use
LikeLike
50mm thick acrylic.
LikeLike
i sendt you a mail plz can you answer me?
LikeLike
Yes. I answered it just now. XD
LikeLike
how much would it cost for you to make one that is 8″ wide 1″ thick and four to five feet long
/\
/ \
l l
l l
l l
\ /
l l
/ \
_——_
ll
LikeLike
Would you want it to be frosted or crystal clear? Also, would you want it to light up?
LikeLike
Where do you get the acrylic? I’ve looked everywhere but I cannot find anything bigger than 0.8″
LikeLike
Check out any industrial plastics manufacturers in the area. If you have trouble finding them, try looking for any company that manufactures business signs. You know, like the big “glass” illuminated signs on the front of a shop. Those are made of nice big acrylic slabs so that if a kid throws a rock at it it doesn’t break through.
If there’s nobody nearby who sells them, you can try eBay or Amazon. Alibaba Express is another good website to buy stuff from for decent prices. When you search for what you need, type in: “clear acrylic sheet”. Despite the fact that you’re working with something that’s 1 or 2 inches thick, and it doesn’t really feel like “sheet” is an appropriate word for it, that’s what they call it. They manufacture these big pieces of acrylic plastic with a huge extruder machine and it comes out a few yards long and a few yards wide. It’s so heavy that even a couple people together can’t lift it until it’s cut into smaller pieces. It really does look like a sheet when it first comes out of the machine like that.
I hope that helps!
LikeLike
How can I replacing the battery easily, since you “hide”. the rectangle of LED making a cable?
LikeLike
The LED is removable. You should not attach the leather completely all around the handle. You must leave the end of the leather free so you can open it and access the LED. First, lift the leather flap. Second, take the LED light out of the handle. Third, take screws out of LED light. Lastly, change the battery. Then, put the light back into the handle and close the leather flap.
LikeLike