
One of the trickiest bits of a shinigami costume from the anime Bleach (aside from the hair) is the sandals. Unlike the quality uniforms that you can order online, the sandals that are available for purchase are pretty sub-par quality wise and don’t fit the feet of the wearer the way a custom made pair will. The good news is: they’re pretty cheap and easy to make once you get the hang of it.
I found a pretty good guide online for how to make the sandals here. However, I found the pictures to be a little unclear and some of the directions were incomplete such as how to actually do the weaving which resulted in quite a bit of trial and error.
So, I thought I’d present an updated guide for you to make use of. I hope you find it helpful!
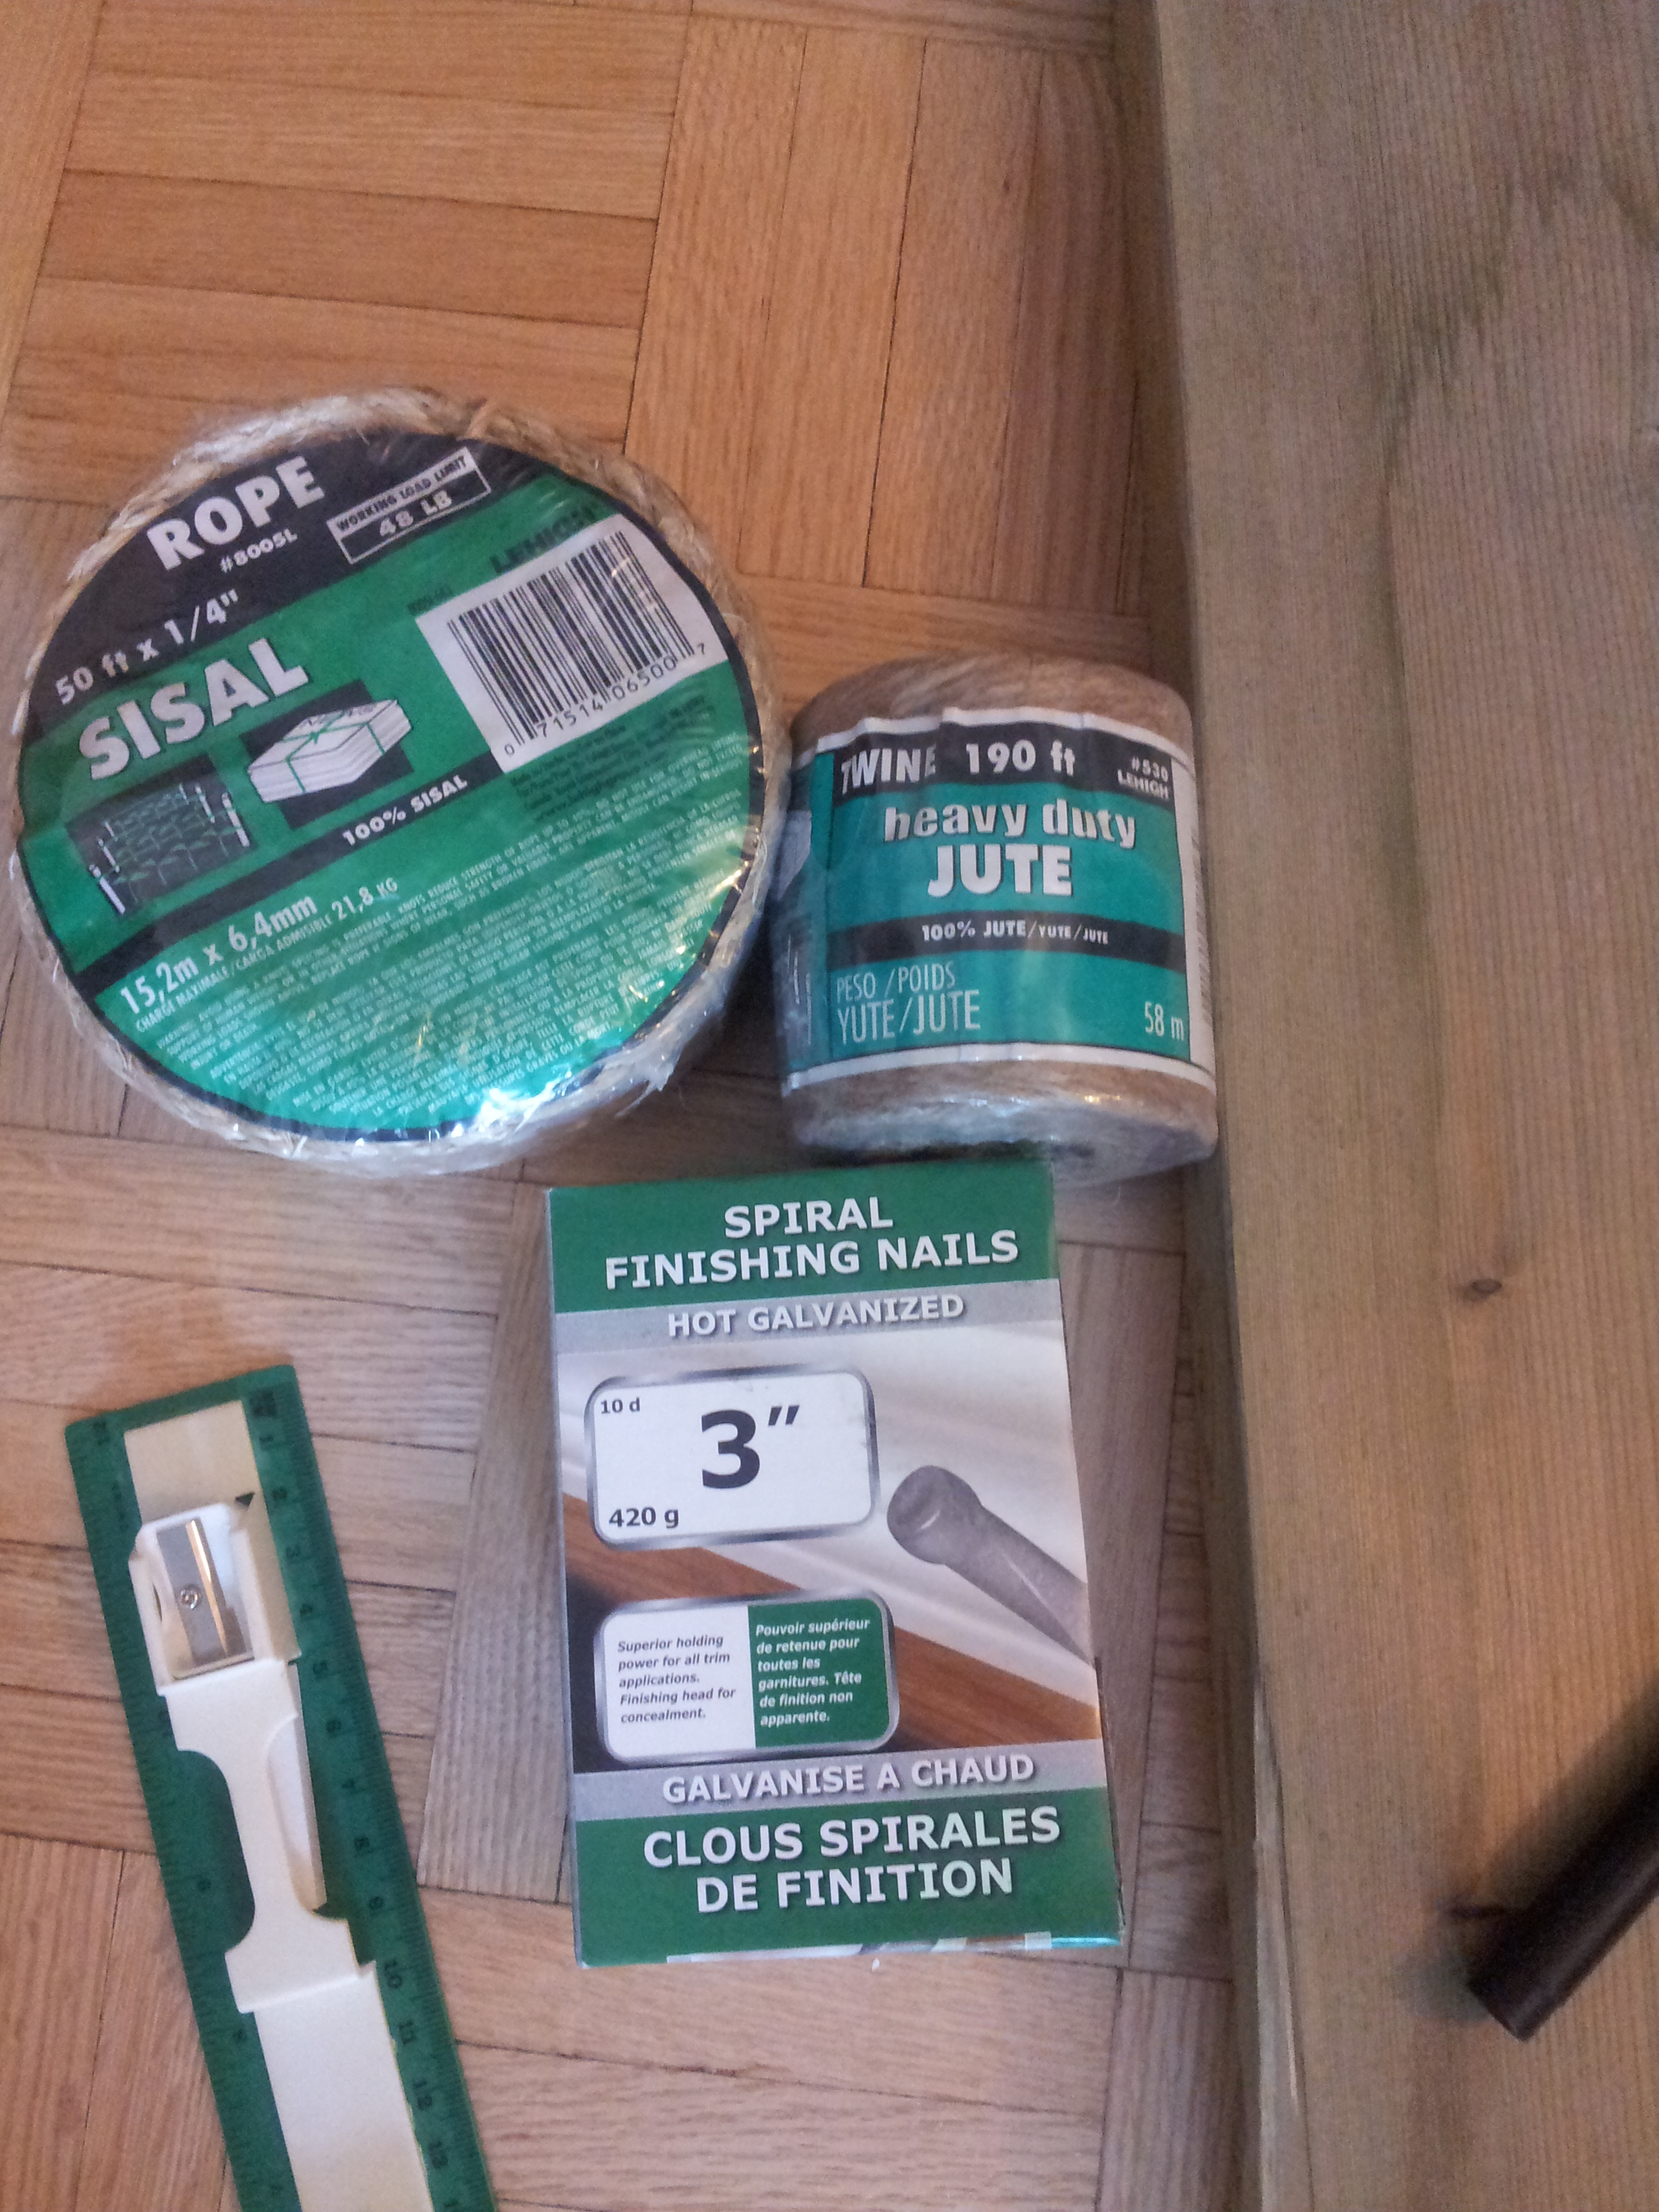
Here is the stuff you’ll need: A board that is thick enough to hammer 3″ nails into and long enough to trace your foot onto plus about 3″ extra on the heel, 3″ nails, 1/4″ thick sisal rope, and some heavy jute twine. It’s important to use jute as most other types of twine and rope will either not hold a good knot or will be too rough and scratchy on your feet.
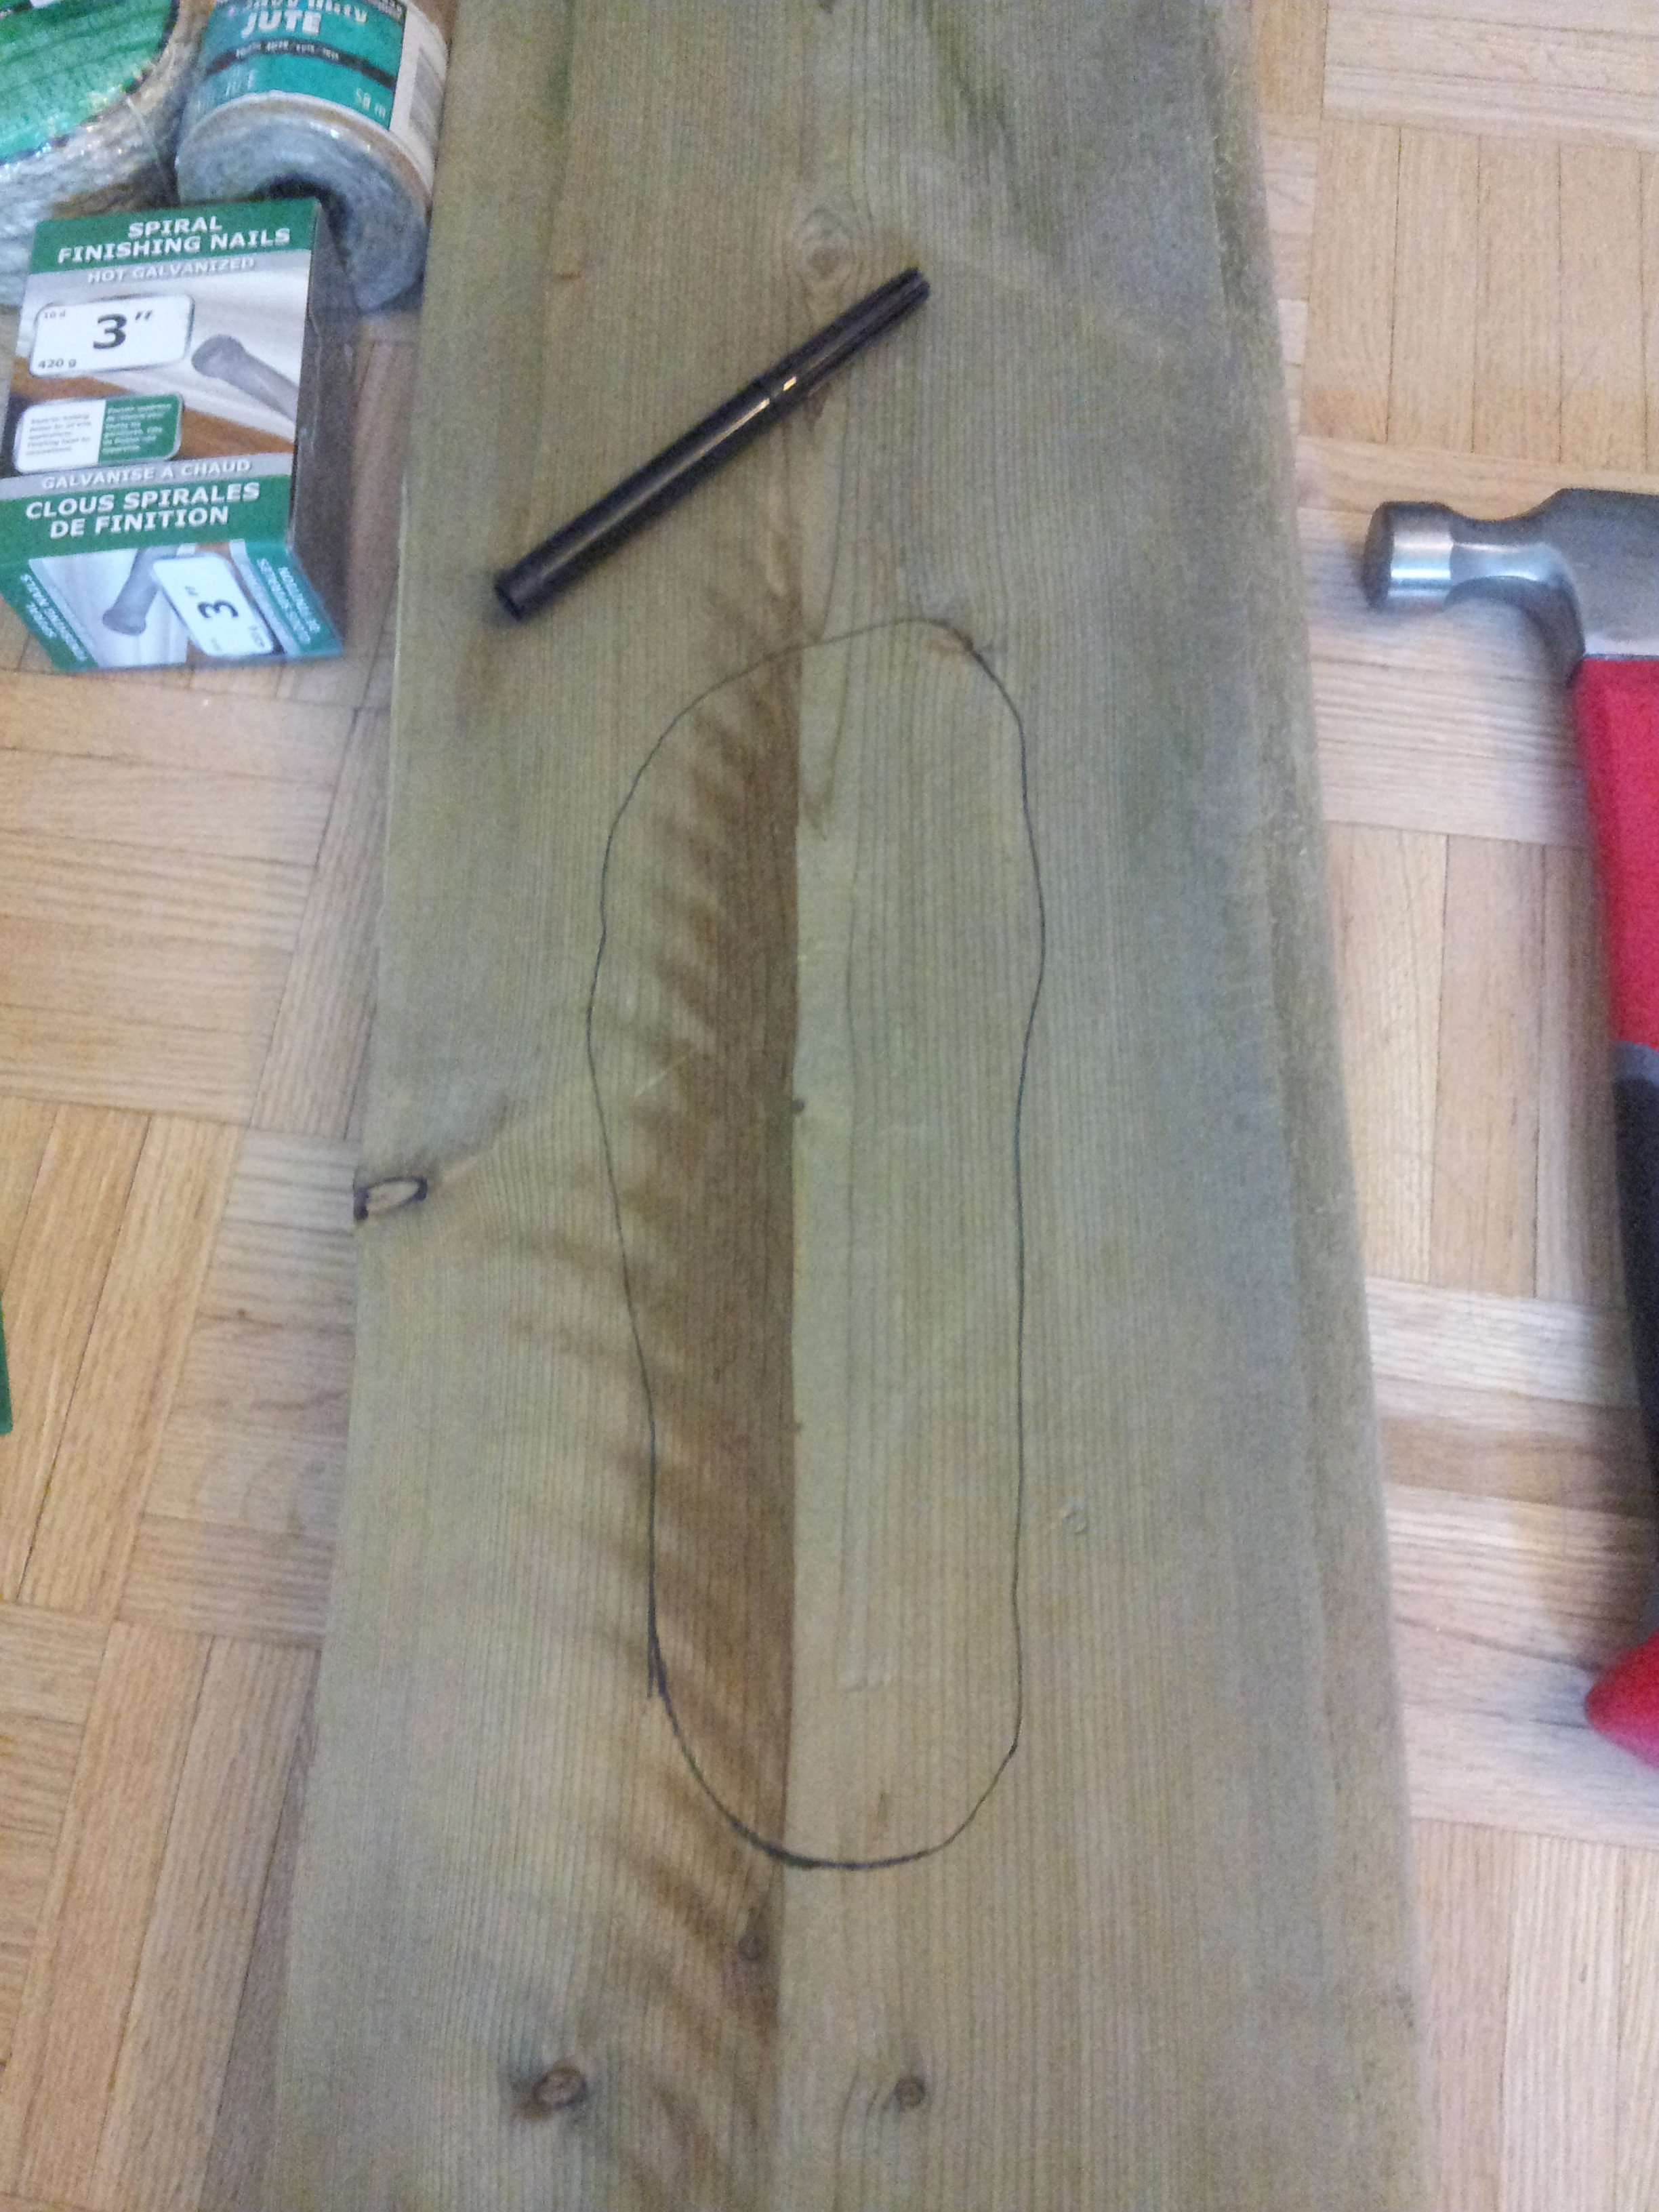
Trace your foot onto the board with lots of room behind your heel. It’s important to leave this space because the sandal does not stop at your heel. It goes all the way up the back of your foot to the ankle. Also, do not curve the line inward with the arch of your foot. Keep the line straight right to the heel.
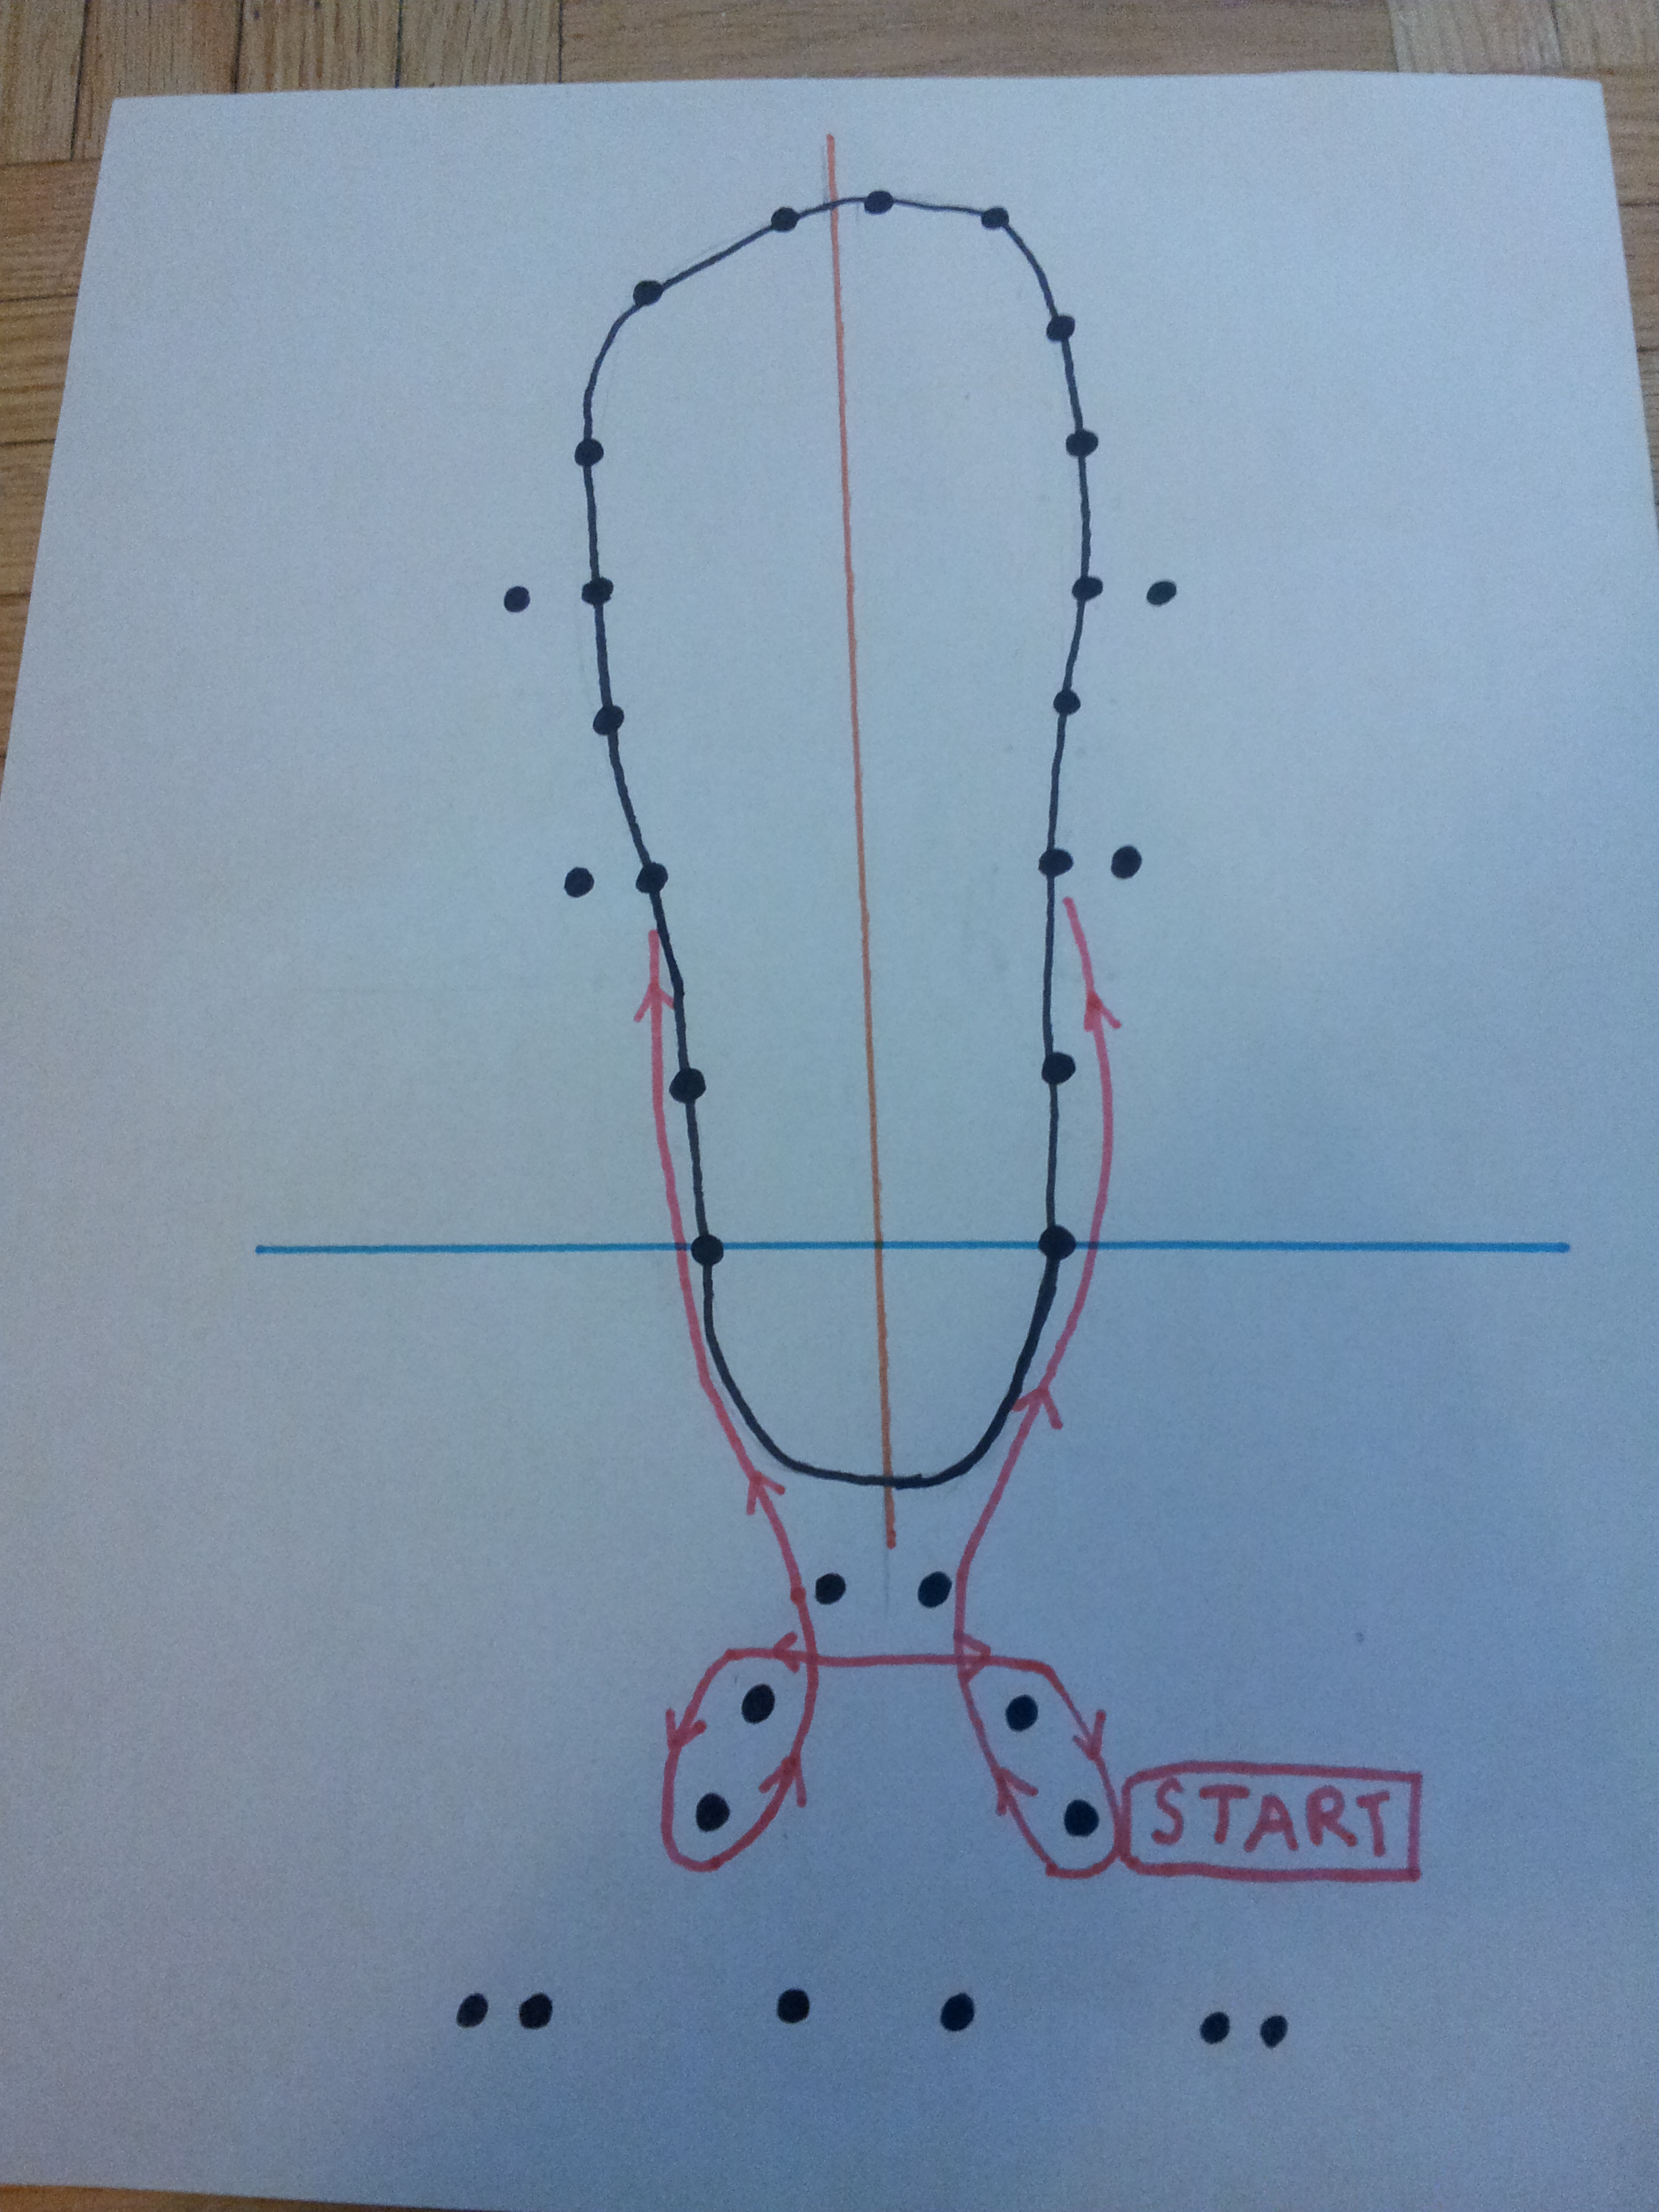
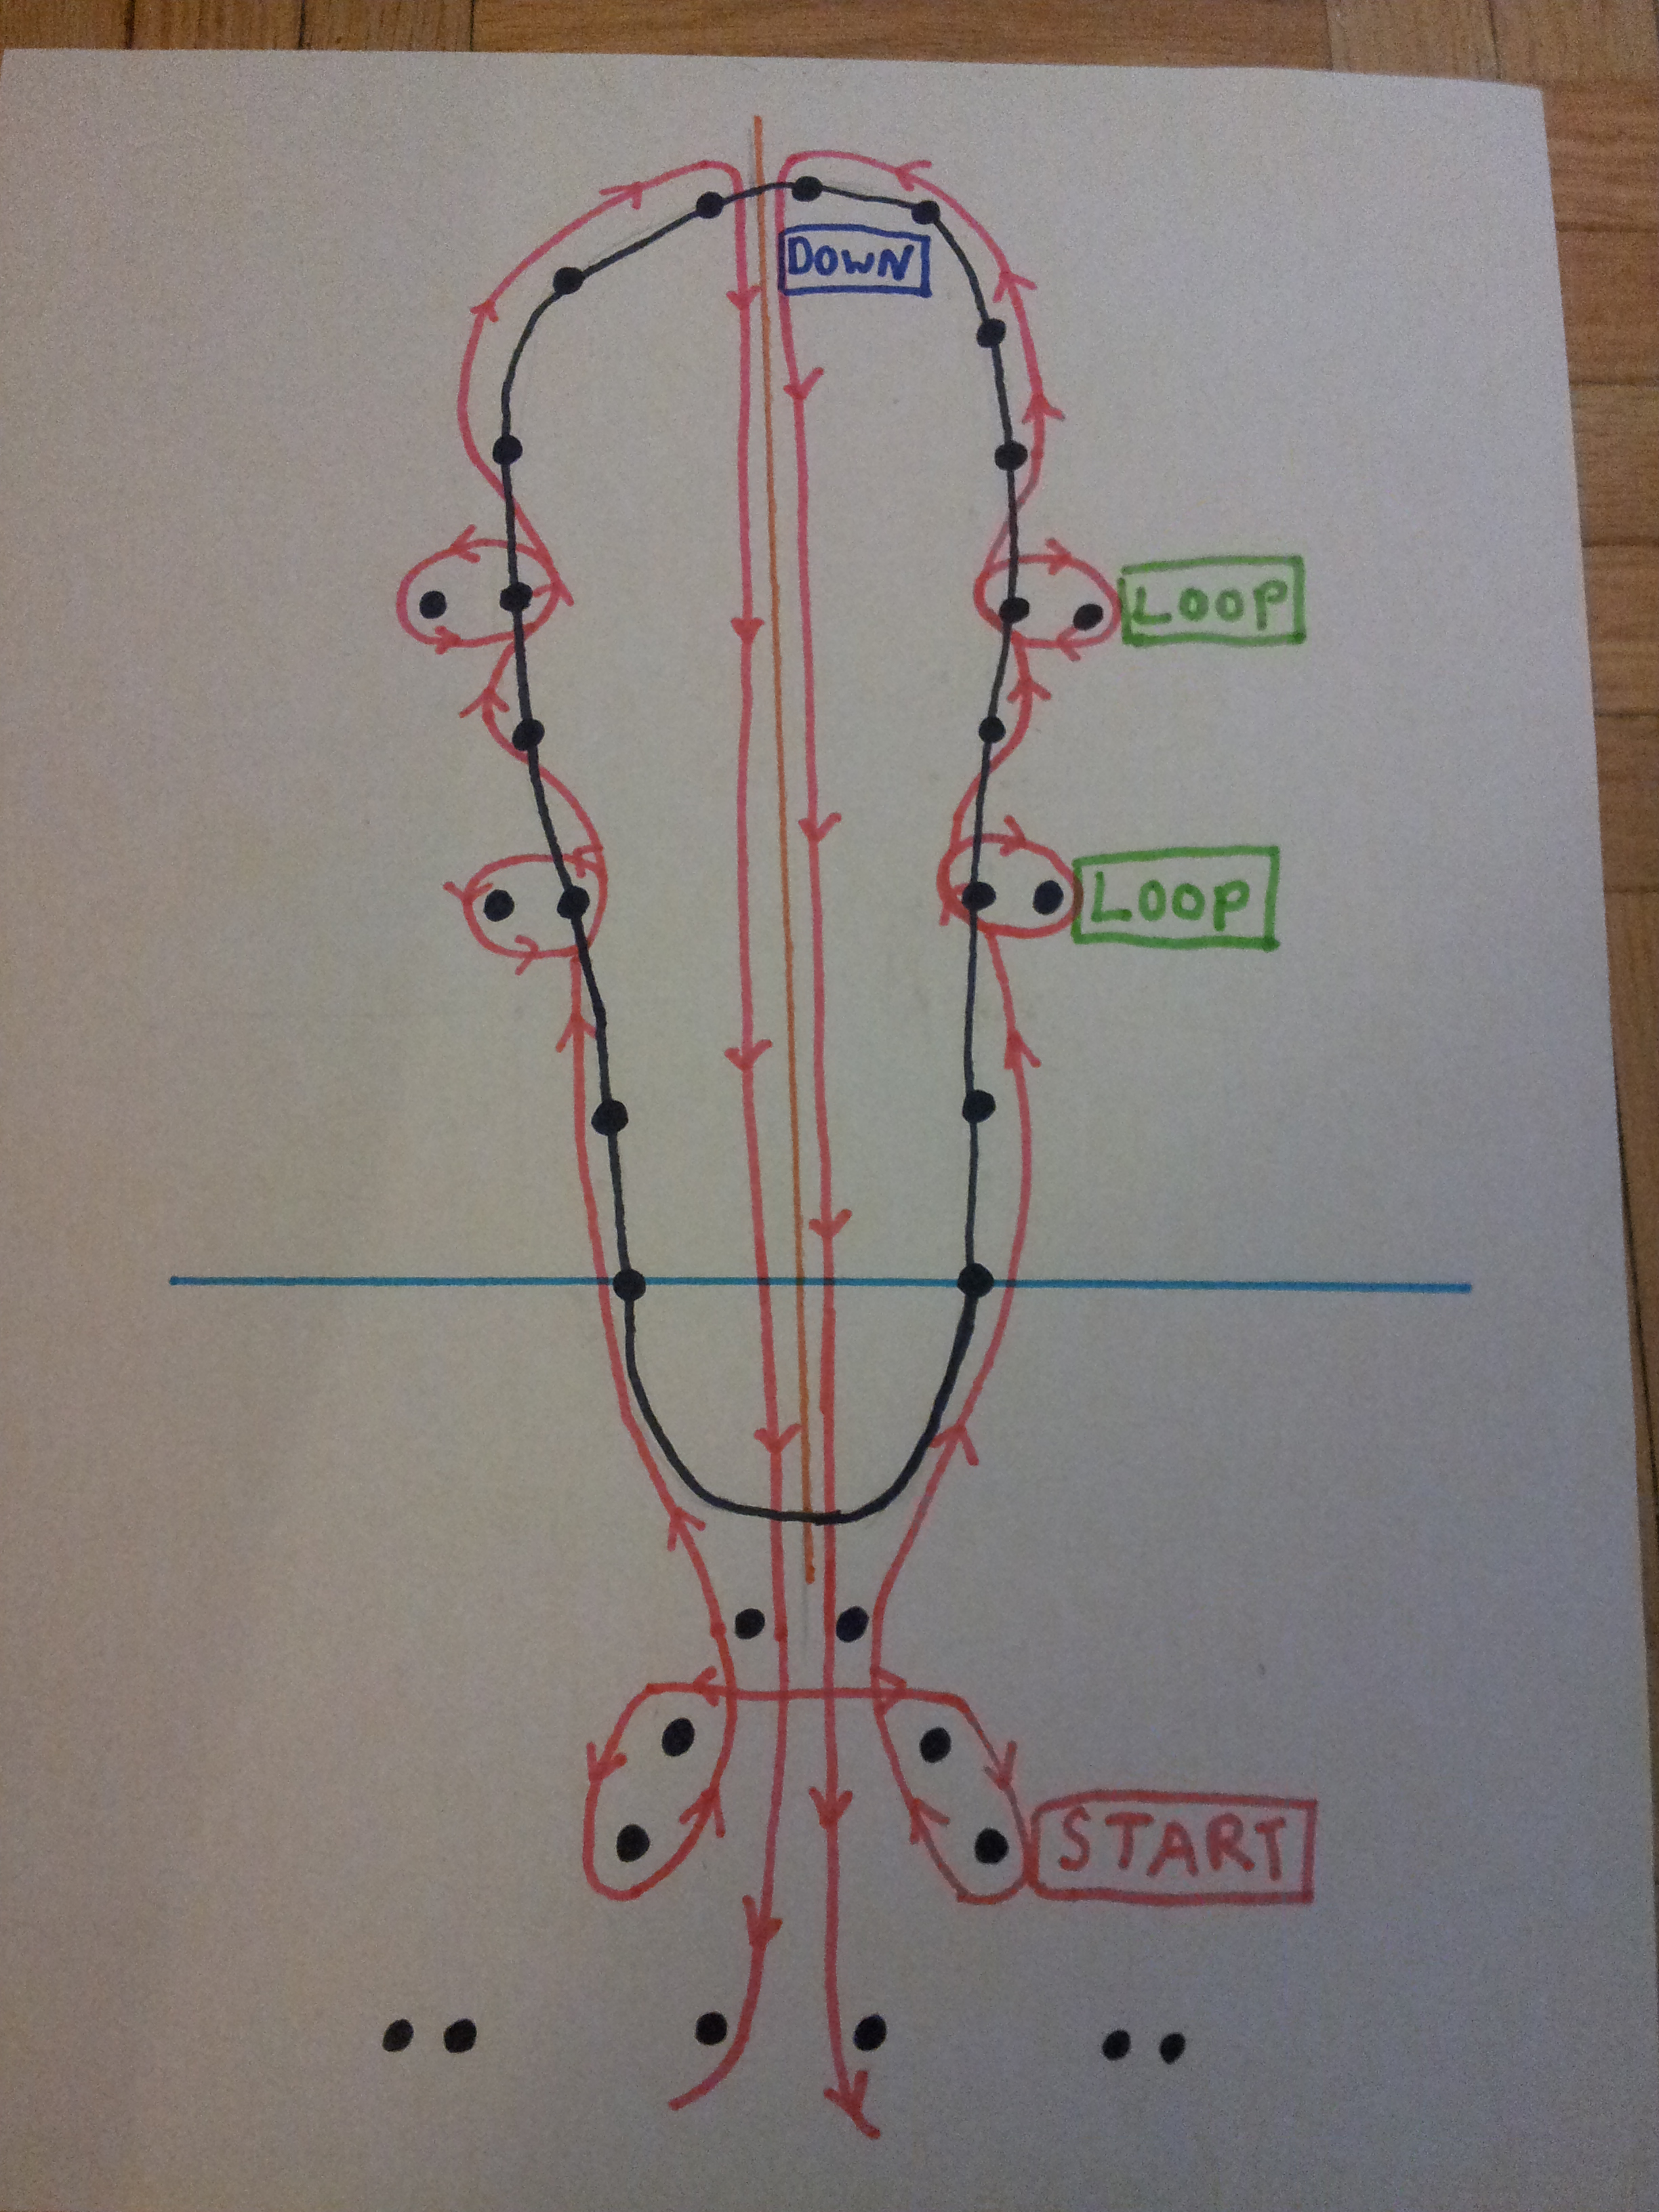
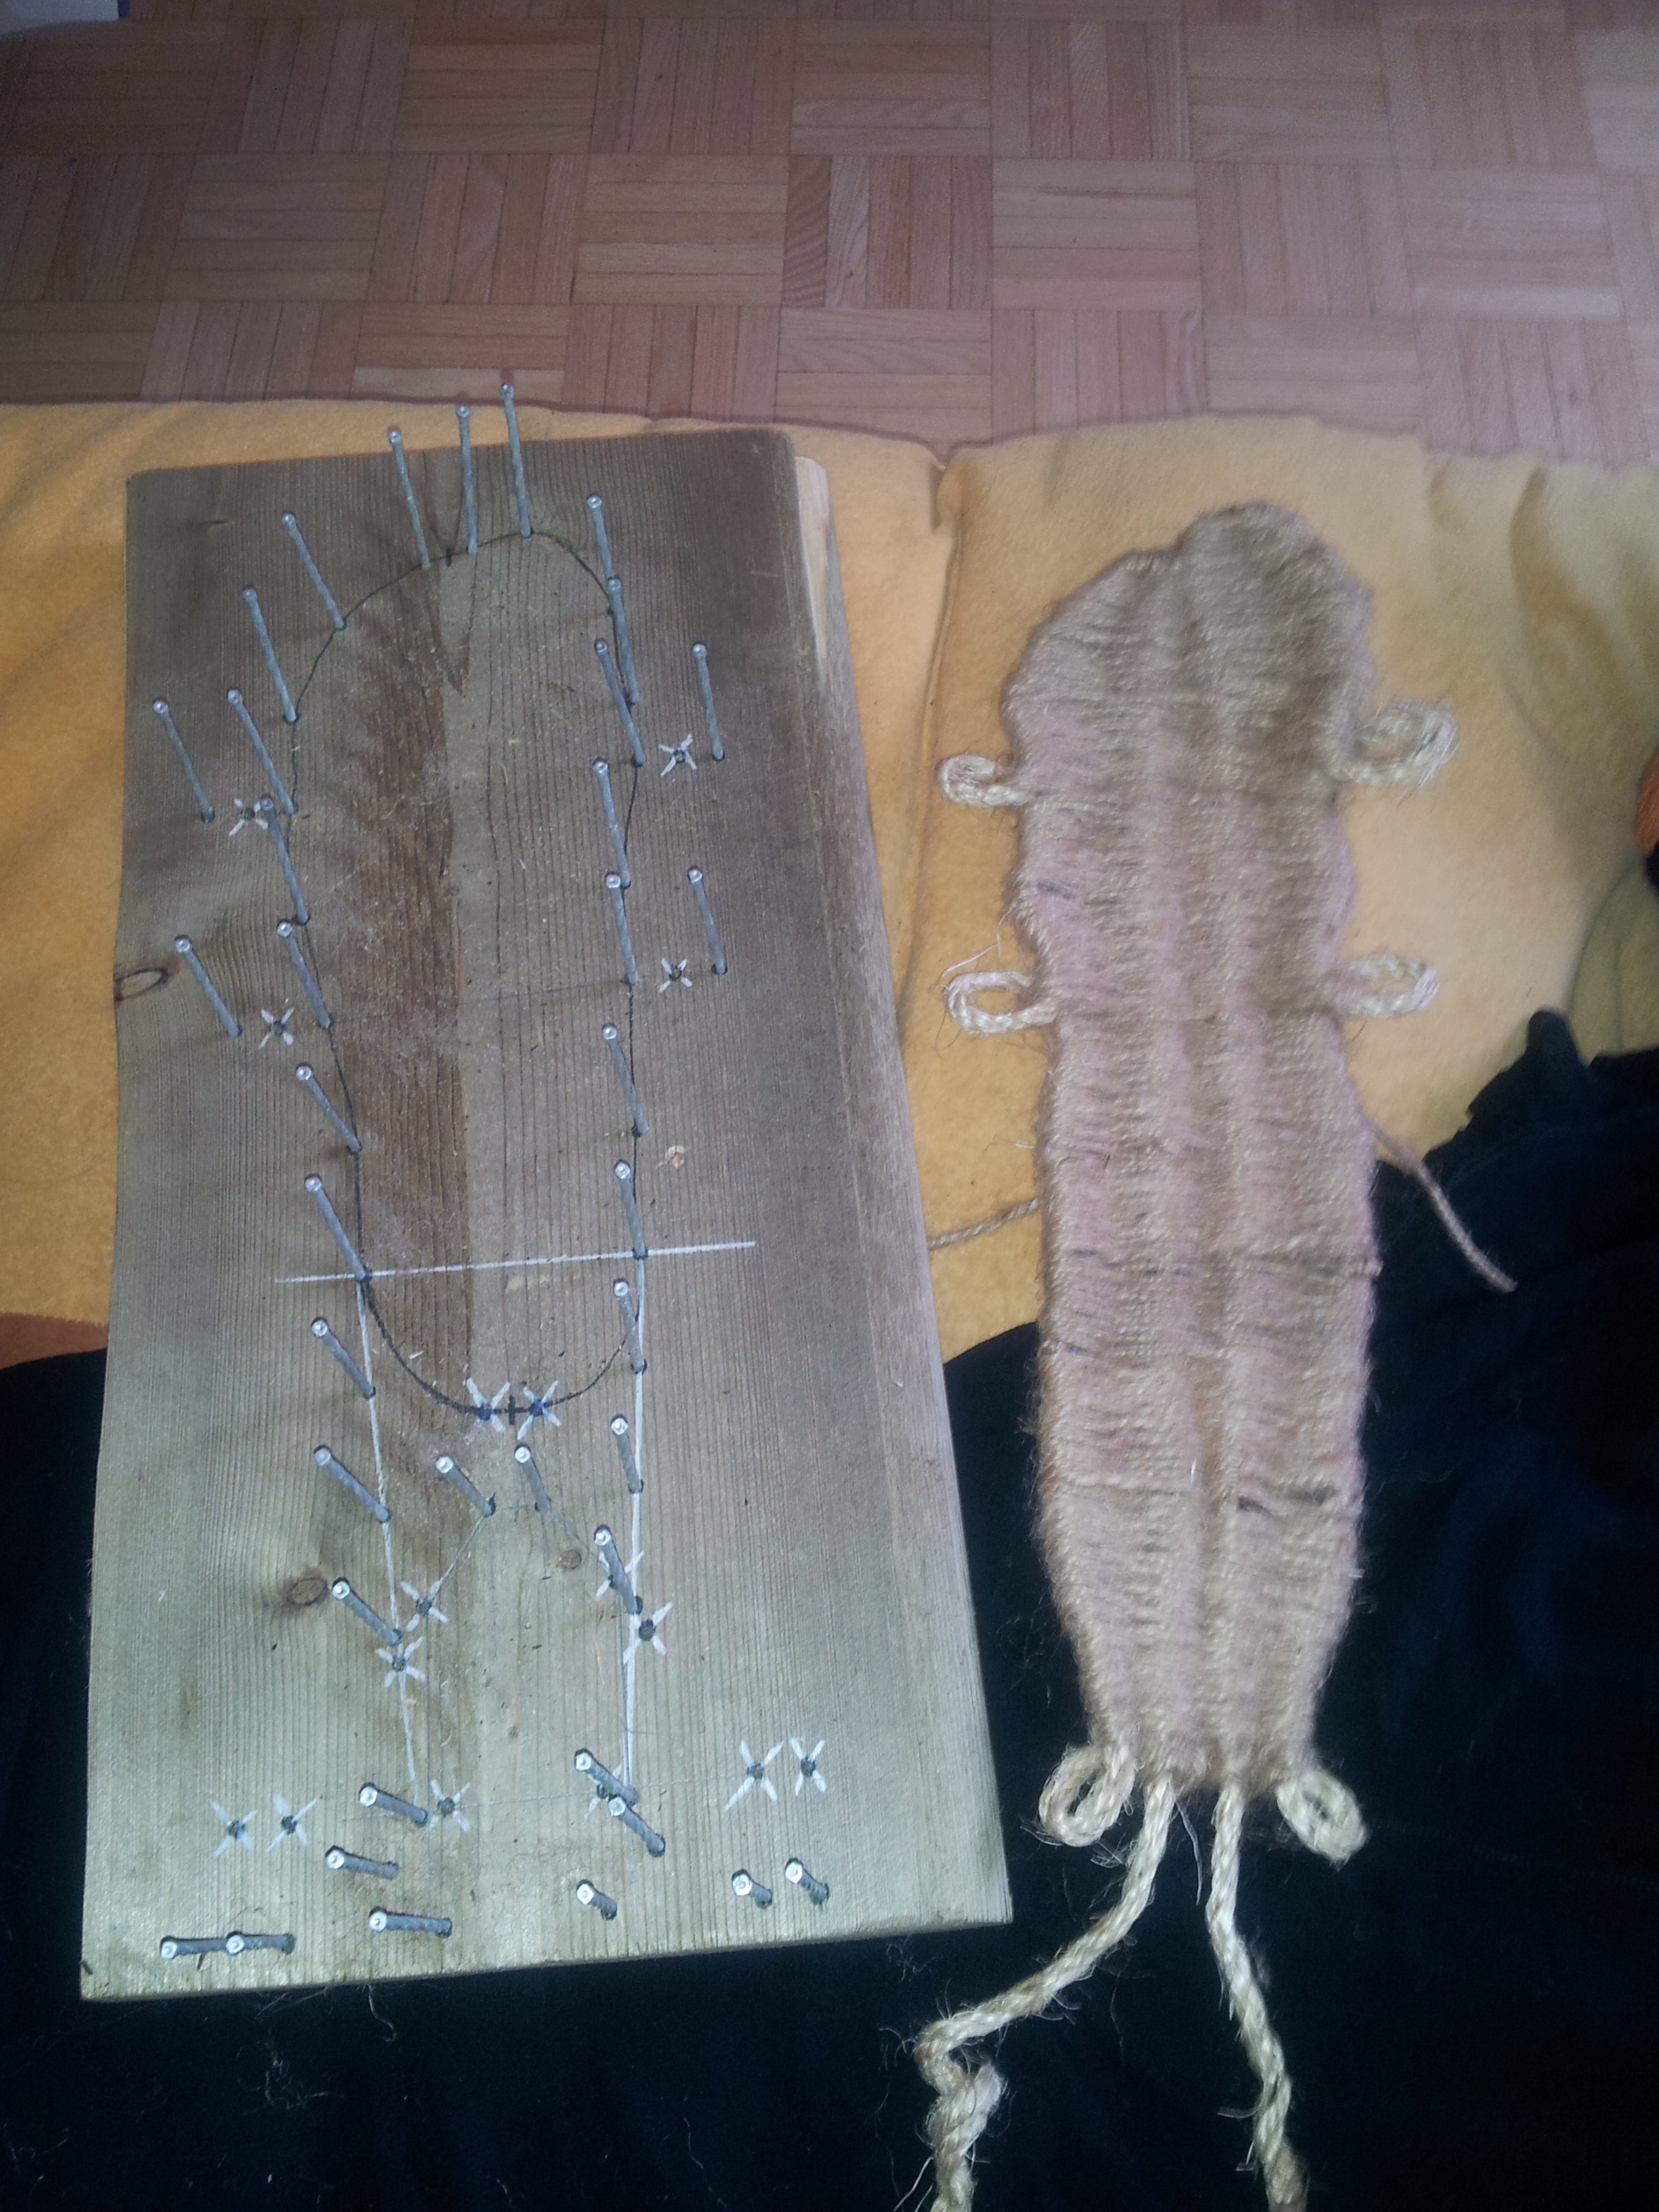
Now it’s time to put in the nails! Here is the basic pattern for making your loom:

The orange line is roughly the middle of your foot. The blue line is where you will be switching the direction of your weave. Don’t worry about it until later. I initially had the paired nails you can see coming off the sides a half inch apart but I find it’s better if it’s a full inch. You get a bigger loop to pass the sandal strap through at the end.
Here is where the “custom made” part comes in. Some of us have bigger feet than others. My wife, for whom I made these sandals, takes after her mother’s side of the family and was blessed with a very long foot. If you have a larger foot, you will need to add more nails around the edge of your foot outline. I recommend no more than 1″ between nails, otherwise the rope will pull inward as you weave the twine and you’ll have a lumpy-looking sandal. You may need to pull out or add more nails. Be patient and play with it a little bit. It’s worth it.
Here is how you set up the rope frame. Cut 10′ of sisal rope and make sure to keep the it very tight.
Find the middle of your rope and make a frowny face downward over the nails at the heel and loop the ends around those two paired nails. Those loops will be where you tie the sandal at your ankle when all is said and done. Pull the rope up on either side of the foot passing on the outside of the nails as you go.
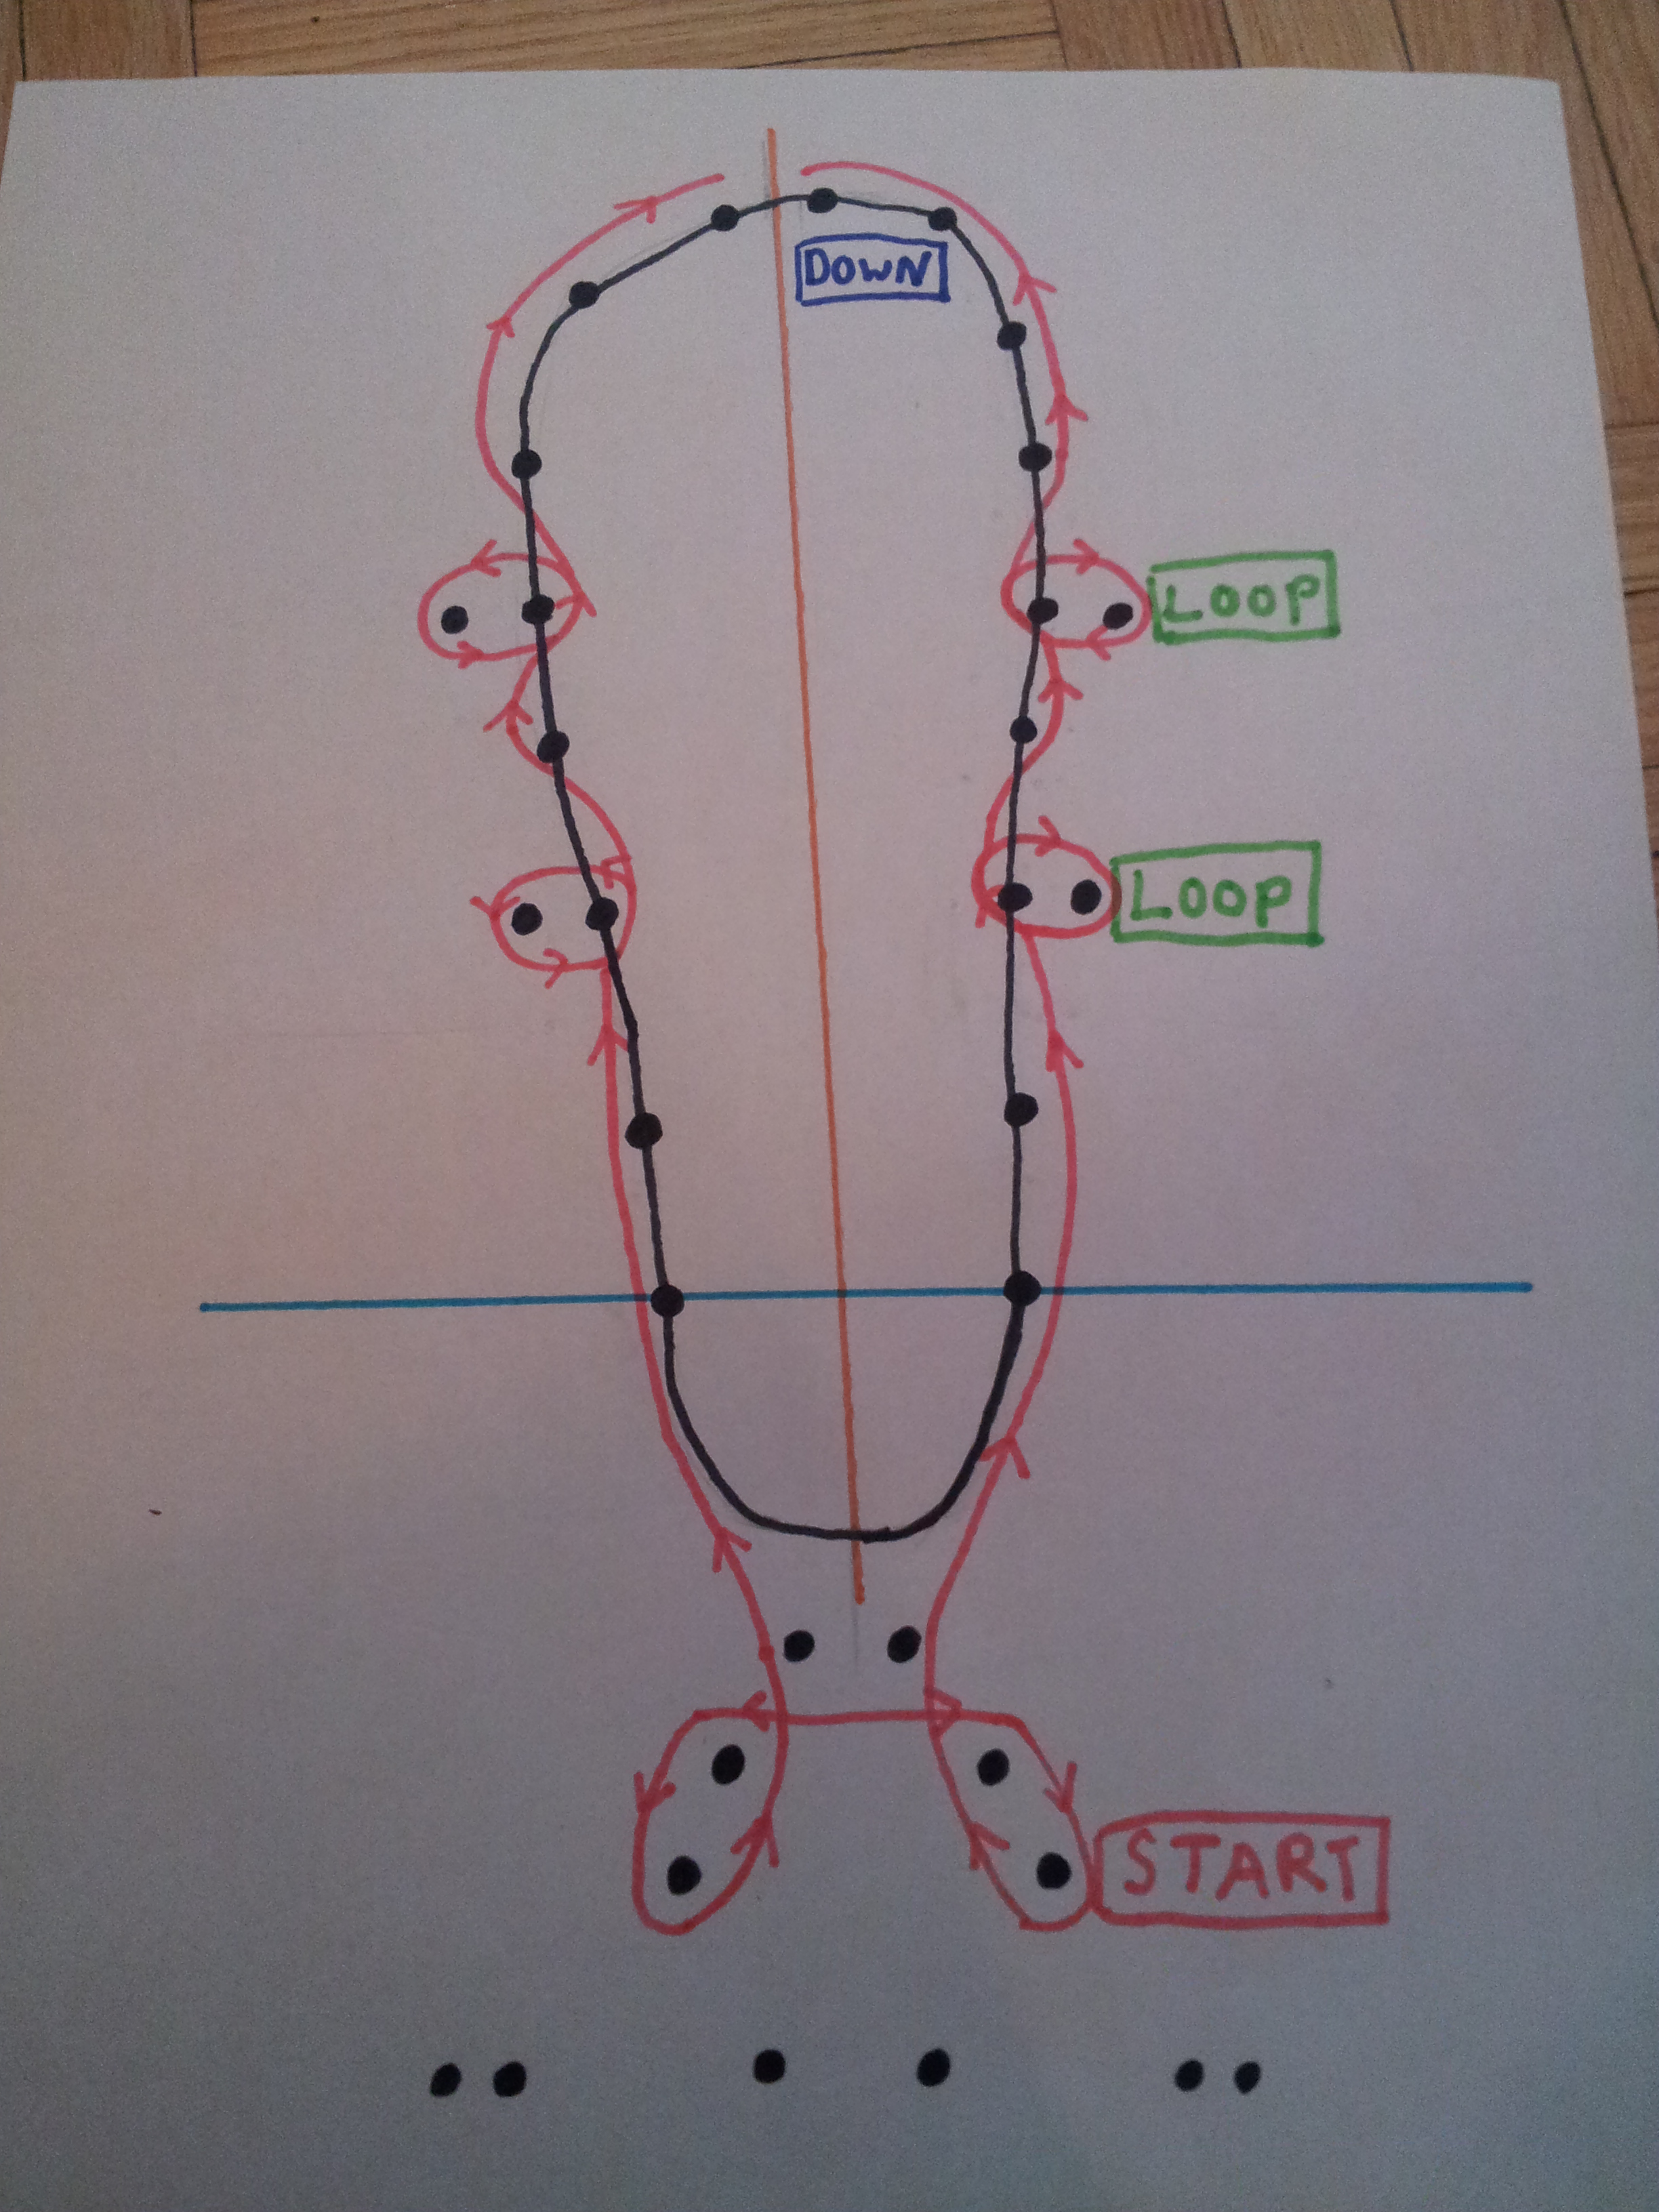
When you reach the next paired nails, pass on the inside of them and loop the rope around like you did at the heel. Remember to keep the rope tight. I’ve drawn it loose here so you can see how it goes around the nails but you want it nice and snug.
Pull the rope down between those two central nails at the toe, right down the centre of the foot, and between the corresponding two nails down near the heel. These will be the two strands in the middle you will weave around later.
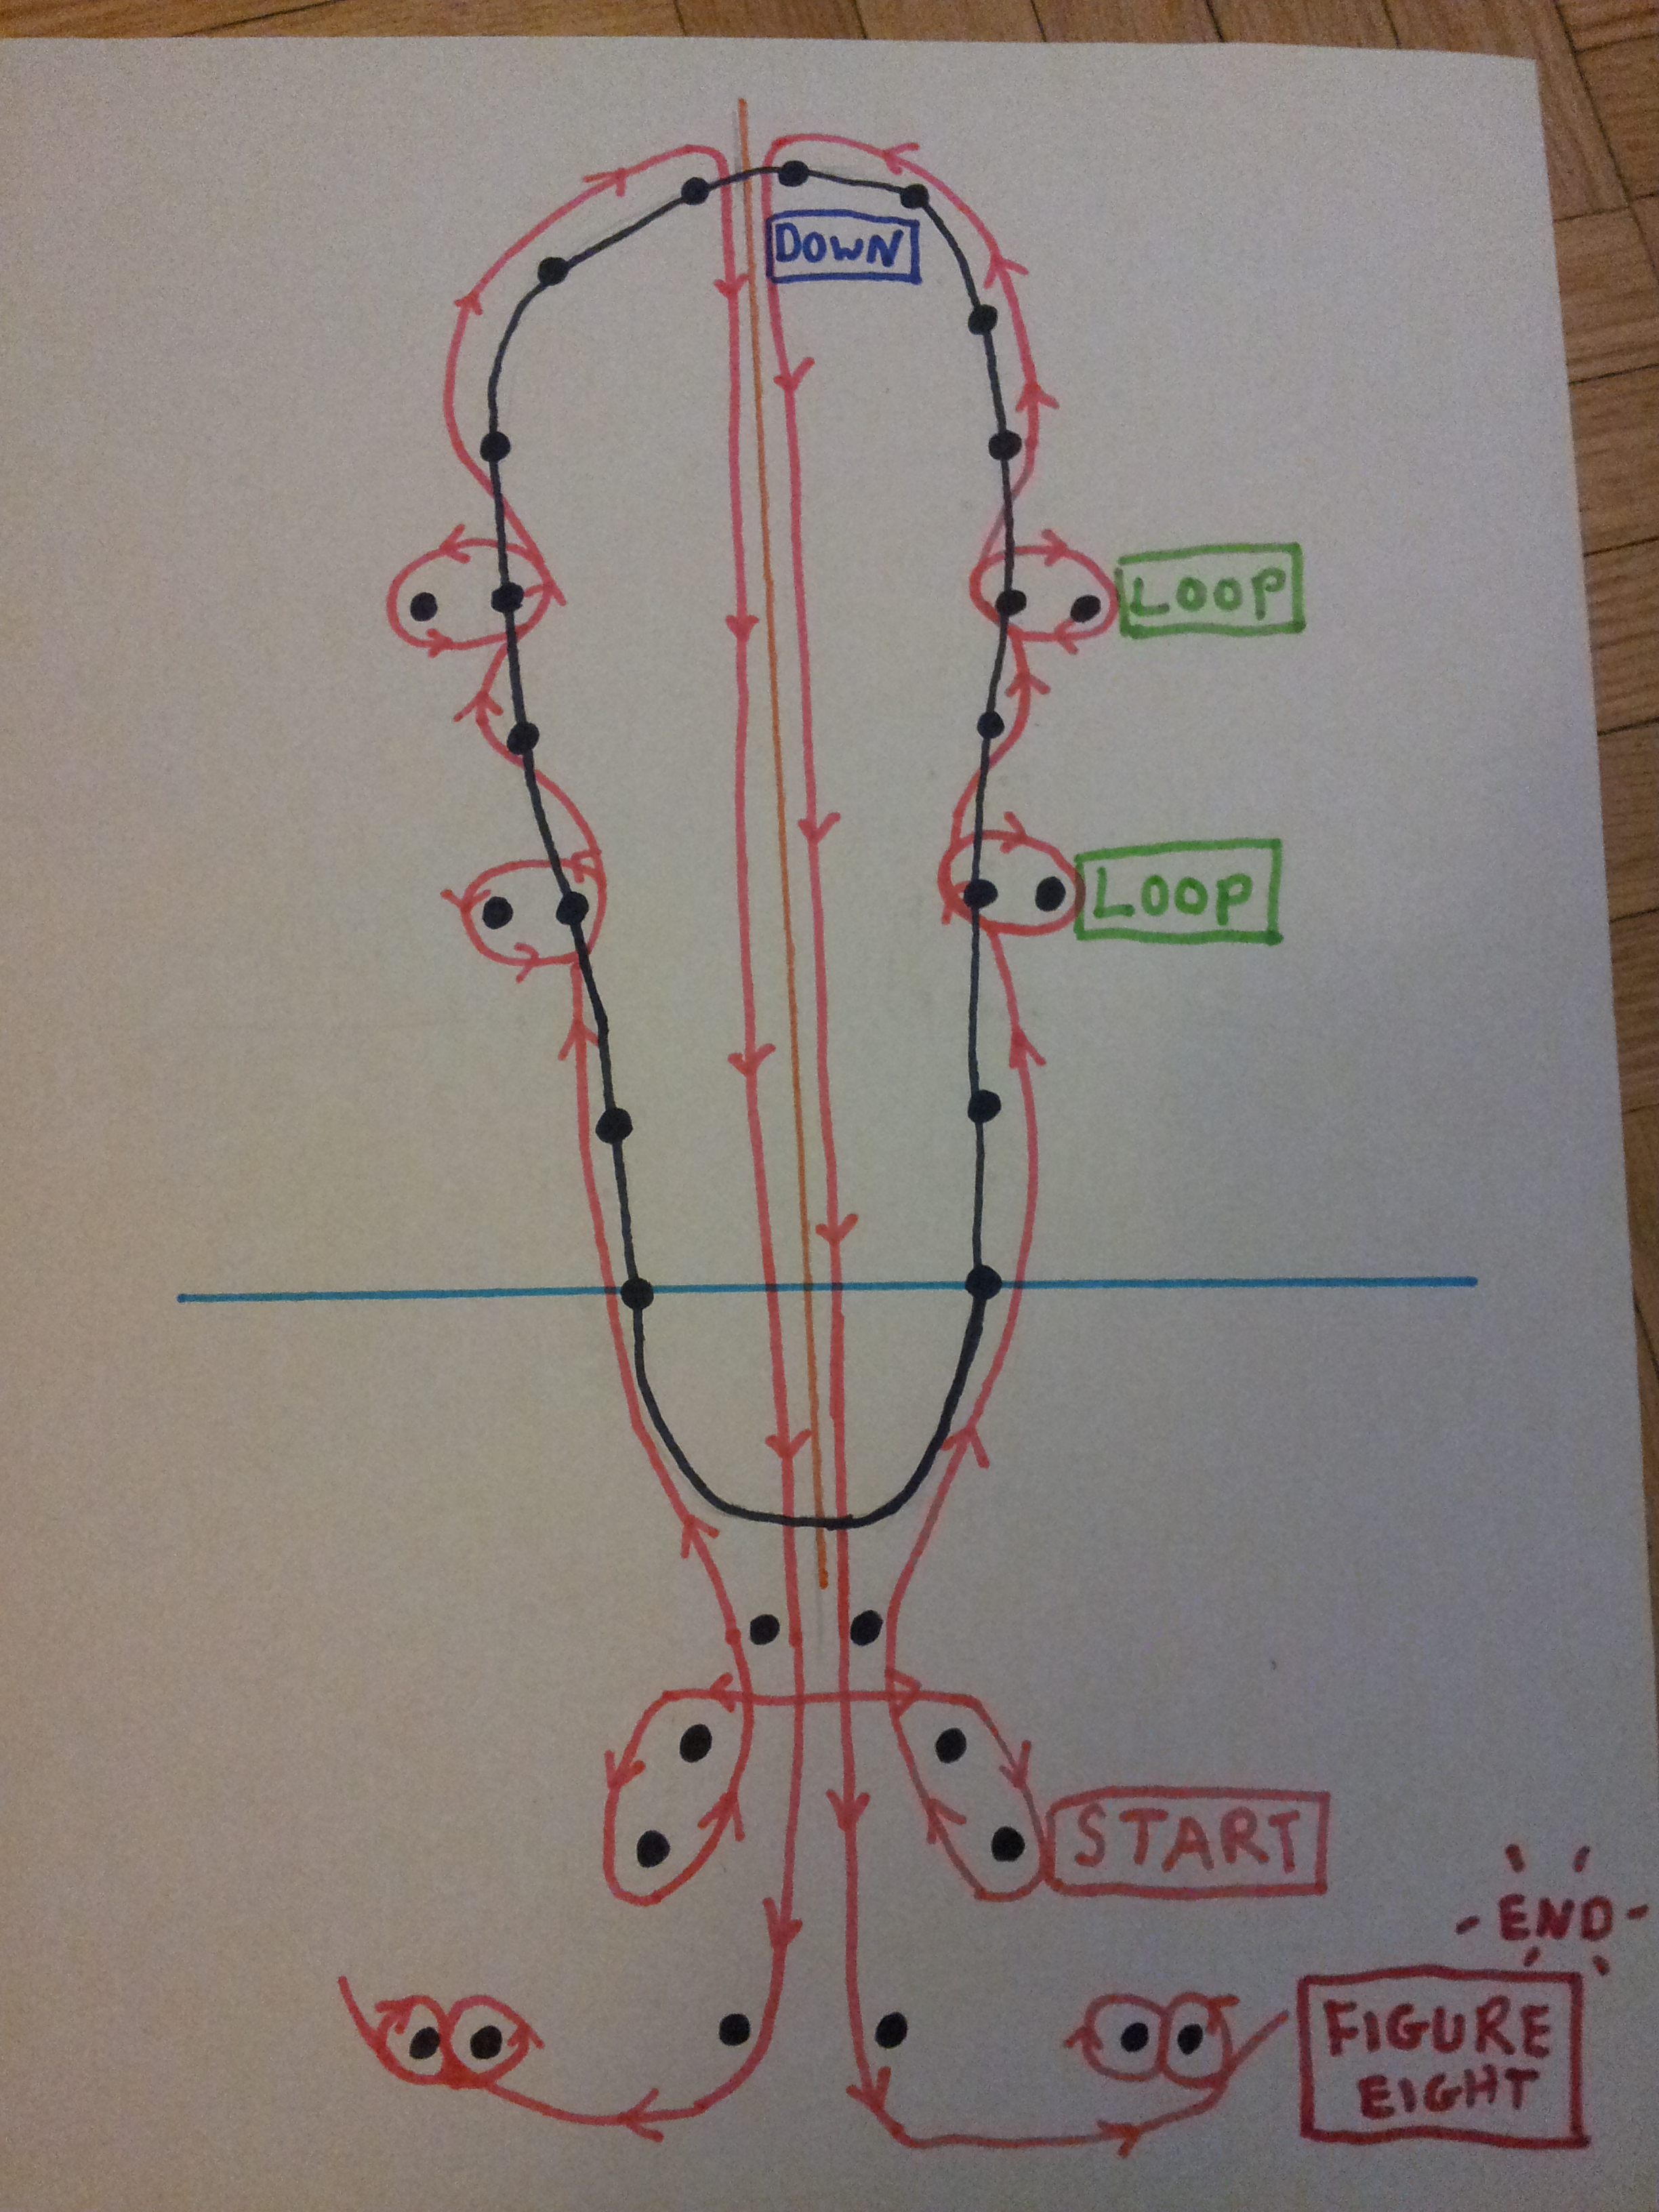
Now, we tighten off the rope at the ends but we don’t want to tie it in case we need to adjust the tension later. So we make figure eights around those last two paired nails down at the bottom.
Here’s what the rope frame will look like:
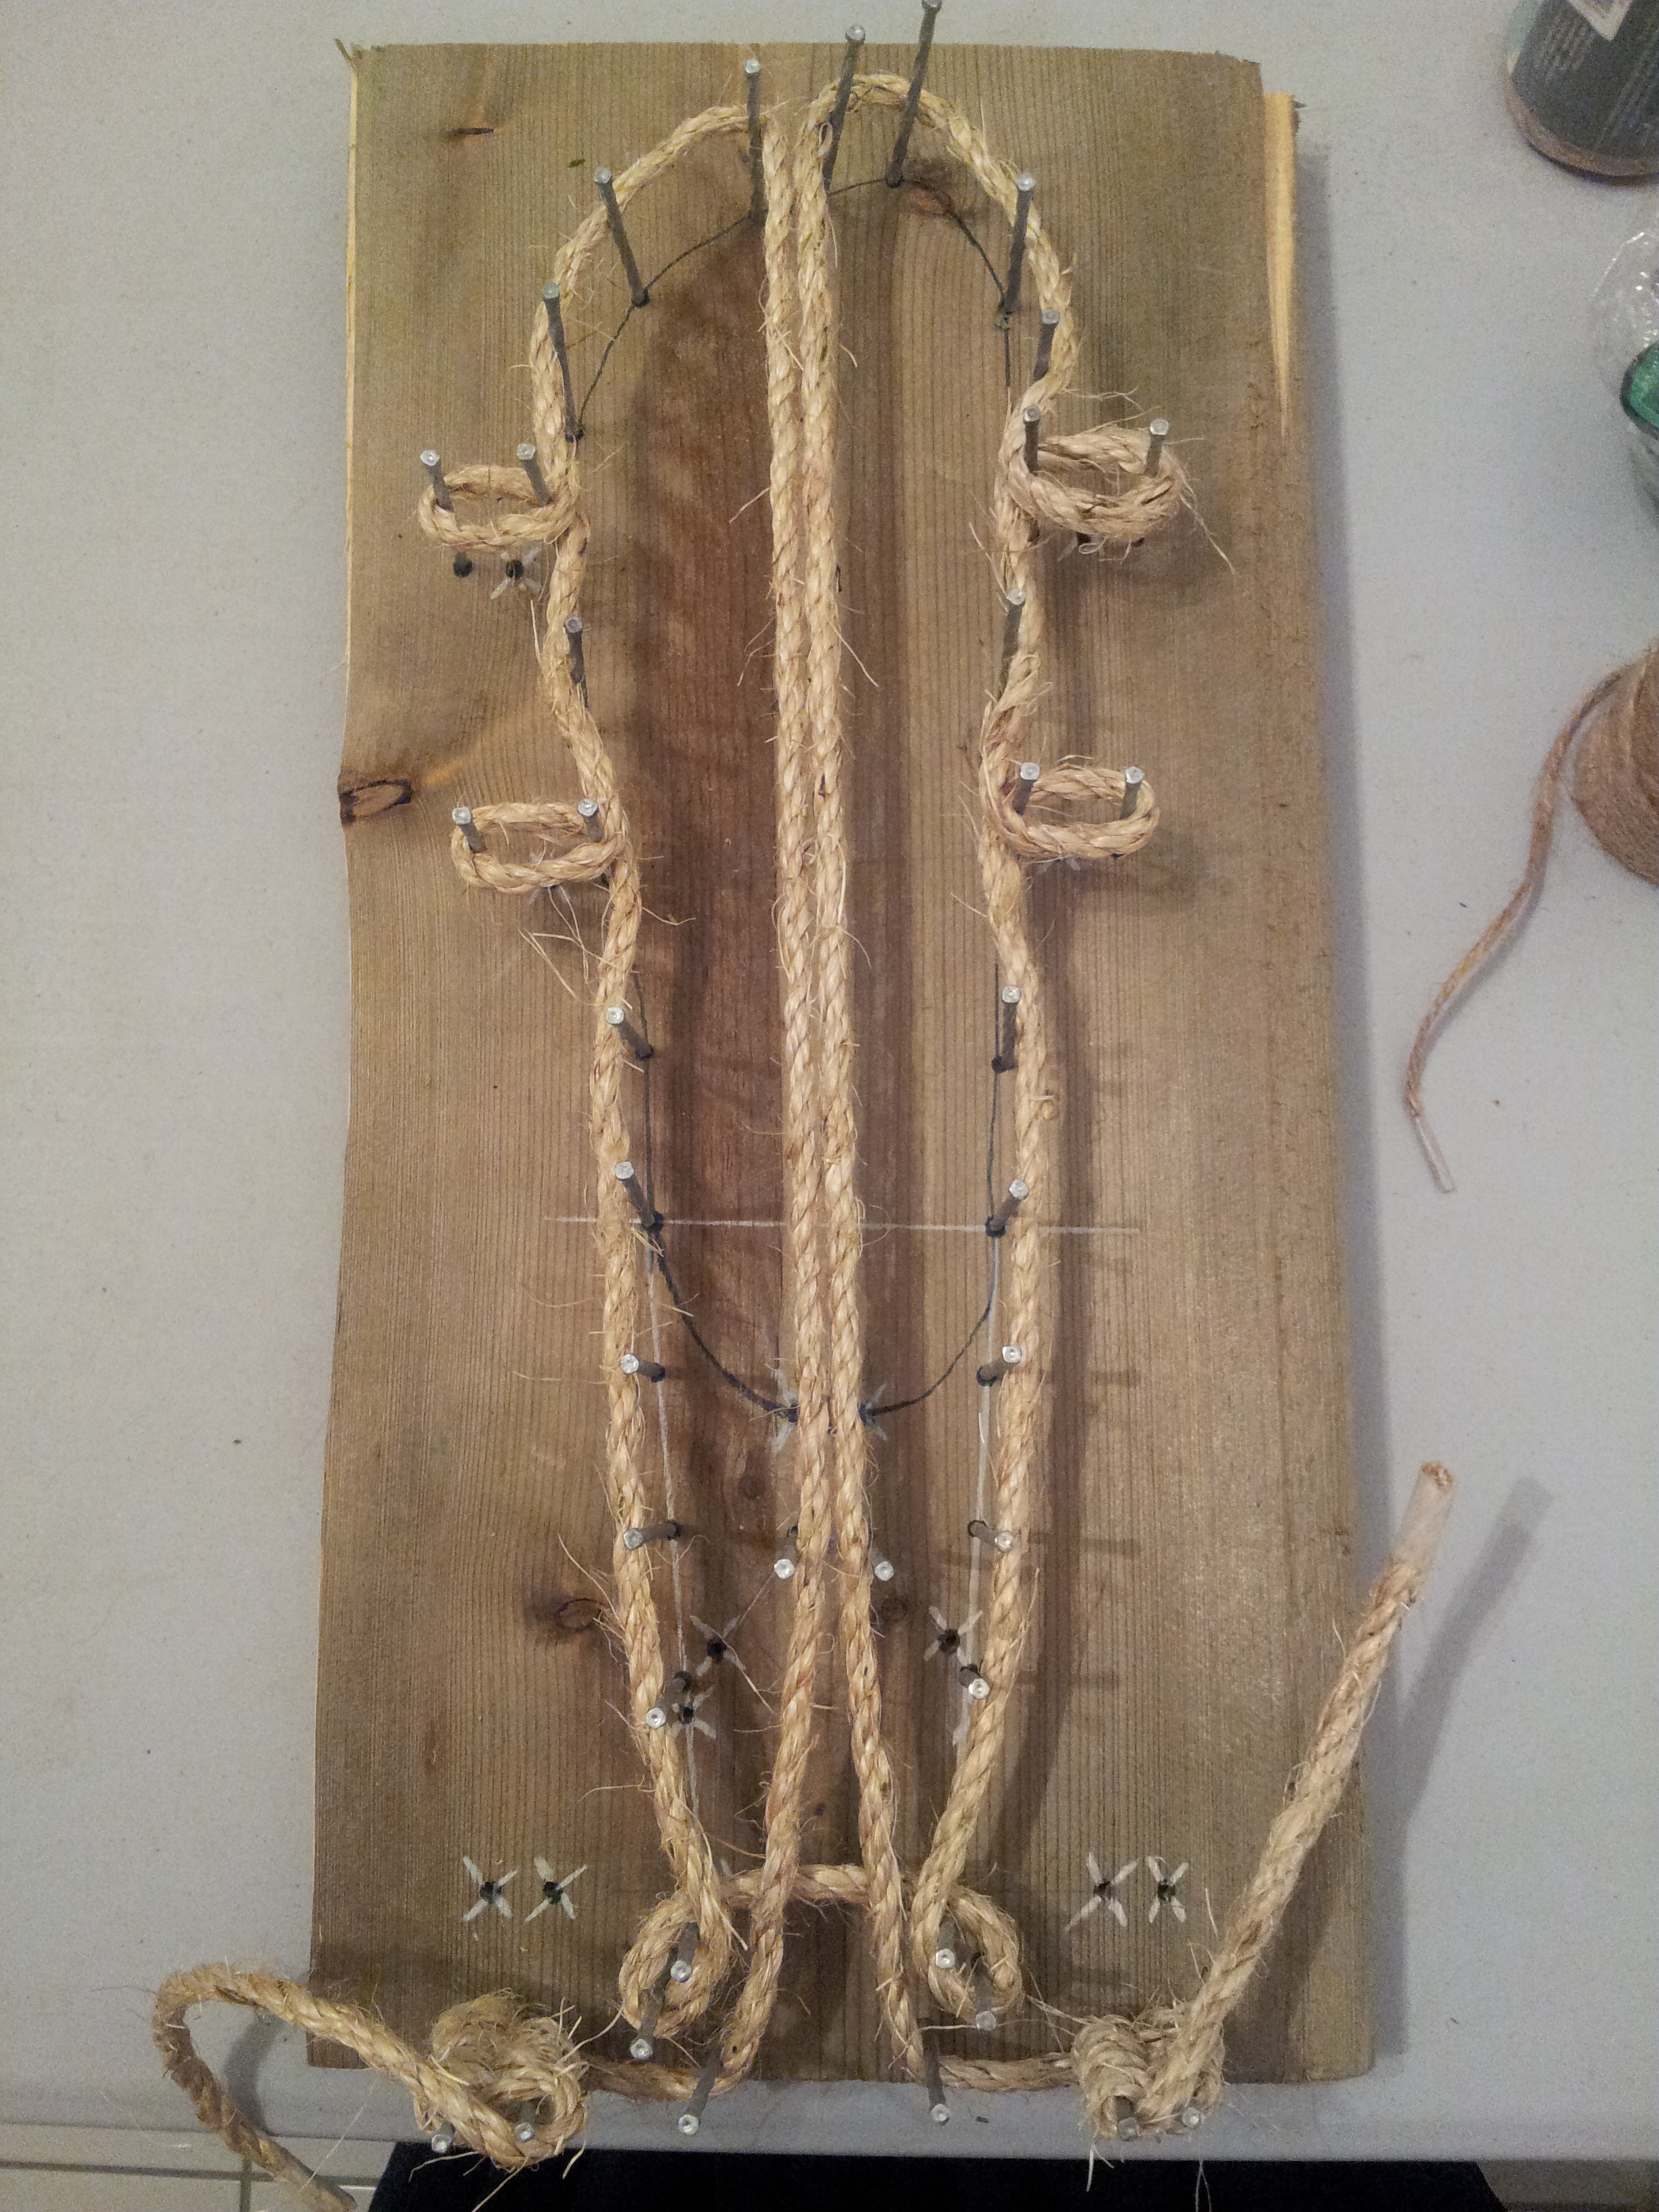
You can see by the empty nail-holes marked off in white that I did some tinkering with my loom to get it just right. You will know if you don’t have enough nails in your loom if it looks like this:

See how the rope fails to cover the whole shape of the foot? Those strands are way too long to be hanging out by themselves. More nails are needed to support the lines!
Now we begin weaving. Cut several lengths of jute twine into 12′ long strands. Anything longer is really unmanageable. Wrap some scotch tape around the end of the twine so you can have a flexible “needle” to pass in and out of the rope frame. This will really save you from having to contort your fingers when the weaving gets tight.
Tie your twine to the tallest part of the frame. As different people have differently shaped feet, this might be the big toe, or it might be the second toe depending on which is longer. In the case of my wife, it’s her big toe.

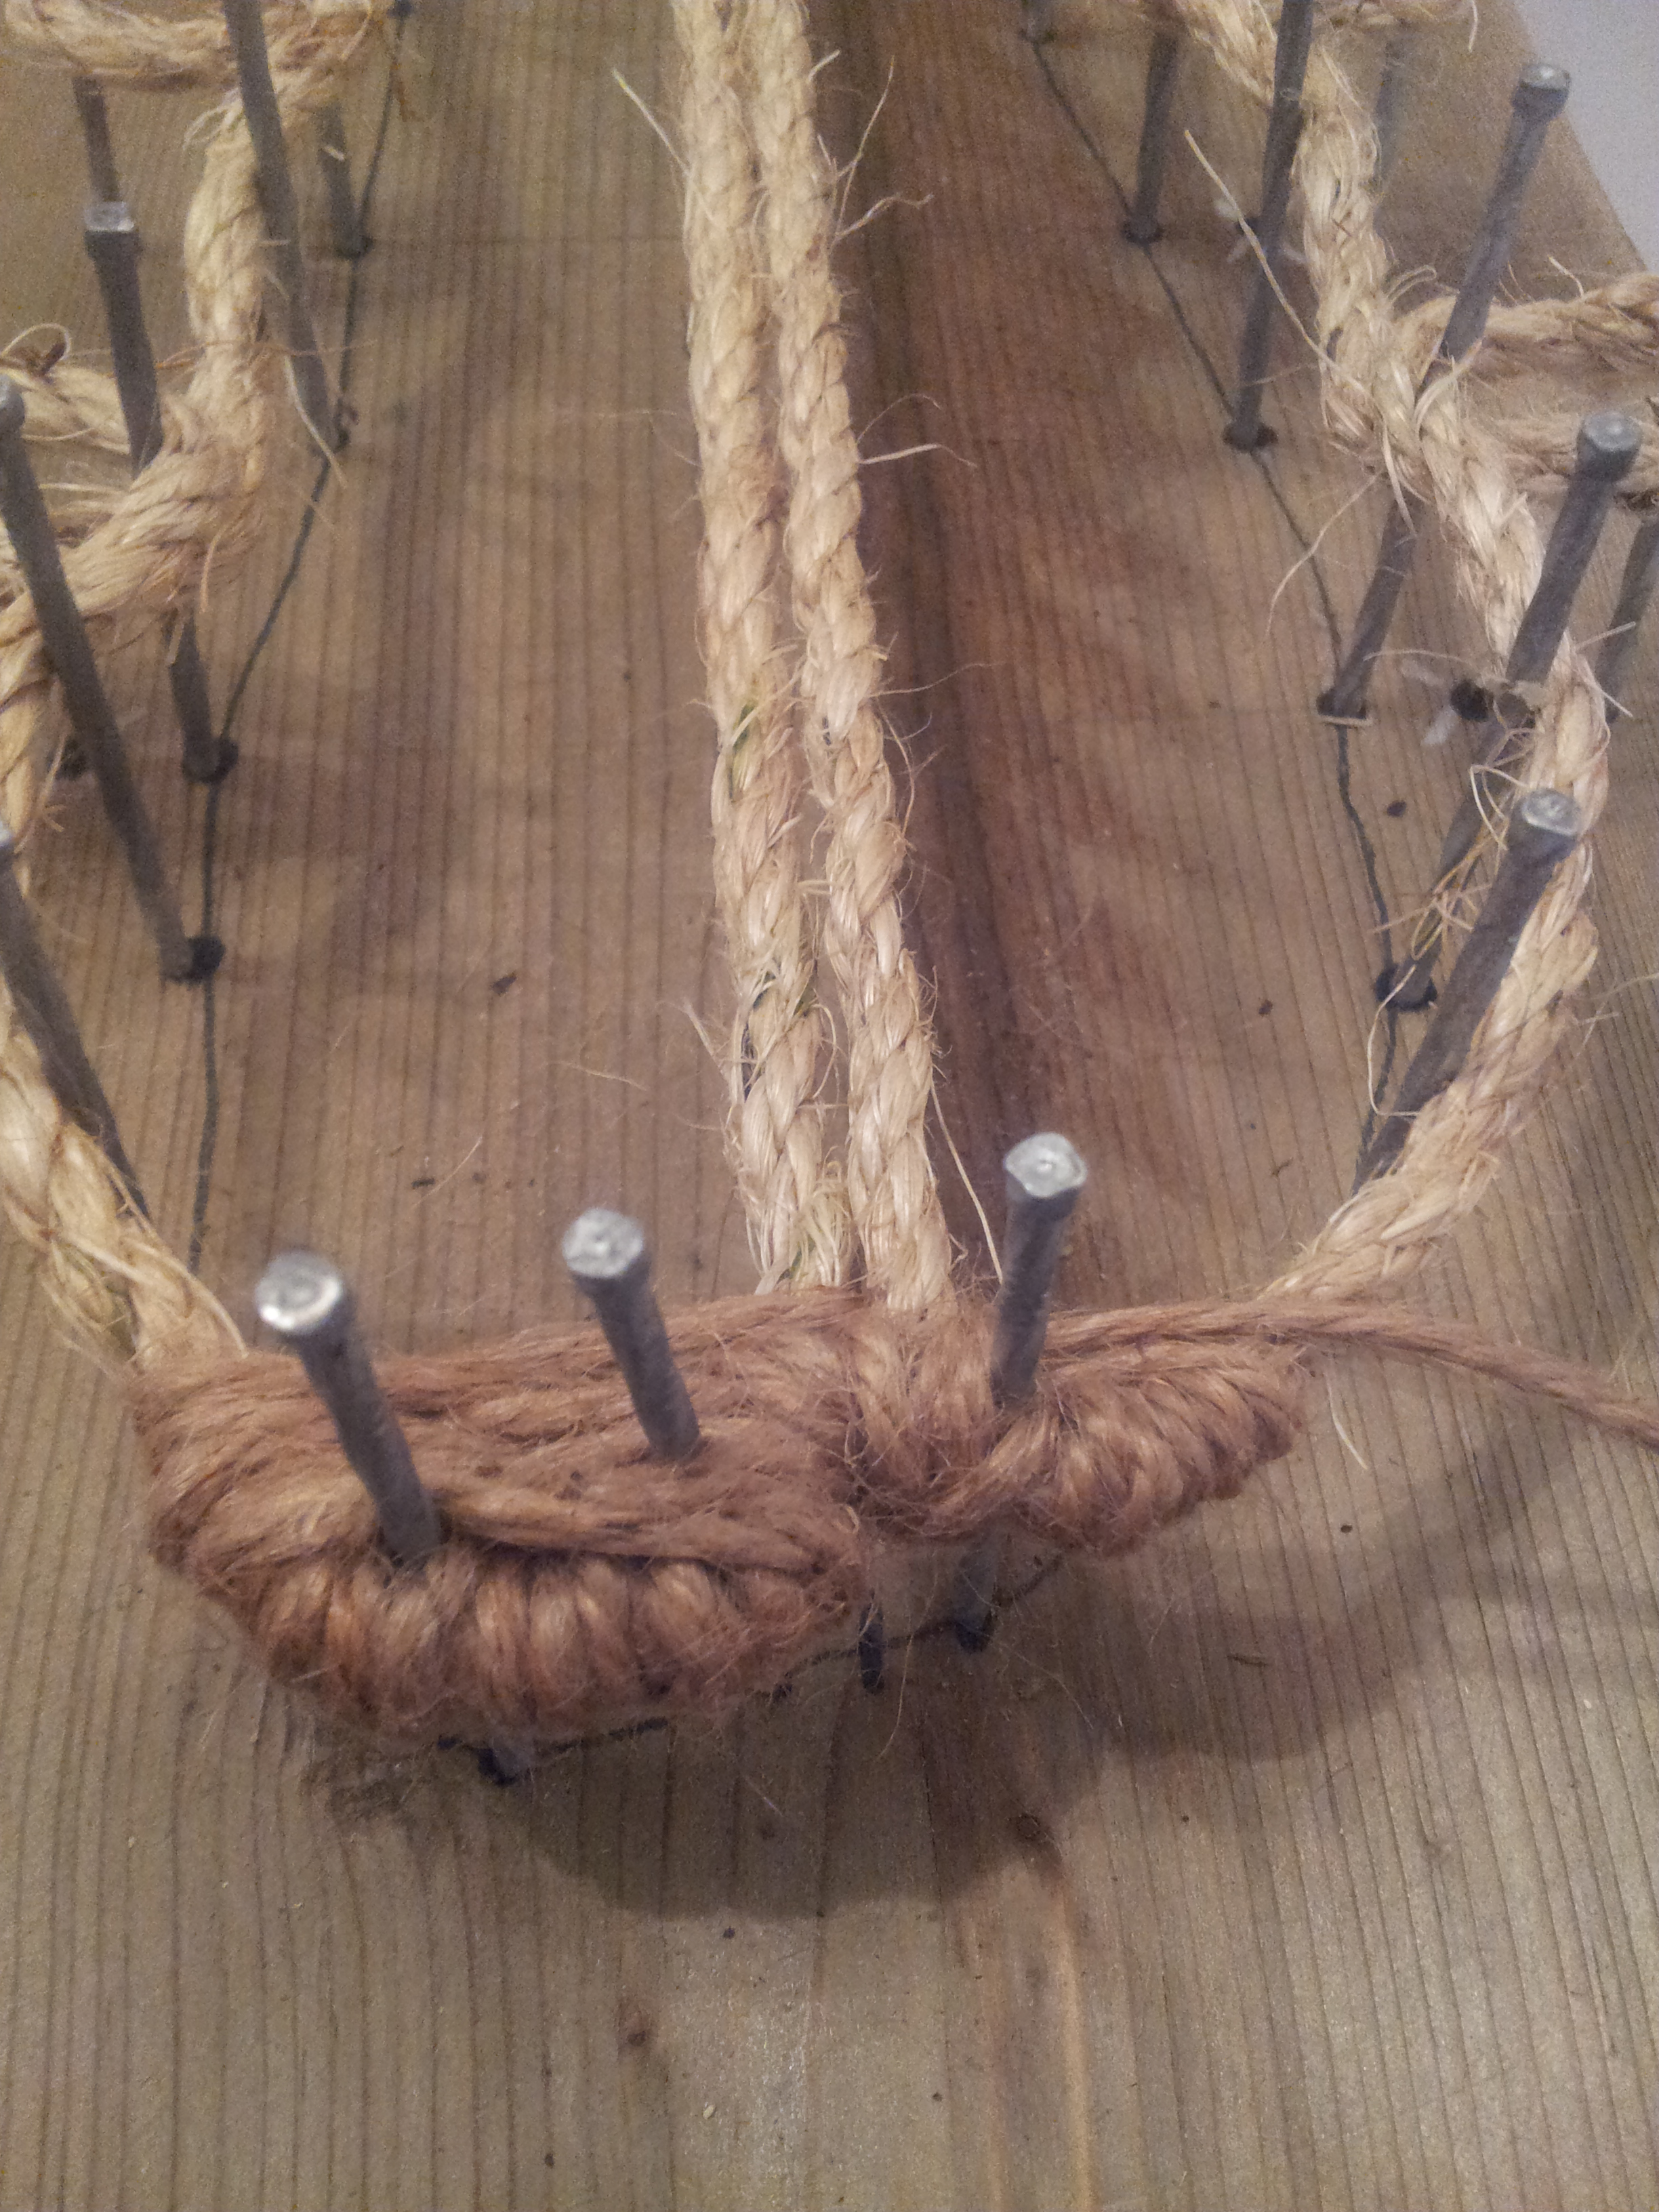
Wind the twine around the sisal rope nice and tightly. Remember, this is the frame of the shoe. It needs to stand up to some wear and tear. You want to wind the twine around the rope until there is enough of a curve to begin crossing the the twine over and under it. Let me show you what I mean:
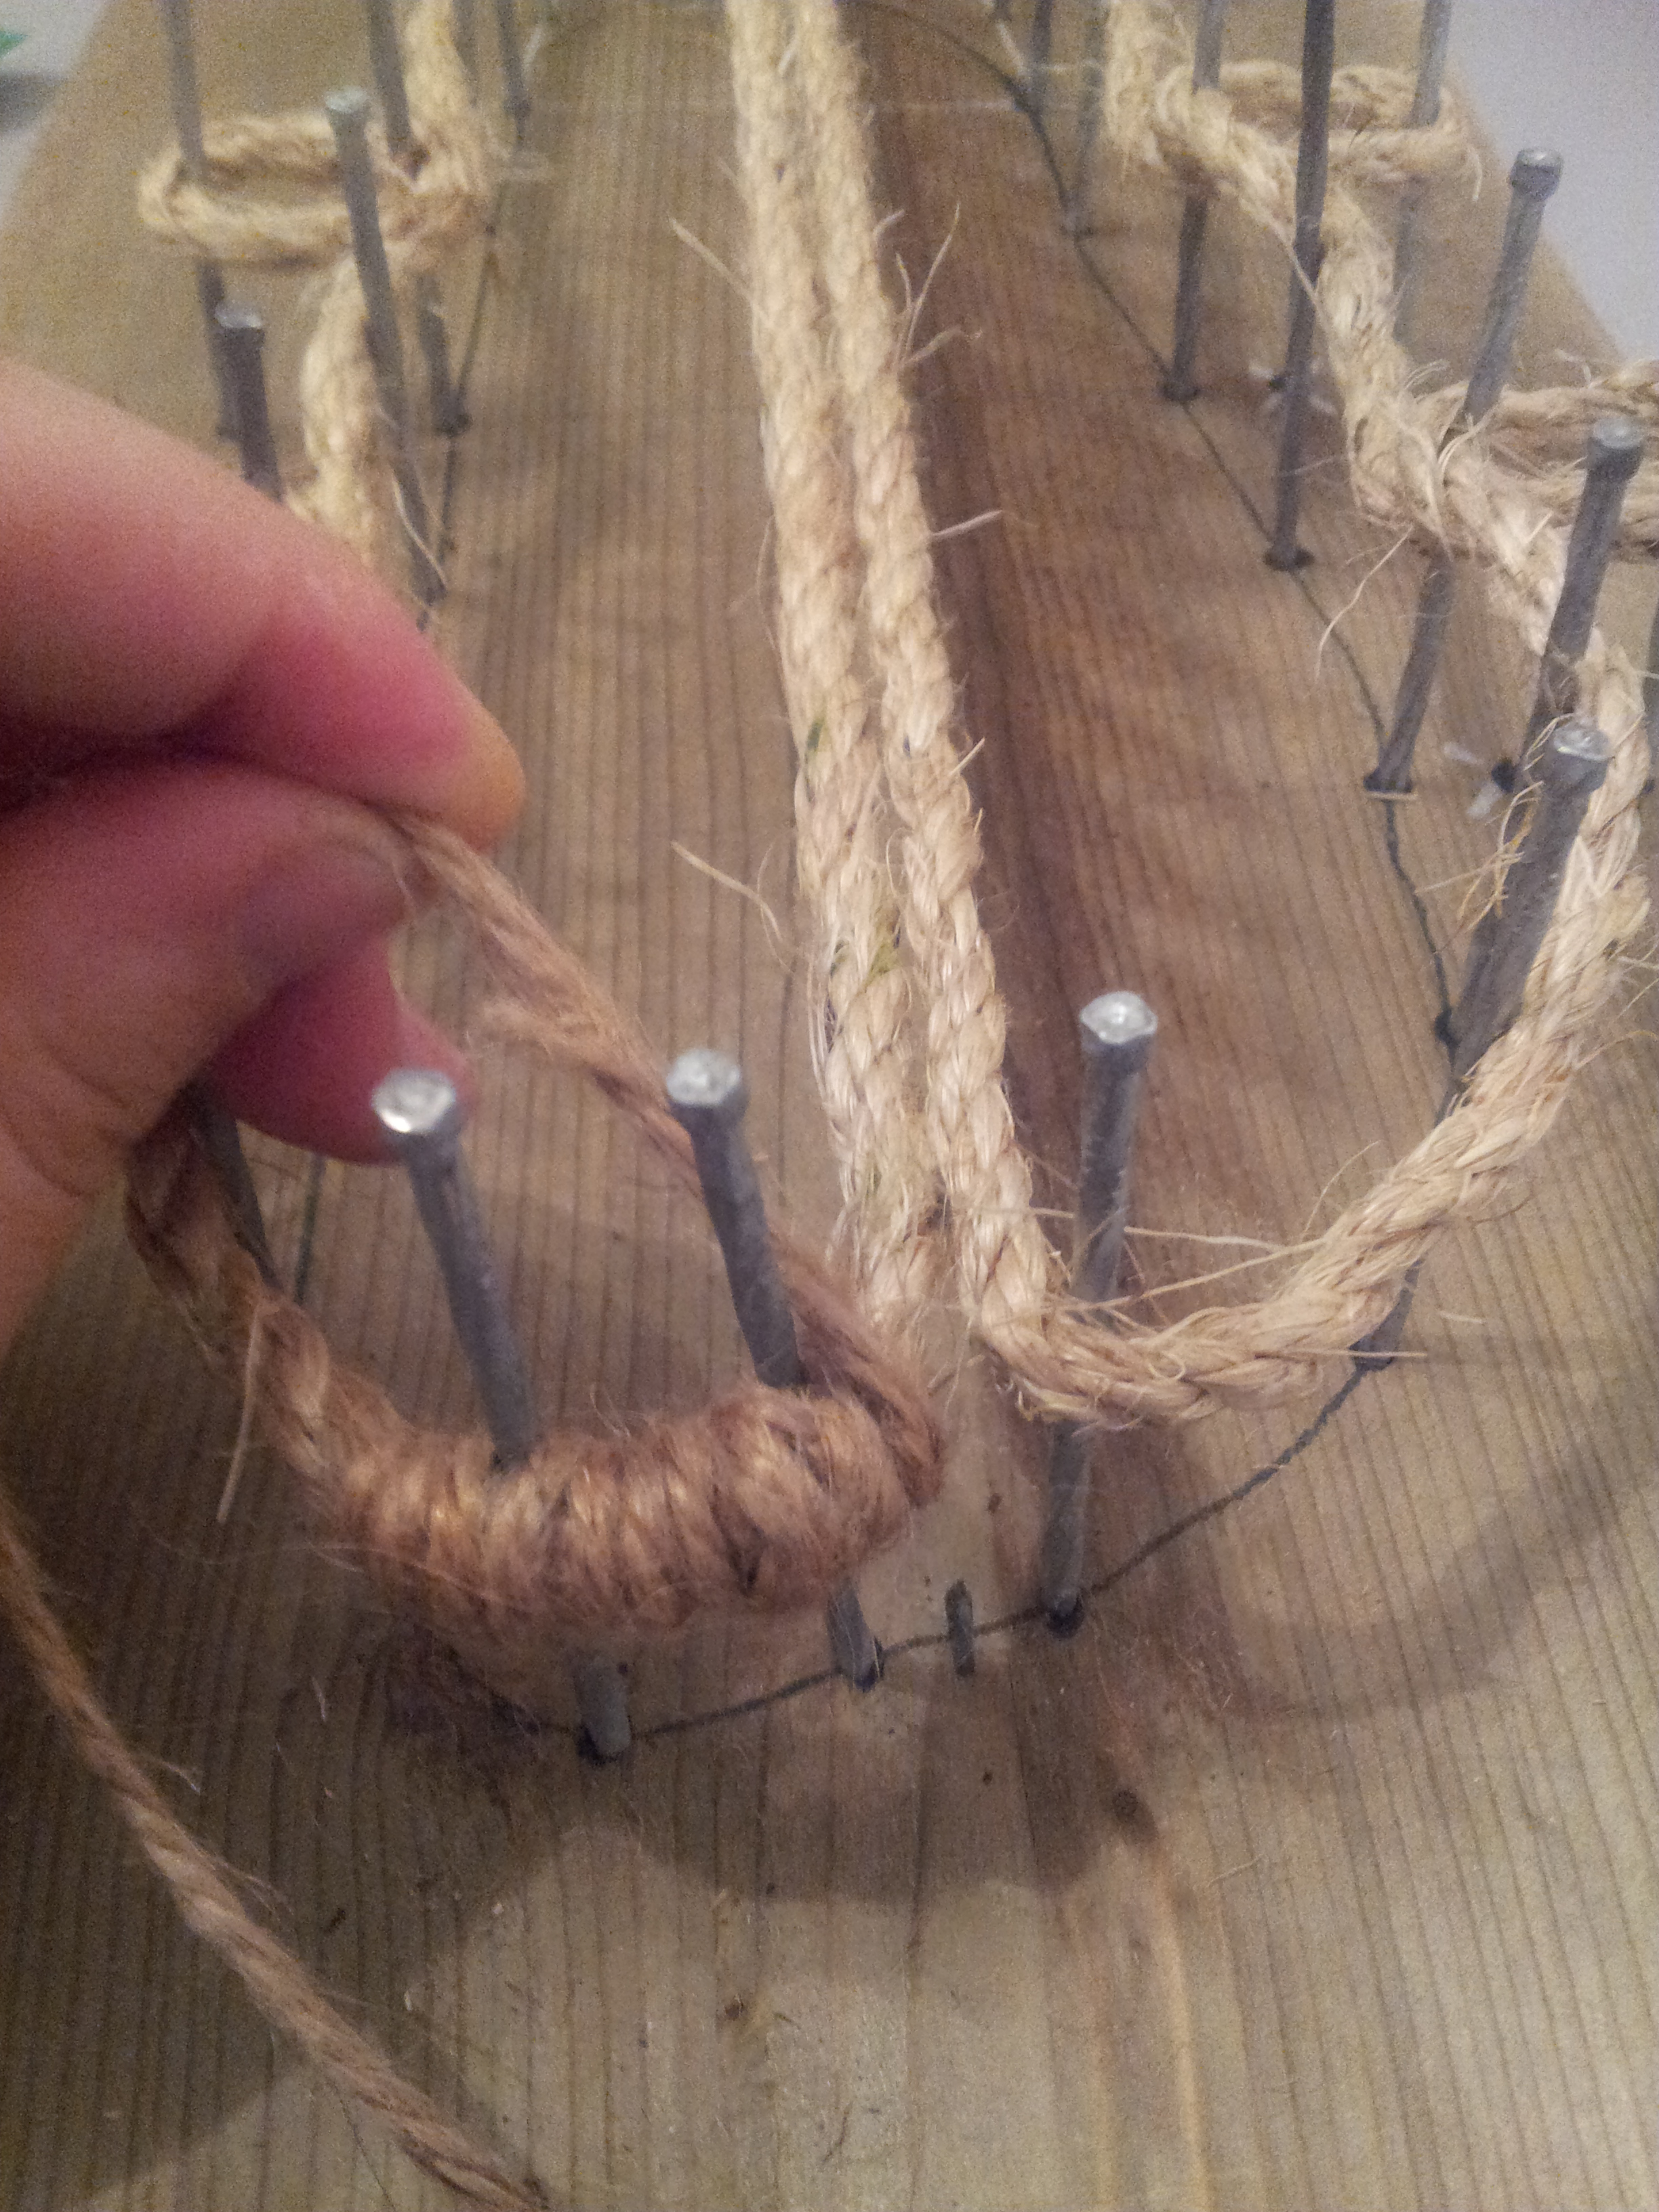
Now you can see that I have enough of a crescent shape going on with the twine I can make my first line of weaving like so:
Yay! Now we’ve gotten started in earnest. A word of caution: do not loop the twine around any of the nails. If you do, chances are you won’t be able to get the sandal off the loom when you’re done and you will be sad. Be sure to pass on either side of every nail you come across but don’t loop around them or tie the twine to them.
The weaving is actually pretty simple and very repetitive. I like it because it’s kind of meditative and I can just sit that loom on my lap and chill out on the couch while watching something or chatting with friends. The twine will go over and under and over and under the sisal rope frame just like weaving a basket.

As you move down the sandal from the toe, you will eventually hit the central ropes. Just wrap them in the twine. I like to secure mine with a little double X pattern to strengthen it. And keep weaving along as normal. Getting started is really the trickiest part. You may have to play with it a little to get the technique but don’t give up! It gets easier.
Make sure to keep your lines of twine as straight as you can as you pass back and forth across the frame. Over and under, over and under. After each pass across the sandal, push the twine toward the toe to make the lines nice and tight. Remember, this is the sole of your foot it’s protecting. You’ll want nice even cushioning and coverage.
When you come to the end of a 12′ length of twine, simply tie it off with a square knot, tie on the next length of twine and keep going.
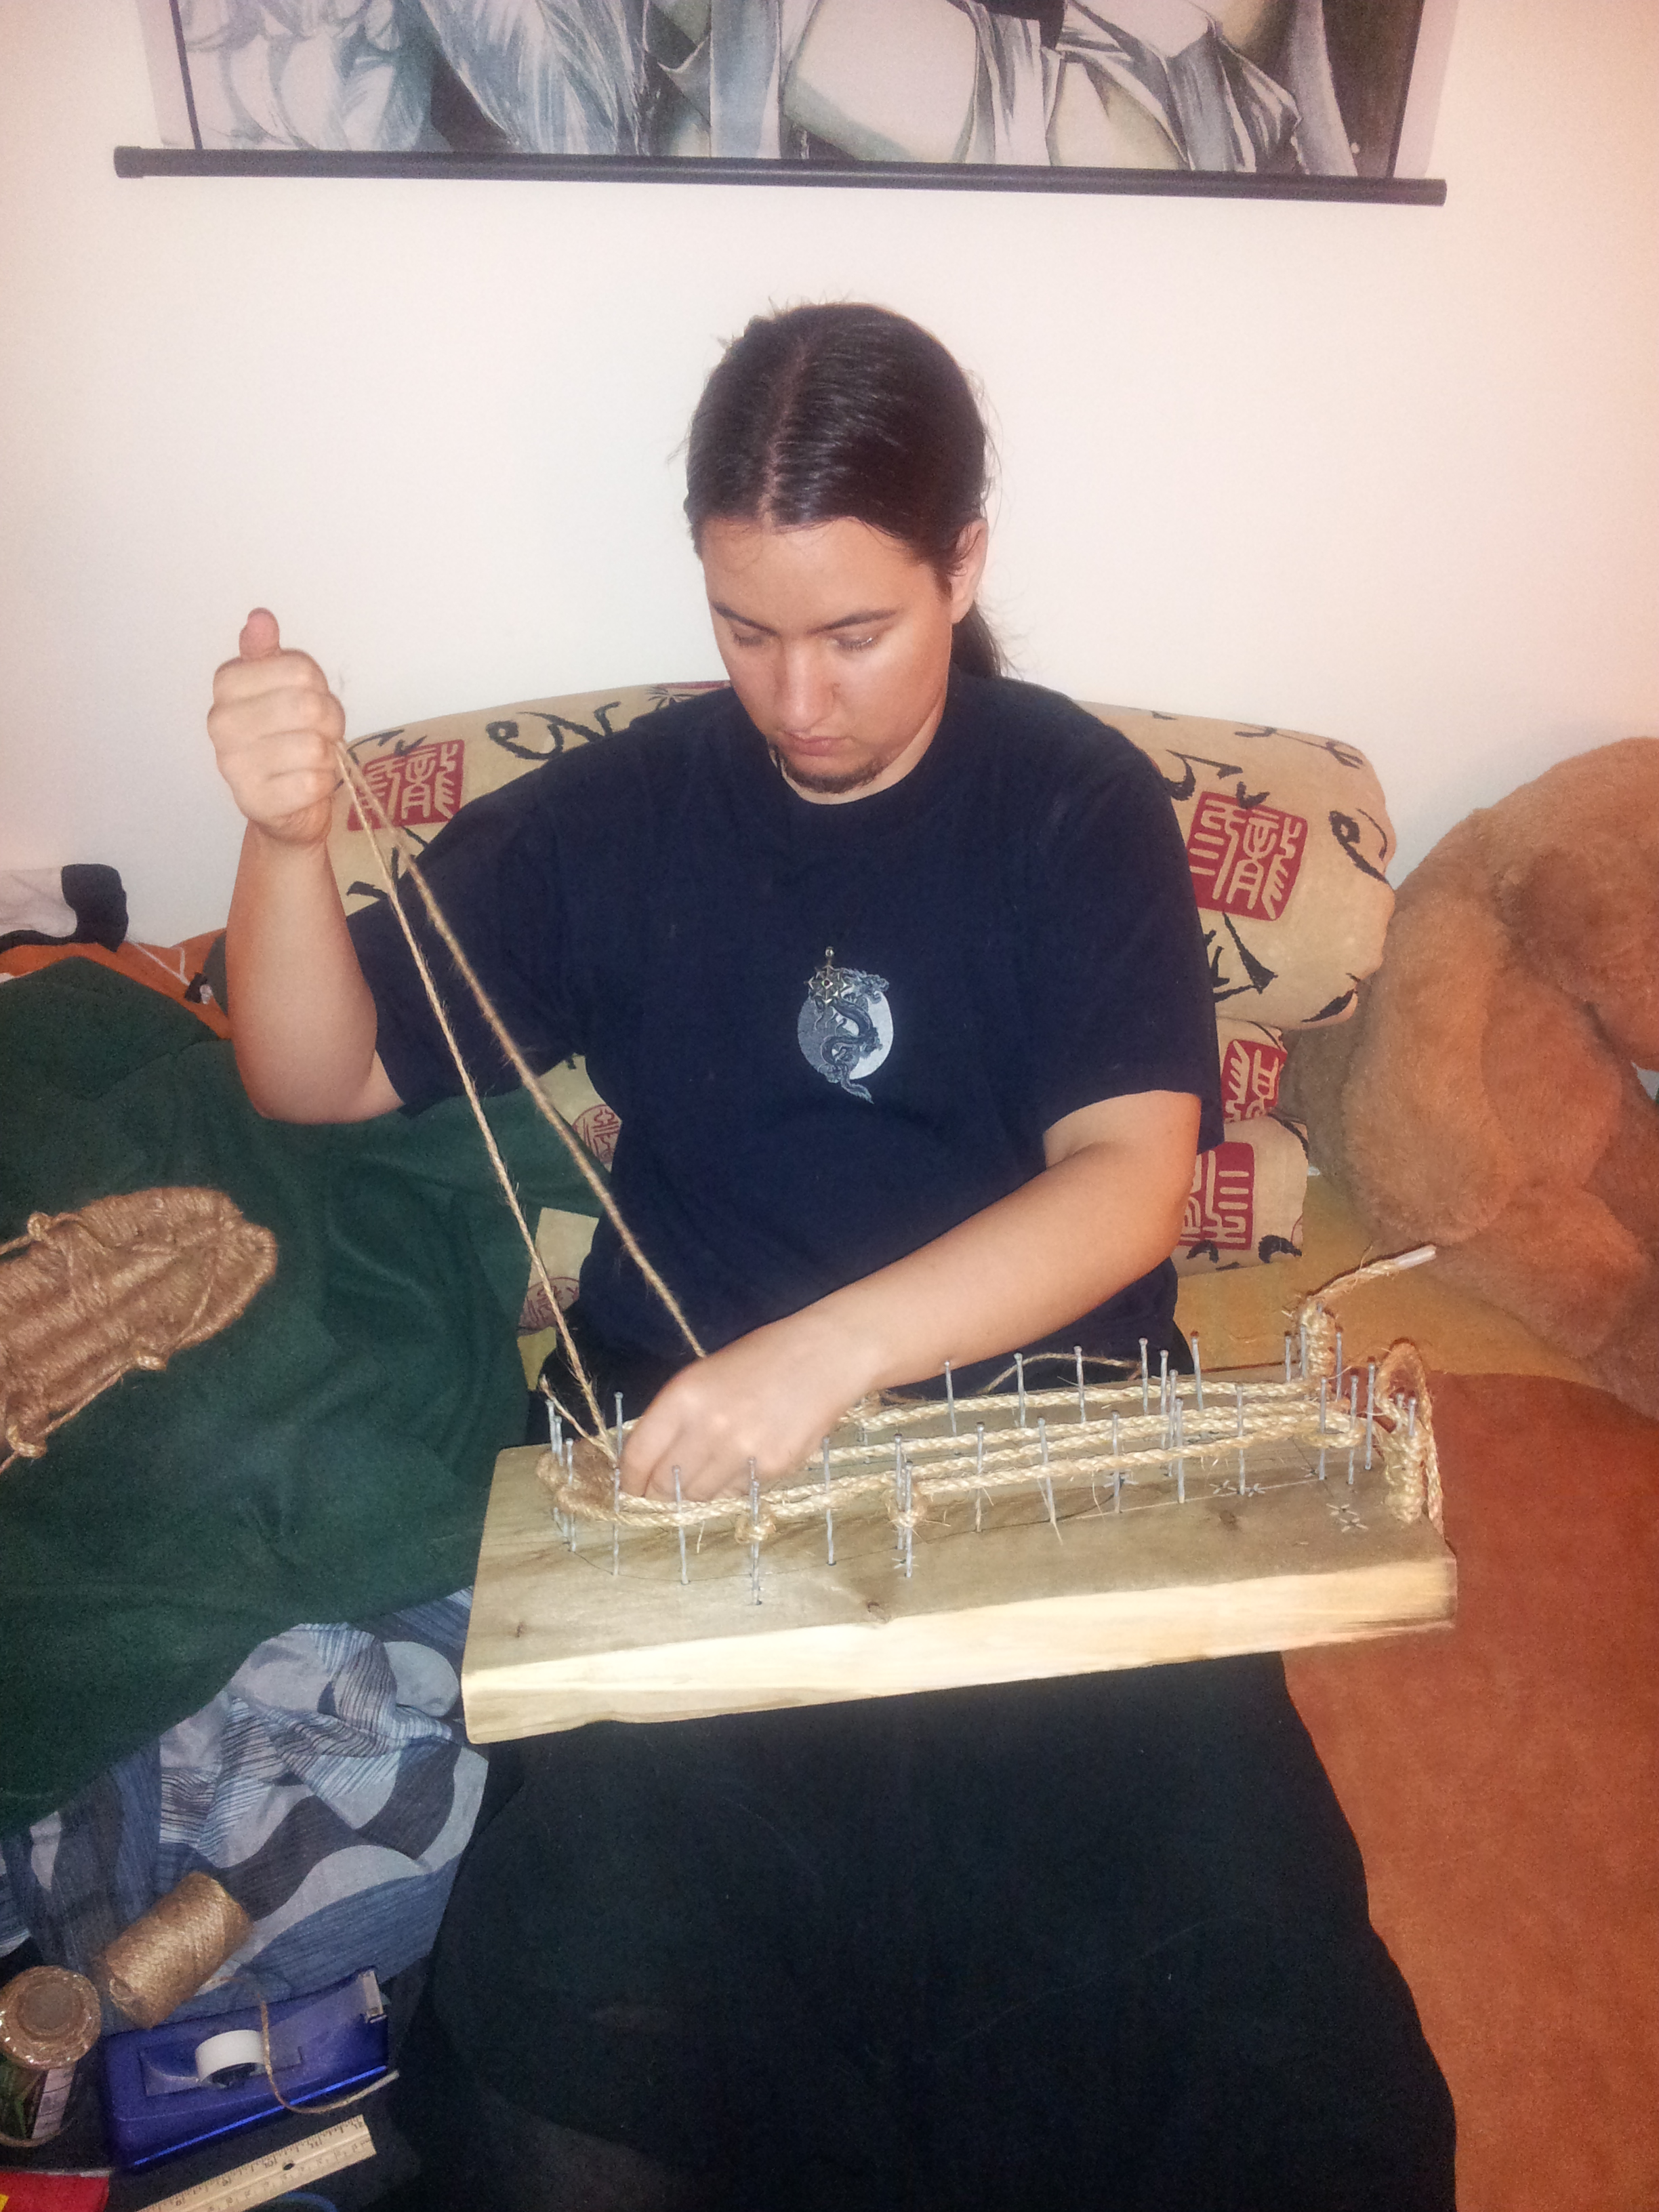
There I am, chillin’ out with my loom on the couch. It’s really a very comfy process though you might want some rubber thimbles or bandaids for your fingertips. The twine and rope can be a little rough on them depending on how thick your skin is.

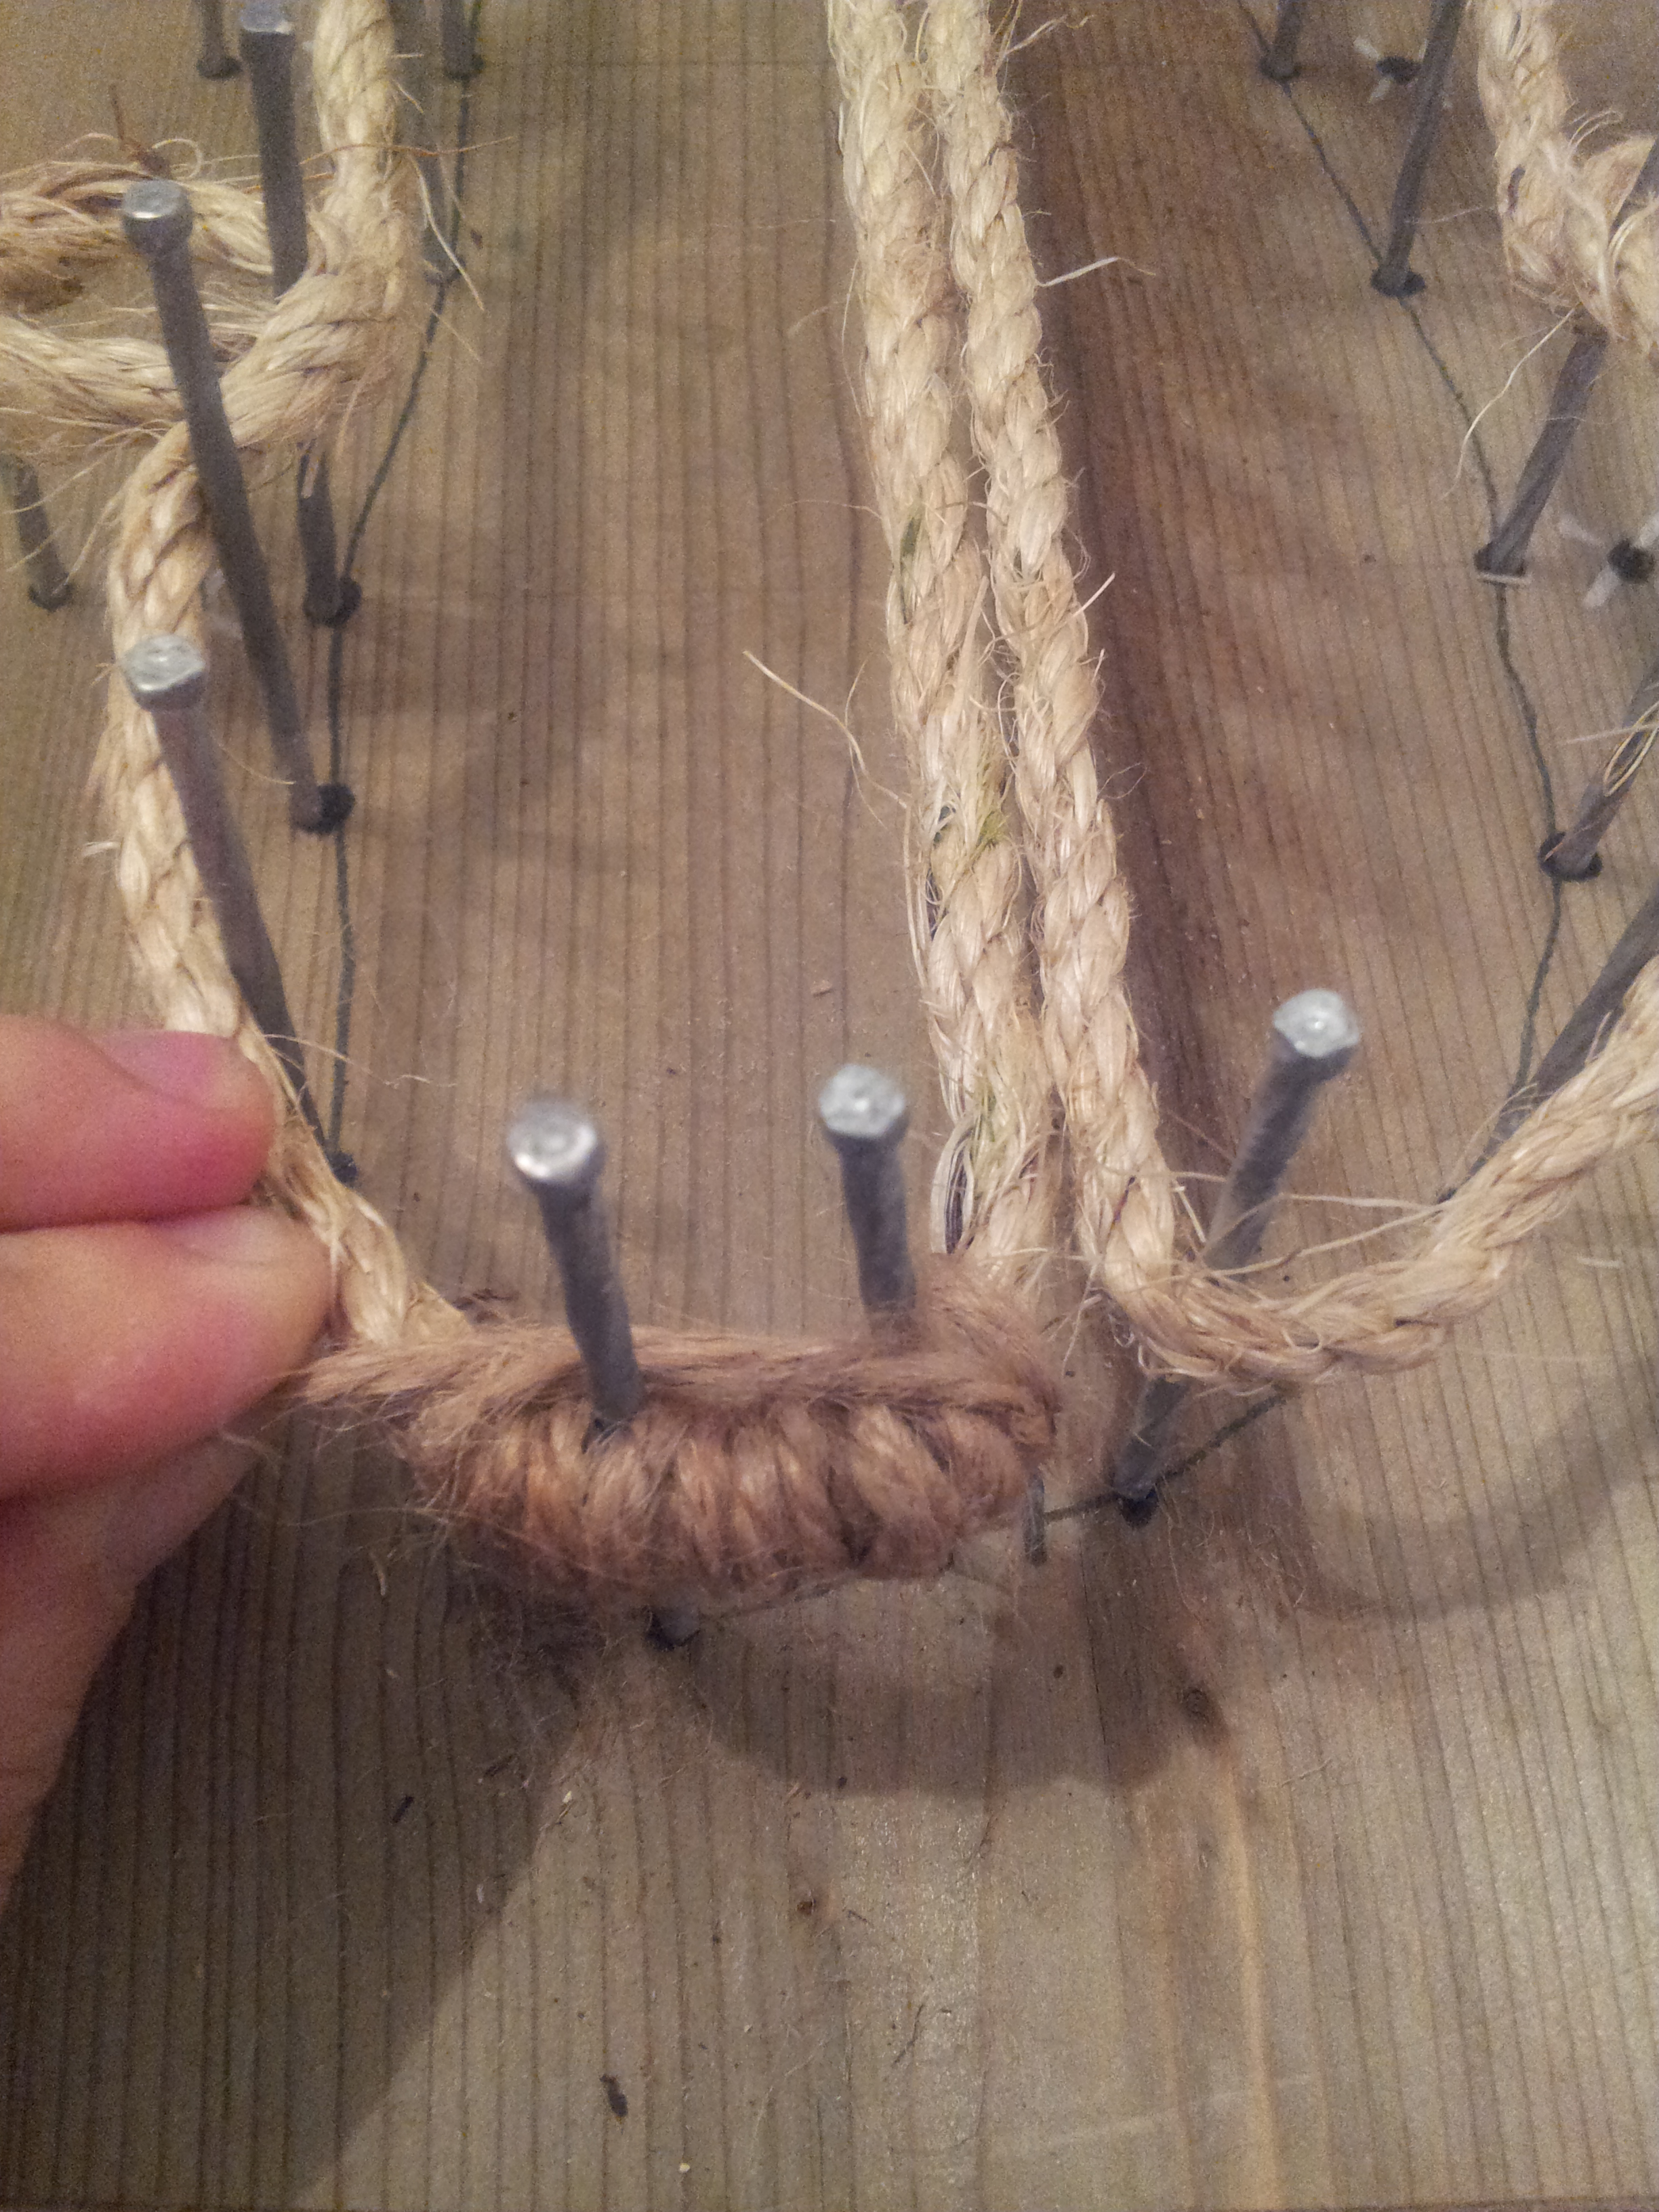
When you get to the side loops, simply pass the twine through the loop and keep weaving as normal. Remember to keep pushing the twine up toward the toe of the sandal as you go to keep everything tight.
Aha! There’s that line I was talking about. It’s blue on my paper but white on the board here. This is where we stop and re-start our weaving down at the heel of the frame. The reason for this is there are a lot of nails really close together at the other end of the shoe and the weaving is a little tricky. It is best to finish somewhere closer to the middle than down at the end where it will likely vex you.
Before you begin weaving at the heel, put an extra width of tape around the end of your string. Having a longer “needle” will help you pass the twine through those hard-to-reach areas!
Wrap the twine nicely around the base of the loops there and cover the back portion of the sisal rope frame. I make another couple X’s over each of those central ropes where they cross over my frame. This not only helps hold them in place but it makes it easier to cover the rope-ends later when you trim them off. You’ll see what I mean in a few steps.
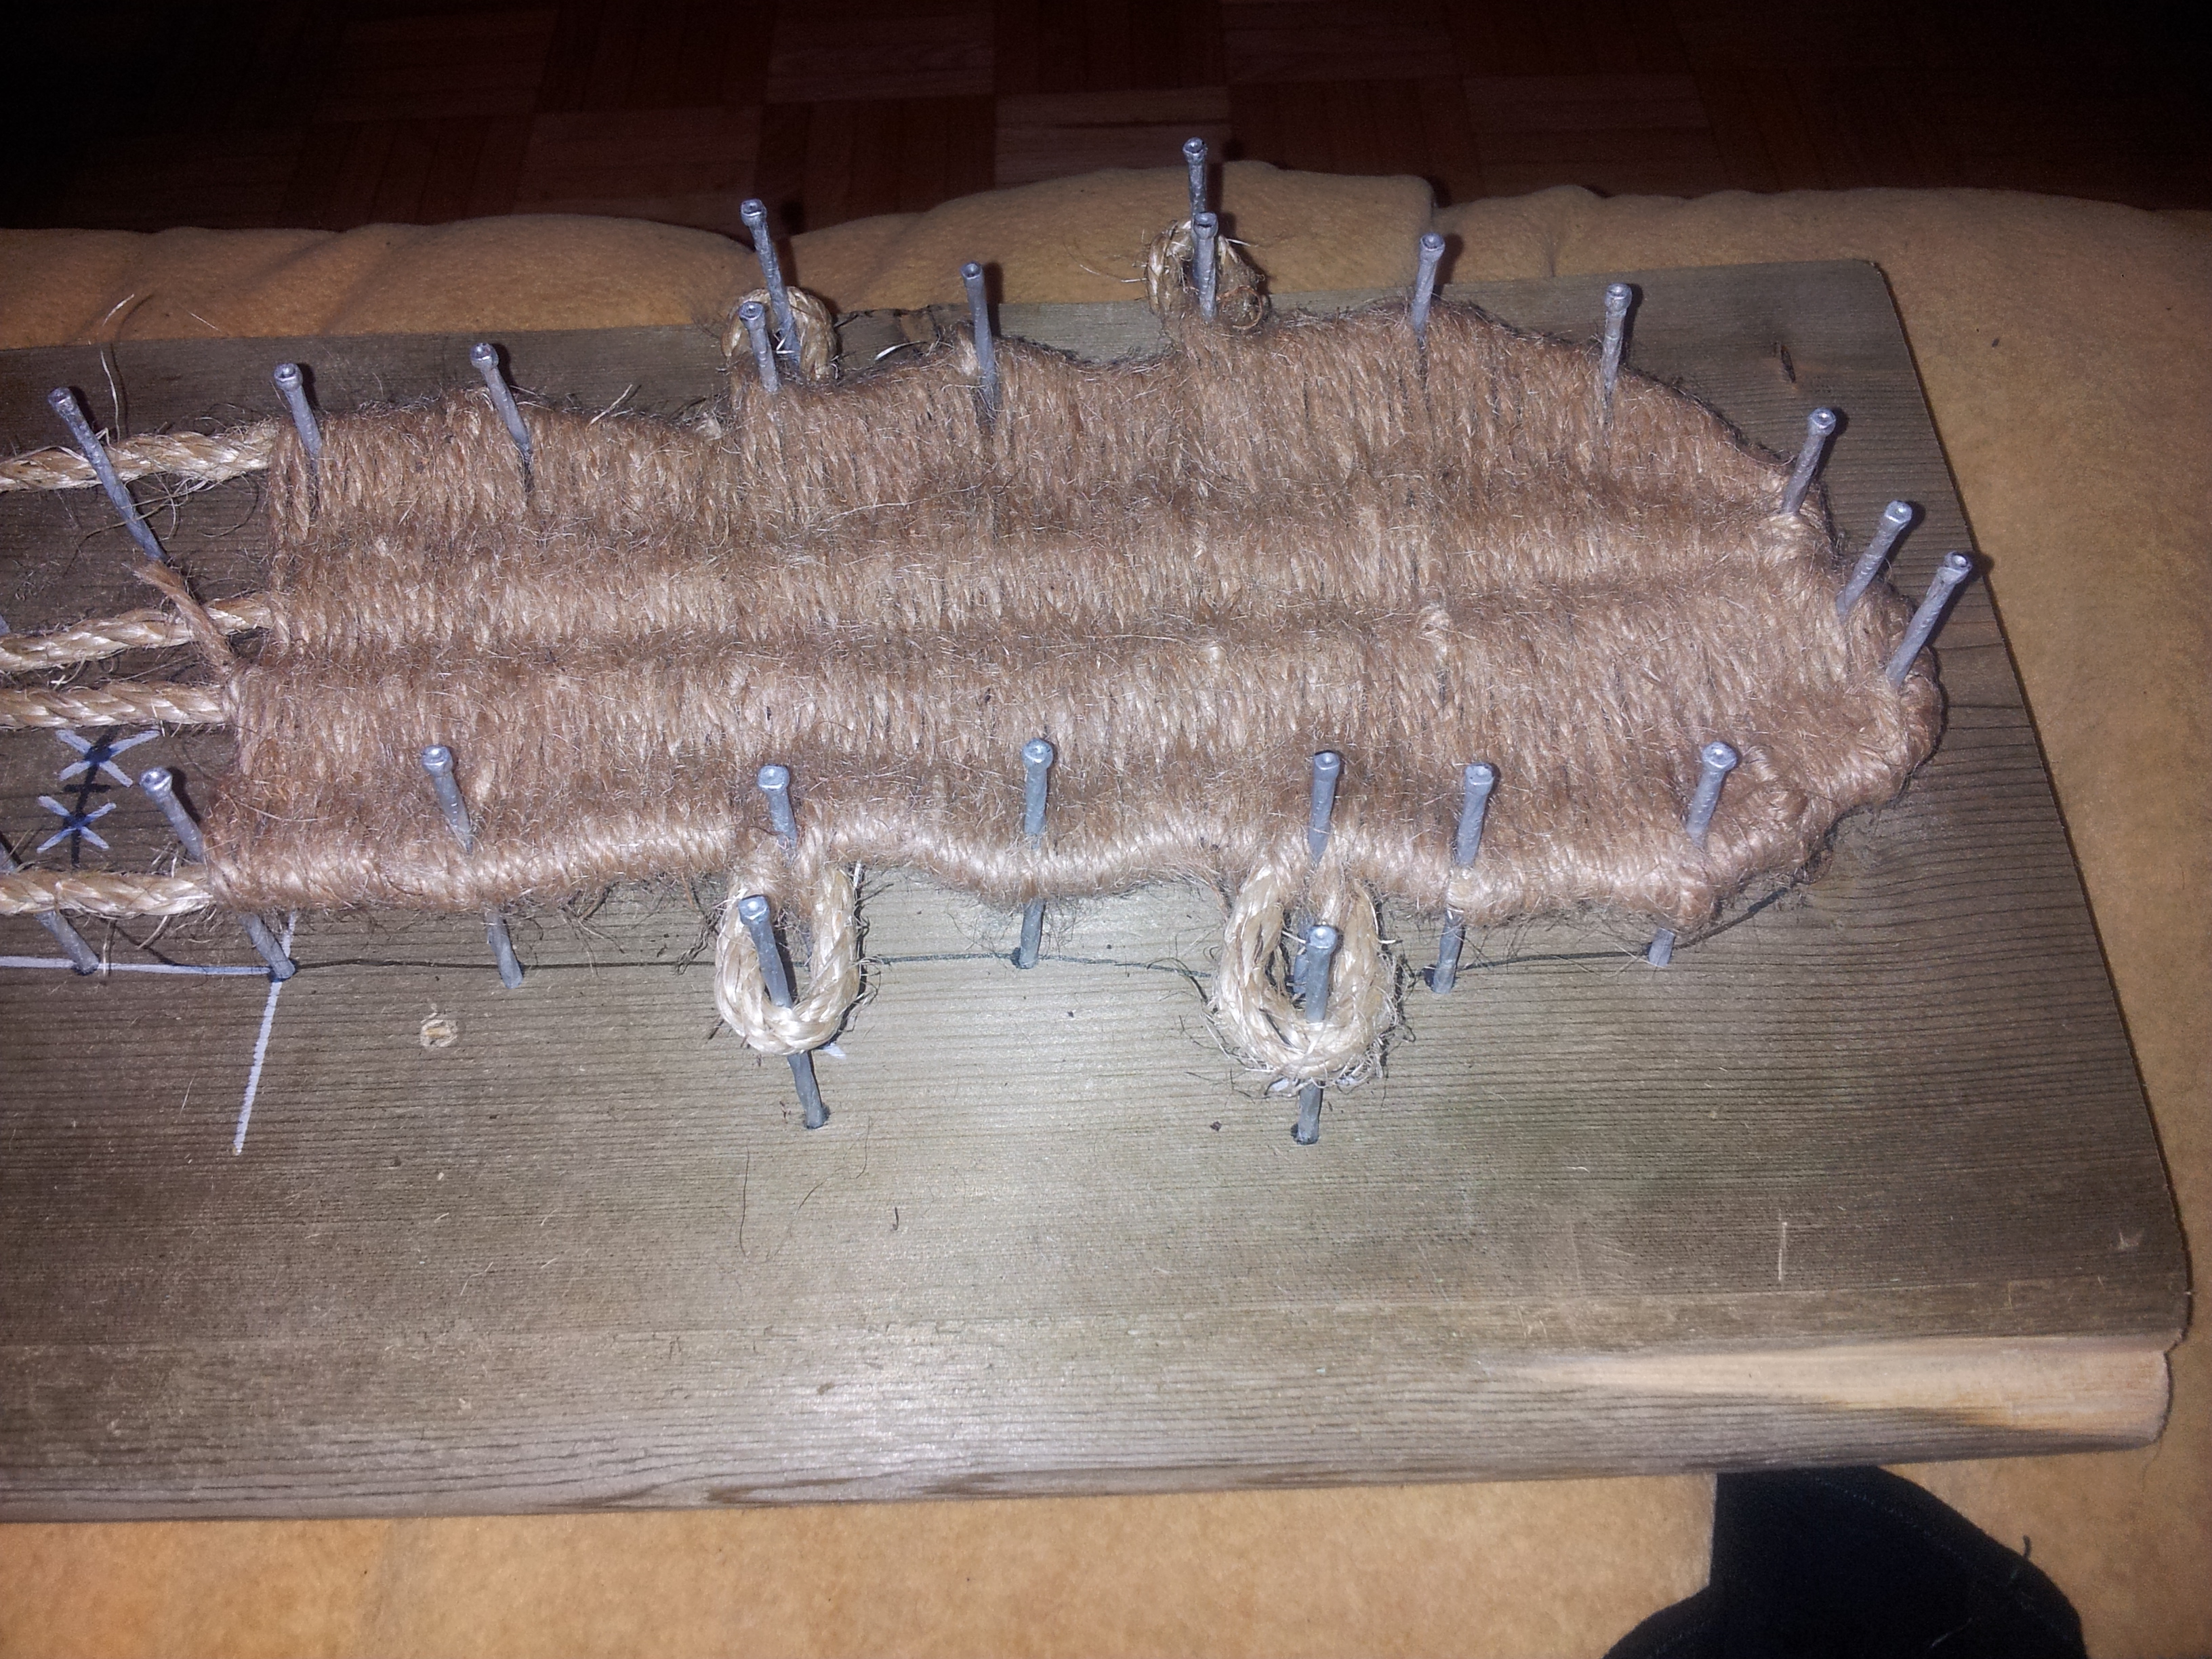
Continue weaving as you did with the toe portion of the sandal. This time, though, push the lines of twine toward the heel of the shoe. This is to make sure you can get the maximum number of lines on your frame so you can have the cushiest sole to walk around on.
Eventually the two parts of the weave will meet. Try to get in as many lines as possible before you finish your weaving.
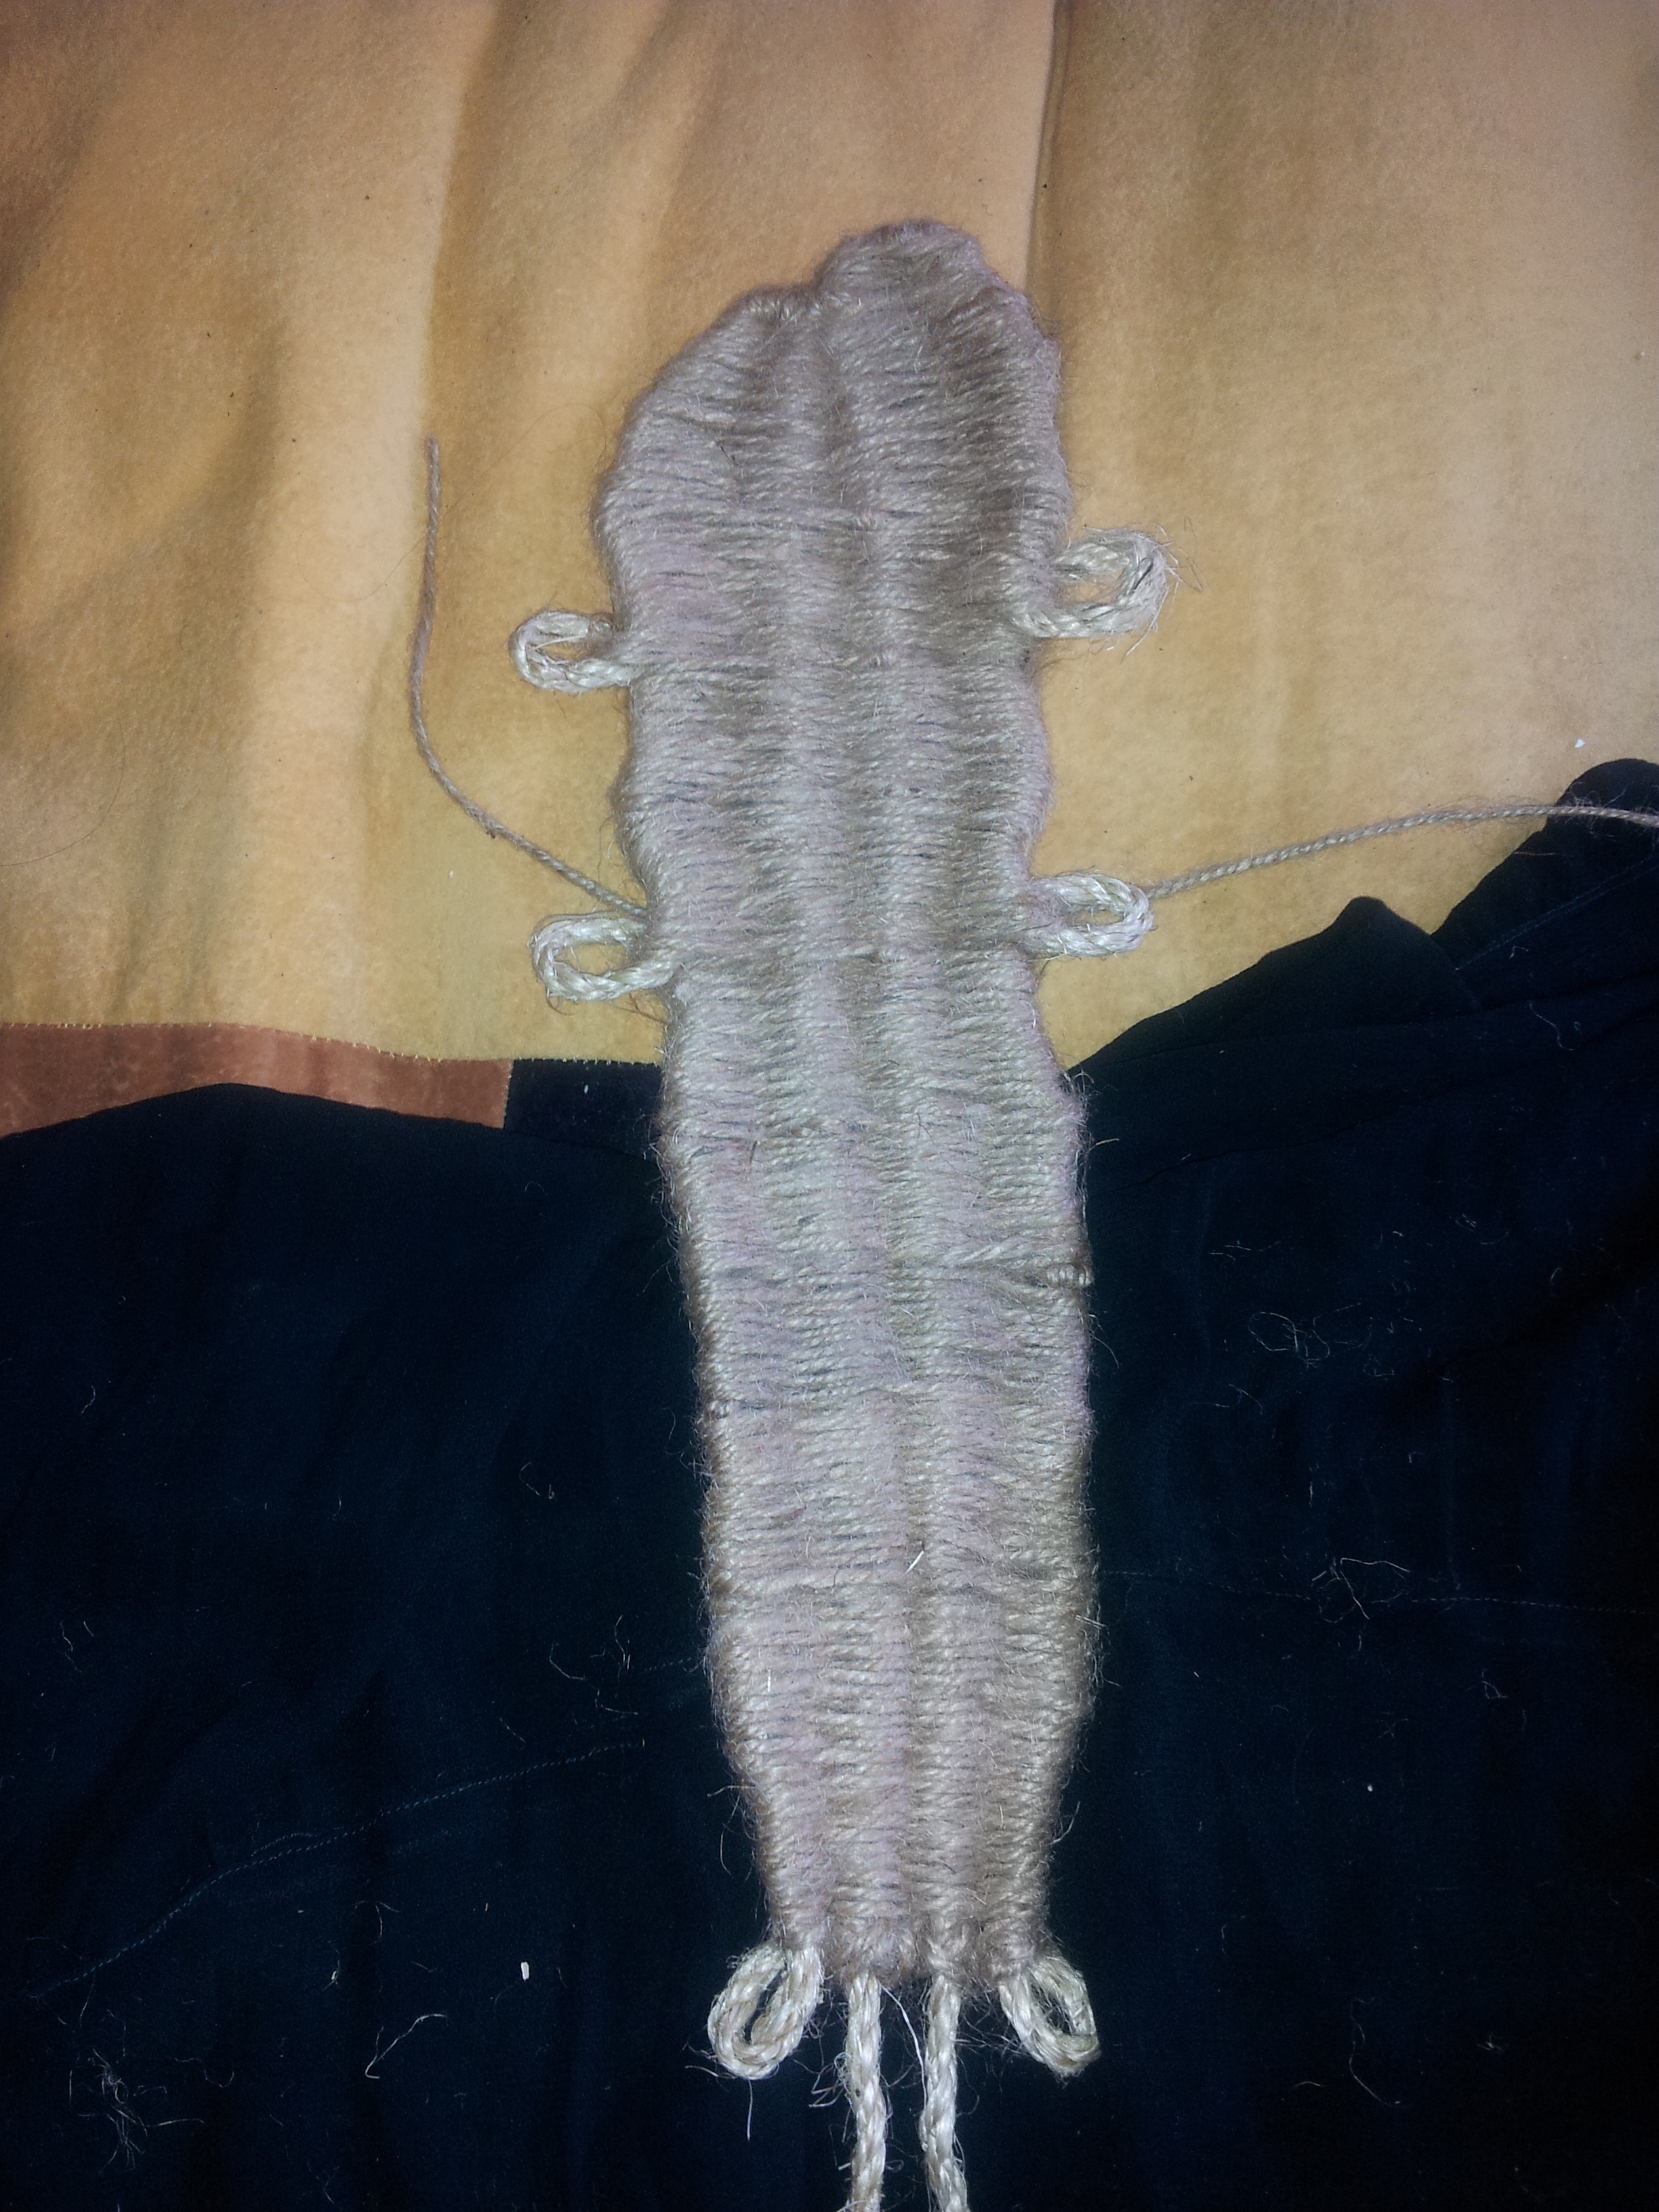
Ideally, it should look something like this. Now it is time to gently work the sandal up off the loom.
Tada!
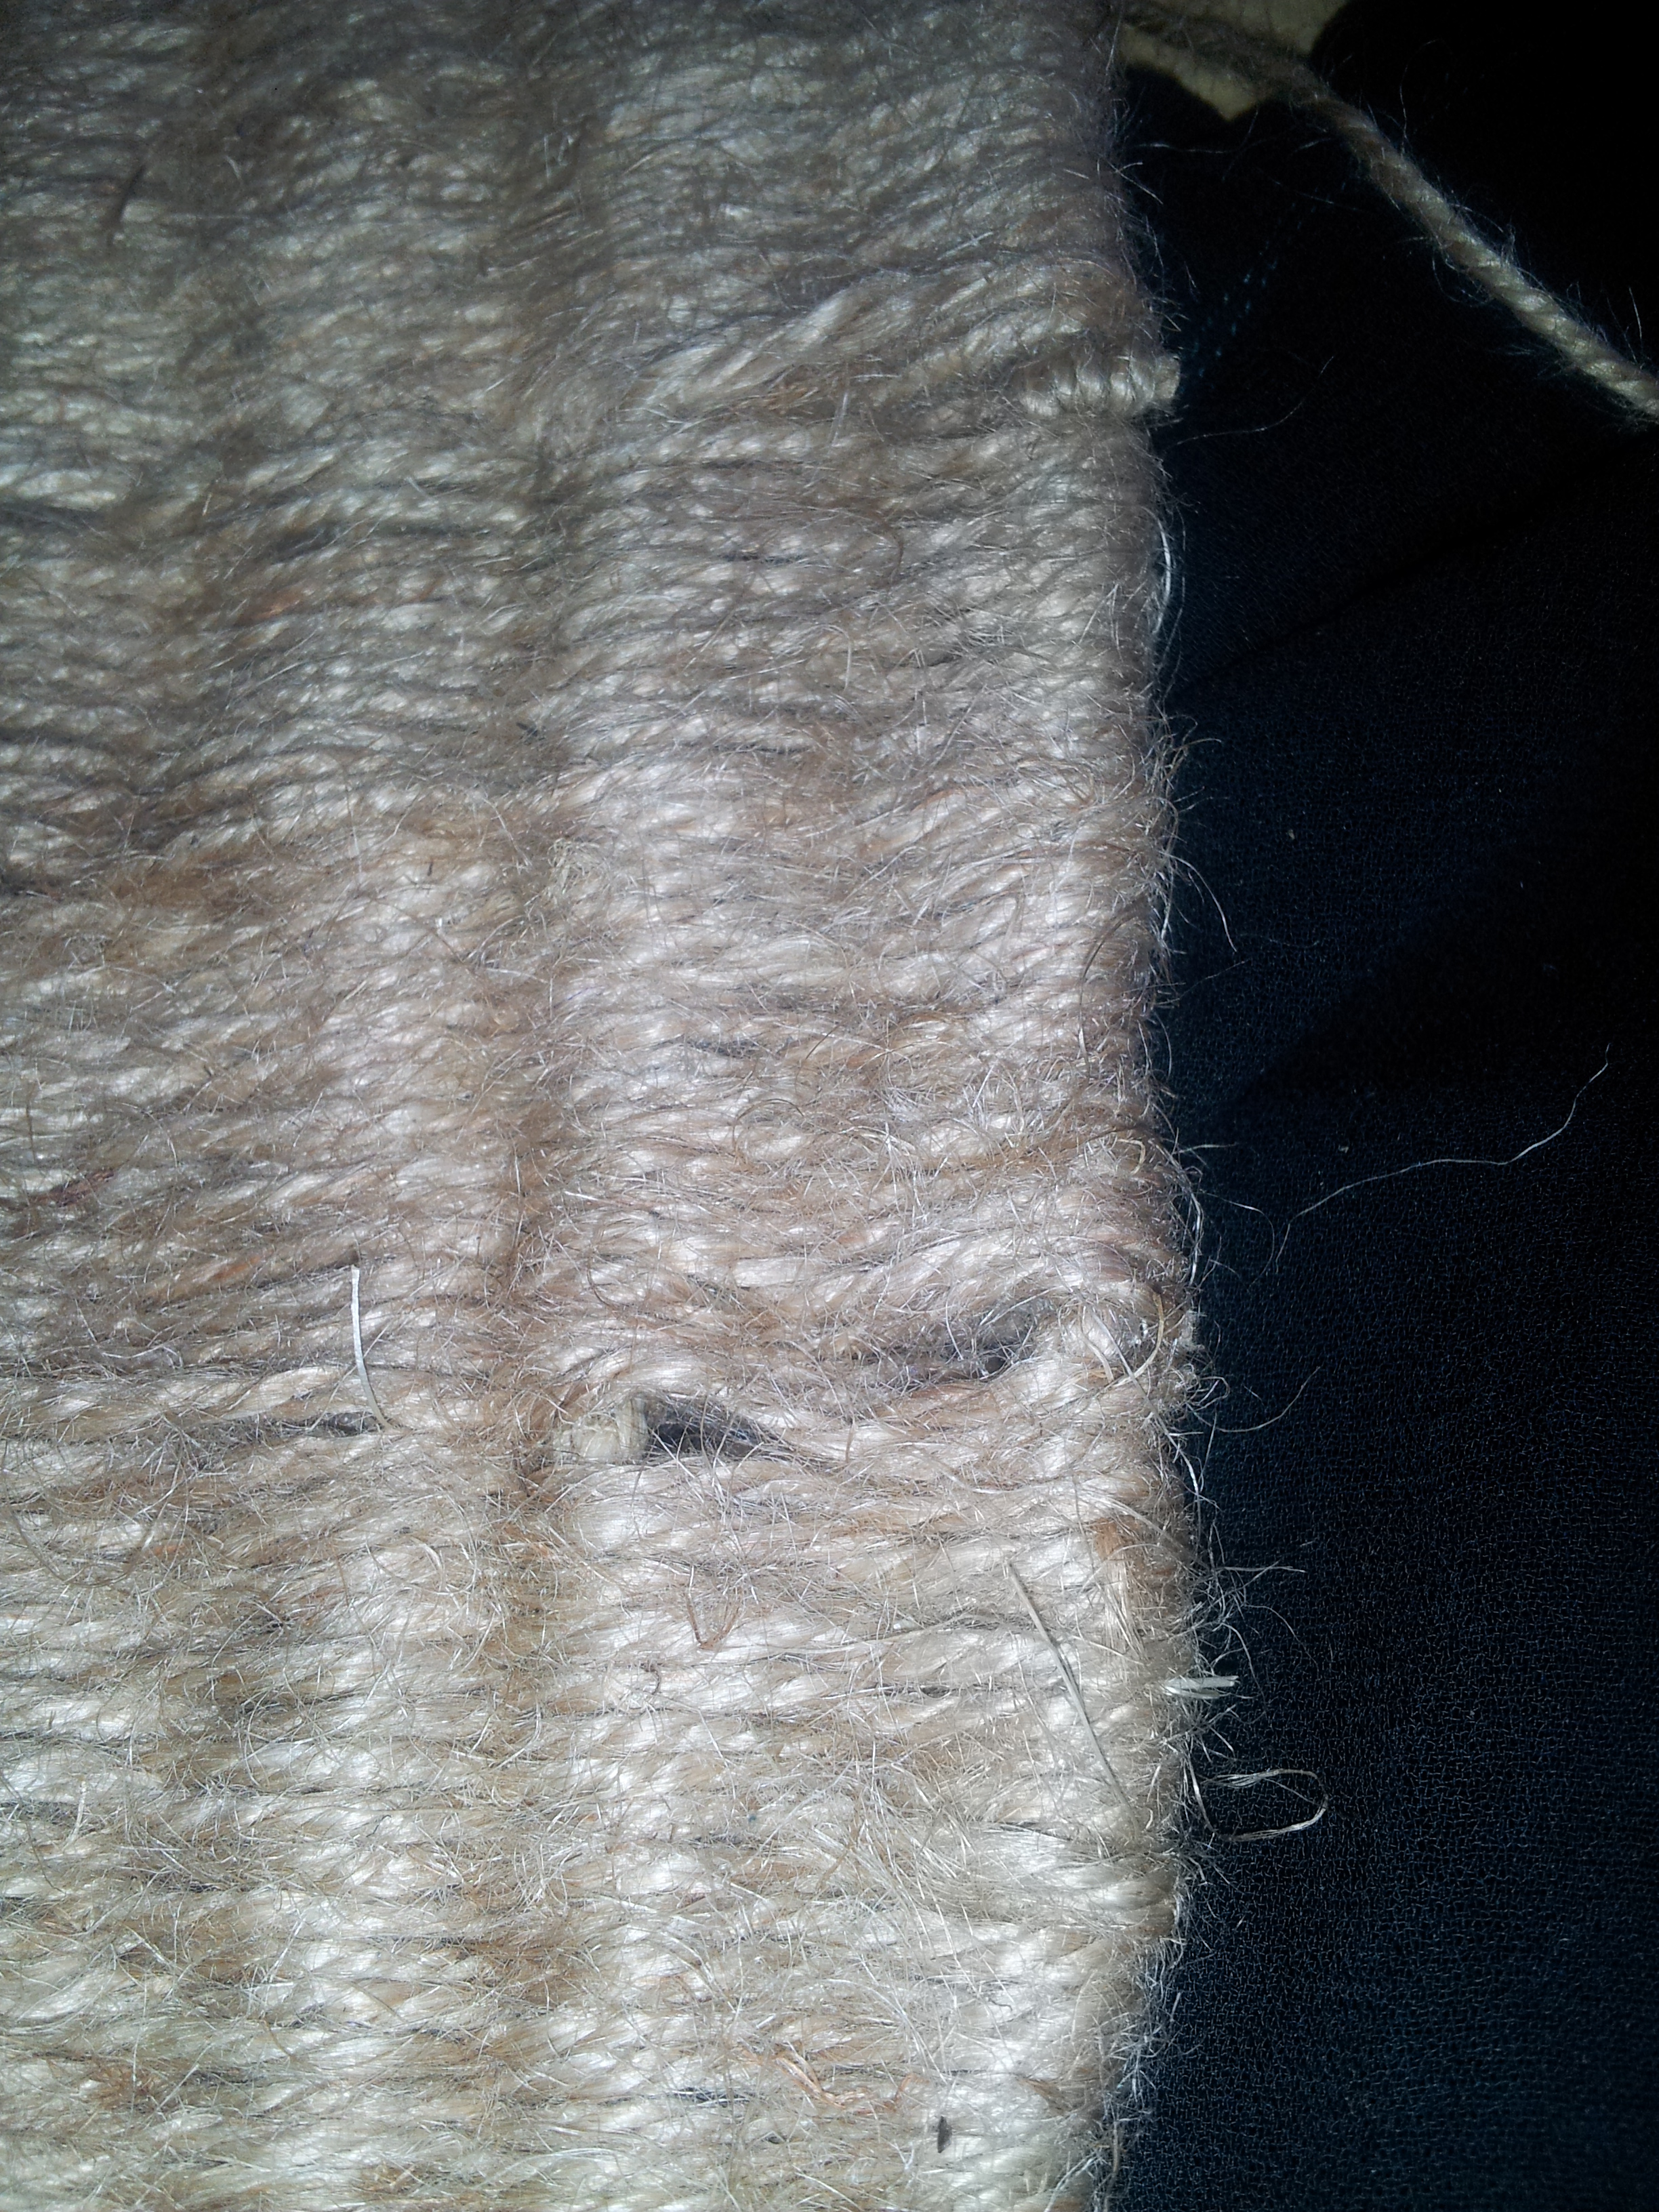
There will naturally be some little gaps here and there where the nails poked through. Simply massage the ropes to get the most even coverage you can.
See? No more gaps!
Now, remember that practice makes perfect. For comparison, here is my first attempt beside my final product:

What a difference! I recommend getting two 200′ spools of twine to work with. It will take more than you think!
Before you add the straps, you will need to trim the extra sisal rope off the sandal. Gently pull the rope about three millimetres out of the back of the sandal and cut it off close to the frame. Then gently pull on the toe and heel of the sandal so that the cut-off ends of the rope pull back into the sole. Then, you can push the loops of those twine X’s over the spaces left where the sisal rope used to stick out. This means that the rope-ends will not poke you in the heel when you move around. Yay!
To put the straps on, simply braid three lengths of twine about 7′ long together. You’ll need to do this twice to have two nice long straps to wrap around your ankle. Rest your foot on the sole of the sandal, lining up your toes with the edge of the sole. Stick a pencil or chopstick down between your big toe and your other toes to show you where to put the strap through the sole. Be sure to get the middle point of the string around the closest of the two middle sisal ropes. Pass the twine strap through the loops on the sides and up and the ones on the back and loop it around your ankle before tying.
Various shinigami tie their waraji differently so pay attention to how the one you’re cosplaying as does it.
This, for example, is how Zaraki Kenpachi ties his:

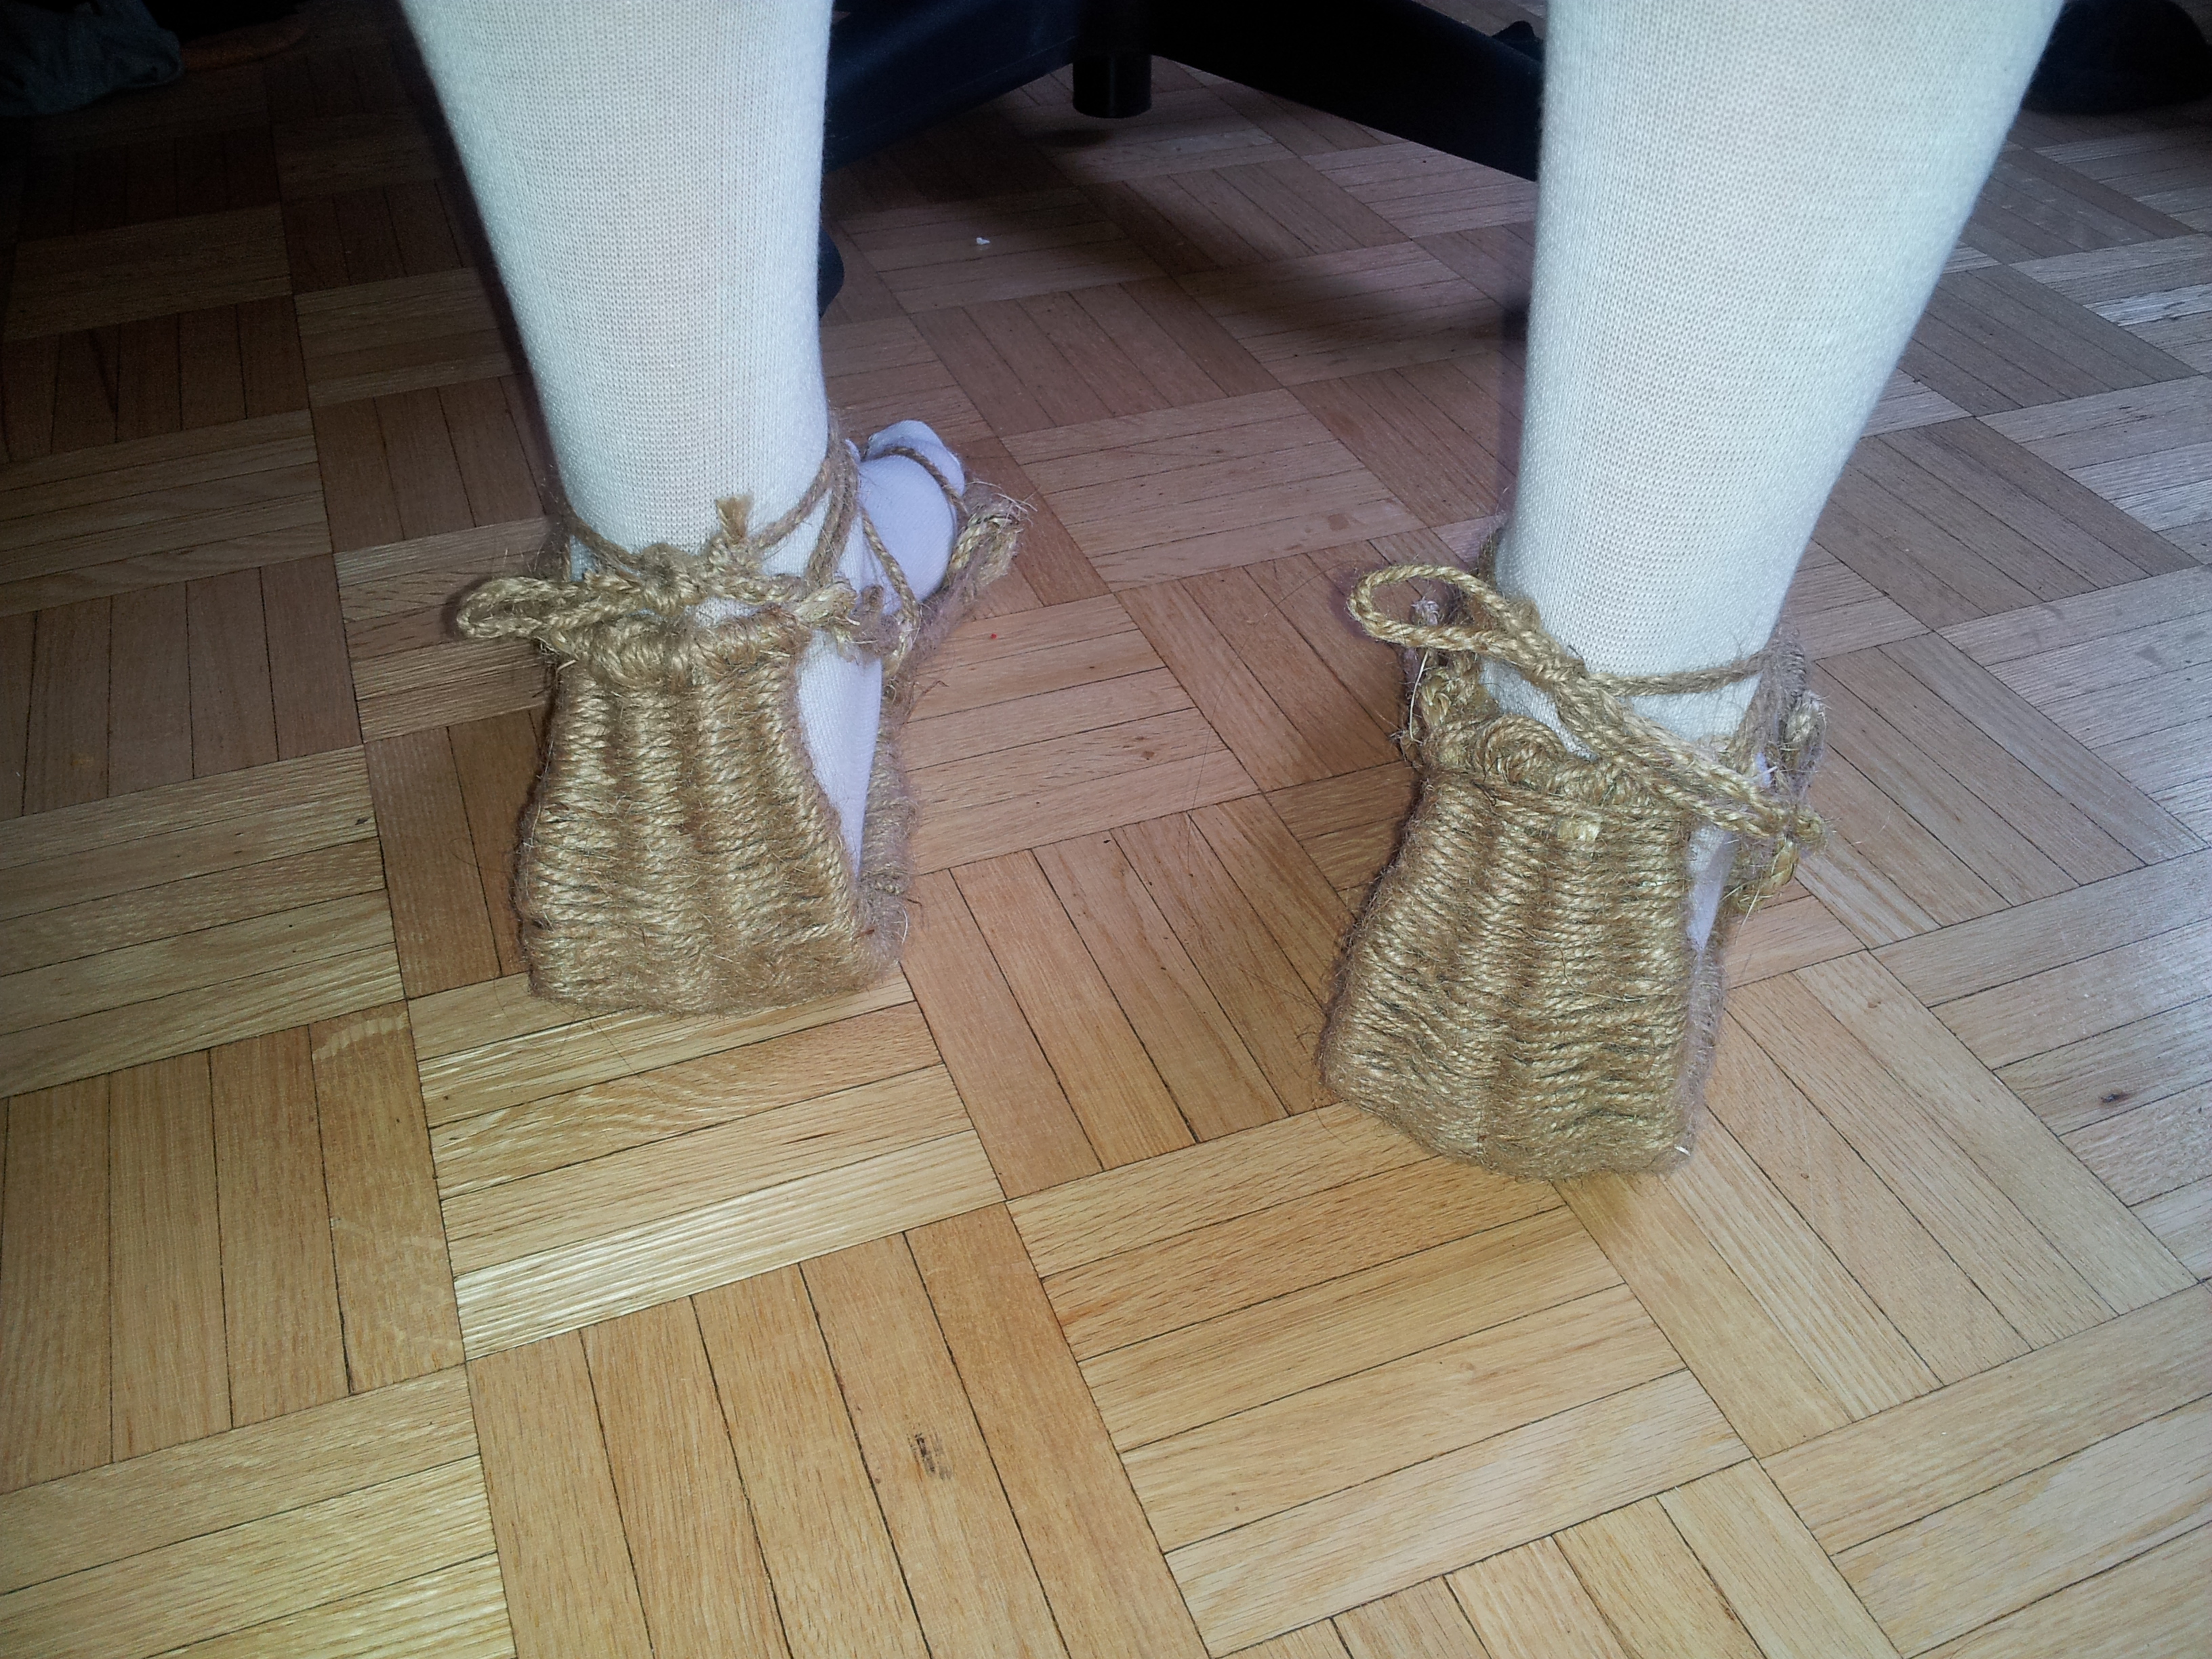
This is about how high they should come up in the back:
Waraji are very comfortable and flexible, especially when they’re custom made for you. Please remember, though that each pair of waraji will probably only last you a week. In ancient times, they were made to be easy and cheap to make and weren’t made to be worn on pavement (which didn’t exist yet). Samurai and peasants alike used to keep another pair of sandals tied to their belt in case one suffered a blow-out. Thankfully, because twine is so cheap, it’s easy and cost-effective to repair or replace a broken sandal.
The work is worth it. If you walk into a convention, you will turn heads with these puppies and I guarantee someone will ask you where you got them.

Aww yeah Kaitlyn, work it!
So, I hope you enjoyed my little tutorial. Please feel free to ask any questions or leave any comments you might have!
As I continue making the pieces of my wife’s costume, I’ll post up how-to’s for y’all. She’s going to be cosplaying as Zaraki Kenpachi.

The next thing I have to make is the wig. … wish me luck!


I’m sorry, but you’re making your waraji sorta… backwards? Anyway, there’s an error in how you do the “”skeleton”, a mystifying one. If you intend to use a loom, you should have a continuous rope (middle of it) around the front, do all the loops as you will, while taking both ends towards back, on the outside line, then cross them in the back until they’re an inch or so apart again, hook them on nails and bring both ends down the middle to the front. Then you secure them to something as you work, and when you’re finished, the loose ends of the skeleton are now ties! You can even work them an inch or so back, deeper into the sole, so you have the “western” waraji which the toes don’t protrude from.
LikeLike
Thanks for the tip. Can you send pictures of your method? I’m having trouble visualizing it.
LikeLike
These look so good! I’m putting together a shinigami outfit as well for Otakon in August. I’m curious to see how these will turn out. I will try your method and post my results. Thanks for this thorough guide!
LikeLike
Follow up my picture. I improvised a little since I didn’t use jute. Using all twine, in some places going double, makes Rangiku’s waraji look a little more feminine I think. It was all more or less easy once I got the hang of it.
THANK YOU for this instructional!
LikeLike
Hello. I am working on a world wide project helping remote villages make their own shoes. I am wondering if I may use one of your photos for our display.
LikeLike
Yep. Sure thing. 🙂
LikeLike
Thank you!
LikeLike
Thank you so much for this tutorial!! I found the instructable one kind of hard to follow and this was very helpful 😊 Unfortunately, I’m having a bit of trouble figuring out what you meant by “Wrap the twine nicely around the base of the loops there and cover the back portion of the sisal rope frame. I make another couple X’s over each of those central ropes where they cross over my frame.” when it comes to starting the weaving from the back. And I’m a little bit confused as well when it comes to actually weaving the twine. Is it possible to go into more detail on how to do this? Thank you!!
LikeLike
Hmm, the weave is a simple basket-weave. Just going over and under the ropes as you pass back and forth in rows. I’m not quite sure how to explain that bit. I’ll look into it.
LikeLike
hey! thanks for the response and I actually have finished the sandals already!! it was really easy with your instructions ☺
LikeLike
Awesome! Be sure to put some shoe inserts in them for comfort. I found walking on the ropes a little pinchy after awhile. 🙂
LikeLike